2In-Ceiling Mounting for Varifocal Dome Camera
12
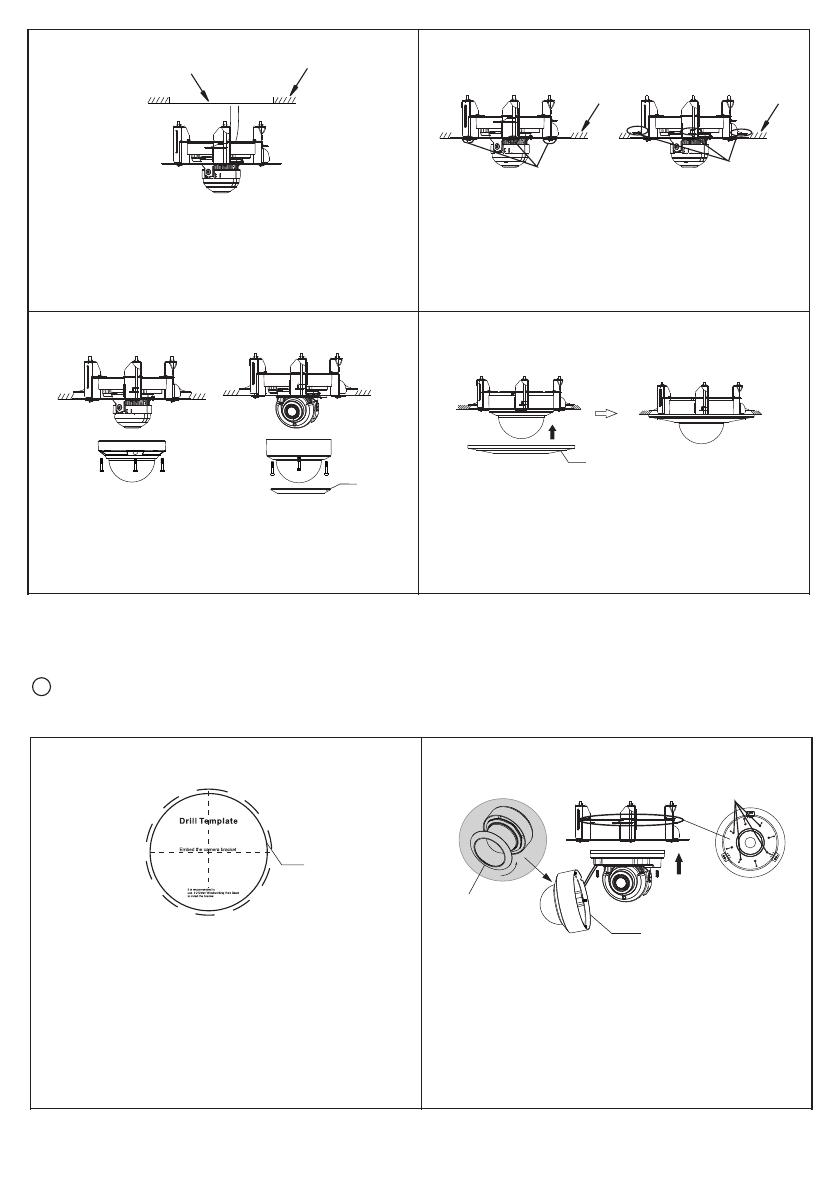
Attach the drill template to the ceiling where you want to
install the dome camera. Then cut a hole according to the
drill template. Note that +2mm of the circle diameter is
allowed.
Rotate the trim ring anticlockwise to remove it. Then remove the
lower dome of the camera by loosening the screws. After that, place
the in-ceiling bracket on the dome camera and make sure the screw
holes of the dome camera is aligned with the screw holes of the
bracket marked with “A”. Then fix the camera to the bracket with
screws.
Ø212mm
A
Trim ring
Lower dome
Tighten the lock screws with the screwdriver and the locks
will automatically rotate outwards to secure the dome camera
to the ceiling. Then adjust the view angle of the camera.
Install the magnetic ring of the bracket.
CeilingMounting hole
Ceiling Ceiling
4
Locks
Screws
3
56
Type A Type B
Install the lower dome back to the camera. (For type B, after
installing back the lower dome, please put the trim ring onto
the lower dome and rotate it clockwise until it is locked.)
Route the cables through the ceiling and connect the cables.
Then push the dome camera with the bracket into the
mounting hole in the ceiling.
Magnetic ring
Trim ring
Page 2


