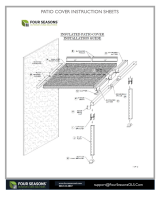
TWV Series Patio Cover
Installation Guide
(Twin V Patio Cover)
(assembly for all sizes and number of posts)
1

TWV Series Patio Cover
Installation Guide
Skill Saw
or Chop Saw
2
**If any parts are damaged or missing
in action, please contact support@
fourseasonsols.com or call 800.533.0887.
We are available Mon to Fri, 9am to 5pm ET.
Please leave a message if we cannot take your
call, so we can call you back.**

TWV Series Patio Cover
Installation Guide
PARTS
The Material Checklist located in Box 1 of your shipment lists the parts included with your kit.
part #1 0549706_ _ _ _ _ _
EX HNGR T/V MALE A WHT/WEA/IV _ _' _ _ _"
Hanging Channel
part # 1A 0549606_ _ _ _ _ _
EX HNGR T/V FEML A WHT/WEA/IV _ _' _ _ _"
Hanging Rail
part #2 6440420000
PVC FOAM WEATHERSTRIP (2-5/8") 50' rl
Foam Rubber Gasket
*This part is pre-installed into Part #1 for your
convenience.
part #3 0536056_ _ _ _ _ _
EX FASC SMSN H WHT/WEA/IV _ _' _ _"
Side Fascia
3

TWV Series Patio Cover
Installation Guide
PARTS (continued)
part #4 0540856_ _ _ _ _ _
EX GUTR SMSN H WHT/WEA/IV _ _' _ _ _ "
Front Fascia
part #00 6440410000
TV EXTRUDED HANGING RAIL SPLIC 100/BX
Hanging Rail Splice
part #5 3020526700030
RA GUTR SMSN SPLICE WHT 30"
Front Fascia Splice
part #6 6440245000
6.5" FASCIA DAM (200 PC BX)
Front Fascia Dams
4

TWV Series Patio Cover
Installation Guide
PARTS (continued)
part #7 101225_ _ _0000
GUTR SCUPPER SM P WHT/WEA/IV
Fascia Drain
part #8 0528456720001
EX CLIP PAN SMSN 2.5" H WHT 00'01"
Fascia Clip
part #9 3056766701110
RA VPAN TWIN 12x2.5 027 SM M WHT/WEA/IV P _ _' _ _"
12" Wide Roof Panel part #10 6440230630
6.5" R-FM CRNR PRESSBREAK POL WHT/
WEA/IV 50/bx
Corner Angle
5

TWV Series Patio Cover
Installation Guide
part #11 6440425630
TWIN-VEE FLASHING 25" POL WHITE (100 PC)
Pre-formed Flashing
part #12A 0567756_ _1000
EX TUBE SQ 3" FLUT WHT/WEA/IV .068M 10'00"
3” Square Post
part #12B 2200330100
BASE HIDDEN 3" *DELUXE*
(2" leg) 100bx
Top Post Bracket
part #12C DP95031
BRACKET POST 3" SQ PP ALU HD
Bottom Post Bracket
part #13 80201220000
BLT 1/4"-20 x3/4 H/H ZN N/C
80851830000
NUT 1/4-20 H/H ZN N/C
1/4"x3/4" Bolt & Nut
part #14 80201370000
BLT 3/8"x3-1/2-16 H/H ZN N/C
80851845000 NUT 3/8"x-16 H/H ZN N/C
3/8"x3-1/2" Bolt & Nut
part #15 82453870000
WASH FLAT 1/4x3/4 ZN N/C
1/4"x3/4" Washer
part #15A 82403855000
WASH FLAT 3/8"x1-0/0 ZN N/C
3/8"x1" Washer
6

TWV Series Patio Cover
Installation Guide
PARTS (continued)
part #16 81802555000
SCW SM-AB #10x3/8 H/H N/C SLT
#10x3/8" Screw
part #17 81802685000
SCW SM-AB #12x3-0/0 HWH ZN N/C
#12x3" Screw
part #18A 81953555_ _ _
SCW T2 #8x1/2 HWH ZN WHT/WEA/IV
#8x1/2” Screw
part #18B 81953370_ _ _
SCW T2 #14x1-0/0 HWH ZN WHT/WEA/IV 1c
#14x1" Tek Screw
part #19 80151085000
ANCR WEDGE 3/8"x2-3/4-16 H/H SS N/C
3/8"x2-3/4" Anchor
part #20 CK_ _ _ _
CAULK SILICONE "C.W.S." WHT/WEA/IV 12/bx
Caulking part #21
1"x1"x7-3/4" spacer tube
Spacer Tube
7

TWV Series Patio Cover
Installation Guide
Read each Step carefully before beginning installation.
Top Post
Bracket (12B)
Part # Description
1 Hanging Channel
1A Hanging Rail
2 Foam Rubber Gasket
3 Side Fascia
4 Front Fascia
5 Front Fascia Splice
6 Front Fascia Dam
7 Fascia Drain
8 Fascia Clip
9 12” Wide Roof Panel
10 Corner Angle
11 Flashing
12A Square Post
12B Top Post Bracket
12C Bottom Post Bracket
13 ¼” x ¾” Bolt & Nut
14 3/8” x 3 ½” Bolt & Nut
15 ¼” x ¾” Washer
16 #10 x 3/8” Screw
17 #12 x 3” Screw
18A #8 x ½” Tek Screw
18B #14 x 1” Tek Screw
19 3/8” x 2 ¾” Anchor
20 Caulking
21 Spacer Tube t
8

TWV Series Patio Cover
Installation Guide
STEP 1-A: Preparing the Front Fascia & Hanging Channel
Lay the hanging channel and front fascia parallel and evenly on a flat, non-abrasive surface.
Make sure both the front fascia and hanging channel rails remain even as shown. Tape
both ends together.
Step 1-B: Preparing the Front Fascia & Hanging Channel
Hook tape on the end and make the first mark on the Front Fascia and Hanging Channel 12
3/8” from the end. Then move the measuring tape to that first mark and proceed to mark
every 12” with a pencil. These will be the CRITICAL center marks of the mated roof panels.
DO NOT CUT the Front Fascia or Hanging Channel.
For Patio Covers wider than 16’, please refer to page 41 first.
9

TWV Series Patio Cover
Installation Guide
Step 2-A: Setting the Hanging Rail & Hanging Channel
Determine if mounting to house wall (Option 1) or to house fascia board (Option 2).
Step 2-B: Setting the Hanging Rail & Hanging Channel
If mounting per Option 1, mark the locations of the wall studs on the wall.
If mounting per Option 2, mark the locations of the roof rafter truss ends to the fascia board.
10

TWV Series Patio Cover
Installation Guide
Step 2-C: Setting the Hanging Rail & Hanging Channel
Pre-drill 3 holes in the Hanging Rail using a 3/16” drill bit 2 inches from each end and one in the
center. Fasten the Hanging Rail using #12 x 3” wood screws, keeping it level. Now mark the
location of the wall studs or roof rafter truss ends onto the hanging rail.
Step 2-C: Setting the Hanging Rail & Hanging Channel
Pre-drill the 3/16” holes and fasten the rail using #12 x 3” wood screws.
11

TWV Series Patio Cover
Installation Guide
Step 2-D: Setting the Hanging Rail & Hanging Channel
If the Hanging Rail is in 2 pieces, butt them together. Caulk up and down the seam joint but not
into the bottom open female groove. Caulk all screw heads in the Hanging Rail.
Step 2-E: Setting the Hanging Rail & Hanging Channel
Run a generous bead of sealant along the entire length of the Hanging Rail. Then, slide the
Hanging Channel onto the Hanging Rail.
12

TWV Series Patio Cover
Installation Guide
Step 3-A: Preparing the Front Fascia
Measure over 15” and 18” from each end for the Top Post Bracket locations.
Step 3-B: Preparing the Front Fascia
Mark equal spacings for the remaining posts by dividing the entire space by the number of
openings. For example, 3 posts = 2 openings; 4 posts = 3 openings, etc. Trace around the
Top Base onto the Front Fascia bottom and re-check measurements.
13

TWV Series Patio Cover
Installation Guide
Step 3-C: Preparing the Front Fascia
If your Top Post Bracket does not have pre-drilled holes, proceed to drill 4 holes ¼” in the bottom
of the base.
Step 3-D: Preparing the Front Fascia
Hold the Top Post Bracket to the marked post locations on the bottom of the Front Fascia. Mark
the 4 hole locations and drill the four ¼” holes. Insert the bolts from inside the Front Fascia
downward through the Top Post Bracket. Fasten with the washer and nut.
14

TWV Series Patio Cover
Installation Guide
Step 3-E&F: Preparing the Front Fascia
Turn over the Front Fascia and set it on the fastened post brackets and caulk around every bolt
head inside the Front Fascia.
Step 3-E&F: Preparing the Front Fascia
Set the Front Fascia on the slab as shown.
15

TWV Series Patio Cover
Installation Guide
Step 4-A&B: Preparing & Fastening Posts to the Front Fascia
Place a level on the front edge of the slab to determine which is the low end of the slab—the left
or right side. After determining the low side, measure from the slab up to the bottom of the
Hanging Channel on that low side. You are determining the measurement for “E” depicted at right.
Step 4-C: Preparing & Fastening Posts to the Front Fascia
Then subtract 2 inches and subtract ½” per foot of depth of your patio cover. For example, if
you have an 8’ deep x 14’ wide patio cover, use this formula: 8’ x ½” = 4 inches. If you measured
98” from the bottom of the hanger you will subtract 98”-2” = 96”. Then 96”-4” = 92” for your first
post length.
16

TWV Series Patio Cover
Installation Guide
KEY
“A” = Total width of patio cover
“B” = Total projection of patio cover
“C” = Eave overhang
“D” = Total projection from eave
“E” = Patio cover height
If mounting to a house wall
Measure the distance from the back wall
of the building to the outside edge of the
desired area (“B”). “B” will be the total
projection of the patio cover.
If attaching to the existing eave
Measure the distance from the wall to the
outside of the eave (“C”). Subtract “C” from
“B” (distance from the back wall to the
Outside edge) to arrive at the measurement
(“D”). “D” will be the total projection of the
patio cover.
OR
Measure the width of the area to be
covered (“A”). Round to the nearest even
foot increment. “A” will be the total width
of the patio cover.
9’ or 10’ tall posts to be cut to desired
height (“E”).
Posts are evenly spaced across the total
width (“A”).
17

TWV Series Patio Cover
Installation Guide
Step 4-D&E: Preparing & Fastening Posts to the Front Fascia
Cut the first Post, slip it over the Top Post Bracket on that low side. Drill two 3/8” holes completely
through the post and the post bracket. Insert 2 3/8” x 3 ½” holes through the post and brackets
And fasten using 2 3 ½” thru bolts. Insert two 3/8 x 3 ½ screws through the bolts and fasten.
Insert the bottom post bracket into the bottom of the post; drill two 3/8” holes through the posts
and brackets. Fasten using two 3 1/2” screws through the bolts.
Step 4-F: Preparing & Fastening Posts to the Front Fascia
Place a ladder at the first end post for Person #1, place 2nd ladder near the opposite end post for
Person #2. Stand up the attached Post and Front Fascia assembly while Person #2 is holding the
Front Fascia level and holding a Post against the Front Fascia.
18

TWV Series Patio Cover
Installation Guide
Step 4-G&H: Preparing & Fastening Posts to Front Fascia
Person #1 has level on Front Fascia, telling person #2 to move it up or down to the level position.
Then, Person #2 marks the Post along the bottom of the Front Fascia. Note: Cut the post ¼” below
the pencil mark on the post to deduct for the bottom post bracket. Repeat Steps 4-D&E.
Step 4-I&J: Preparing & Fastening Posts to Front Fascia
If your patio cover has more than 2 Posts, stand up the Post and Front Fascia assembly, level the
Fascia, mark the post along the Fascia bottom, cut posts ¼” below the line and fasten by repeating
Steps-D&E. All Posts tops should be thru bolted through the Top Post Bracket. All Post bottoms
should be thru bolted through the Bottom Post Brackets.
19

TWV Series Patio Cover
Installation Guide
Step 5-A: Setting the First Roof Panels
Raise the Front Fascia and Post assembly into position and temporarily stabilize the Front Fascia
and Post in an upright position by tying each end Post to each ladder with a rope or cord. DO NOT
FASTEN the Post bottom to the patio surface.
Step 5-B: Setting the First Roof Panels
Check the Front Fascia with a 4’ level across the width of the patio cover (if adjustments are needed,
remove a post and cut the bottom to make it level).
20
Page is loading ...
Page is loading ...
Page is loading ...
Page is loading ...
Page is loading ...
Page is loading ...
Page is loading ...
Page is loading ...
Page is loading ...
Page is loading ...
Page is loading ...
Page is loading ...
Page is loading ...
Page is loading ...
Page is loading ...
Page is loading ...
Page is loading ...
Page is loading ...
Page is loading ...
Page is loading ...
Page is loading ...
Page is loading ...
Page is loading ...
Page is loading ...
Page is loading ...
Page is loading ...
Page is loading ...
-
 1
1
-
 2
2
-
 3
3
-
 4
4
-
 5
5
-
 6
6
-
 7
7
-
 8
8
-
 9
9
-
 10
10
-
 11
11
-
 12
12
-
 13
13
-
 14
14
-
 15
15
-
 16
16
-
 17
17
-
 18
18
-
 19
19
-
 20
20
-
 21
21
-
 22
22
-
 23
23
-
 24
24
-
 25
25
-
 26
26
-
 27
27
-
 28
28
-
 29
29
-
 30
30
-
 31
31
-
 32
32
-
 33
33
-
 34
34
-
 35
35
-
 36
36
-
 37
37
-
 38
38
-
 39
39
-
 40
40
-
 41
41
-
 42
42
-
 43
43
-
 44
44
-
 45
45
-
 46
46
-
 47
47
Integra 1283006700820 Operating instructions
- Type
- Operating instructions
- This manual is also suitable for
Ask a question and I''ll find the answer in the document
Finding information in a document is now easier with AI
Related papers
Other documents
-
 Daylily Nursery 615891498 User guide
-
 Heritage Patios H1P252004320820 Owner's manual
-
 Americana Building Products SM10120WH Installation guide
-
 Americana Building Products ALP12BM120 Installation guide
-
 Americana Building Products ALP7NB120 Installation guide
-
 Four Seasons Outdoor Living Solutions FSOLPCLP2012W20 Installation guide
-
AMERICANA DC4050 Installation guide


