Page is loading ...

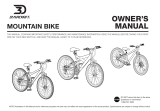
Bicycle Owner’s Manual
Children’s Bicycles
The following manual provides assembly and maintenance
instructions, as well as a guide to safe usage of your new
bicycle.
WARNING
- Read the complete Owner’s Manual before starting the
assembly of this bicycle.
- Rider of this bicycle must wear a helmet at all times.
- Assembly of this product should be carried out by an adult
-Keep body parts and clothing away from moving parts to
avoid entrapment during use and maintenance.
If you need replacement parts or have a question regarding
assembly of this product, please contact our CUSTOMER
SERVICE team on:
1800 632 792 (Australia)
0800 623 792 (New Zealand)
Email: spares@hunterleisure.com.au Visit:
www.momentumservicesco.com
100 Keilor Park Dr, Tullamarine, 3043, Victoria.

2
20210120
Table of Contents Page
Safety Information 3
Bicycle Identification 4
Fitting the rider to the bicycle 4
Rules of the road 5
Wet weather riding 6
Introduction to the manual 7
Front fender and front wheel assembly 8
Training wheel assembly 9
Front reflector assembly 10
Rear reflector assembly 13
Spoke reflectors 15
Handlebar and stem assembly 17
Rotor Headset 21
Seat assembly 23
Pedal attachment /push bar 26
Kickstand 27
Brake systems 28
Brake pad replacement 36
Attaching accessories 36
Chain 41
Bicycle Care and Maintenance 42
Service checklist 43
Recommended torque 44
Tyres 45
Suspension frames 47
Inspection on bearings 48
Parts order 49

3
Exploded diagram 49
Warranty 50
Owner’s Safety Information and
Responsibilities
During this manual you will read many WARNINGS, CAUTIONS or NOTES,
please pay special attention to these throughout.
WARNING: This is shown with personal safety instructions, failure to
follow these may result mechanical failure or damage.
CAUTION: This is shown with mechanical instructions; failure to follow
these may result in injury to the rider or others.
NOTE: This is shown to highlight a specific point of interest, which will
help in the assembly or maintenance of this bicycle.
The Owner’s Responsibility
- If the bicycle was purchased unassembled, it is the responsibility of
the owner to follow all the assembly and adjustment instructions
exactly as written in this manual.
- If your bicycle was purchased assembled, it is the owners
responsibility to read and make sure bicycle was assembled as
shown in this manual.
- Know how to use all standard and accessory equipment on the
bicycle.
WARNING This bicycle is made to be ridden by one rider at a time
for general transportation and recreational use. It is not made to
withstand the abuse associated with stunting and jumping.
Advice on the selection of a bicycle for children or people of short stature,
that the seat position must be adjustable so that the feet of seated rider
can reach the ground

4
A recommendation that significant mechanical repairs should be carried
out by a skilled bicycle mechanic.
Bicycle Identification Record
Each bicycle has a Model / Serial Number stamped into the bottom of the
frame. Write this number below to keep it for future reference. If the bicycle
is stolen, give this number and description of the bicycle to the police.
You will also need this number if you orders parts or request service
information.
Model / Serial Number……………………………………………………
Purchase Date…………………………………………………
Purchase Location……………………………………………………….
Model Name
……………………………………………………
Fitting the Rider to the Bicycle
To determine the correct size of bicycle for the rider:

5
• Straddle the assembled bicycle with feet shoulder width apart and flat on
the ground
• There must be at least 25.4mm of clearance between the top of the tube
and the crotch of the rider.
Rules of the Road
WARNING Failure of the rider to obey the following “Rules of
the Road” can result in injury to the rider or to others.
- Obey the road rules at all times, such as traffic signals, signs and giving
way to pedestrians.
- Always wear a bicycle helmet that meets the local safety standards.
- Always ride in the same direction as the traffic. Never ride against traffic.
-Avoid the following hazards: drain grates, soft road edges, gravel or sand,
pot holes or ruts, wet leaves, or uneven paving.
- When crossing railroad tracks do so carefully at a 90 degree angle to
prevent loss of control.
- Do not carry packages or object that obstruct your vision or control.
- Do not carry any passengers.
- Do not ride with both hands off the handlebars.
- Use hand signals. Indicate intended actions, such as turning or stopping,
by using appropriate hand signals.
- Apply the rear brake first, then apply the front brake. The front brake is
more potent and if not used properly you may loose control and fall.
- Do not use items that may impede your hearing. Eg headphones
-Ride predictably and in a straight line.
Night Riding
- Avoid riding at night if possible, if you choose to ride at night:

6
- Purchase, install, and use a front and rear bicycle light.
- Make sure the reflectors of your bicycle are correctly positioned.
- Use a flashing rear light to improve visibility.
- Wear light-coloured reflective clothing, such as a reflective vest and
reflective bands for your arms and legs.
Wet Weather
- Use extra caution in wet weather.
- Avoid sudden braking.
- Apply brakes sooner in wet conditions, as stopping distance increases in
wet weather.
- Slow overall riding pace and approach corners more carefully.
Off-Road Riding
- Use extreme caution when not riding on pavement.
- Always wear correct safety equipment.
- Ride only on the trails.
- Avoid rocks, branches, or depressions.
- When approaching a descent, reduce speed, keep you weight back and
low, and use the rear brake more than the front.
- Be sensitive to the environment, conscientious of the property on which
you ride, and considerate of others you may meet on the trail.

7
Introduction and How to use this Manual
This owner’s Manual is made for several different bicycles. The illustrations
used are to provide examples and some may not look exactly like the parts
of the bicycle, but the instructions are correct. In addition some of the parts
shown might be optional and not part of your bicycle’s standard equipment.
If the bicycle has any parts that are not described in this manual, look for
separate “Special Instructions” that are supplies with the bicycle. Make
sure the rear wheel is centered in the bicycle frame.
Unpacking
Remove the bicycle from and all parts from the carton.
Do not dispose of the carton and packaging until you complete the
assembly of the bicycle. This can prevent accidentally discarding parts of
the bicycle.
NOTE: All of the directions (right, left, front, rear, etc) in this manual are as
seen by the rider while seated on the bicycle.

8
Tools Needed for Assembly
Step 1 Front Fender Assembly
NOTE: If Bicycle does not have a front fender, go to Step 2.
1. With the fork turned forward, lean the
bicycle against the wall.
2. Place the fender in the fork with the
mounting tab(s) on correct side of the fork.
3. Secure with mounting bolt, lock
washer and Nylon nut.
4. Tighten each screw sufficiently to hold
the fender in place, be careful not to over
tighten and strip the screw threads.
Step 2 Front Wheel Assembly
(Recommended torque is 25-32 Nm)
15
cm Adjustable wrench 25cm Adjustable wrench
Flat Blade
Screwdriver Phillips Screwdriver
Slip Joint Pliers Metric Allen Wrenches
(
Needed on some models
)
Torque Wrench

9
1. Remove plastic axle protectors off the wheel axle and dispose of
them, they are for shipping purposes only.
2. Slide wheel axle into the open ends of the Front fork.
3. Slide a wheel retainer (6) onto each end of the axle. Ensure the
tab of each retainer is in the hole in the frame.
4. Install an axle nut (7) loosely onto each end of Axle.
5. Center the wheel in the fork and tighten both nuts securely to the
recommended torque, alternating form on to the other.
NOTE: Some models are shipped with the reflector installed facing between
the front forks to protect fork when shipping. If so please remove reflector
and rotate it 90 degrees and install again before inserting the wheel
between the front forks.
Step 3 Training Wheels
1. Attach the legs to the bicycle frame:
• Put the alignment insert (1), a leg (2),
and a nut (3) on each end of the
rear wheel axle (4)
• Make sure the tab of the alignment
insert (5), is to the rear of the axle
and in the slot (6) of the frame
• Make sure both training wheels are the same distance
from the ground
• Tighten the nuts securely
Operation

10
WARNING: Before each ride, make sure both nuts are tight. Also
make sure both training wheels are the same distance from the ground.
As your child’s ability and balance improve, you may raise or remove the
training wheels.
• To move the training wheels, loosen the
nut, slide the leg to the correct position,
and retighten the nut.
• To remove the training wheels, remove
the nut, leg, and alignment insert.
Step 4 Front Reflector Bracket and Clear Reflector
Assembly
This section covers the assembly of the front reflector to the front reflector
bracket. Determine which style you have before beginning assembly.
Snap in Style Screw In Style

11
Reflector Assembly
1. Assemble the clear reflector to the front reflector bracket:
WARNING: Install the clear reflector exactly as shown or it will not
operate correctly
Snap In Style
• Push the reflector onto the reflector bracket.
• Make sure the stud on the reflector goes into the hole of the bracket with
a “snap” sound.
Screw In Style
• Put the reflector onto the reflector bracket
• Make sure the studs on the back of the reflector go into the holes of the
reflector bracket.
• Put the screw through the bracket and into the reflector
• Tighten screw
Front Reflector Bracket Installation
This section covers several different placements of the front reflector
bracket. Make sure the front reflector is vertical (perpendicular to the
ground)
The front reflector bracket will mount on the fork or handlebar. Some
models may already have the brackets and reflector installed. If the

12
reflector is not installed, refer to the “Front Reflector Bracket and Clear
Reflector Assembly” section.
Determine which type of reflector bracket you have and it’s mounting
location and then follow the instructions for that style.
Top of Fork Front Bracket Handlebar Mount Handlebar Mount
S
t
y
l
e
1
S
t
y
l
e
2
Top of Fork
• Attach the hardware to the fork:
• Remove and discard the plastic cap (if installed) on fork (6)

13
• Tighten bearing cone (7) by hand to make sure the bearings are tight
• Install reflector bracket and locknut (4)
• Tighten locknut
Front Bracket
1. Attach the hardware to the fork:
• Place the bracket over the front bracket. Ensure that you install correct
way with the reflector facing up.
• Secure with Phillips head screw provided.
NOTE: On some models the front reflector is pre-installed, but rotated so
that bracket is facing between the forks to protect it during shipping. If so,
before attaching the front wheel you will have to remove the reflector, turn it
around and install again using the above steps.
2. Assemble the front reflector bracket and clear reflector to the fork:
• Attach the reflector bracket to the front of the fork with a bolt
and self locking nut
• If necessary, adjust the angle of the front reflector bracket so the
clear Reflector is vertical (perpendicular to the ground)
Handlebar Mount – Style 1 and Style 2
Assemble to the handlebar:
• Put the clamp (1) as near the handlebar stem as possible
NOTE: If you have Style 1, make sure the bracket points towards the
ground.
• Hold the reflector in this position and tighten the screw(s) (3)
Operation and Maintenance

14
WARNING: For your own safety, do not ride this bicycle if the
reflectors are incorrectly installed, damaged, or missing. Make sure the
front and rear reflectors are vertical. Do not allow the visibility of the
reflectors to be blocked by clothing or other articles. Dirty reflectors do not
work well. Clean the reflectors, as necessary, with soap and a damp cloth.
If necessary, adjust the angle of the reflector bracket so the reflector is
vertical (perpendicular to the ground).
Rear Reflector Bracket and Red Reflector Assembly
This section covers the assembly of the rear reflector to the rear reflector
bracket. Determine which style you have before beginning assembly.
Snap-In
Style
Reflector Assembly
Assemble the red reflector to the rear reflector bracket:
WARNING: Install the red reflector exactly as shown or it will not
operate correctly.
Snap-In Style
• Push the reflector (1) onto the reflector bracket (2)

15
• Make sure the stud (3) on the reflector goes into the hole (4) of the
bracket with a “snap” sound.
Screw-In Style
• Put the reflector onto the reflector bracket
• Make sure the studs on the back of the reflector go into the holes of the
reflector bracket
• Put the screw through the bracket and into the reflector
• Tighten screw.
Step 5 Rear Reflector Bracket Installation
This section covers several different placements of the rear reflector
bracket. Make sure the rear reflector is vertical (perpendicular to the
ground)
The rear reflector bracket will mount on the seat post, post clamp, or rear
brace. Some models may already have the brackets and reflectors
installed. If the reflector is not installed, refer to the “Rear Reflector Bracket
and Red Reflector Assembly” Section.
Determine which type of reflector bracket you have and it’s mounting
location and then follow the instructions for that style.
Seat Post
Seat Post
Post Clamp
Rear Brace
Seat Post

16
1. Assemble the reflector bracket to the seat post:
• Make sure the red reflector (4) is vertical, points toward the rear of the
bicycle, and has 7.5cm of clearance between the top of the seat and the
top of the red reflector.
• Hold the red reflector in this position and tighten the screw(s).
Post Clamp
1. Put the rear reflector bracket on the post clamp:
• Make sure the rear reflector bracket points up
• Put the bolt through the reflector bracket and the post clamp (8)
• Install nut (or nut and washer)
• Do not tighten at this time.
Rear Brace
Install bracket on rear brace:
• Put bracket on brace so the bracket points
up
• Install bolt and nut (also washer, if
provided)
• Tighten securely
WARNING: For your own safety, do not ride the bicycle if the
reflectors are incorrectly installed, damaged, or missing. Make sure the
front and rear reflectors are vertical. Do not allow the visibility of the
reflectors to be blocked by clothing or other articles. Dirty reflectors do not
work well. Clean the reflectors, as necessary, with soap and a damp cloth.

17
Spoke Reflectors
Your bicycle may have one of the following styles of spoke reflectors. Many
bicycles will come with the wheel reflectors already attached. If your
bicycle does not have the wheel reflectors attached, determine which style
you have and follow the instructions.
Style 1 – Bolt and nut
Assemble a reflector between the spokes of each wheel:
NOTE: If the bicycle has a wheel disc, put the reflector in the notch of the
wheel disc. The notch is shaped so the spoke reflector fits into it.
• Make sure the center of the each reflector (1) is less than 76mm from
the inside edge of the wheel rim (2)
• Make sure the curve of the reflector (3)
matches the curve of the wheel rim (4)
• Install bolt and nut, then tighten.
Style 2 – Push pin
• Put fastener (6) over a spoke (7) and into each reflector.
• Push pin straight into reflector until a “snap” sound is heard.
Style 3 – One-quarter turn
• Put fasteners (6) over a spoke (7) and into each reflector
• Turn fasteners clockwise one-quarter of a turn

18
Operation and maintenance
WARNING: For your own safety, do
not ride the bicycle if the reflectors are
incorrectly installed, damaged, or missing.
Make sure the front and rear reflectors are
vertical. Do not allow the visibility of the
reflectors to be blocked by clothing or other
articles. Dirty reflectors do not work well.
Clean the reflectors, as necessary, with soap
and a damp cloth.
Step 6
Handlebar and Stem Assembly
The bicycle may have different styles of handlebar stems. One style
mounts inside the fork while the
other mounts around the outside of
the fork. Follow the instructions for
the style that you have.
Assembly
1. Assemble the stem to the fork:

19
Inside mount style
Insert the stem into head set lock nut.
• The handle bar clamp should face towards the front of the bicycle
WARNING: Etched on the stem is a mark about 65mm up from the
bottom with the words ‘max height” or “minimum insertion”. Never ride a
bicycle if the stem has been raised so that this mark can be seen.
• At this stage tighten stem bolt just enough to hold it in position.
Outside mount style
• If necessary, loosen the top bolt (1) of
the stem (2) and the
Stem bolt (s) (3) only just far enough so the stem
can turn on the fork.
• Point the stem toward the front of the
bicycle
• Tighten the top bolt of the stem
• Tighten the stem bolt(s) equally
2. Assemble the handlebar to the stem:
Insert the handlebar (5) into the stem, but do not
tighten the handlebar Clamp (6) at this time.
3. Determine the type of parts to be assembled to the handlebar:
Some models of bicycles require additional parts to be installed onto the
handlebars. The following are the various combinations of parts that you
may have to assemble. You may not have some of the parts but assemble
the parts you have in the order as shown.
NOTE: If Bicycle does not have these extra parts or are already installed,
go to next step

20
• Make sure the brake lever to the
front brake is mounted on the
right side of the handle bar
• Install the safety bell onto the handlebar, secure with bolt provided.
• Make sure the shifter to the rear derailleur is mounted on the right side of
the handlebar
• Install grips using a mixture of five drops of liquid soap in a cup of water
WARNING: Use only soap and water to install the grips. The grips
may slip while wet. Allow grips to completely dry before riding the bicycle.
• Wet the handlebar and the inside of each grip (1) with the soap mixture
• Using a twisting motion, push each grip fully on the handlebar
• If you have bar ends, make sure they are fully on the handlebar
• If the grips are open on both ends, push a plastic plug (11) into each end
of the handlebar (you may need a rubber mallet for this).
4. Tighten the stem bolt and handlebar clamp
Recommended torque Single Bolt is 21-25 Nm, four bolt type (M8 bolt:
1820Nm; M6 bolt: 9-13Nm)
WARNING: Handlebar grips and tube end plugs should be replaced if
damaged, as bare ends have been known to cause injury. Please check
condition of grips and bar ends before every ride.
Thumb Shift
Grip Shift
/