iv
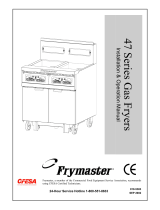
CF Series Gas Fryers
TABLE OF CONTENTS
PAGE #
CHAPTER 1: General Information
1.1 Applicability and Validity..............................................................................................................1-1
1.2 Parts Ordering and Service Information.........................................................................................1-1
1.3 Safety Information..........................................................................................................................1-2
1.4 European Community (CE) Specific Information..........................................................................1-2
1.5 Equipment Description...................................................................................................................1-3
1.6 Installation, Operating, and Service Personnel...............................................................................1-4
1.7 Definitions......................................................................................................................................1-4
1.8 Shipping Damage Claim Procedure ...............................................................................................1-5
CHAPTER 2: Installation Instructions
2.1 General Installation Requirements .................................................................................................2-1
2.2 Caster/Leg Installation....................................................................................................................2-4
2.3 Pre-Connection Preparations..........................................................................................................2-4
2.4 Connection to Gas Line..................................................................................................................2-6
2.5 Converting to Another Gas Type....................................................................................................2-9
CHAPTER 3: Operating Instructions
3.1 Start-Up Procedure.........................................................................................................................3-1
3.2 Boiling-Out the Frypot...................................................................................................................3-4
3.3 Shutting the Fryer Down ................................................................................................................3-5
3.4 Controller Operation and Programming.........................................................................................3-5
CHAPTER 4: Filtration Instructions
4.1 Draining and Manual Filtering.......................................................................................................4-1
4.2 Filter Magic II Filtration System Operation...................................................................................4-3
Preparing the Filter Unit for Use and/or Changing Filter Paper.....................................................4-3
Operation of the Filter Unit............................................................................................................4-6
CHAPTER 5: Preventive Maintenance
5.1 Fryer Preventive Maintenance Checks and Services......................................................................5-1
Daily Checks and Services.............................................................................................................5-1
Weekly Checks and Services..........................................................................................................5-2
Quarterly Checks and Services.......................................................................................................5-2
Semi-Annual Checks and Services.................................................................................................5-5
5.2 Filter Magic II Filtration System Preventive Maintenance Checks and Services ..........................5-5
5.3 Annual/Periodic System Inspection................................................................................................5-6
CHAPTER 6: Operator Troubleshooting
6.1 Introduction ....................................................................................................................................6-1
6.2 Troubleshooting Fryers with Solid State (Analog), Digital, or CM III.5 Controllers....................6-2
6.3 Troubleshooting Fryers with Thermostat Controls.........................................................................6-3
6.4 Troubleshooting the Built-In Filtration System..............................................................................6-4
6.5 Troubleshooting Abnormal Burner Operation................................................................................6-6
6.6 Replacing the Controller or Controller Wiring Harness.................................................................6-7