R1 EVO CS Smart Cycling Helmet | 9
1 ABOUT THE R1 EVO CS SMART CYCLING HELMET
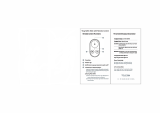
1.4.2 Helmet Fitment Check
With the retention system knob turned clockwise until comfortably tight
and the chinstrap buckled under the chin and back against the throat,
grab the helmet with both hands and try to remove it by rolling the
helmet forward and backward as far as you can. This is an important test
to ensure that the helmet fits correctly. When you do this, you should
feel the chinstrap pull against the underside of your chin and the helmet
will resist any movement. If this isn’t the case, tighten the chinstrap and
try it again until this happens. If you cannot achieve the proper fit, DO
NOT USE THIS HELMET. Replace it with a different size until the correct
fit is achieved.
Also, for a proper Helmet Fitment Check if you can roll the helmet
forward such that it blocks your vision or if you can roll the helmet
backwards such that your forehead is not covered, tighten the chinstrap
and the retention system and try again until you cannot roll the helmet
forward or backwards.
WARNING
• Do not wear anything underneath your helmet, such as a cap,
hood, bundled hair, headphones, or barrettes, as the helmet may
loosen or come off. Do not wear anyone else’s helmet and don’t
loan your helmet to anyone else.
• Always make sure the buckle is properly fastened before you ride.
Failure to follow this instruction could result in serious personal
injury, as the helmet may not stay in position while riding or during
a fall. For proper use, make sure the loose end of the chinstrap is
tucked through the rubber “O” ring.
• Check for proper fit and adjustment often, including each time you
wear it, and periodically during use.
• This helmet has been designed for recreational bicycling. This
helmet has not been approved and is not intended for extreme
uses such as downhill racing at high speeds, jumping or leaping
with a fully suspended bicycle, snow sports, water sports, motor
sports, street hockey, playground activities, or other activities where
face, ear, or greater protection or coverage is desired.
• Always wear a helmet when bicycling. When you get off your
bicycle, remove your helmet. Do not wear a helmet while climbing
trees, in play areas, on playground equipment, or, at any time while
not riding a bicycle. Parents: Instruct children to follow this warning.
Failure to follow this warning could result in serious personal injury,
death or death by strangulation.