Page is loading ...

DRYER OPERATING iNSTRUCTiONS
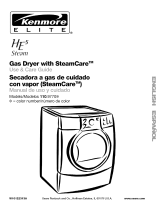
AUTO DRY
__MED DRY
Normal
Pe_m Press
o o
45 75
5O
No
Heat
TEMP
Low
O Mo_eDry
0 N{_rmal
0 LessDry
0 Damp
0
DRYNESS
Before Operating Your Dryer
Read your dryer Owner's Guide. It has important
safety and warranty information. It also has many
suggestions for best drying results.
To reduce the risk of fire, electric
shock or injury to persons, read the IMPORTANT
SAFETY INSTRUCTIONS in your dryer Owner's
Guide before operating this appliance.
Operating Steps
Read "Drying Procedures" inyour Owner's Guide.
It explains these operating steps in detail.
1. Prepare items for drying.
2. Check that lint screen is clean and in place.
3. Load the dryer. If desired, add a dryer fabric
softener sheet. Close the door.
0 Drying
0 (oe[ D_wn
0 PressSave_' 0 PressSavef
0 CydeS gnal 0 deankintFilter
O O (olltro[ @
O0 O0
OPTIONS Selec_ START Pause
0- Ca_cel
,
.
Follow the same steps to delete an option. Ifa
dryness level or option isnot available for a cycle,
it will not light.
The changes you make will be remembered the
next time that cycle is selected. See the "Dryer
Settings Chart" for more details.
Press START to begin cycle.
, To pause the cycle or change settings,
press Pause/Cancel once.To resume
the cycle, press START again.
• To stop or change the cycle, press
Pause/Cancel twice.
8. A signal will sound at the end of the cycle and
periodicallyduring Press Saverwhen the Cycle
Signal option is selected. When the cycle ends,
remove items immediately and hang or fold.
4. Select the cycle and drying temperature for each
load. To change the temperature, turn the TEMP
knob to the desired temperature.
,
A suitable dryness level and options will
automatically be displayed for each cycle. To
change the dryness level, press DRYNESS until
the desired selection is made. To select an
option, press OPTIONS until the indicator for a
desired option flashes and press Select.
9. Clean the lint screen after every load.
Cycle Selection
For best results, follow the fabric care label
instructions on items to be dried.
Auto Dry
Auto Dry cycles take the guesswork out of drying
time. The load will automatically be dried at the
selected temperature to the desired dryness level.
The dryer senses the moisture level of the load as
it tumbles through heated air. Auto Drycycles save
time and energy and protect fabrics.
When the load has reached the selected dryness
level, it will continue to tumble, unheated, during a
Cool Down period. This helps reduce wrinkling and
makes items easier to handle during unloading.
Drying time varies depending on size and dampness
of load, weight and fabric type. Room temperature
and humidity, type of installation and electrical
voltage or gas pressure can also affect drying time.
Towels
Select this Auto Dry cycle for towel loads.
Normal
Select this Auto Dry cycle for cotton items.
Perm Press
Select this Auto Dry cycle to dry cottons and blends
with a no-iron finish.
PN 134420600D (0604)

Cycle Selection (Con't)
Delicate
Select this Auto Dry cycle for knits and delicate
items.
Quick
Select this cycle to quickly dry a small load made
up of just a few items. It provides approximately
20 minutes of tumbling followed bya 10-minute cool
down period.
Touch Up
Select Touch Up to help remove wrinkles from clean
and dry items that were not taken from the dryer at
the end of the cycle, have been stored incrowded
closets or drawers, or unpacked from luggage
following a trip. It provides approximately 10minutes
of tumbling followed by a 5-minute cool down
period.
Timed Dry
To manually select the drying time for any load,
turn the knob to a numbered setting. Drying times
from 15 to 90 minutes are available in 15-minute
increments. You will not be able to select a cycle
or dryness level. Timed Dry is recommended when
using the No Heat option.
Note: To change cycles, press Pause/Cancel
twice.
Temperature Selection
For best results, follow the fabric care label
instructions on items to be dried.
High is recommended for sturdy fabrics.
Medium is recommended for wrinkle free,
permanent press and lightweight fabrics.
No Heat should only be used with a Timed Dry
setting to dry items containing feathers, down, foam
rubber, plastics or rubber-like materials; to freshen
clothing, pillows or blankets; or to dust draperies.
Note: Using No Heat in any Auto Dry cycle will
result in long drying times and/or wet loads at the
end of the cycle.
Toavoid fire hazard, do not use heat
to dry items containing feathers or down, foam
rubber, plastics, or similarly textured, rubber-like
materials. Use the No Heat setting only.
Cycle Adjustments
A suitable combination of dryness level and options
will automatically be displayed for each cycle. The
settings can be changed before the cycle isstarted.
Those adjustments will automatically be
remembered each time that cycle is selected. Ifa
dryness level or option is not recommened for a
cycle, the indicator will not light. See the "Dryer
Settings Chart" for more details.
If changes are attempted after the cycle starts, the
status lights will blink and the signal will beep 3
times. The cycle must be paused before the set-
tings can be changed.
Dryness Level
Tochange the dryness level, press DRYNESS until
the desired selection is made. Select Normal for
most loads.
Occasionally a load may seem too damp or over-
dried at the end of the cycle. To increase drying
time for similar loads in the future, select More
Dry. For loads requiring less drying time, select
Less Dry.
Select Damp Dry for items you wish to partially
dry before hanging or ironing.
Note: To prevent over-drying, not every dryness
level isavailable with every cycle.
Options
To select an option, press OPTIONS until the
indicator for the desired option flashes and press
Select. If an option is not available for a cycle, the
indicator will not light. Follow the same steps to
delete an option.
The Cycle Signal will sound at the end of the cycle
and periodically during Press Saver.
Select Press Saver if the dried load might not be
removed promptly at the end of the cycle. The dry
load will continue tumbling without heat for 30
minutes to help reduce wrinkling. When the Cycle
Signal is selected, a beep will be heard periodically.
The load may be removed any time during Press
Saver.
Dryer Features
_(Control Lock)
Toavoid having someone accidentally start or stop
the dryer, press OPTIONS and Select at the same
time and hold for about 10 seconds until the
_(Control Lock) lights up. Tounlock the controls,
press and hold OPTIONS and Select for about 10
seconds.
Status Lights
The following indicators may be lighted during the
cycle:
'* Drying
,* Cool Down
o Press Saver
Clean Lint Filter
_ (Control Lock)
Low is recommended for delicate fabrics.
PN 134420600D (0604)

ERRORCODECHART
If the dryer stops, the status lights flash and the signal beeps, an error has occured. Press PAUSE/CANCEL. Consult the Error Code Chart below or the "Avoid Service Checklist" in the Owner's
Guide for the possible cause and solution. Make correction, then select a cycle and press START. If the dryer stops, status lights flash again and the beeping continues, please contact service
for assistance.
Push button held too long or wedged in the Press buttons lightly and release. Disengage
6 beeps Push button does not function
control panel, button.
DRYER SETTINGS CHART
These temperatures, dryness levels and options are available with the following cycles:
Towels Normal Perm Press Delicate Quick Touch Up Timed Dry
60 minutes 50 minutes 40 minutes 20 minutes ** ** **
./ ./ ./ ./ ./ ./ ./
./ ./ ./ ./ ./ ./ ./
-/ -/ -/ -/ -/ recommended -/
not recommended not recommended not recommended not recommended -/ -/ -/
,/ ,/
./ ./ ./ ./
,/ ,/ ,/
,/ ,/ ,/
,/ ,/ ,/
"k "k "k "k
./ ./ ./ ./
Estimated Cycle
Duration ***
Temperatures
High
Medium
Low
No Heat
Dryness Level
More Dry
Normal Dry
Less Dry
Damp Dry
Options
Press Saver
Cycle Signal
* Factory setting -/Available settings ** Timed Dry Cycle Only
,/ ,/ ,/
,/ ,/ ,/
*** Estimated cycle duration is based on normal
dryness level and factory settings.
PN 134420600D (0604)

AUTO DRY
_IMED DRY
lnstrucciones de Funcionamiento Del Secador
Perm _esg
No_ma[_ _ Delicate
'_ 1ouchUp
@ (3
4B 75
6O
$
No
Heat
_EMP
Med O MoreDry
0 Normal
O LessDry
Low O Damp
0
DRYNESS
O PressSavet
O CydeSigr_a_
©©
OPtIONS Se[ecf_
0 Drying
O Coei Down
O Pressgaver
O Clean LintFi[ter
O O Corttro[ @
©©
S-['AR g Pause
Cance_
Antes de Usar Su Secadora
Lea la Guia del Usuario de su secadora. Contiene
informaci6n importante sobre seguridad y garantia.
Ademas, contiene muchas sugerencias para obtener
los mejores resultados de secado.
ADVERTENCIA Para reducir el
riesgo de incendio, choque el6ctrico o lesiones a
personas, lea las INSTRUCCION ES IMPORTANTES
DE SEGURIDAD en la Guia del Usuario de su
secadora antes de usar este artefacto.
Pasos Operativos
Lea "Procedimientos de Secado" en su Guia del
Usuario, donde estos pasos se explican en detalle.
1. Prepare las prendas para secar.
2. Verifique que el filtro de pelusas este limpio e
instalado.
3. Cargue la secadora. Si Iodesea, puede agregar
una lamina de suavizante. Cierre la puerta.
4. Seleccione el ciclo y la temperatura de secado
para cada carga. Para cambiar la temperatura,
gire la perilla TEMP hasta el nivel deseado.
5. Un nivel apropiado de secado y las opciones se
visualizaran automaticamente para cada ciclo.
Para cambiar el nivel de secado, pulse SECADO
hasta que se realice la selecci6n deseada. Para
seleccionar una opci6n, pulse OPCIONES hasta
que destelle el indicador de la opci6n deseada y
luego pulse SELECCIONAR Siga los mismos
pasos para anular una opci6n. Si un nivel de secado
o una opci6n no esta disponible para un ciclo, no
se encendera el indicador.
6. Los cambios que realice quedaran memorizados
la pr6xima vez que se seleccione ese ciclo.
Consulte la "Tabla de Valores de la Secadora"
para obtener mas detalles.
7. PulseARRANCAR para comenzar el ciclo.
Para realizar una pausa o cambiar los valores
del ciclo,pulse PAUSA/CANCELAR (Pause/
Clear) una vez. Para reiniciar el ciclo, pulse
ARRANCAR nuevamente.
Para detener o cambiar el ciclo, pulse
PAUSA/CANCELAR dos veces.
8. Cuando se selecciona la opci6n Seffal de Ciclo,
sonara una seffal al concluir el ciclo y
peri6dicamente durante el Secado sin Arrugas.
Cuando termine el ciclo, saque las
prendas de inmediato y cuelguelas o d6blelas.
9. Limpie el filtro de pelusas despues de cada carga.
Seiecci6n de Ciclos
Para obtener los mejores resultados, siga las
instrucciones de cuidado que figuran en la etiqueta
de las prendas a secar.
Secado Automatico (Automatic Dry)
Con los ciclos de Secado Automatico no es
necesario definir el tiempo de secado. La carga se
secara automaticamente a la temperatura
seleccionada en el nivel de secado deseado. La
secadora detecta el nivel de humedad de la carga,
ya que funciona con aire caliente. Los ciclos de
Secado Automatico ahorran tiempo y energia, y
tambien protegen las prendas.
Cuando la carga Ilega al nivel de secado
seleccionado, la secadora continuara funcionando
sin calor durante el periodo de Enfriado. De esta
manera se reducen las arrugas y es mas facil sacar
las prendas de la secadora.
El tiempo de secado varia segOn el volumen y la
humedad de la carga, el peso y el tipo de tela. La
temperatura y la humedad ambiente, el tipo de
instalaci6n y el voltaje electrico o la presi6n del gas
tambien pueden afectar el tiempo de secado.
Toallas (Towels)
Seleccione este ciclo de Secado Automatico para
toallas.
Normal
Seleccione este ciclo de Secado Automatico para
prendas de algod6n.
Planchado de Permanente (Perm Press)
Seleccione este ciclo de Secado Automatico para
secar prendas de algod6n y mezcla, y sacar las
listas para no planchar.
PN 134420600D (0604)

Selecci6n de Ciclos (Cont.)
Delicado (Delicate)
Seleccione este cido de Secado Automatico para
prendas tejidas y delicadas.
R&pido (Quick)
Seleccione este ciclo de para secar rapidamente
una carga peque_a de pocas prendas. Este ciclo
funciona durante aproximadamente 20 minutos
seguidos de un periodo de Enfriado de 10 minutos.
Retocarse (Touch Up)
Seleccione Terminacion para eliminar arrugas de
prendas limpias y secas que no se retiraron de la
secadora al final del ciclo, se guardaron apretadas
en armarios o cajones, o se sacaron de una maleta
despues de un viaje. Este ciclo funciona durante
aproximadamente 10 minutos seguidos de un
periodo de Enfriado de 5 minutos.
Tiempo de Secado Timed Dry)
Para seleccionar manualmente el tiempo de secado
para una carga, gire la perilla hasta algQn nOmero.
Se dispone de tiempos de secado de 15 a 90
minutos, en incrementos de 15minutos. No podra
seleccionar un ciclo o nivel de secado. Se
recomienda usar Tiempo de Secado con la opcion
Sin Calor.
Nota" Para cambiar los ciclos, pulse PAUSA/
CANCELAR dos veces.
Temperatura de Secado
Para obtener los mejores resultados, siga las
indicaciones de cuidado de la etiqueta de las prendas
a secar.
Alta (High) se recomienda para prendas resistentes.
Mediana (Medium) se recomienda para planchado
permanente, sin arrugas y prendas livianas.
Baja (Low) se recomienda para prendas delicadas.
Nota: El uso de la funci6n Sin Calor en cualquier
Ciclo de Secado Automatico data como resultado
cargas mojadas al terminar el ciclo.
Para evitar el peligro de incendio,
no use calor para secar prendas que contienen
plumas, edredones, goma espuma, plastico o
materiales con textura similar a la goma. Use s61o
la funcion Sin Calor (No Heat).
Ajustes de los Ciclos
Para cada ciclo se visualizara automaticamente el
nivel apropiado de secado y las opciones. Las
definiciones se pueden modificar antes de que
arranque el ciclo. Estos ajustes se memorizaran
automaticamente cada vez que se seleccione ese
ciclo. Si un nivel de secado o una opci6n no se
recomiendan para un ciclo, no se encendera el
indicador. Consulte la "Tabla de Valores de la
Secadora" para obtener mas detalles.
Si se intenta realizar cambios despues de que
arranca el ciclo, la luz de estado parpadeara y la
sepal sonara 3 veces. Se debe hacer una pausa del
ciclo antes de modificar los valores.
Nivel de Secado
Para cambiar el nivel de secado, pulse Sequedad
(Dryness) hasta que se realice la selecci6n
deseada. Seleccione Normal para la mayoria de
las cargas.
Ocasionalmente, una carga puede parecer muy seca
o mojada despues de terminar el ciclo. Para
aumentar el tiempo de secado para cargas similares
en el futuro, seleccione Mas Seco (More Dry). Para
las cargas que requieren menos tiempo de secado,
seleccione Menos Seco (Less Dry).
Opciones (Options)
Para seleccionar una opci6n, pulse OPCIONES
hasta que el indicador de la opci6n deseada destelle
y luego pulse SELECCIONAR. Si una opci6n no
esta disponible para un ciclo, el indicador no se
encender& Siga los mismos pasos para anular una
opci6n.
La SeSal del Ciclo (Cycle Signal) sonata al
terminar el ciclo y peri6dicamente durante el Secado
sin Arrugas.
Seleccione Salvador de Plancho (Press Saver)
si no va a sacar la carga seca inmediatamente
despues de terminar el ciclo. La secadora seguira
funcionando con carga seca sin calor durante 30
minutos para reducir las arrugas. Cuando se
selecciona Sedal de Ciclo, se escuchara una alarma
peri6dicamente. La carga se puede sacar en
cualquier momento durante el
Salvador de Plancho.
Caracteristicas de la Secadora
O Bloqueo de Control (Control Lock)
Para evitar que alguien arranque o detenga
accidentalmente la secadora, pulse OPCIONES y
SELECCIONAR al mismo tiempo y sujetar
aproximadamente 10 segundos hasta que se
encienda el indicador O BIoqueo de Control
(Control Lock). Para desactivar esta funci6n, pulse
y sujetar OPCIONES y SELECCIONAR nuevamente
aproximadamente 10 segundos.
Luces de Estado
Los siguientes indicadores se pueden encender
durante el ciclo:
• Secado (Drying)
• Enfriado (Cool Down)
Salvador de Plancho (Press Saver)
Filtro de Pelusas Limpio (Clean Lint Filter)
O Bloqueo de Control (Control Lock)
Sin Calor (No Heat) solo se debe usar con Tiempo
de Secado para secar prendas que contienen
plumas, edredones, goma espuma, plastico o
materiales tipo goma; para renovar prendas de vestir,
almohadas o mantas, o para eliminar polvo de
cortinas.
Seleccione Secado Humedo (Damp Dry) para las
prendas que desea que esten parcialmente secas
antes de colgar o planchar.
Nota: Para evitar el secado excesivo, no todos
los niveles de secado estan disponibles en cada
ciclo.
PN 134420600D (0604)

CARTADECODIGO DEERROR
Si el secadora para, el estado enciende el flash y las se_ales sonoras de la se_aI, un error han ocurrido. Presione PAUSE/CANCELLAR. Consulte la carta de c6digo de error abajo o "evite la
lista de comprobaci6n del servicio" en la guia del duefio para la causa y la soluci6n posibles. Haga Ia correcci6n, despues seleccione un ciclo y presione IMPRESlON. Si el secadora para, eI
estado enciende el flash otra vez yet sefialar continua, satisface el servicio det contacto para la ayuda.
4 Sefiales Sonoras El secadora funcion6 demasiado largo.
Quite la pelusa; lave el filtro de la pelusa
El filtro de la pelusa bloque6. El sistema para quitar residuo de la hoja del
de la ventilacidn estorb6. El secadora suavizador limpian hacia fuera eI sistema
sobrecarg6, de la ventilacidn. Reduzca el tama_o de
Ia carga.
[ iN [N[N NN @?@roi;
Carta de la Referencia de los Ajustes del Secador
Plancho de Tiempo de
Toalles Permanente Delicado Rapido Retrocarse Secado
(Towels) Normal (Perm Press) (Delicate) (Quick) (Touch Up) (Timed Dry)
La duraci6n estimada
del ciclo *** 60 minutos 50 minutos 40 minutos 20 minutos ** ** **
Temperaturas
Alta (High) -/ -/ -/ -/ -/ -/ -/
Media (Medium) -/ -/ -/ -/ -/ -/ -/
No
Baja (Low) -/ -/ -/ -/ -/ recomendado -/
No No No No
Sin Calor (No Heat) recomendado recomendado recomendado recomendado -/ -/ -/
Nivel de la Sequedad
Mas Seco (More Dry) "/ -/
Normal Seco (Normal Dry) -/ -/ -/ -/
Menos Seco (Less Dry) -/ -/ -/
Seco H_medo Damp Dry) -/ -/ -/
Opciones
Salvador de Plancho (Press Saver) -/ "/ "/ -/ -/ -/
"k "k "k "k "k "k "k
Serial de Ciclo (Cycle Signal) -/ -/ -/ -/ -/ -/ -/
* Ajuste de la Fabrica -/Ajustes Disponsibles ** Ciclo Tiempo de Secado s61o *** La duraci6n estimada del ciclo se basa en ajustes normales del
nivel y de la fabrica de la sequedad PN 134420600D (0604)
/