Page is loading ...

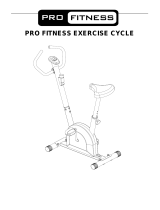
York Compact X-Bike
Item #YRK53119A
www.yorkfitness.com.au
Owner’s Manual

2
www.yorkfitness.com.au
Table of contents
Congratulations on
purchas
ing your new
exercise equipment from
Safety Precautions 03
Pre-Assembly Checklist 04
Hardware Packing List 05
Parts Lists 06-08
Exploded Diagrams
09-
10
Computer Instructions 16-17
Exercise Instructions 18-19
Warranty Information 20
You have chosen a high quality, safe and
innovative piece of equipment as your training
partner and we are certain it will keep you
motivated on the way to
achieving your personal fitness goals.
Please take the time to read this owner’s manual
as it will help you to get the most out of your new
exercise equipment.
For more information, please visit
www.yorkfitness.com.au
CONTENTS
Assembly Instructions
11-15

3
www.yorkfitness.com.au
Important Safety Precautions
This exercise machine is built for optimum safety. However, certain precautions apply
whenever you operate a piece of exercise equipment. Be sure to read the entire manual
before you assemble or operate your machine. In particular, note the following safety
precautions:
1. Keep children and pets away from the machine at all times. DO NOT leave children
unattended in the same room with the machine.
2. Only one person at a time should use the machine.
3. If the user experiences dizziness, nausea, chest pain, or any other abnormal symptoms,
STOP the workout at once. CONSULT A PHYSICIAN IMMEDIATELY.
4. Position the machine on a clear, leveled surface. DO NOT use the machine near water
or outdoors.
5. Keep hands away from all moving parts.
6. Always wear appropriate workout clothing when exercising. DO NOT wear robes or
other clothing that could become caught in the machine. Running or aerobic shoes are
also required when using the machine.
7. Use the machine only for its intended use as described in this manual. DO NOT use
attachments not recommended by the manufacturer.
8. Do not place any sharp object around the machine.
9. Disabled person should not use the machine without a qualified person or physician in
attendance.
10. Before using the machine to exercise, always do stretching exercises to properly warm
up.
11. Never operate the machine if the machine is not functioning properly.
12. The max. User capacity is 100 KGs.
WARNING: BEFORE BEGINNING ANY EXERCISE PROGRAM, CONSULT YOUR
PHYSICIAN. THIS IS ESPECIALLY IMPORTANT FOR INDIVIDUALS OVER THE AGE
OF 35 OR PERSONS WITH PRE-EXISTING HEALTH PROBLEMS. READ ALL
INSTRUCTIONS BEFORE USING ANY FITNESS EQUIPMENT.
Keep these instructions somewhere safe!

4
www.yorkfitness.com.au
Pre-Assembly Checklist
PART NO.
DESCRIPTION
QTY
1
Front / Rear Support Tube
1
3
Seat Post Tube
1
4
Handlebar tube
1
5
Rear Stabilizer Tube
1
6
Front Stabilizer Tube
1
10
Back Cushion Support Tube
1
12
Support Holder
1
13L/R
Pedal L/R
1/1
18
Seat
1
19
Monitor
1
22
Back Cushion
1
28
Side Handlebar
1
35
Phone Holder
1

5
www.yorkfitness.com.au
Hardware Packing List
PART
NO.
DRAWING DESCRIPTION Q’TY
PART
NO.
DRAWING DESCRIPTION QTY
07
Curved washer 6 27
Allen bolt 2
08
Domed nut 6 30
Allen bolt 2
15
Quick released knob 1 31
Allen bolt 2
21
Nylon nut 2 32
Spring washer 2
23
Carriage bolt 2 33
Flat washer 2
24
Flat washer 4 34
Screw 2
25
Allen bolt 2 90
Allen key 1
26
Carriage bolt 4 91
Allen wrench
1

6
www.yorkfitness.com.au
Parts List
Part No.
Description
QTY
01
Front support tube
1
02
Rear support tube
1
03
Seat post tube
1
04
Handlebar tube
1
05
Rear stabilizer tube
1
06
Front stabilizer tube
1
07
Curved washer
6
08
Domed nut
6
09
Safety pin
1
10
Back cushion support tube
1
11
Crank R
1
12
Support holder
1
13L
Pedal L
1
13R
Pedal R
1
14
Upper sensor wire
1
15
Quick release knob
1
16
Crank L
1
17
Hand pulse wire
1
18
Seat
1
19
Monitor
1
20 Flat washer 3
21
Nylon nut
5
22
Back cushion
1
23
Carriage bolt
2
24
Flat washer
6
25
Allen bolt
2
26
Carriage bolt
4
27
Allen bolt
2
28
Side handlebar
1
29
Cross-head screw
2
30
Allen bolt
2
31
Allen bolt
2
32
Spring washer
2
33
Flat washer
2
34
Screw
2
35
Phone holder
1

7
www.yorkfitness.com.au
Parts List
Part No.
Description
QTY
36
Adjusting screw
2
37
Spring
1
38
Magnetic bracket
1
39
Flange nut
2
40
Square end cap
1
41
Idler wheel sets
1
42
Wave spring washer
1
43
Belt pulley 2
1
44
Hex head nut
2
45
Bushing
6
46
Sensor bracket
1
47
EVA pad
1
48
Bearing bracket
2
49
Hollow end cap
1
50
Cushion rubber
1
51
Oval grommet
4
52
Hex head bolt
1
53
Crank end cap
2
54
Chain cover (L)
1
55
Chain cover (R)
1
56
Front cover
1
57
Allen screw
2
58
Cross-head screw
1
59
Cross-head screw
6
60
Cross-head screw
1
61
Cross-head screw
1
62
Self-tapping screw
10
63
Hex head nut
1
64
Plastic washer
1
65
Bearing
2
66
Foam grip
2
67
Grommet
1
68
Flat washer
2
69
Belt
2
70
Lower sensor wire
1
71
Tension control knob with cable
1
72
Hand pulse sensor
2

8
www.yorkfitness.com.au
Parts List
Part No.
Description
QTY
73
EVA pad
1
74
Plastic washer
1
75
End cap for rear stabilizer tube
2
76
End cap for front stabilizer tube
2
77
Flat washer
1
78
Flat washer
1
79
Axle for main frame
1
80
Belt pulley
1
81
Foam grip for side handlebar
2
82
Self-tapping screw
2
83
Round end cap
4
84
Snap ring
6
85
Flywheel
1
86
Axle for belt pulley 2
1
87
Step nut
1
88
Nylon nut
1
89
Fixed plate
2
90
Allen key
1
91
Allen wrench
1

9
www.yorkfitness.com.au
Exploded Diagram 1

10
www.yorkfitness.com.au
Exploded Diagram 2

11
www.yorkfitness.com.au
Assembly Instructions
STEP 1
Pull out the lock pin (09), open the bike completely as the picture show, then insert the lock
pin (09).

12
www.yorkfitness.com.au
STEP 2
Attach the front & rear stabilizer (06 & 05) to the main frame, tighten with carriage bolts (26),
curved washers (07) and domed nuts (08).

13
www.yorkfitness.com.au
STEP 3
The left and right pedal (13L) & (13R) are marked "L" and "R".
Connect them to their appropriate crank arm (16) & (11). The right pedal is on the right hand
side of the cycle as you sit on it.
Note that the right pedal (13R) should be threaded on clockwise and the left pedal (13L) on
counter-clockwise.
STEP 4
Attach the seat (18) to the seat support tube (03), tighten with flat washers (20) and nylon
nuts (21) which are pre-assembled on the seat.
Insert the seat support tube (03) to the main frame (01), fasten with the quick release knob
(15).

14
www.yorkfitness.com.au
STEP 5
Attach the handlebar tube (04) to the rear support tube (02), tighten with two sets of allen
bolts (30), spring washers (32) and flat washers (33).
Fasten the support holder (12) on the front of the main frame with two allen bolts (31).
Insert the phone holder (35) to the support holder (12) and fasten it with 2 screws (34).
STEP 6
Attach the monitor (19) to the handlebar (04) and fasten it with 2 cross-head screws which
are pre-assembled on the back of the monitor (19).
Connect the upper sensor wire (14) to the sensor wire from the back of monitor (19).
Insert the hand pulse wire (17) to the pulse hold on the back of monitor (19).

15
www.yorkfitness.com.au
STEP 7
Attach the back cushion support tube (10) to the seat support tube (03) and fasten it with 2
sets of carriage bolts (23), flat washers (24) and nylon nuts (21).
Attach the back cushion (22) to the back cushion support tube (10) and fasten it with 2 sets
of allen bolts (25) and flat washers (24).
STEP 8
Attach the side handlebar (28) to the curved piece of the back cushion support tube (10)
and fasten it with 2 sets of allen bolts (27), curved washers (07) and domed nuts (08).

16
www.yorkfitness.com.au
Console / Computer Instructions
FUNCTIONAL BUTTONS:
MODE - Push down for selecting functions.
SET - To set time, distance, calories and pulse.
RESET - For reset time, distance, calories and pulse.
FUNCTION AND OPERATIONS:
1. SCAN: Press “MODE” button until “SCAN” appears, monitor will rotate through all the 6
functions: Time, speed, distance, calories, odometer and pulse. Each display will
be held for 6 seconds.
2. TIME: (1) Counts the total time from start to end.
(2) Press “MODE” button until “TIME” appears, press “SET” button to set
exercise time. Automatically counts down from targeting value during exercise.
3. SPEED: Displays the current speed.
4. DISTANCE: (1) Counts the distance from start to end.
(2) Press “MODE” button until “DIST” appears. Press “SET” button to set
exercise distance. Automatically counts down from target value during
exercise.
5. CALORIES: (1) Counts the total calories from start to end.
(2) Press “MODE” button unit “CAL” appears. Press “SET” button to set
exercise calories. Automatically counts down from target value during
exercise.
6. ODOMETER:Monitor will display the total accumulated distance.
7. PULSE: Press MODE button until “PULSE” appears. Before measuring your pulse rate,
please place the palms of your hands on both of the contact pads and the
monitor will show your current heart beat rate in beats per minute(BPM) on the
LCD after 6~7 seconds.
Remark: During the process of pulse measurement, because of the contact
jamming, the measurement value may be higher than the virtual pulse rate
during the first 2~3 seconds, then it will return to a normal level. The
measurement value cannot be regarded as the basis for medical treatment.

17
www.yorkfitness.com.au
NOTE:
1. If the display is faint or shows no figures, please replace the batteries.
2. The monitor will automatically shut off if there is no signal received after 4 minutes.
SPECIFICATIONS:
FUNCTION
AUTO SCAN
Every 6 seconds
TIME
0:00’~99:59’
CURRENT SPEED
0.0~999.9 KM/H
TRIP DISTANCE
0.00~999.9 KM
CALORIES
0.0~999.9 CAL
ODOMETER
0.0 ~ 9999 KM
PULSE RATE
40~240 BPM
BATTERY TYPE
2pcs of SIZE –AAA or UM –4
OPERATING TEMPERATURE
0°C ~ +40°C
STORAGE TEMPERATURE
-10°C ~ +60°C

18
www.yorkfitness.com.au
Exercise Instructions
Using your X-BIKE
will provide you with several benefits. It will improve your physical
fitness, tone muscle and in conjunction with a calorie controlled diet, help you lose weight.
1. The Warm Up Phase
This stage helps get the blood flowing around the body and the muscles working properly. It
will also reduce the risk of cramp and muscle injury. It is advisable to do a few stretching
exercises as shown below. Each stretch should be held for approximately 30 seconds, do
not force or jerk your muscles into a stretch - if it hurts, STOP.
2. The Exercise Phase
This is the stage where you put the effort in. After regular use, the muscles in your legs will
become more flexible. Work to your limits but remember it is very important to maintain a
steady tempo throughout. The rate of work should be sufficient to raise your heart beat into
the target zone shown on the graph below.
This stage should last for a minimum of 12 minutes though most people start at about 15-20
minutes
SIDE BENDS OUTER THIGH
INNER THIGH
FORWARD
BENDS
CALF / ACHILLES

19
www.yorkfitness.com.au
3. The Cool Down Phase
This stage is to let your cardio-vascular system and muscles wind down. This is a repeat of
the warm up exercise e.g. reduce your tempo, continue for approximately 5 minutes. The
stretching exercises should now be repeated, again remembering not to force or jerk your
muscles into the stretch.
As you get fitter you may need to train longer and harder. It is advisable to train at least
three times a week, and if possible space your workouts evenly throughout the week.
MUSCLE TONING
To tone muscle while on your X-BIKE you will need to have the resistance set quite high.
This will put more strain on your leg muscles and may mean you cannot train for as long as
you would like. If you are also trying to improve your fitness you need to alter your training
program. You should train as normal during the warm up and cool down phases, but
towards the end of the exercise phase you should increase resistance, making your legs
work harder. You may have to reduce your speed to keep your heart rate in the target zone.
WEIGHT LOSS
The important factor here is the amount of effort you put in. The harder and longer
you work the more calories you will burn. Effectively this is the same as if you were
training to improve your fitness, the difference is the goal.

20
www.yorkfitness.com.au
WARRANTY, SAFETY AND ASSEMBLY INFORMATION
York Compact X-Bike Item #YRK53119A
IMPORTANT
Please read and retain this manual as it will assist with identification for parts and service.
------------------------------------------------------------------------------------------------------------
BOYLES FITNESS warrants their Bike to be free from defects in material and workmanship
under normal use and service conditions.
The various components of the Bike are warranted against defects and workmanship for the
time periods specified as follows:
YRK53119A – York Compact X- Bike
Domestic use
1 year parts and frame
All warranty coverage extends only to the original retail purchaser from the date of purchase.
Boyles Fitness’ obligation under this Warranty is limited to replacing or repairing, at Boyles
Fitness’ option, the product or parts therein. Any enquiries relating to warranties or spare parts
For efficient processing of your enquiry please have relevant date of purchase, retailer name
you purchased the item from and the brand on the product. This warranty does not extend to any
damage to a product caused by abuse, improper or abnormal usage (as detailed in this
instruction manual), or repairs not provided by Boyles Fitness. Nor does this warranty extend to
products used for commercial or rental purposes. This warranty does not cover ordinary wear,
tear and weathering, failure to follow directions, improper installation, improper maintenance or
acts of God (such as damage caused by storms, lightning and by snow or ice). No other
Warranty beyond that specifically set forth above is authorised by Boyles Fitness.
Our sales and Service Centre has been set up to provide assembly assistance, replacement
parts and accessories, and to efficiently handle all warranty related matters.
Hours: 9:00am – 3:00pm Monday – Friday (excluding Public Holidays)
Email: Spares@boylesfitness.com.au
Website: https://www.boylesfitness.com.au/service/
/