Page is loading ...

Oneida Air Systems2
System Start-Up Information
1. Do not vacuum anything that is burning or smoking, such as cigarettes,
matches, hot ashes, or any hot substance!
2. Do not vacuum (or use this cyclone near) ammable or combustible
liquids, gases, or explosive dusts, such as gasoline or other fuels,
lighter uid, cleaners, oil-based paints, natural gas, hydrogen, coal dust,
magnesium dust, grain dust, aluminum dust, sugar dust, our dust or
gun powder.
3. To reduce the risk of health hazards from vapors or dusts, do not
vacuum toxic materials unless a HEPA lter is used. Do not use or store
near hazardous materials.
4. Dust can be ammable and explosive. Some dust can be toxic or cause
allergic reactions.
5. Wood dust mixtures are highly ammable and can be explosive.
NEVER introduce sparks or sources of ignition into collector.
a. Empty drum after each use.
b. Ground system.
6. NEVER leave wood dust in a building or vehicle.
7. Keep re extinguishers handy at all times.
8. Can be used for collecting non-ammable liquids.
9. Dispose of waste in a FIRE SAFE AREA.
READ THE SAFETY PRACTICES INSTALLATION
AND MAINTENANCE INSTRUCTIONS AND YOUR
WET/ DRY VACUUM’S OWNER’S MANUAL BEFORE
ASSEMBLING AND USING THE DUST DEPUTY
SOME DUSTS ARE HIGHLY FLAMMABLE OR
EXPLOSIVE. LEARN/ KNOW WHAT YOU ARE
DEALING WITH. FOLLOW ALL LOCAL, STATE,
FEDERAL & NFPA CODES AND GUIDE LINES.

3oneida-air.com
System Dimensions
13-1/4"
337 mm
9-5/8"
244 mm
2" O.D.
1-7/8" I.D.
51 mm O.D.
48 mm I.D.
8"
203 mm
Nominal dimensions shown. Dimensions subject to slight
variations in manufacturing.
2" O.D.
1-7/8" I.D.
51 mm O.D.
48 mm I.D.
6-3/4"
171 mm

Oneida Air Systems4
System Contents
ID Part number Part description Qty
A VXC110002 Anti- Static Cyclone 1
B AXG000004A Cyclone Gasket 1
C AHX000016 Cyclone Hardware Pack 1
C1 AFS015920 1/4" - 20 x 3/4" Hex Head Bolt 6
C2 AFW025000 1/4" Flat Washer 6
C3 AFT000005 1/4" Whiz-Lock Nut 6
INCLUDED ONLY WITH AXD001004SD
A VXC110009 Static Dissipative Cyclone 1
INCLUDED ONLY WITH AXD050004
D AXD200036A 2" x 36" Hose 1
E AXD600103A 2" Elbow 2
F ACB320000 Clamp Band 1
G AFO990225 O Ring 2
H SDL050001A Lid 1
Please unpack the parts carefully and conrm you have received
each item listed here.
You will need the following:
• Air tight dust container and lid
• Power Drill
• 5/16" Drill Bit
• 7/16" Open End Wrench
• Hole Saw or reciprocating saw
• Wet/Dry Vacuum
• Vacuum Hose
• Vacuum hose adapters

5oneida-air.com
System Contents (Cont.)
B
A
C
D
E
F
H
G
C1 C2
C3

Oneida Air Systems6
Assembly Instructions
If you purchased the Dust Deputy Plus (#AXD050004),
continue to step 3 [FIG. 1].
Draw 3" diameter circle on your supplied lid. Carefully cut
out 3" hole in lid. Use 5/16" drill bit to drill bolt holes.
Note: Use the base of the Cyclone (A), Gasket (B), or the Dust
Deputy Template on page 18 for reference.
1
Turn Cyclone (A) upside-down. Place Gasket (B) on the
base of Cyclone (A) and align all the holes. Place the topside
of the supplied lid against Gasket (B) and align all the holes.
Secure Cyclone (A), Gasket (B) and lid together using six
Bolts (C1), six Washers (C2), and six Whiz-Lock Nuts (C3)
as shown in [FIG. 2].
Note: oroughly tighten hardware to eliminate air leaks.
2
FIG. 1
FIG. 2
FF
C1
C2
C3

7oneida-air.com
Assembly Instructions (Cont.)
Turn the Cyclone (A) upside-down. Place Gasket (B) on
the base of the Cyclone and align all the holes. Place the
topside of the Lid (H) against the Gasket and align all the
holes. Secure Cyclone, Gasket and Lid together using six
Bolts (C1), six Washers (C2), and six Whiz-Lock Nuts (C3)
as shown in [FIG. 3].
Note: Tighten hardware evenly to eliminate air leaks. DO
NOT OVERTIGHTEN! On the underside of the Lid there is
a hex-shaped recess for ease of installation of the nuts. e
Whiz-Lock Nuts MUST be installed upside down to t into
the hex-shaped recess.
3
FIG. 3
C1
C2
B
C3
A

Oneida Air Systems8
Assembly Instructions (Cont.)
Put the Cyclone (A) and lid on top of your dust container
and seal it airtight.[FIG. 4a].
If you purchased the Dust Deputy Plus (#AXD050004),
Snap Dust Deputy Cyclone and Lid assembly onto your
supplied bucket and ensure it's fully seated. [FIG. 4b] The
lid will make an audible click when it's securely sealed.
Note: We recommend a drum or container that will
withstand the vacuum pressure (at least a 90 mil side
thickness) otherwise the container may collapse when in use.
e larger the container, the sturdier the walls must be to
prevent collapse. Oneida Air Systems has many container
options available at oneida-air.com.
If you purchased the Dust Deputy Plus, when emptying the
Bucket, li up on latch and pull up on the lid to release the
cyclone assembly from the Bucket. [FIG. 4c] e Lid ts a
variety of buckets and may feel loose, but will seal completely
under vacuum pressure.
4
FIG. 4a FIG. 4b
FIG. 4c

9oneida-air.com
Assembly Instructions (Cont.)
If you purchased the Dust Deputy Plus (#AXD050004),
continue to step 6.
Connect the Cyclone's (A) inlet (sideways facing port)
to your dust producing tool with your vacuum's hose or
ductwork. Connect Cyclone's outlet (upwards facing port)
to your vacuum [FIG. 5] with hose or ductwork.
5
A
FIG. 5
To wet/dry vacuum
To Tool

Oneida Air Systems10
To wet/dry vacuum To Tool
Assembly Instructions (Cont.)
FIG. 6b
FIG. 6a
FIG. 6c
If you did not purchase the Dust Deputy Plus
(#AXD050004), continue to step 7.
Attach one Elbow (E) to the top outlet of the Cyclone (A)
and ax Hose (D) to the tapered end of the Elbow. Attach
the other open end of Hose (D) to the second Elbow (E)
and attach to the inlet of your wet dry vacuum.
Connect the Cyclone's (A) inlet (sideways facing port)
to your dust producing tool with your vacuum's hose or
ductwork [FIG. 6a].
Note: If your vacuum hose is not tight on the inlet or it keeps
pulling o use the Clamp Band (F) and/or the two O-Rings
(G) [FIG. 6b] [FIG. 6c].
6
F G
D
A
E

11oneida-air.com
Assembly Instructions (Cont.)
FIG. 7
Make sure there are no air leaks at the connections. Review
[FIG. 7] for common leak points.
Note: Any air leak in the lid or drum will aect separation
performance. Make sure to check your dust drum frequently
so you do not overll it.
7
Leak Point
(Cyclone/lid)
Leak Point
(Lid/Drum)
Leak Point
(Outlet)
Leak Point
(Inlet)

Oneida Air Systems12
Top View
Top View
Top View
To Tools
To Tools
To Tools
Adding Cyclones to Improve Performance
Attach in Series
Attach in Parallel
Multiple Vacuums
Increases particle eciency
and helps in very ne dust
situations.
Same particle eciency but
increases the CFM.
More CFM/airow to larger
tools such as Table Saw,
Jointer, and Planer.
2 or More
200 CFM 100 CFM 100 CFM

13oneida-air.com
You are only limited by your imagination. The lid must be
sealed and the container must stand up to your vacuum's
suction pressure without collapsing.
Additional D.I.Y. Ideas
Examples of DIY setups
An example of a plywood top that had a groove routed out of it to
t the bucket rim and accommodate the gasket. For mobility and
additional stability, you can make a plywood platform to fasten
your bucket to. We recommend 5 casters for the best stability.

Oneida Air Systems14
Accessories
2" x 10' Wire Reinforced Vacuum
Hose
#AXD400000
• Crush-resistant, exible hose with a smooth-
wall inner lining that minimize air resistance.
2.5" Turnkey Hose Clamp
#ACB360000
• Secures hose tting in place to eliminate
disconnects when pulling or exing the hose.
• Fits hoses and port sizes from 2" to 2-1/2" in
diameter.
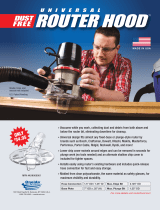
Universal Dust-Free Router Hood
#AXH000001
• Collects router waste from both above and
below the bit, virtually eliminating post-
project cleanup.
1.5" x 6.5' Dust Extraction Hose
Whip
#AHE000001
• is highly exible vacuum hose ts onto the
dust collection ports of common portable
power tools. Includes 2.5" rotating swivel cu.

15oneida-air.com
Accessories
2.5" x 5.5 Wire Reinforced Vacuum
Hose
#AXD250066
• Crush-resistant, exible hose with a smooth-
wall inner lining that minimize air resistance.
1.25" x 1.5" Hose Adapter Kit
#AKD000000
• Includes reducers, adapters, and O-rings for
connecting smaller vacuum hoses to standard
2" Dust Deputy cyclone ports.
2.5 Tapered Static Conductive
Vacuum Hose Elbow
#AXD600103
• For creating smooth 90 degree hose turns with
minimal loss of air performance. Tapered on
one end for easy friction-t hose connections.
Viper Vacuum Scraper Paint
Removal Tool
#AXS001160B
• Ergonomic hand scraping tool with high-
textured grip and reversible, tungsten-carbide
blade.
• Hollow handle ts 1-1/4" to 1-1/2" vacuum
hoses.

Oneida Air Systems16
Troubleshooting
PROBLEM CAUSE SOLUTION
Not separating well.
(Only a tiny amount of
dust should reach the
vacuum)
Air leaks in the drum 1. Check for leaks between the lid and the dust drum.
2. Check for holes or leaks in the dust drum.
3. Check for leaks along the ange of the cyclone.
Material swirls in
cyclone and won't drop
into the dust container.
Material swirls in
cyclone and won't drop
into the dust container.
Collecting large bulky
material
1. Large, bulkier material might swirl. Restart or temporarily cut
o air ow to drop material down.
Low Air Volume System clogged 1. Clean vacuum and the vacuum lter per the manufacturer's
specs.
2. Check all hose connections for a blockage in the hose.
Drum Collapsing Blocked airow 1. Ensure at least one gate is open during operation of your dust
collector.
Hose Pulling o Hose connections not
tight
1. Due to the varied hose diameters, exible couplers can
be used. They are available at local hardware stores in the
plumbing section.
2. Use a hose clamp.
3. Wrap the inlet and outlet of the Dust Deputy with a layer of
electrical tape to increase the friction t.
4. Secure hose with a sheet metal screw.

17oneida-air.com
Warranty Information
Limited Warranty – Activate online at oneida-air.com/warranty
Oneida Air Systems®, Inc. (OAS) warrants the Dust Deputy for a period of 1 year, to the original purchaser from the date of purchase,
unless otherwise specied. Items not manufactured by Oneida Air Systems are limited to their own manufacturer’s warranties. All
electrical items such as magnetic starters, remotes, sensors, pumps, bin sensors, bag grippers, etc. and accessories are limited to 90 days.
Oneida Air Systems warrants that the product will be free from defects in materials and workmanship.
is is Oneida Air Systems’ sole written warranty and any and all warranties that may be implied by law, including any merchantability
or tness, for any particular purpose, are hereby limited to the duration of this written warranty. Oneida Air Systems does not warrant
or represent that the merchandise complies with the provisions of any law or acts unless the manufacturer so warrants. is warranty
does not apply to defects due directly or indirectly to misuse, negligence, accidents, abuse, repairs, alterations, improper wiring or lack of
maintenance. In no event shall Oneida Air Systems’ liability under this warranty exceed the purchase price paid for the product and any
legal actions brought against Oneida Air Systems shall be tried in the State of New York, County of Onondaga.
e buyer is cautioned to install and operate Dust Collectors in accordance with prescribed Federal, State, OSHA, NFPA, local codes
and regulations. is equipment should be installed/wired by a licensed electrician following all applicable codes. Local codes can be
signicantly dierent from national codes. e customer assumes the responsibility for contacting their insurance underwriter with
regard to specic application requirements of venting or if additional re protection and safety equipment may be required. Oneida Air
Systems shall in no event be liable for death, injuries to persons or property or for incidental, and contingent, special, or consequential
damages arising from the use of our product.
Oneida Air Systems makes every eort to accurately represent our products and prices, however Oneida Air Systems reserves the
right to make changes to products and prices at any time. As a manufacturer, Oneida Air Systems reserves the right to change product
specications at any time in an eort to achieve better quality products.
SAFETY WARNING PLEASE READ
Before Purchasing or Installing a dust collection system the buyer is cautioned to do so in accordance with prescribed Federal, State,
Local, OSHA, NFPA, and any other applicable codes or regulations relating to the type of dust(s) you are collecting.
SOME TYPES OF DUST UNDER CERTAIN CONDITIONS HAVE THE POTENTIAL TO BE EXPLOSIVE.
Oneida Air Systems is not responsible for how the dust collector is used or installed. Dusts with deagration or explosion risks, such as
wood dust, may require additional safety equipment including but not limited to; venting, spark detection, suppression systems, back
dra dampers or may require installation in an outside location or in a protected area away from personnel. e customer assumes the
responsibility for contacting their insurance underwriter with regard to specic engineering controls or application requirements. (We
suggest you reference NFPA 664, 654 and 68 codes for more information) Oneida Air Dust Collection Systems may not be suitable for
some applications and are not designed to be used in explosive atmospheres. Oneida Air Systems equipment should only be installed and
wired by a licensed electrician following all applicable local and national electrical codes.
Some dust created by power sanding, sawing, grinding, drilling, and other construction activities contains chemicals known to cause
cancer, birth defects or other reproductive harm. Some examples of these chemicals are: Lead from lead-based paints; Crystalline silica
from bricks, cement and other masonry products; Arsenic and chromium from chemically-treated lumber; etc.
Your risk from these exposures varies, depending on how oen you do this type of work. To reduce your exposure to these chemicals,
work in a well ventilated area, and work with approved safety equipment, such as those dust masks that are specially designed to lter
out microscopic particles. Oneida Air Systems recommends using additional approved safety equipment such as an approved OSHA and
NIOSH dust mask or respirator.
ONEIDA AIR SYSTEMS SHALL IN NO EVENT BE LIABLE FOR DEATH, INJURIES TO
PERSONS OR PROPERTY OR FOR INCIDENTAL, AND CONTINGENT, SPECIAL, OR
CONSEQUENTIAL DAMAGES ARISING FROM THE USE OF OUR PRODUCT.

Oneida Air Systems18
Dust Deputy Template
12345678
1:1 SCALE. DO NOT ALTER DOCUMENT SIZE WHEN PRINTING
LID MOUNTING TEMPLATE
FOR STANDARD 14" TALL DUST DEPUTY CYCLONES
Use this template to prepare your lid for installation of the Dust
Deputy.

19oneida-air.com

Customer Service Dept.
1-866-387-8822 • support@oneida-air.com
1001 West Fayette Street, Syracuse, NY 13204 U.S.A.
Copyright © 2022 Oneida Air Systems, Inc.
ank you for your purchase
of this American made product!
Regardless of where you purchased your Oneida Air Systems'
product, if you have any questions or issues with missing /
damaged parts, please call Oneida Air Systems rst to let us
help resolve your problem. We fully stand behind the quality of
our products and place the utmost value on the satisfaction of
our customers.
We want to do everything possible to make your purchase and
experience with Oneida Air Systems a good one!
/


