
INSTALLATION GUIDE
INSTALLATIEGIDS
GUIDE D’INSTALLATION
MONTAGEANLEITUNG
Disclaimer
If you install the product in a way that diers from this manual, this will void all
guarantees. Before installation check that the product meets all your requirements
and is not damaged. By proceeding with installation, you accept the condition of the
product.
Disclaimer
Indien u het product plaatst op een manier die afwijkt van deze handleiding, vervalt
alle garantie. Controleer voor plaatsing of het product aan al uw eisen voldoet en niet
beschadigd is. Indien u overgaat tot plaatsing, aanvaardt u de staat waarin het product
zich bevindt.
Clause de non-responsabilité
Si vous installez le produit d’une manière diérente de celle présentée dans ce manuel,
toutes les garanties seront invalidées. Contrôlez avant le placement si le produit répond
à toutes vos exigences et n’est pas endommagé. En procédant au placement, vous
acceptez l’état dans lequel se trouve le produit.
Haftungsausschluss
Wenn Sie das Produkt nicht genau nach den Angaben in dieser Montageanleitung ein-
bauen, verfällt die Garantie. Überprüfen Sie vor dem Einbau des Produkts, ob sämtliche
Voraussetzungen erfüllt sind und das Produkt nicht beschädigt ist. Sobald Sie mit der
Montage beginnen, sehen Sie, in welchem Zustand sich das Produkt befindet.
Tools needed
Cleaning
Maintenance
IMPORTANT
Shower tray • Douchebak • Receveur de douche • Duschwanne
27640_INSTALL_INT_ver2020.1.2
Clean drain regularly.
Maak de afvoer regelmatig
schoon.
Nettoyez régulièrement
l’évacuation.
Abfluss regelmäßig reinigen.
Dry tub after each use.
Droog de bak na elk gebruik.
Sécher le receveur après
chaque utilisation.
Trocknen Sie die Wanne
nach jedem Gebrauch.
NATURAL
STONE
MS-polymeer kit
+ sanitairy
silicone
SOUL

CLEANING AND TREATMENT - REINIGING EN BEHANDELING - NETTOYAGE ET TRAITEMENT -
REINIGUNG UND BEHANDLUNG
PRODUCT FEATURES - PRODUCT EIGENSCHAPPEN - CARACTÉRISTIQUES DU PRODUIT -
MERKMALE DES PRODUKTS -
All natural stone products are supplied untreated from the factory. The colour and pattern of individual items can vary and are
not accepted for warranty claims. Check the supplied product before you proceed with treatment and subsequent installation.
Elk product in natuursteen wordt onbehandeld geleverd vanuit fabriek. De kleur en het patroon van afzonderlijke items kunnen
variëren en worden niet geaccepteerd voor garantieclaims. Controleer het geleverde product voor u verdergaat met behandeling
en latere installatie.
Les produits à base de pierres naturelles ne bénécient d’aucun traitement en usine. La couleur et le dessin des éléments indi-
viduels peuvent varier et ne sont pas acceptés pour les réclamations de garantie. Vériez le produit livré avant de procéder au
traitement et à l’installation.
Jedes Produkt aus Naturstein wird werkseitig unbehandelt geliefert. Die Farbe und das Design von Einzelelementen können
variieren und sind nicht für Gewährleistungsansprüche akzeptiert. Überprüfen Sie das gelieferte Produkt, bevor Sie mit der Be-
handlung und späteren Montage fortfahren.
DU
EN
EN
NL
NL
FR
FR
DU
1 2 3
Vor der Montage muss jeder Duschwanne aus Naturstein vorab mit sauberem Wasser gereinigt werden. Anschließend muss
der Naturstein vor der Behandlung mit einem Antieckenmittel vollständig trocknen. Vor der Imprägnierung des Natursteins
dürfen keine Flecken oder Reste von Flecken vorhanden sein, damit diese nicht durch das Antieckenmittel in den Poren
eingeschlossen werden. Entfernen Sie zuerst den Fleck und lassen Sie den Naturstein trocknen. Anschließend können Sie
ihn mit dem Antieckenmittel behandeln. Bitte testen Sie das Produkt zunächst an einer unauälligen Stelle, bevor Sie den
Naturstein vollständig behandeln. Es ist sehr wichtig, die Anweisungen auf der Produktverpackung des Antieckenmittels genau
zu befolgen. Auf dem Markt sind verschiedene Antieckenprodukte erhältlich; einige verwenden einen farbintensivierenden
Eekt. Wählen Sie das Produkt aus, das Ihre Ansprüche an die Behandlung erfüllt. -Bevor Sie den Naturstein endgültig montieren,
muss er vollständig getrocknet sein.
Before installation, clean each natural stone showertray with clean water. The natural stone must be completely dry before
being treated with a stain protection product. Before priming the natural stone, ensure that there are no stains or stain residues.
Otherwise, the stain protection product will lock these stains into the pores. First remove the stain and allow to dry, then commence
the stain protection treatment. It is advisable to test the product rst on an inconspicuous area before proceeding with a full
treatment of the natural stone. It is very important to apply the stain protection treatment in accordance with the instructions on
the product packaging. Various stain protection products are available on the market; some may deepen the colour of the stone.
Ensure that you choose a treatment product that fulls your requirements. The treated natural stone must be completely dry
before being installed in its permanent location.
Avant installation, les receveurs de douches en pierre naturelle doivent être nettoyés à l’eau pure. La pierre naturelle doit être
entièrement sèche avant le traitement à l’aide d’un produit antitaches. Avant l’imprégnation de la pierre naturelle, assurez-vous
de l’absence de taches ou de restes de taches. Le produit antitaches les emprisonnerait dans les pores. Ôtez d’abord les taches,
puis laissez sécher. Vous pouvez ensuite commencer le traitement avec le produit antitaches. Veuillez préalablement tester le
produit à un emplacement invisible avant de procéder au traitement sur l’ensemble de la pierre naturelle. C’est très important
d’appliquer le traitement antitaches conformément aux instructions qui gurent sur l’emballage du produit. Diérents produits
antitaches sont disponibles sur le marché, certains renforcent la couleur. Sélectionnez le produit correspondant au traitement
souhaité. La pierre naturelle traitée doit être entièrement sèche avant l’installation dénitive.
Vóór installatie, moet elke natuurstenen douchebak met zuiver water worden gereinigd. Laat de natuursteen volledig drogen,
vooraleer deze te behandelen met een vlekstopproduct. Zorg er vóór het impregneren van de natuursteen voor dat de douchebak
vrij is van (restanten van) vlekken. Deze worden met de vlekstop immers opgesloten in de poriën. Verwijder daarom eerst de vlek
en laat uitdrogen. Gelieve het vlekstopproduct eerst te testen op een onzichtbare plaats voor u verder gaat met een volledige
behandeling. Het is van groot belang om bij de vlekstopbehandeling de instructies van de leverancier te volgen. Er zijn diverse
vlekstopproducten verkrijgbaar op de markt. Sommigen werken met een kleurverdiepend eect. Kies enkel het product dat aan
uw wensen voldoet. De behandelde natuursteen moet volledig droog zijn voor u verder gaat met de denitieve installatie.
CHECK

PRÉ-INSTALLATION - PRÉ-INSTALLATIE - PRÉ-INSTALLATION - PRÉ-INSTALLATION
1
3
DRAIN
Ø 40
Ø 50
Ø 40 Ø 40
Ø 40 Ø 50
Ø 50
DRAIN DRAIN
SINGLE
DRAIN
Ø 40
Ø 50
Ø 40 Ø 40
Ø 40 Ø 50
Ø 50
DRAIN DRAIN
DOUBLE
check !
2
5
4
90°90°
90°
Level dierence > 3 mm -> leveling
Niveauverschil > 3 mm -> egaliseren
Diérence de niveau > 3 mm -> nivellement
Niveaudierenz > 3 mm -> Nivellierung
Floor and walls must be stable,
flat, dust-free!
Vloer en wanden moeten stabiel,
vlak, stofvrij zijn!
Le sol et les murs doivent être
stables, plats, sans poussière!
Boden und Wände müssen
stabil, flach und staubfrei sein!
Clean inside.
Zuiver binnenin.
Propre à l’intérieur.
Innen sauber
machen.
Place in final room 24 hours before installation.
Vooraf 24u in definitieve ruimte leggen.
Placer 24h à l’avance dans la pièce ou il sera installé.
24 Stunden vorher in den letzten Raum stellen.
After the test - Na de test
Après le test - Nach dem Test
floor
tub
A
floor tub
B
6 7
Floorlevel
Vloerpas
Niveau du sol
Bodenhöhe
INSTALLATION - INSTALLATIE - INSTALLATION - INSTALLATION
+ 3 mm + 3 mm

WALL - WAND - MUR - WAND
min 3 mm
Expansion tape
Uitzetvoegband
Bande d’expansion
Expansionsband
Silicone
min 3 mm
FLOOR - VLOER - SOL - BODEN
A
min 3 mm
B
12
98
1110
See specific installation
instructions of siphon.
Zie specifieke installatie-
instructies van de sifon.
Voir les instructions
d’installation spécifiques du
siphon.
Siehe spezifische Installations-
anweisungen zu Siphon.
PROTECT
Bottom side
Onderzijde
Dessous
Unterseite
13 14
MS-polymeer kit

21
TEST
15 16
17
20
19A
PROTECT
floor tub
A
floor tub
B
floor tub
A
floor tub
B
Mounting glass panels only after 48 hours.
Montage glaspanelen pas na 48 uur.
Montage des panneaux de verre après 48 h.
Montage der Glasscheiben erst nach 48 St.
19B
18
Second screed layer, under tile floor.
Tweede chape laag, onder tegelvloer.
Deuxième couche de chape, sous le carrelage.
Zweite Estrichschicht, unter Fliesenboden.
Sanitary silicone
Sanitaire silicone
Silicone sanitaire
Bad-Silicon
-
 1
1
-
 2
2
-
 3
3
-
 4
4
-
 5
5
Balmani 27644 Installation guide
- Type
- Installation guide
Ask a question and I''ll find the answer in the document
Finding information in a document is now easier with AI
in other languages
- français: Balmani 27644 Guide d'installation
- Deutsch: Balmani 27644 Installationsanleitung
- Nederlands: Balmani 27644 Installatie gids
Related papers
-
 Balmani 95573 Installation guide
-
 Balmani 201241 Installation guide
-
 Balmani 91177 Installation guide
-
 Balmani 84091 Installation guide
-
 Balmani 84232 Installation guide
-
 Balmani 84483 Installation guide
-
 Balmani 70692 Installation guide
-
 Balmani 91176 Installation guide
-
 Balmani 201704 Installation guide
-
 Balmani 201679 Installation guide
Other documents
-
 Linie 84037 Installation guide
-
 Luca Varess 201801 Installation guide
-
 Santeg 28333 Installation guide
-
 Linie 200127 Installation guide
-
 Linie 34649 Installation guide
-
 storke 84269 Installation guide
-
 Santeg 85626 Installation guide
-
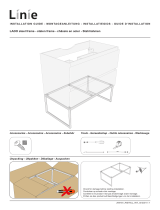 Linie 200185 Installation guide
-
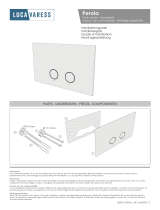 Luca Varess 86075 Installation guide
-
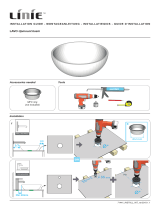 Linie 71441 Installation guide


