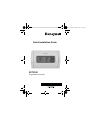
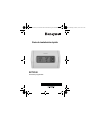
Honeywell RCT8100 offers many intelligent features to make your life more comfortable. This easy-to-install programmable thermostat is compatible with various systems, including gas, oil, or electric furnaces, central air conditioners, hot water systems with or without a pump, and millivolt systems. It allows for precise temperature control with its customizable programming options, including up to 4 periods per day, 7 days a week, and a temporary override function. The large, backlit display provides clear visibility, and the intuitive user interface makes programming a breeze.
Honeywell RCT8100 offers many intelligent features to make your life more comfortable. This easy-to-install programmable thermostat is compatible with various systems, including gas, oil, or electric furnaces, central air conditioners, hot water systems with or without a pump, and millivolt systems. It allows for precise temperature control with its customizable programming options, including up to 4 periods per day, 7 days a week, and a temporary override function. The large, backlit display provides clear visibility, and the intuitive user interface makes programming a breeze.


-
 1
1
-
 2
2
-
 3
3
-
 4
4
-
 5
5
-
 6
6
-
 7
7
-
 8
8
-
 9
9
-
 10
10
-
 11
11
-
 12
12
-
 13
13
-
 14
14
-
 15
15
-
 16
16
-
 17
17
-
 18
18
-
 19
19
-
 20
20
-
 21
21
-
 22
22
-
 23
23
-
 24
24
-
 25
25
-
 26
26
-
 27
27
-
 28
28


Honeywell RCT8100 offers many intelligent features to make your life more comfortable. This easy-to-install programmable thermostat is compatible with various systems, including gas, oil, or electric furnaces, central air conditioners, hot water systems with or without a pump, and millivolt systems. It allows for precise temperature control with its customizable programming options, including up to 4 periods per day, 7 days a week, and a temporary override function. The large, backlit display provides clear visibility, and the intuitive user interface makes programming a breeze.
Ask a question and I''ll find the answer in the document
Finding information in a document is now easier with AI
in other languages
- español: Honeywell RCT8100 Manual de usuario
Related papers
-
Honeywell RTHL3550 User manual
-
Honeywell RCT8100 Programmable Thermostat User guide
-
Honeywell RCT8102A User manual
-
-
-
Honeywell RTH2510 Series Operating instructions
-
-
Honeywell RTH4300B User manual
-
Honeywell Pro TH2210D User manual
-
Other documents
-
Sanus SA304 Installation guide
-
TAYMAC Thermostat Guard Installation guide
-
 Aube Technologies TH303 User manual
-
ResMed Mirage Quattro User guide
-
RocketFish RF-LTRMS User manual
-
-
 Honeywell Home RTH2410 Installation guide
-
White Rodgers White-Rodgers 1E30N-910 Mercury Free Mechanical Thermostat User manual
-
Emerson 1E50N-301 User manual
-

