Chefman RJ19-V2-SBP-BLACK User guide

Category
Food processors
Type
User guide

The Chefman RJ19-V2-SBP-BLACK is a versatile kitchen tool that can help you quickly and easily prepare a variety of healthy and delicious meals. With its powerful motor and two-speed settings, you can effortlessly spiralize vegetables for salads, zucchini noodles, and more.

The Chefman RJ19-V2-SBP-BLACK is a versatile kitchen tool that can help you quickly and easily prepare a variety of healthy and delicious meals. With its powerful motor and two-speed settings, you can effortlessly spiralize vegetables for salads, zucchini noodles, and more.

6-IN-1
Spiralizing
FOOD PREP KIT
USER GUIDE
Safety Instructions
Features
Assembly and Operating
Instructions
Cleaning & Maintenance
Terms & Conditions
Warranty Registration
RJ19-V2-SBP-BLACK
READ ALL INSTRUCTIONS BEFORE USE
For your safety and continued enjoyment of this product, always
read the instruction manual before using.
COOKING FORWARD™
Welcome!
Whether this is your rst Chefman® appliance or you’re already a part of our family,
we’re happy to be in the kitchen with you! With your new Ultimate 6-in-1 Food Prep
Kit, it has never been faster or easier to prep a huge range of healthy, delicious meals.
Turn fresh vegetables into spiral ribbons for gorgeous salads, puree soups right in the
pot, effortlessly blend smoothies, chop ingredients in seconds, and whip egg whites to
voluminous heights. We designed the Food Prep Kit to offer ample power, two speeds
for customized control, and an ergonomic grip.
Before you get cooking, please take a few minutes to read our directions, safety
instructions, and warranty information.
From our kitchen to yours,
The Chefman® Team
1 Safety Instructions
3 Features
5 Operating Instructions
12 Cleaning & Maintenance
13 Terms & Conditions
15 Warranty Registration
CONTENTS
1 2
WARNING: Using electrical appliances, basic safety precautions should always be
taken, including the following:
1. Read all instructions.
2. Unplug from the outlet when not in use, before putting on or taking off parts
and before cleaning.
3. To protect against risk of electrical shock, do not put the appliance or power cord
in water or other liquids.
4. This appliance should not be used by or near children or individuals with certain
disabilities.
5. This appliance is not intended for use by persons (including children) with reduced
physical, sensory, or mental capabilities, or lack of experience and knowledge,
unless they have been given supervision or instruction concerning the appliance by
a person responsible for their safety.
6. Children should be supervised to ensure that they do not play with the appliance.
7. Avoid contact with all moving parts.
8. Never put the unit near a hot burner, in an oven, or in a dishwasher.
9. Do not operate the appliance with a damaged cord or plug, or after the appliance
malfunctions. Should this occur, please contact Chefman® Customer Support.
10. Do not use outdoors or for anything other than intended use.
11. Keep hands and utensils away from the blade during operation to reduce the risk
of personal injury and/or damage to the immersion blender. WARNING: The cutting
blades are SHARP. Handle with care both when using and cleaning the product.
12. Do not let the cord hang over the edge of a table or counter, come into contact
with sharp edges, or touch hot surfaces.
13. Do not pull on the power cord to disconnect.
14. Always place the appliance on a rm, stable surface when in use and not in use.
15. The use of attachments not recommended or sold by Chefman® may cause re,
electric shock, or injury.
16. Never use abrasive cleaning agents or abrasive cloths when cleaning the unit.
17. Do not use ngers to scrape food away from the cutting blade, especially while the
appliance is plugged in. Serious injury may result.
18. Use the unit only when it is completely assembled.
19. Before using for the rst time, remove all packaging, and wash and dry the parts.
20. To avoid overheating the motor, do not use the blender for more than 1 minute
continuously. Allow the motor to cool between uses.
WARNING: To avoid the risk of injury, avoid the blade when the unit is still rotating.
HOUSEHOLD USE ONLY
SAVE THESE INSTRUCTIONS
SAFETY INSTRUCTIONS SAFETY INSTRUCTIONS
IMPORTANT SAFEGUARDS IMPORTANT SAFEGUARDS
Do not place the appliance
on a stovetop or any other
heatable surface, even if
stovetop is not on. Doing
so is a re hazard.
3 4
1
1. Handheld Motor Unit
2. Low Speed Button
3. High Speed Button
4. Spiralizer Head
5. Spiked Food Gripper
(not pictured)
6. Spiralizer Discs
(3; see diagram, p 4)
7. Spiralizer Base
8. Chopper Head
(not pictured)
9. Chopper Blade
(not pictured)
10. Chopper Bowl
11. Immersion Blender
Attachment
12. Whisk Attachment
13. Whisk Coupler
FEATURES FEATURES
4
6
7
10
11
12
13
2
3
SPIRALIZER DISCS
Ribbon Blade
Use to create wide spiral ribbons
similar to pappardelle. Potatoes,
apples, and zucchini all work
great with this blade.
Spiral Blade
Use to create long, thin spirals,
such as zoodles (spaghetti-like
strands of zucchini). Ideal for
zucchini, beets, and butternut
squash.
Grate Blade
Use as you would the narrow
holes of a box grater. Grate
potatoes and onions for hash
browns or carrots or radishes
for salads. You can also use it to
grate hard cheeses.
5 6
OPERATING INSTRUCTIONS OPERATING INSTRUCTIONS
BEFORE FIRST USE
The Food Prep Kit comes with a number of parts all designed to create beautiful,
healthful food.
1. Carefully unpack the Food Prep Kit and remove all packaging materials. Before throwing
away any packaging, check that all attachments and accessories are accounted for.
2. Wipe down the handheld motor unit with a damp cloth to remove any packaging debris.
Never immerse the motor unit in water.
3. Wash all accessories and attachments as detailed in the Cleaning and Maintenance
section on p. 12.
HOW TO ASSEMBLE THE SPIRALIZER
The spiralizer enables you to easily cut vegetables and fruits into long, spiraled
strands, ribbons, or thin shreds to make beautiful salads, desserts, and plant-based
“noodle” dishes. You can also use the grating disc to grate hard cheeses. Note that
you may need to trim the ingredient to t in the spiralizer base.
HOW TO USE THE SPRIRALIZER
STEP 1:
Ensure that the spiked food
gripper is snapped into place
on the spiralizer head (push
until you hear a click).
STEP 2:
Place the handheld
motor unit on the other
side of the spiralizer
head, aligning the arrow
on the motor unit with
the unlock symbol on the
spiralizer head.
STEP 4:
Choose one of the three
spiralizer discs (see diagram
on p. 4). With the sharp side
of the blade facing up, insert
your ngers into the nger
holes and align the three
grooves on the side of the disc
with the three ridges on the
spiralizer base. WARNING: Use
caution when handling as the
blades are sharp.
STEP 1:
Place the spiralizer base on a
at, even work surface.
STEP 2:
Put the vegetable in the
spiralizer base so that it rests
on top of the blade.
STEP 3:
Align the three grooves on
the spiralizer head with the
three ridges on the spiralizer
base, then lower the head into
the base until it rests on the
vegetable.
STEP 5:
Lower the disc into the top
portion of the spiralizer base
until it comes to rest on the
lip. Make sure the disc is level
and not tilted.
STEP 3:
Twist until the arrow
on the motor unit
aligns with the lock
symbol and it clicks
into place.
7 8
STEP 4:
Plug in the motor unit.
STEP 7:
Hold the button until the
vegetable or fruit stops
spinning, and then release it to
stop. The spiralizer head will
be close to the blade.
STEP 5:
Press one of the speed
buttons on the motor unit. You
may need to steady the top
of the spiralizer head with your
free hand. WARNING: Keep
ngers free of the openings on
the spiralizer base.
STEP 8:
Unplug the unit and remove
the spiralized fruit or vegetable
from the spiralizer base.
Depending on how much you
are grating or spiralizing, you
may need to do this a few times.
STEP 6:
Hold the button down while
pressing on the fruit or
vegetable with the motor
unit/spiralizer head. NOTE: To
reduce risk of overheating, do
not hold down the button for
longer than 1 minute at a time.
STEP 9:
Carefully remove any of the
remaining vegetable or fruit
from the spiralizer head.
OPERATING INSTRUCTIONSOPERATING INSTRUCTIONS
SPIRALIZING TIPS
Use high speed to create thinner spirals and low speed for thicker spirals.
Firm fruits and vegetables spiralize best. Good candidates include apples,
potatoes, butternut squash, zucchini, and root vegetables.
If foods have a hard, inedible skin, such as butternut squash, remove it before
spiralizing. Likewise, if foods have an inedible core (apples, pears), remove that
before spiralizing.
Apply more pressure when working with rmer and narrower vegetables and fruits.
HOW TO ASSEMBLE THE CHOPPER
Think of the chopper as a mini food processor, perfect for chopping small quantities of
fresh vegetables or nuts. It can also puree cooked fruits or vegetables for baby food,
make a small batch of hummus or other dips, and grind nuts.
1. Lower the chopper blade onto the shaft in the chopper bowl.
2. Insert the handheld motor unit in the top of the chopper head, aligning the arrow
on the motor unit with the unlock symbol on the chopper head.
3. Twist until the arrow on the motor unit aligns with the lock symbol and clicks
into place.
HOW TO USE THE CHOPPER
1. Place the chopper bowl on a at, even work surface.
2. Place ingredients in the chopper bowl. For best results, be sure the food is cut into
similar–size pieces.
3. Place the chopper head with the motor unit attached on the bowl, aligning the
tabs on the chopper head with the tabs on the bowl. Twist the chopper head
clockwise to lock.
4. Plug in the motor unit.
9 10
5. Press one of the speed buttons on the motor unit, depending on the chopping
task. Press and release the button repeatedly to pulse or hold it down for
continuous chopping. NOTE: To reduce risk of overheating, do not hold down the
button for longer than 1 minute at a time.
6. Twist the chopper head counterclockwise to unlock and remove from the bowl.
Remove the chopper blade before removing any food from the bowl.
CHOPPER TIPS
For best results, start with foods cut to a similar size. If the pieces are not uniform
to begin with, you will not get an even chop.
Do not overload the chopper bowl. Overloading causes an uneven chop and puts
strain on the motor.
Pulse the button rather than holding it down to avoid overprocessing.
If food sticks to the bowl, release the button, wait for the blade to stop spinning,
remove the lid, and scrape down the bowl with a spatula before continuing.
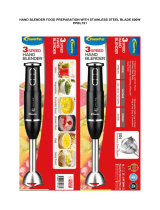
HOW TO ASSMBLE THE IMMERSION BLENDER
The immersion blender is ideal for emulsifying salad dressings, mayonnaise, and other
sauces. Perfect for blending smoothies, it also can puree soups right in the pot.
1. Insert the handheld motor unit into the immersion blender attachment, aligning the
arrow on the motor unit with the unlock symbol.
2. Twist until the arrow aligns with the lock symbol and clicks into place.
HOW TO USE THE IMMERSION BLENDER
1. Place food to be processed in a bowl, saucepan, or pot deep enough to contain
any increase in volume from using the blender. NOTE: Avoid having fruit pits,
bones, or other hard materials in the blending mixture as these can damage
the blade.
2. Plug in the motor unit.
3. Lower the blending shaft into the mixing container as deeply as possible, then
press one of the speed buttons. To avoid overheating the motor, blend ingredients
in short spurts and do not run the blender for more than 1 minute at a time.
WARNING: Use caution when blending hot ingredients. Never leave the blender in
or against the side of a hot pot.
4. To stop blending, release the speed button. When completely nished, unplug
from the wall outlet.
IMPORTANT: If a piece of food becomes lodged in the blade or the guard surrounding
the blade, immediately turn off the blender, unplug it, and detach the blending shaft.
Then use a spatula to carefully remove the food. Avoid using your ngers. After the
stuck food has been removed, reattach the shaft, plug the blender back in, and continue
blending.
BLENDING TIPS
Cut solid foods into uniform sizes for easy blending and consistent results.
To avoid splatter, do not turn the blender on until the blade is beneath the surface
of the food, then turn the blender off before removing it. Never take the blender
out of a mixture while it is running.
Use a gentle up and down motion to blend all ingredients, being sure to keep the
blender head beneath the surface.
Tall, narrow containers such as plastic quart containers or taller saucepans are best
for holding liquids as you blend, since the blender head must stay beneath the
surface.
Leave room at the top of the container as blending can cause the liquid level to
rise and may overow if too full.
Carefully tilt the mixing container as needed to ensure that the blade reaches all
OPERATING INSTRUCTIONS OPERATING INSTRUCTIONS
11 12
OPERATING INSTRUCTIONS CLEANING AND MAINTENANCE
the ingredients.
HOW TO ASSEMBLE THE WHISK
The whisk is perfect for whipping air into liquids, particularly cream or egg whites, to
create a light foam. It’s also ideal for smoothly and evenly blending our into liquids.
1. Insert the handheld motor unit into the whisk coupler, aligning the arrow on the
motor unit with the unlock symbol.
2. Twist until the arrow on the motor unit aligns with the lock symbol and clicks into
place.
3. Push the shaft of the whisk into the whisk coupler, aligning the tabs, until it clicks.
HOW TO USE THE WHISK
1. Place the food to be whisked in a bowl large enough to contain splatter. Narrow,
deep containers can be useful for whipping small amounts of liquid, such as cream.
2. Plug in the motor unit.
3. Lower the whisk into the mixing container as deeply as possible, then press one of
the speed buttons on the motor unit. NOTE: To reduce the risk of overheating, do
not hold down the button for longer than 1 minute at a time.
4. To stop whisking, release the speed button. When completely nished, unplug
from the wall outlet.
WHISKING TIPS
Cream whips best when it is very cold. For best results, refrigerate the container
and whisk attachment for about 15 minutes before whipping, and use high speed.
When whipping egg whites, ensure that the container and whisk are completely
clean without any trace of grease or oil, and use room-temperature egg whites.
Start whipping on low speed and switch to high once the whites look foamy.
To avoid overwhipping either cream or egg whites, switch to low speed once you
are close to your desired stage.
With many dishwasher-safe attachments, cleaning your 6-in-1 Food Prep Kit is easy.
1. Always unplug the handheld motor unit.
2. Completely disassemble the parts (see assembly in sections above).
3. Wipe down the motor unit, whisk coupler, and cord with a damp cloth if needed.
Do not submerge motor unit in water or place in the dishwasher.
4. For how to wash the remaining parts, refer to the chart below.
Part Dishwasher-safe? Hand-wash with soap and water?
Handheld Motor Unit No No
Spiralizer Discs Yes (top rack) Yes (use a brush to protect ngers)
Spiralizer Head No Yes
Spiked Food Gripper Yes (top rack) Yes
Spiralizer Base Yes (top rack) Yes
Chopper Head No Yes
Chopper Bowl Yes (top rack) Yes
Chopper Blade Yes (cutlery basket) Yes
Immersion Blender Attachment Yes (top rack) Yes
Whisk Coupler No No
Whisk Attachment Yes (top rack) Yes
13 14
TERMS AND CONDITIONS
Limited Warranty
TERMS AND CONDITIONS
Limited Warranty
RJ Brands, LLC d/b/a Chefman® offers a limited 1-year Warranty (the “Warranty”)
available on sales through authorized distributors and retailers only. Please note
that this Warranty becomes valid from the date of initial retail purchase and that the
Warranty is non-transferable and applies only to the original purchaser.
This Warranty is void without proof of purchase within the United States and Canada.
Please be aware that this Warranty supersedes all other warranties and constitutes
the entire agreement between the consumer and Chefman®. Any changes to the
Terms and Conditions of this Warranty must be in writing, signed by a representative
of Chefman®. No other party has the right or ability to alter or change the Terms and
Conditions of this Warranty.
We may ask you to please submit, via email, photos and/or video of the issue you are
experiencing. This is to help us better assess the matter and possibly offer a quick x.
Photos and/or video may also be required to determine warranty eligibility.
We encourage you to register your product. Registering can make the Warranty
process easier and can keep you informed of any updates or recalls on your product.
To register, follow the directions on the Chefman® Warranty Registration page in the
Chefman® User Guide. Please retain your proof of purchase even after registering. In
the event that you do not have proof of your purchase date, we may declare your
Warranty void or we may, at our sole discretion, apply the date of manufacture as the
purchase date for purposes of this Warranty.
WHAT THE WARRANTY COVERS
Manufacturer Defects
Chefman® products are warranted against defects in material and workmanship,
under normal household use, for a period of 1 year from the date of purchase when
used in accordance with the directions listed in the Chefman® User Guide. If your
product does not work as it should, please contact Customer Support at
[email protected] so that we may assist you.
THIS WARRANTY DOES NOT COVER
Misuse
Damage that occurs from neglectful or improper use of products, including, but not
limited to, damage that occurs as a result of usage with incompatible voltage, regardless
of whether the product was used with a converter or adapter. See Safety Instructions
in the Chefman® User Guide for information on proper use of product;
Poor Maintenance
General lack of proper care. We encourage you to take care of your Chefman®
products so that you may continue to enjoy them. Please see Cleaning and
Maintenance directions in the Chefman® User Guide for information on proper
maintenance;
Commercial Use
Damage that occurs from commercial use;
Normal Wear and Tear
Damage or degradation expected to occur due to normal use over time;
Altered Products
Damage that occurs from alterations or modications by any entity other than
Chefman® such as the removal of the rating label afxed to the product;
Catastrophic Events
Damage that occurs from re, oods, or natural disasters; or
Loss of Interest
Claims of loss of interest or enjoyment.
15 16
CHEFMAN® WARRANTY REGISTRATION
For product information, visit chefman.com
EXCEPT WHERE SUCH LIABILITY IS REQUIRED BY LAW, THIS WARRANTY DOES NOT COVER, AND
CHEFMAN® SHALL NOT BE LIABLE FOR, INCIDENTAL, INDIRECT, SPECIAL, OR CONSEQUENTIAL
DAMAGES, INCLUDING WITHOUT LIMITATION, DAMAGE TO, OR LOSS OF USE OF THE PRODUCT, OR
LOST SALES OR PROFITS OR DELAY OR FAILURE TO PERFORM THIS WARRANTY OBLIGATION. THE
REMEDIES PROVIDED HEREIN ARE THE EXCLUSIVE REMEDIES UNDER THIS WARRANTY, WHETHER
BASED ON CONTRACT, TORT OR OTHERWISE
Chefman® is a registered trademark of RJ BRANDS, LLC.
Cooking Forward™ is a trademark of RJ Brands, LLC.
Intertek® is a registered trademark of Intertek Group, PLC.
CHEFMAN® WARRANTY REGISTRATION
NOTE: Label depicted here is an example.
MADE IN CHINA/FABRIQUE EN CHINE
AC ONLY/ AC SEULEMENT
DATE CODE:
ACCESS CODE:
Model/Modele: RJ25-C
Conveyor toaer
120v~60hz 1800W
CONFORMS TO UL STD. 1026
CERTIFIED TO CSA STD.C22.2 No.64
CAUTION: DO NOT IMMERSE IN WATER
ATTENTION: NE PAS PLONGER DANS L’EAU
WARNING: TO PREVENT ELECTRIC SHOCK,
UNPLUG BEFORE CLEANING
PRÉAVIS: POUR ÉVITER LES CHOCS ÉLECTRIQUES,
DÉBRANCHEZ L’APPAREIL AVANT DE L’UTILISER
READ INSTRUCTIONS BEFORE USING
LISEZ LES INSTRUCTIONS AVANT DE L’UTILISER
HOUSEHOLD USE ONLY
POUR USAGE DOMESTIQUE SEULEMENT
0000000
0000
XXXXXXXX
What do I need to register my product?
•Contact Information
•Model Number
Proof of Purchase
(online conrmation,
receipt, gift receipt)
•Date Code
•Access Code
How do I register my product?
All you need to do is ll out a simple Chefman® registration form. You can easily
access the form in one of the two ways listed below:
1. Visit chefman.com/register
2. Scan the QR code to the right to
access site:
17
®
©CHEFMAN 2021
  • Page 1 1
  • Page 2 2
  • Page 3 3
  • Page 4 4
  • Page 5 5
  • Page 6 6
  • Page 7 7
  • Page 8 8
  • Page 9 9
  • Page 10 10
  • Page 11 11

Chefman RJ19-V2-SBP-BLACK User guide

Category
Food processors
Type
User guide

The Chefman RJ19-V2-SBP-BLACK is a versatile kitchen tool that can help you quickly and easily prepare a variety of healthy and delicious meals. With its powerful motor and two-speed settings, you can effortlessly spiralize vegetables for salads, zucchini noodles, and more.

Ask a question and I''ll find the answer in the document

Finding information in a document is now easier with AI