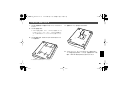
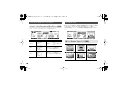
Roland TDW-20 Owner's manual
- Category
- Music drums
- Type
- Owner's manual
This manual is also suitable for
Page is loading ...
Page is loading ...

3
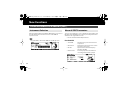
Before using this product, carefully read the sections
entitled: “Using the Unit Safely” and “Important Notes”
(p. 4–p. 7 ). These sections provide important information
concerning the proper operation of the product.
Additionally, in order to feel assured that you have gained
a good grasp of every feature provided by your new
product, Owner’s manual should be read in its entirety.
The manual should be saved and kept on hand as a
convenient reference.
In the interest of product improvement, the specifications
and/or contents of this package are subject to change
without prior notice.
Copyright © 2008 ROLAND CORPORATION
All rights reserved. No part of this publication may be
reproduced in any form without the written permission of
ROLAND CORPORATION.
TDW-20_e.book 3 ページ 2008年7月17日 木曜日 午前11時35分

4
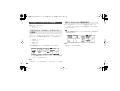
Using the Unit Safely
The symbol alerts the user to things that must be
carried out. The specific thing that must be done is
indicated by the design contained within the circle. In the
case of the symbol at left, it means that the power-cord
plug must be unplugged from the outlet.
Used for instructions intended to alert the
user to the risk of injury or material
damage should the unit be used
improperly.
* Material damage refers to damage or
other adverse effects caused with
respect to the home and all its
furnishings, as well to domestic animals
or pets.
Used for instructions intended to alert the
user to the risk of death or severe injury
should the unit be used improperly.
The symbol alerts the user to important instructions or
warnings.The specific meaning of the symbol is
determined by the design contained within the triangle. In
the case of the symbol at left, it is used for general
cautions, warnings, or alerts to danger.
The symbol alerts the user to items that must never be
carried out (are forbidden). The specific thing that must
not be done is indicated by the design contained within
the circle. In the case of the symbol at left, it means that
the unit must never be disassembled.
TDW-20_e.book 4 ページ 2008年7月17日 木曜日 午前11時35分

5
• Do not open or perform any
internal modifications on the
product. (The only exception
would be where this manual
provides specific instructions
which should be followed in
order to put in place user-
installable options; see p. 13.)
...............................................................................................
• Do not attempt to repair the
product, or replace parts within
it (except when this manual
provides specific instructions
directing you to do so). Refer all
servicing to your retailer, the
nearest Roland Service Center,
or an authorized Roland
distributor, as listed on the
“Information” page.
...............................................................................................
• Do not allow any objects (e.g.,
flammable material, coins,
pins); or liquids of any kind
(water, soft drinks, etc.) to
penetrate the TD-20.
...............................................................................................
• Never install the product in any
of the following locations.
• Subject to temperature
extremes (e.g., direct
sunlight in an enclosed
vehicle, near a heating duct,
on top of heat-generating
equipment); or are
• Damp (e.g., baths,
washrooms, on wet floors);
or are
• Exposed to steam or smoke;
or are
• Subject to salt exposure; or
are
• Humid; or are
• Exposed to rain; or are
• Dusty or sandy; or are
• Subject to high levels of
vibration and shakiness.
...............................................................................................
• In households with small
children, an adult should
provide supervision until the
child is capable of following all
the rules essential for the safe
operation of the product.
...............................................................................................
• Protect the product from
strong impact.
(Do not drop it!)
...............................................................................................
• Before installing the TDW-20,
you must first always turn off
the TD-20 and unplug its power
cord.
• Never step on, nor place heavy
objects on the product.
...............................................................................................
• Install the circuit board only
into the specified product (TD-
20). Remove only the specified
screws during the installation.
...............................................................................................
• Keep any screws you may
remove and the included
installation tool in a safe place
out of children’s reach, so there
is no chance of them being
swallowed accidentally.
...............................................................................................
TDW-20_e.book 5 ページ 2008年7月17日 木曜日 午前11時35分

6
Important Notes
Placement
• Do not expose the product to direct sunlight, place it near
devices that radiate heat, leave it inside an enclosed vehicle, or
otherwise subject it to temperature extremes. Excessive heat
can deform or discolor the product.
• When moved from one location to another where the
temperature and/or humidity is very different, water droplets
(condensation) may form. Damage or malfunction may result if
you attempt to use the product in this condition. Therefore,
before using the product, you must allow it to stand for several
hours, until the condensation has completely evaporated.
Repairs and Data
• Please be aware that all data contained in the product’s
memory may be lost when the product is sent for repairs.
Important data should always be backed up on a memory card,
or written down on paper (when possible). During repairs, due
care is taken to avoid the loss of data. However, in certain cases
(such as when circuitry related to memory itself is out of order),
we regret that it may not be possible to restore the data, and
Roland assumes no liability concerning such loss of data.
Additional Precautions
• Unfortunately, it may be impossible to restore the contents of
data that was stored on a CompacfFlash card once it has been
lost. Roland Corporation assumes no liability concerning such
loss of data.
• When you need to transport the product, package it in the box
(including padding) that it came in, if possible. Otherwise, you
will need to use equivalent packaging materials.
TDW-20_e.book 6 ページ 2008年7月17日 木曜日 午前11時35分

7
Before Using Cards
Using CompactFlash Cards
• CompactFlash cards are constructed using precision
components; handle the cards carefully, paying particular note
to the following.
• To prevent damage to the cards from static electricity, be
sure to discharge any static electricity from your own body
before handling the cards.
• Do not touch or allow metal to come into contact with the
contact portion of the cards.
• Do not bend, drop, or subject cards to strong shock or
vibration.
• Do not keep cards in direct sunlight, in closed vehicles, or
other such locations (storage temperature: -25 to 85˚ C).
• Do not allow cards to become wet.
• Do not disassemble or modify the cards.
* CompactFlash and are trademarks of SanDisk
Corporation and licensed by CompactFlash association.
* Roland Corporation is an authorized licensee of the
CompactFlash
™
and CF logo ( ) trademarks.
Copyright
• When you purchase the TDW-20 expansion board for TD-20
from an authorized Roland dealer, the included sounds are
licensed, not sold, to you by Roland Corporation, for
commercial use in music production, public performance,
broadcast, etc.
You may use any of the included sounds in a commercial or
noncommercial recording without paying any additional
license fees. However, you must strictly adhere to the following
crediting guidelines on any music recording that utilize material
from TDW-20.
Reproduction or duplication of any of the sound contained in
the TDW-20, either as they exist on this sound module or by any
means of reformatting, mixing, filtering, re-synthesizing,
processing or otherwise editing for use in another product or for
re-sale, is strictly prohibited without the express written
consent of Roland. All unauthorized giving, trading, lending,
renting, re-issue, re-distribution or re-sale of the sounds
included in the TDW-20 are expressly prohibited.
In Plain English: Be creative and respectful in your application of
the TDW-20 sounds. These sounds are for your use only. DO NOT
COPY THEM.
TDW-20_e.book 7 ページ 2008年7月17日 木曜日 午前11時35分

8
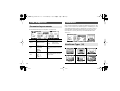
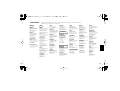
Contents
Using the Unit Safely............................................ 4
Important Notes ................................................... 6
Installing the TDW-20 in the TD-20................... 10
IMPORTANT! Please Read
before Beginning the Installation Process .................................10
IMPORTANT! Backing Up Your Data .............................................12
How To Install the TDW-20 Expansion Board............................13
Updating the TD-20 with the CompactFlash Card..................15
Installation du TDW-20 dans le TD-20 .............. 16
IMPORTANT! Lire ce qui suit
avant d’entreprendre la procédure d’installation ...................16
IMPORTANT! Sauvegarde des données.......................................18
Installation de la carte d’expansion TDW-20.............................19
Mise à jour du TD-20 à l’aide de la carte CompactFlash........21
Features............................................................... 22
About the Drum Kits...........................................................................24
New Functions .................................................... 26
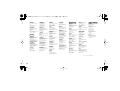
Drum Instruments Parameters [INST]..........................................26
Instrument Selection.................................................................26
About V-EDIT Parameters ........................................................26
Mixer Settings.......................................................................................29
Minimum Volume of Each Trigger Input............................29
Pad Compressor...................................................................................30
Parameter Improvements........................................................30
Ambience...............................................................................................30
New Room Types (15)...............................................................30
New Wall Types (3).....................................................................31
Mic Positions (9) ..........................................................................31
New Output Gain Parameter..................................................32
Ambience Monitor (“solo” mode).........................................32
Multi-Effects ..........................................................................................32
New Output Gain Parameter..................................................32
Multi-Effects Monitor (“solo” mode) ....................................32
Master Compressor.............................................................................33
Gain Reduction (GR) Meter......................................................33
Drum Kit Parameters [KIT]................................................................33
Pad Pattern ON/OFF Switch....................................................33
Trigger Settings....................................................................................34
Advanced Trigger Parameter Function ..............................34
Checking the Trigger Information........................................34
TDW-20_e.book 8 ページ 2008年7月17日 木曜日 午前11時35分

9
Copy Functions ....................................................................................35
Trigger Bank Copy ......................................................................36
Copying an Instrument Set .....................................................36
Copying an Instrument.............................................................37
Quick Jump Functions to the Copy Screen .......................37
Settings for the Entire TD-20...........................................................38
Master Output..............................................................................38
Output Assign (OTHER).............................................................38
Using Foot Switches and Pad Switches ..............................39
MIX IN new Function .................................................................39
Importing Original TD-20 Data into the Expanded TD-20
......40
Other Functions ...................................................................................41
The Kit Selection Function.......................................................41
Choosing a Drum Kit from a CompactFlash......................41
Appendices ......................................................... 42
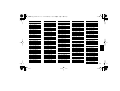
Drum Instrument List.........................................................................42
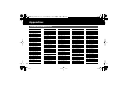
Preset Drum Kit List ............................................................................46
Information......................................................... 53
TDW-20_e.book 9 ページ 2008年7月17日 木曜日 午前11時35分

10
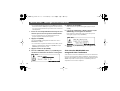
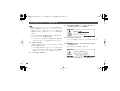
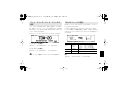
Installing the TDW-20 in the TD-20
Installation Procedure
1.
Check the package contents to be sure you have the expansion
board, screwdriver (for removing the cover on the back of the
TD-20), locking key (for securing the expansion board into
place) and CompactFlash card. Please leave the expansion
board in its package until it is time to install it.
2.
Back up your data (carefully read p. 12).
3.
Install the TDW-20 expansion board (p. 13).
4.
Update the TD-20 (p. 15).
Enclosed CompactFlash Card
• Do NOT use with a computer BEFORE executing the update
process.
Back up Your Original TD-20 Data!
• Save your current data to your CompactFlash card before you
install the TDW-20.
When executing an update, all data and settings in the TD-20
are lost. That’s why it is important to back up your data and
settings on a ConpactFlash card before updating. If you are
using the CompactFlash card included with your TDW-20,
insert the card ONLY AFTER turning the power on. Otherwise
the “updater” on the card will automatically open.
IMPORTANT! Please Read before Beginning the Installation Process
TDW-20_e.book 10 ページ 2008年7月17日 木曜日 午前11時35分

11
Data Compatibility
• Data created on the original TD-20 and backups stored on a
CompactFlash card can be used with an expanded TD-20 (p.
40).
• The original TD-20’s factory preset drum kits can be used with
an expanded TD-20.
• Data created with an expanded TD-20 is not compatible with
original TD-20.
• The TD-20 will not function if you remove the TDW-20 after
performing the update.
Caution when Handling the TDW-20
• Components of the TDW-20 can be damaged by static
electricity. Please observe the following precautions when
handling it.
• Before touching the TDW-20, you must touch some other
metal object to safely discharge any static electricity that
might be in your body or clothing.
• When holding the TDW-20, grasp the edges of the circuit
board and DO NOT touch the components on the circuit
board or the connectors.
• If you need to store or ship the TDW-20, place it in the
original bag (conductive bag for electrostatic protection).
• DO NOT touch the circuitry or connectors inside the TD-20.
• When inserting the TDW-20, do not force it into the slot. If
insertion is difficult, take the TDW-20 out and then try again.
Use the provided tool to lock it in place.
• When you’ve finished installing the TDW-20, double-check
your work.
• If a foreign object should get inside the TD-20, request
servicing by your retailer, the nearest Roland Service Center, or
an authorized Roland distributor, as listed on the “Information”
page.
TDW-20_e.book 11 ページ 2008年7月17日 木曜日 午前11時35分

12
If you are using the CompactFlash card included with your
TDW-20, insert the card ONLY AFTER turning the power on.
Otherwise the “updater” on the card will automatically open.
1. Insert a CompactFlash card into the TD-20’s front
panel memory card slot.
* Carefully insert the CompactFlash card all the way in—until
it is firmly in place.
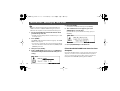
2. Press [CARD].
The [CARD] and CompactFlash indicators light up. The “CARD
MENU” screen appears.
* If you insert a card that has never been used with the TD-20,
the screen will indicate “Unformatted!” Press [CARD] and [F4
(FORMAT)] to format.
3. Then press [F1 (SAVE)].
4. In the “CARD SAVE” screen, use [+/-] or [VALUE] to
select the backup destination for the data you are
saving.
5. Press [F5 (SAVE)].
If you want to rename the backup, press [F4 (NAME)].
6. The confirmation screen appears, press [F5
(EXECUTE)] to save the data.
If you decide not to proceed with the backup, press [F1
(CANCEL)].
7. Press [F5 (EXECUTE)] to save the data.
If You Have BULK DUMP Data Stored on Your
Computer
If you have individual kit data or your entire kit’s data stored on a
computer, in order for it to be compatible with the expanded
version, you must load it into the TD-20, and save the data to a
CompactFlash card BEFORE updating with the TDW-20.
IMPORTANT! Backing Up Your Data
TDW-20_e.book 12 ページ 2008年7月17日 木曜日 午前11時35分

13
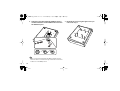
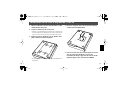
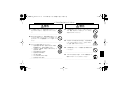
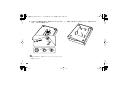
1. Power-off the TD-20, and unplug the power cord
from the AC outlet.
2. Turn the TD-20 over on its back.
* When turning the TD-20 on its back, take care not to damage
the buttons and knobs. To protect them, spread a cushion or
towel over your work surface.
3. Remove the eight screws (marked by arrows) on the
bottom panel. Take off the cover.
* Do not remove any screws other than those marked by ar-
rows.
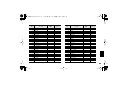
4. Orient the circuit board holder as shown in the
illustration.
5. Insert the connector of the expansion board all the
way into the connector of the TD-20. Make sure that
the tip of each circuit board holder protrudes
through the holes in the TDW-20.
How To Install the TDW-20 Expansion Board
TDW-20_e.book 13 ページ 2008年7月17日 木曜日 午前11時35分

14
6. Using the tool included with the TDW-20, turn the
circuit board holders in the LOCK direction to fasten
the TDW-20 in place.
When you’ve finished installing the TDW-20, double-check to
make sure that it is installed correctly and that the circuit board
holders are in the LOCK position.
7. Reattach the cover using the eight screws you
removed in step 3.
TDW-20_e.book 14 ページ 2008年7月17日 木曜日 午前11時35分

15
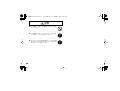
1. With the power off, insert the CompactFlash Card
provided in this package.
2. Turn the power on and the following screen
appears.
3. To execute the update, press the [F5=UPDATE]
button.
* It may take 3 minutes before update is finished.
* Do not turn the power off during the update process.
4. When the screen shows “Update Completed.”, turn
off the TD-20 and remove the CompactFlash card.
5. Turn the power back on and execute the system
initialize.
6. To initialize, press the [F5 (EXECUTE)] button.
Updating the TD-20 with the CompactFlash Card
TDW-20_e.book 15 ページ 2008年7月17日 木曜日 午前11時35分
Page is loading ...
Page is loading ...
Page is loading ...
Page is loading ...
Page is loading ...
Page is loading ...

22
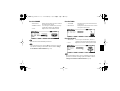
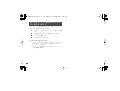
Features
New Sounds and 50 New Drum Kits (100 total)
The new acoustic sounds have more punch, expressiveness, stereo
presence and dynamic range. The Processed and Electronic sounds
give you lots of new choices for everything from Alternative Pop,
Hip Hop or Club music. The USER memory is now 100 kits, including
50 NEW kits, and the TD-20’s original preset kits.
New Editing and Performance Power
• A new, Large “Mic Size” choice for the kick drum enhances low
frequency attack (p. 26).
• More “Mic Position” choices for more precise microphone
placement (p. 30).
• Full “Kit Resonance” function, triggered by the bass drum,
adds overall kit depth and presence (p. 30).
• New Snare Drum Rim function allows selected layering choices
(p. 27).
• Electronic sounds now have a new Dynamic pitch bend
feature (p. 28).
• Turn the snares on or off, or change from a normal Hi-Hat to
“Fixed Hi-Hat” using foot or pad switches (p. 39).
• “Dynamic Interval Control” results in a more accurate response
to your playing dynamics and speed (p. 34).
• “Enhanced HH Control” improves the feel and response of the
V-Hi-Hat (p. 23).
• “Enhanced Snare Buzz Control” gives more dynamic response
and presence when adding “snare buzz” to the toms or kick (p.
26).
Ambience — User Interface, New functions
Not only has the interface has been improved, but new algorithms
offer high resolution definition and stereo presence. New functions
include 15 new room types, 3 new wall material choices and 7 new
mic positions (p. 30).
TDW-20_e.book 22 ページ 2008年7月17日 木曜日 午前11時35分

23
Improved Memory Storage on a
CompactFlash Card
Up to 99 full backups on the CompactFlash Card. Your current
CompactFlash Card stays compatible on the new, expanded
version, as well as the original version (p. 24).
Directly “audition” a kit on the
CompactFlash card.
You can choose between preset kits: TD-20/TDW-20 and kits saved
on CompactFlash card (p. 41).
You can play the kit before loading it into the USER area. (however,
pad patterns will not work when being played from the
CompactFlash card)
Sequencer
• Additional Preset Patterns
• 50 new Preset Patterns have been added (P 101 – 150).
KD-120 Users
If you have imported your own trigger bank settings from the
original TD-20 version, we advise you to double check the
trigger parameters for the KD-120. As dynamic response has
been improved, re-adjusting those parameters will make you
feel even more comfortable while playing.
Important notes about the Hi-Hat
We strongly recommend that you spend time adjusting the
Hi-Hat parameters to adapt to your performance techniques.
• The most important is correctly setting the “offset”
before you play each time.
ACCESS: [KIT] + [TRIGGER]
• The “Foot Splash Sens” parameter is also important.
Spend some time testing this setting.
ACCESS: [TRIGGER]–[F3 (HI-HAT)]
• Also remember that for each kit, there is a separate
control for the sound level of the “Foot Closed (Pedal
HH)” sound.
ACCESS: [KIT]–[F2 (FUNC)]–[F1 (VOLUME)]
• Keep in mind that for the sound level of the Hi-Hat that
setting different levels for the “Head” and “Rim” can
help you get a good sound balance.
When in the MIXER screen. Press [F5] so you can adjust
the levels separately.
TDW-20_e.book 23 ページ 2008年7月17日 木曜日 午前11時35分

24
After you have completed the upgrade process, you will find that
the user memory has expanded to 100 Kits: 50 NEW kits from 1–50
and the original TD-20 pre-set Kits from 51–100. These 100 factory
preset kits are always available via the “copy” function, or when
totally re-setting the TD-20. So you have 100 USER kits to work
with.
CompactFlash Card Data
• All user drum kits can be backed up to the CompactFlash card
for a total of 99 full back-ups.
• Kit data on the CompactFlash card can be played (but not
edited) without loading it into the TD-20 (p. 41).
• The Import function allows you to load data saved prior to
updating (p. 40).
When importing a previously saved “backup” the kits will
appear from kit No.51.
Backup File Names
This is important for those who might want to organise their data
in their computers or share data with other TD-20 users.
How Names appear
Though you can give a name to your backup file that you can see
when loading/saving with a CompactFlash card in the TD-20, the
name that appears when looking at it in your computer is different.
Here we will explain the difference between “original” TD-20 data,
and data after upgrading with the TDW-20.
Original TD-20
Backup 1 appears like
“TD20BK01.TD0.”
“TD20” indicates the original version.
The “BK01” means Backup No.1, “BK08” would mean backup
No.08.
Expanded TD-20
Backup 1 appears like
“TDW2BK01.TD0.”
“TDW2” indicates the upgraded version.
The “BK01” means Backup No.1, “BK99” would mean backup
No.99.
Pattern Files
This refers to patterns saved independently on the CompactFlash
Card.
Pattern No.1 (on the card) will appear as
“TD20P001.TD0.”
The “P001” means pattern No.1. Pattern No.100 appears as
“TD20P100.TD0.”
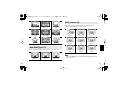
About the Drum Kits
TDW-20_e.book 24 ページ 2008年7月17日 木曜日 午前11時35分

25
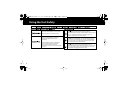
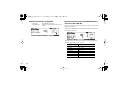
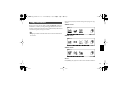
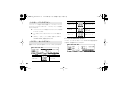
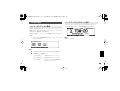
TD-20
CARD
KIT 100
User
KIT 4
KIT 3
KIT 2
KIT 1
Backup 3Backup 2Backup 1 Backup 99
KIT 100
KIT 4
KIT 3
KIT 2
KIT 1
[CARD]–[F2 (LOAD)]
[CARD]–[F1 (SAVE)]
[COPY]–[F1(KIT)]–[F2 (PRESET)]
KIT 100
TDW-20 Preset
KIT 4
KIT 3
KIT 2
KIT 1
PRESET
Backup 3Backup 2Backup 1
KIT 50
KIT 4
KIT 3
KIT 2
KIT 1
Backup 8
TD-20 Preset
CARD
(Original TD-20)
[CARD]–[F3 (IMPORT)]
LOAD
SAVE
IMPORT
COPY
TDW-20_e.book 25 ページ 2008年7月17日 木曜日 午前11時35分

26
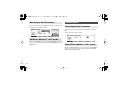
New Functions
After pressing the [INST], the [F4 (INT<>EXP)] allows you to choose
from the TD-20’s internal sounds or those on the TDW-20
expansion board.
The prefix “EXP” is attached to TDW-20’s Inst Group name.
To restore an instrument to a non v-edited state press [SHIFT] and
[F4] while in the INST EDIT screen. This was previously referred to as
“default” in the original TD-20 version.
* Not all sounds have full V-Edit parameters.
For the KICK
• Snare Buzz: The dynamic response of this function
is improved.
• Mic Position: New positions allow even more realistic
microphone placement.
• Mic Size: Improvement in sub-low frequency
attack for the KICK.
• Kit Resonance: Accurately reproduces the whole kit
resonating when the kick is played.
Drum Instruments Parameters [INST]
Instrument Selection
About V-EDIT Parameters
TDW-20_e.book 26 ページ 2008年7月17日 木曜日 午前11時35分

27
For the SNARE
• Mic Position: New positions allow even more realistic
microphone placement.
• Add Rim Sound: You can layer a tambourine, 909 claps
or Gate Hit sound to the RIM only.
• Level: Adjusts level of the added sound.
Not all sounds have full V-Edit parameters.
You can turn the “Snare Strainer Off” by pressing an optional
foot switch or hitting a “Pad Switch.” Please refer to
“Using
Foot Switches and Pad Switches”
(p. 39).
For the TOMs
• Snare Buzz: The dynamic response of this function
is improved.
• Mic Position: New positions allow even more realistic
microphone placement.
For the HI-HAT
• Add Sound: You can layer a tambourine, cabasa or
cowbell on the Hi-Hat (Head and/or Rim)
• Level: Adjusts the volume of the layered sound.
The “Fixed Hi-Hat” position can be enabled by pressing an
optional foot switch or hitting a pad switch. Please refer to
“Using Foot Switches and Pad Switches”
(p. 39).
TDW-20_e.book 27 ページ 2008年7月17日 木曜日 午前11時35分

28
Additional Sizzle for All Cymbals
• Sizzle Type: New “BEADS” sizzle type.
• Sizzle Amount: Adjusts the amount (size) of the chosen
sizzles.
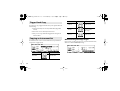
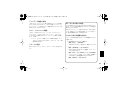
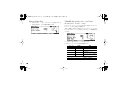
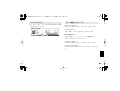
Dynamic Pitch Bend (only for NEW Electronic
Sounds on the TDW-20)
Before accessing this function, be sure there is an electronic sound
assigned to the pad.
Then press [F2 (EDIT)] and the following screen appears. Adjust the
parameters as you wish.
The pitch of the sound can be controlled by your playing dynamics.
The following parameters are available.
Parameter Value
[F1 (PITCH)]
Basic Pitch -480 – +480
Dynamic Bend OFF, ON
Bend Depth -24 – +24
Bend Time -31 – +31
[F2 (DECAY)]
Decay Time -31 – +31
TDW-20_e.book 28 ページ 2008年7月17日 木曜日 午前11時35分
Page is loading ...
Page is loading ...
Page is loading ...
Page is loading ...
Page is loading ...
Page is loading ...
Page is loading ...
Page is loading ...
Page is loading ...
Page is loading ...
Page is loading ...
Page is loading ...
Page is loading ...
Page is loading ...
Page is loading ...
Page is loading ...
Page is loading ...
Page is loading ...
Page is loading ...
Page is loading ...
Page is loading ...
Page is loading ...
Page is loading ...
Page is loading ...
Page is loading ...
Page is loading ...
Page is loading ...
Page is loading ...
Page is loading ...
Page is loading ...
Page is loading ...
Page is loading ...
Page is loading ...
Page is loading ...
Page is loading ...
Page is loading ...
Page is loading ...
Page is loading ...
Page is loading ...
Page is loading ...
Page is loading ...
Page is loading ...
Page is loading ...
Page is loading ...
Page is loading ...
Page is loading ...
Page is loading ...
Page is loading ...
Page is loading ...
Page is loading ...
Page is loading ...
Page is loading ...
Page is loading ...
Page is loading ...
Page is loading ...
Page is loading ...
Page is loading ...
Page is loading ...
Page is loading ...
Page is loading ...
Page is loading ...
Page is loading ...
Page is loading ...
Page is loading ...
Page is loading ...
Page is loading ...
Page is loading ...
Page is loading ...
Page is loading ...
Page is loading ...
Page is loading ...
Page is loading ...
-
 1
1
-
 2
2
-
 3
3
-
 4
4
-
 5
5
-
 6
6
-
 7
7
-
 8
8
-
 9
9
-
 10
10
-
 11
11
-
 12
12
-
 13
13
-
 14
14
-
 15
15
-
 16
16
-
 17
17
-
 18
18
-
 19
19
-
 20
20
-
 21
21
-
 22
22
-
 23
23
-
 24
24
-
 25
25
-
 26
26
-
 27
27
-
 28
28
-
 29
29
-
 30
30
-
 31
31
-
 32
32
-
 33
33
-
 34
34
-
 35
35
-
 36
36
-
 37
37
-
 38
38
-
 39
39
-
 40
40
-
 41
41
-
 42
42
-
 43
43
-
 44
44
-
 45
45
-
 46
46
-
 47
47
-
 48
48
-
 49
49
-
 50
50
-
 51
51
-
 52
52
-
 53
53
-
 54
54
-
 55
55
-
 56
56
-
 57
57
-
 58
58
-
 59
59
-
 60
60
-
 61
61
-
 62
62
-
 63
63
-
 64
64
-
 65
65
-
 66
66
-
 67
67
-
 68
68
-
 69
69
-
 70
70
-
 71
71
-
 72
72
-
 73
73
-
 74
74
-
 75
75
-
 76
76
-
 77
77
-
 78
78
-
 79
79
-
 80
80
-
 81
81
-
 82
82
-
 83
83
-
 84
84
-
 85
85
-
 86
86
-
 87
87
-
 88
88
-
 89
89
-
 90
90
-
 91
91
-
 92
92
-
 93
93
-
 94
94
-
 95
95
-
 96
96
-
 97
97
-
 98
98
-
 99
99
-
 100
100


Roland TDW-20 Owner's manual
- Category
- Music drums
- Type
- Owner's manual
- This manual is also suitable for
Ask a question and I''ll find the answer in the document
Finding information in a document is now easier with AI
in other languages
- 日本語: Roland TDW-20 取扱説明書
Related papers
Other documents
-
Silvercrest 285323 Owner's manual
-
MIMAKI CJV300 (Normal) User manual
-
Boss FV-500H/FV-500L Owner's manual
-
Supermicro SuperServer 1028R-TDW User manual
-
Sanyo POA-CFC20 User manual
-
Westermo TD-36 485 AV User guide
-
Electrolux EWP1062TEW User manual
-
Electrolux EWT0862TDW User manual
-
 AB Soft DIN-rail Tele V.90 modem TDW-33 User manual
-
Aiphone TD-24H/B User manual
