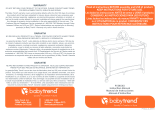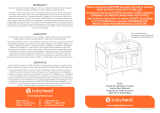
Guide d’utilisation
Guía del Usuario
TR1000 • TR1001
User Guide
KidCo, Inc., 1013 Technology Way, Libertyville, IL 60048-5349 • www.kidco.com • Phone 1.800.553.5529 • Fax 1.800.553.0221
®
WARNING
Failure to follow these warnings and the instructions could result in serious injury or death. Do not use this bassinet if you cannot
exactly follow the accompanying instructions. KEEP INSTRUCTIONS FOR FUTURE USE. For your convenience a pouch is located on top of
product floor to store instructions.
• FALL HAZARD – To help prevent falls, do not use this product when the infant begins to push up on hands and knees, can roll over or has
reached 20 lbs. whichever comes first.
• If a sheet is used with the pad, use only the one provided by the bassinet manufacturer or one specifically designed to fit the dimension
of the bassinet mattress.
• Use a bassinet mattress that is no thicker than 3.8 cm and is of such a size that, when it is pushed firmly against any side of the bassinet,
it does not leave a gap of more than 3 cm between the mattress and any part of the sides of the bassinet.
• Strings can cause strangulation! Do not place items with a string around a child’s neck, such as hood strings or pacifier cords.
Do not suspend strings over a bassinet or attach strings to toys.
• Do not place in or near this bassinet any cord, strap or similar item that could become wrapped around a child’s neck.
• Do not place this bassinet near a window or a patio door where a child could reach the cord of a blind or curtain and be strangled.
• Check this bassinet regularly before using it and do not use it if any parts are loose or missing or if there are any signs of damage.
Do not substitute parts. Contact KidCo if replacement parts or additional instructions are needed.
SUFFOCATION HAZARD
- Infants have suffocated
• In gaps between extra padding and side of the bassinet, and
• On soft bedding
• Use only the pad provided by manufacturer. NEVER add a pillow,
comforter, or another mattress for padding.
• To reduce the risk of SIDS, pediatricians recommend healthy infants be
placed on their backs to sleep, unless otherwise advised by your physician.
1. Peel apart mattress Velcro straps from under
bassinet floor.
2. Remove mattress.
3. Peel apart the Velcro holding fabric and lift over
top of steel framework.
4. Remove all U-tubes.
5. Slide black plastic tubes to unlock the two lateral
steel supports.
6. Lift up on any two corners to fold.
7. Wrap mattress around steel leg tubes and insert
Velcro strap through plastic ring. Fasten Velcro straps
together. Repeat for second set of straps.
8. Place in nylon carry bag, followed by the U-tubes.
• Metal frame and bassinet fabric can be wiped clean with
mild soap and water.
• Removable sheet is machine washable in cold water on
gentle cycle – AIR DRY.
• Le cadre métallique et le tissu du couffin se nettoient
d'un coup d'éponge au savon et à l'eau.
• Le drap amovible se lave à la machine à l'eau froide
sur cycle délicat – LAISSER SÉCHER À L'AIR.
• La estructura de metal y la tela del moisés se pueden
limpiar con jabón suave y agua.
• La sábana separable se puede lavar en lavadora con
agua fría y en el ciclo suave. DEJE SECAR AL AIRE.
1. Détacher les sangles à Velcro du matelas du dessous
du plancher du couffin.
2. Retirer le matelas.
3. Détacher le tissu au niveau de la bande Velcro et
l'enlever des tubes en acier.
4. Enlever tous les tubes en U.
5. Glisser les tubes en plastique noir pour déverrouiller
les deux supports en acier latéraux.
6. Soulever deux coins quelconques pour plier.
7. Enrouler le matelas sur les tubes-pieds en acier et enfiler
la sangle à Velcro dans l'anneau en plastique. Attacher
les sangles à Velcro l'une à l'autre. Répéter pour le second
jeu de sangles.
8. Placer dans le sac de transport en nylon, puis y mettre
les tubes en U.
1. Separe las cintas de bucle y gancho del colchón del piso
del moisés.
2. Quite el colchón.
3. Separe la tela con la cinta de bucle y gancho y levántela
sobre la parte superior de la estructura de acero.
4. Quite todos los tubos en U.
5. Deslice los tubos de plástico negros para desembragar los
dos soportes de acero laterales.
6. Levante cualquiera de las dos esquinas para plegar.
7. Envuelva el colchón alrededor de los tubos de las patas de acero
e inserte la cinta de bucle y gancho a través del anillo de plástico.
Conecte entre sí las cintas de bucle y gancho. Repita el
procedimiento con el segundo conjunto de cintas.
8. Coloque en la bolsa de nilón seguido de los tubos en U.
TO CLEAN • POUR NETTOYER • PARA LIMPIAR
TO FOLD • POUR PLIER • PARA PLEGAR
DreamPod
1 2 3
5 6 7
4
8
Parts List Liste des Pieces Lista de Pièzas
2x Short U-Tube U-Tube Court U-Tubo Corto
2x Long U-tube Longue U-Tube Larga U-Tube
1x Mattress Matelas Colchón
1x Fitted Sheet Drap Sábana Ajustable
1x Carry Bag Carry Bag Bolsa de Transporte
1x Asssembly Assemblage Montaje
Page is loading ...
/


