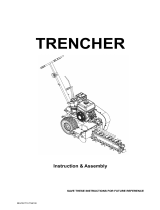
Toro TRX-16 Trencher User manual

Category
Utility Vehicle
Type
User manual
FormNo.3367-302RevC
TRX-16,TRX-20,andTRX-26
Trencher
ModelNo.22972—SerialNo.311000001andUp
ModelNo.22972G—SerialNo.311000001andUp
ModelNo.22973—SerialNo.311000001andUp
ModelNo.22973G—SerialNo.311000001andUp
ModelNo.22974—SerialNo.311000001andUp
ToregisteryourproductordownloadanOperator'sManualorPartsCatalogatnocharge,gotowww.Toro.com.OriginalInstructions(EN)
Thismachineisdesignedtodigtrenchesinsoiltobury
cablingandpipingforvariousapplications.Itisnot
intendedtocutrock,wood,oranyothermaterialother
thansoil.
WARNING
CALIFORNIA
Proposition65Warning
Thisproductcontainsachemicalorchemicals
knowntotheStateofCaliforniatocausecancer,
birthdefects,orreproductiveharm.
Theengineexhaustfromthisproduct
containschemicalsknowntotheStateof
Californiatocausecancer,birthdefects,
orotherreproductiveharm.
Useofthisproductmaycauseexposureto
chemicalsknowntotheStateofCalifornia
tocausecancer,birthdefects,orother
reproductiveharm.
DANGER
Theremaybeburiedpower,gas,and/ortelephone
linesintheworkarea.Shockorexplosionmay
occurifyoudigintothem.
Havethepropertyorworkareamarkedforburied
linesanddonotdiginmarkedareas.Contactyour
localmarkingserviceorutilitycompanytohavethe
propertymarked(forexample,intheUnitedStates,
call811forthenationwidemarkingservice).
ThissparkignitionsystemcomplieswithCanadian
ICES-002.
Important:Thisengineisnotequippedwitha
sparkarrestermufer.ItisaviolationofCalifornia
PublicResourceCodeSection4442touseoroperate
theengineonanyforest-covered,brush-covered,or
grass-coveredland.Otherstatesorfederalareas
mayhavesimilarlaws.
Theenclosed
Engine Owner's Man ual
issupplied
forinformationregardingtheUSEnvironmental
ProtectionAgency(EPA)andtheCalifornia
EmissionControlRegulationofemissionsystems,
maintenance,andwarranty.Replacementsmaybe
orderedthroughtheenginemanufacturer.
ThisproductcomplieswithallrelevantEuropean
directives,fordetailspleaseseetheseparateproduct
specicDeclarationofConformity(DOC)sheet.
©2013—TheToro®Company
8111LyndaleAvenueSouth
Bloomington,MN55420
2
Contactusatwww.Toro.com.
PrintedintheUSA.
AllRightsReserved
Introduction
Readthisinformationcarefullytolearnhowtooperate
andmaintainyourproductproperlyandtoavoidinjury
andproductdamage.Youareresponsibleforoperating
theproductproperlyandsafely.
YoumaycontactTorodirectlyatwww.Toro.comfor
productandaccessoryinformation,helpndingadealer,
ortoregisteryourproduct.
Wheneveryouneedservice,genuineToroparts,
oradditionalinformation,contactanAuthorized
ServiceDealerorToroCustomerServiceandhave
themodelandserialnumbersofyourproductready.
Figure1illustratesthelocationofthemodelandserial
numbersontheproduct.Writethenumbersinthe
spaceprovided.
G007797
1
Figure1
1.Modelandserialnumberplate
ModelNo.
SerialNo.
Thismanualidentiespotentialhazardsandhassafety
messagesidentiedbythesafetyalertsymbol(
Figure2),
whichsignalsahazardthatmaycauseseriousinjury
ordeathifyoudonotfollowtherecommended
precautions.
Figure2
1.Safetyalertsymbol
Thismanualuses2otherwordstohighlightinformation.
Importantcallsattentiontospecialmechanical
informationandNoteemphasizesgeneralinformation
worthyofspecialattention.
3
Contents
Introduction.................................................................3
Safety...........................................................................5
SafeOperatingPractices.......................................5
SoundPressure.....................................................7
SoundPower........................................................7
Vibration..............................................................8
SlopeIndicator.....................................................9
SafetyandInstructionalDecals...........................10
Setup.........................................................................14
1InstallingtheBoomandChain.........................14
2CheckingFluidLevels......................................15
3ChargingtheBattery(ElectricStartModels
Only)..............................................................15
ProductOverview......................................................15
Controls.............................................................15
Specications.....................................................18
Attachments/Accessories...................................18
Operation...................................................................18
AddingFuel.......................................................18
CheckingtheEngineOilLevel............................19
CheckingtheHydraulicFluidLevel.....................20
StartingandStoppingtheEngine........................21
StoppingtheMachine.........................................21
MovingaNon-functioningMachine...................22
DiggingaTrench................................................22
SecuringtheMachineforTransport....................22
LiftingtheMachine............................................23
OperatingTips...................................................23
Maintenance...............................................................25
RecommendedMaintenanceSchedule(s)................25
PremaintenanceProcedures....................................26
RemovingtheCoverPlate...................................26
InstallingtheCoverPlate....................................26
RemovingtheBottomShield..............................26
InstallingtheBottomShield................................26
Lubrication.............................................................27
GreasingtheMachine.........................................27
GreasingtheTrencherHousing..........................27
EngineMaintenance...............................................28
ServicingtheAirCleaner(Models22972and
22973)............................................................28
ServicingtheAirCleaner(Model22974)..............29
ServicingtheEngineOil.....................................30
ServicingtheSparkPlug.....................................31
FuelSystemMaintenance.......................................33
DrainingtheFuelTank.......................................33
ReplacingtheFuelFilter.....................................33
ElectricalSystemMaintenance................................34
ServicingtheBattery(Models22973and
22974)............................................................34
ReplacingtheFuses(Models22973and
22974)............................................................36
DriveSystemMaintenance.....................................36
ServicingtheTracks............................................36
BeltMaintenance....................................................39
ReplacingthePumpDriveBelt...........................39
ControlsSystemMaintenance.................................39
AdjustingtheTractionControl
Alignment......................................................39
AdjustingtheTractionControlNeutral
Position..........................................................41
AdjustingtheTrackingoftheTraction
Control,FullForwardPosition........................41
HydraulicSystemMaintenance...............................41
ReplacingtheHydraulicFilter.............................41
ChangingtheHydraulicFluid.............................41
CheckingtheHydraulicLines.............................43
TrencherMaintenance............................................43
ReplacingtheDiggingTeeth...............................43
CheckingandAdjustingtheDiggingChain
andBoom......................................................43
ReplacingtheDriveSprocket..............................44
Cleaning.................................................................45
RemovingDebrisfromtheMachine....................45
Storage.......................................................................46
Troubleshooting.........................................................47
Schematics.................................................................49
4
Safety
Improperuseormaintenancebytheoperatoror
ownercanresultininjury.Toreducethepotential
forinjury,complywiththesesafetyinstructions
andalwayspayattentiontothesafetyalert
symbol
,whichmeans:
Caution
,
W ar ning
,or
Danger
—personalsafetyinstruction.Failureto
complywiththeinstructionmayresultinpersonal
injuryordeath.
SafeOperatingPractices
Thisproductiscapableofamputatinghandsandfeet.
Alwaysfollowallsafetyinstructionstoavoidserious
injuryordeath.
WARNING
Engineexhaustcontainscarbonmonoxide,an
odorless,deadlypoisonthatcankillyou.
Donotruntheengineindoorsorinanenclosed
area.
Training
ReadtheOperator'sManualandothertraining
material.Iftheoperator(s)ormechanic(s)cantread
English,itistheowner'sresponsibilitytoexplain
thismaterialtothem.
Becomefamiliarwiththesafeoperationofthe
equipment,operatorcontrols,andsafetysigns.
Alloperatorsandmechanicsshouldbetrained.The
ownerisresponsiblefortrainingtheusers.
Neverletchildrenoruntrainedpeopleoperateor
servicetheequipment.Localregulationsmayrestrict
theageoftheoperator.
Theowner/usercanpreventandisresponsiblefor
accidentsorinjuriesoccurringtohimselforherself,
otherpeopleorproperty.
Preparation
Evaluatetheterraintodeterminewhataccessories
andattachmentsareneededtoproperlyand
safelyperformthejob.Onlyuseaccessoriesand
attachmentsapprovedbythemanufacturer.
Wearappropriateclothingincludinghardhat,
safetyglasses,longpants,safetyshoes,andhearing
protection.Longhair,looseclothingorjewelrymay
gettangledinmovingparts.
Inspecttheareawheretheequipmentistobeused
andremoveallobjectssuchasrocks,toys,andwire
whichcanbethrownbythemachine.
Useextracarewhenhandlinggasolineandother
fuels.Theyareammableandvaporsareexplosive.
Useonlyanapprovedcontainer
Neverremovethegascaporaddfuelwiththe
enginerunning.Allowtheenginetocoolbefore
refueling.Donotsmoke.
Neverrefuelordrainthemachineindoors.
Checkthattheoperatorpresencecontrols,safety
switches,andshieldsareattachedandfunctioning
properly.Donotoperateunlesstheyarefunctioning
properly.
Operation
Neverrunanengineinanenclosedarea.
Onlyoperateingoodlight,keepingawayfromholes
andhiddenhazards.
Besurealldrivesareinneutralandtheparkingbrake
isengagedbeforestartingtheengine.Onlystartthe
enginefromtheoperator'sposition.
Slowdownanduseextracareonhillsides.Besure
totravelintherecommendeddirectiononhillsides.
Turfconditionscanaffectthemachine'sstability.
Slowdownandusecautionwhenmakingturnsand
whenchangingdirectionsonslopes.
Neveroperatewithouttheguardssecurelyinplace.
Besureallinterlocksareattached,adjusted,and
functioningproperly.
Donotchangetheenginegovernorsettingor
overspeedtheengine.
Stoponlevelground,lowertheboom,disengage
thetrencherhydraulics,engagetheparkingbrake,
andshutofftheenginebeforeleavingtheoperator's
positionforanyreason.
Keephandsandfeetawayfromthemovingchain,
diggingteeth,andspoilsauger.
Lookbehindanddownbeforebackinguptobesure
ofaclearpath.
Nevercarrypassengersandkeeppetsandbystanders
away.
Slowdownandusecautionwhenmakingturnsand
crossingroadsandsidewalks.
Donotoperatethemachineundertheinuenceof
alcoholordrugs.
Usecarewhenloadingorunloadingthemachine
intoatrailerortruck.
Usecarewhenapproachingblindcorners,shrubs,
trees,orotherobjectsthatmayobscurevision.
5
Ensurethattheareaisclearofotherpeoplebefore
operatingthemachine.Stopthemachineifanyone
entersthearea.
Neverleavearunningmachineunattended.Always
lowertheboom,stoptheengine,settheparking
brake,andremovethekeybeforeleaving.
Neverjerkthecontrols;useasteadymotion.
Watchfortrafcwhenoperatingnearorcrossing
roadways.
Donottouchpartswhichmaybehotfrom
operation.Allowthemtocoolbeforeattemptingto
maintain,adjust,orservice.
Ensurethatyouoperatethemachineinareaswhere
therearenoobstaclesincloseproximitytothe
operator.Failuretomaintainadequatedistancefrom
trees,walls,andotherbarriersmayresultininjury
asthemachinebacksupduringoperationifthe
operatorisnotattentivetothesurroundings.Only
operatetheunitinareaswherethereissufcient
clearancefortheoperatortosafelymaneuverthe
product.
Beforedigging,havetheareamarkedfor
undergroundutilities,anddonotdiginmarkedareas.
Locatethepinchpointareasmarkedonthemachine
andkeephandsandfeetawayfromtheseareas.
Lightningcancausesevereinjuryordeath.If
lightningisseenorthunderisheardinthearea,do
notoperatethemachine;seekshelter.
SlopeOperation
Slopesareamajorfactorrelatedtoloss-of-controland
tip-overaccidents,whichcanresultinsevereinjuryor
death.Allslopesrequireextracaution.
Donotoperatethemachineonhillsidesorslopes
exceedingtheanglesrecommendedinthefollowing
table.
ModelFrontFacing
Uphill
RearFacing
Uphill
SideFacing
Uphill
22972
15°14°19°
22973
13°14°19°
22974
1116°
Note:SeealsotheSlopeIndicator(page9).
Operateupanddownslopeswiththefrontend
ofthemachineuphill.
Removeobstaclessuchasrocks,treelimbs,etc.
fromtheworkarea.Watchforholes,ruts,orbumps,
asuneventerraincouldoverturnthemachine.Tall
grasscanhideobstacles.
UseonlyToro-approvedaccessories.Accessoriescan
changethestabilityandtheoperatingcharacteristics
ofthemachine.Warrantymaybevoidedifusedwith
unapprovedaccessories.
Keepallmovementsonslopesslowandgradual.Do
notmakesuddenchangesinspeedordirection.
Avoidstartingorstoppingonaslope.Ifthemachine
losestraction,proceedslowly,straightdownthe
slope.
Avoidturningonslopes.Ifyoumustturn,turn
slowlyandkeeptheheavyendofthemachineuphill.
Donotoperateneardrop-offs,ditches,or
embankments.Themachinecouldsuddenlyturn
overifatrackgoesovertheedgeofaclifforditch,
orifanedgecavesin.
Donotoperateonwetgrass.Reducedtractioncould
causesliding.
Donotparkthemachineonahillsideorslope
withoutloweringtheboomtotheground,setting
theparkingbrake,andchockingthetracks.
MaintenanceandStorage
Disengagethetrencherhydraulics,lowertheboom,
settheparkingbrake,stoptheengine,andremove
thekey.Waitforallmovementtostopbefore
adjusting,cleaning,orrepairing.
Cleandebrisfromthechain,diggingteeth,boom,
trencherhead,drives,mufers,andenginetohelp
preventres.Cleanupoilorfuelspillage.
Lettheenginecoolbeforestoringanddonotstore
nearame.
Donotstorefuelnearamesordrainindoors.
Parkthemachineonlevelground.Neverallow
untrainedpersonneltoservicethemachine.
Usejackstandstosupportcomponentswhen
required.
Carefullyreleasepressurefromcomponentswith
storedenergy.
Disconnectthebattery(electricstartmodelsonly)
orremovethesparkplugwiresbeforemaking
anyrepairs.Disconnectthenegativeterminalrst
andthepositivelast.Reconnectpositiverstand
negativelast.
Keephandsandfeetawayfrommovingparts.If
possible,donotmakeadjustmentswiththeengine
running.
6
Keepallpartsingoodworkingconditionandall
hardwaretightened.Replaceallwornordamaged
decals.
Keepnutsandboltstight.Keepequipmentingood
condition.
Nevertamperwithsafetydevices.
Keepthemachinefreeofgrass,leaves,orother
debrisbuild-up.Cleanupoilorfuelspillage.Allow
themachinetocoolbeforestoring.
Useextracarewhenhandlinggasolineandother
fuels.Theyareammableandvaporsareexplosive.
Useonlyanapprovedcontainer.
Neverremovethegascaporaddfuelwhen
theengineisrunning.Allowtheenginetocool
beforerefueling.Donotsmoke.
Neverrefuelthemachineindoors.
Neverstorethemachineorfuelcontainerinside
wherethereisanopename,suchasneara
waterheaterorfurnace.
Neverllacontainerwhileitisinsideavehicle,
trunk,pick-upbed,oranysurfaceotherthanthe
ground.
Keepcontainernozzleincontactwiththetank
duringlling.
Stopandinspecttheequipmentifyoustrikean
object.Makeanynecessaryrepairsbeforerestarting.
UseonlygenuineTororeplacementpartstoensure
thatoriginalstandardsaremaintained.
Batterysafety(electricstartmodelsonly):
Chargebatteriesinanopen,wellventilated
area,awayfromsparkandames.Unplugthe
chargerbeforeconnectingordisconnectingit
fromthebattery.Wearprotectiveclothingand
useinsulatedtools.
Batteryacidispoisonousandcancauseburns.
Avoidcontactwithskin,eyes,andclothing.
Protectyourface,eyes,andclothingwhen
workingwithabattery.
Batterygasescanexplode.Keepcigarettes,
sparksandamesawayfromthebattery.
Keepyourbodyandhandsawayfrompinhole
leaksornozzlesthatejecthighpressurehydraulic
uid.Usecardboardorpapertondhydraulic
leaks;neveruseyourhands.Hydraulicuidescaping
underpressurecanpenetrateskinandcauseinjury
requiringsurgerywithinafewhoursbyaqualied
surgeonorgangrenemayresult.
SoundPressure
Model22972
Thisunithasasoundpressurelevelattheoperator’s
earof89dBA,whichincludesanUncertaintyValue(K)
of1.0dBA.
Soundpressurelevelwasdeterminedaccordingtothe
proceduresoutlinedinENISO11201.
Model22973
Thisunithasasoundpressurelevelattheoperator’s
earof90dBA,whichincludesanUncertaintyValue(K)
of1.0dBA.
Soundpressurelevelwasdeterminedaccordingtothe
proceduresoutlinedinENISO11201.
Model22974
Thisunithasasoundpressurelevelattheoperator’s
earof93dBA,whichincludesanUncertaintyValue(K)
of1.0dBA.
Soundpressurelevelwasdeterminedaccordingtothe
proceduresoutlinedinENISO11201.
SoundPower
Model22972
Thisunithasaguaranteedsoundpowerlevelof107
dBA,whichincludesanUncertaintyValue(K)of3.75
dBA.
Soundpowerlevelwasdeterminedaccordingtothe
proceduresoutlinedinENISO3744.
Model22973
Thisunithasaguaranteedsoundpowerlevelof108
dBA,whichincludesanUncertaintyValue(K)of3.75
dBA.
Soundpowerlevelwasdeterminedaccordingtothe
proceduresoutlinedinENISO3744.
Model22974
Thisunithasaguaranteedsoundpowerlevelof107
dBA,whichincludesanUncertaintyValue(K)of3.75
dBA.
Soundpowerlevelwasdeterminedaccordingtothe
proceduresoutlinedinENISO3744.
7
Vibration
Model22972
Measuredvibrationlevelforrighthand=2.1m/s
2
Measuredvibrationlevelforlefthand=2.0m/s
2
UncertaintyValue(K)=1.1m/s
2
Measuredvaluesweredeterminedaccordingtothe
proceduresoutlinedinENISO20643.
Model22973
Measuredvibrationlevelforrighthand=2.3m/s
2
Measuredvibrationlevelforlefthand=2.1m/s
2
UncertaintyValue(K)=1.1m/s
2
Measuredvaluesweredeterminedaccordingtothe
proceduresoutlinedinENISO20643.
Model22974
Measuredvibrationlevelforrighthand=1.8m/s
2
Measuredvibrationlevelforlefthand=2.0m/s
2
UncertaintyValue(K)=1.00m/s
2
Measuredvaluesweredeterminedaccordingtothe
proceduresoutlinedinENISO20643.
8
SlopeIndicator
G01 1841
Figure3
Thispagemaybecopiedforpersonaluse.
1.Todeterminethemaximumslopeyoucansafelyoperatethemachineon,refertotheSlopeOperationsection.Usetheslope
indicatortodeterminethedegreeofslopeofhillsbeforeoperating.Donotoperatethismachineonaslopegreaterthanthat
speciedintheSlopeOperationsection.Foldalongtheappropriatelinetomatchtherecommendedslope.
2.Alignthisedgewithaverticalsurface,atree,building,fencepole,etc.
3.Exampleofhowtocompareslopewithfoldededge.
9
SafetyandInstructionalDecals
Safetydecalsandinstructionsareeasilyvisibletotheoperatorandarelocatednearanyareaof
potentialdanger.Replaceanydecalthatisdamagedorlost.
115-1230
1.Warning—donotoperatethismachineunlessyouaretrained.
2.Engine—stop
3.Engine—run
4.Trencherchain—reverse
5.Trencherchain—forward
6.Trencherchain—off
7.Enginethrottle
8.Fast
9.Slow
10.Choke
11.On/Closed
12.Off/Open
13.ReadtheOperator'sManualbeforestartingtheengine;tostarttheengine,movethetrenchercontrolleverintotheOffposition,
placethetractioncontrolinNeutral,movetheenginespeedtoFastandthechoketoOn/Closed,turntheignitionkeytorun,
andreleasetheparkingbrakeoncetheenginehasstarted.
14.ReadtheOperator'sManualbeforeoperatingthetrencher;tooperatethetrencher,lowertheboom,movethetrenchercontrol
levertothereferencebar,pullthetractioncontrolrearwardtomoveinreverseanddigthetrench.
10
115-1231
1.Cutting/dismembermenthazardofbystanders,
trencher—keepbystandersasafedistancefromthemachine;
donotoperatethetrencherchainwhiletransportingthe
machine.
6.Explosionhazard;shockhazard—donotusemachinenear
buriedutilitylines;contacttheproperagenciesbeforedigging.
2.Explosionhazard,fueling—stoptheengineandextinguish
allameswhenfueling.
7.Boomelevation
3.Tipping/crushinghazard—lowerthetrencherheadwhen
operatingonslopes.
8.Lowertheboom
4.Warning—stayawayfrommovingparts;waitforallmoving
partstostop
9.Raisetheboom
5.Warning—lowertheboom,engagetheparkingbrakeand
stoptheengine,removetheignitionkey,beforeleavingthe
machine.
99-9952
1.Cuttinghazard,chainandauger—stayawayfrommovingpartsandkeepbystandersawayfromthemachine.
2.Warning—stoptheengineandremovethekeybeforepreformingmaintenanceorrepairs.
3.Explosionand/orelectricshockhazard—donotdiginareaswithburiedgasorpowerlines.
11
115-4020
1.Turnright3.Reverse
2.Forward
4.Turnleft
93-7814
1.Entanglementhazard,belt—stayawayfrommovingparts.
93-6686
1.Hydraulicoil
2.ReadtheOperator'sManual.
93-9084
1.Liftpoint
2.Tie-downpoint
100-4650
1.Crushinghazardofhand—keepbystandersasafedistance
fromthemachine.
2.Crushinghazardoffoot—keepbystandersasafedistance
fromthemachine.
107-8495
1.Parkingbrake
117–2718
12
BatterySymbols
Someorallofthesesymbolsareonyourbattery
1.Explosionhazard
6.Keepbystandersasafe
distancefromthebattery.
2.Nore,opename,or
smoking.
7.Weareyeprotection;
explosivegasescan
causeblindnessandother
injuries
3.Causticliquid/chemical
burnhazard
8.Batteryacidcancause
blindnessorsevereburns.
4.Weareyeprotection9.Flusheyesimmediately
withwaterandgetmedical
helpfast.
5.ReadtheOperator's
Manual.
10.Containslead;donot
discard.
13
Setup
LooseParts
Usethechartbelowtoverifythatallpartshavebeenshipped.
ProcedureDescription
Qty.
Use
Boom(soldseparately)
1
1
Chain(soldseparately)
1
Installtheboomandchain.
2
Nopartsrequired
Checktheuidlevels.
3
Nopartsrequired
Chargethebattery.
1
InstallingtheBoomandChain
Partsneededforthisprocedure:
1
Boom(soldseparately)
1
Chain(soldseparately)
Procedure
Important:Thereareseveralboomandchainsize
congurationsavailable.RefertoyouAuthorized
ServiceDealertoobtaintheappropriateboomand
chaintomeetyourrequirements.
1.Stoptheengineandremovethekey.
2.Removethebolt,2saddlewashers,andnutsecuring
thespoilsaugerandremovetheauger(
Figure4).
Savethefastenersforfutureuse.
Figure4
1.Spoilsauger
6.Adjustingbolt
2.Boom7.Jamnut
3.Bolts8.Armonthedrivehead
4.Doublewasher9.Drivesprocket
5.Nuts
3.Removethe2bolts,nuts,anddoublewashersfrom
thesidesoftheboom(Figure4).
4.Loosentheadjustingboltandjamnut(Figure4).
5.Slidetheboomoverthearmonthedrivehead.
6.Installthe2bolts,nuts,anddoublewashersremoved
instep
3throughtheboomandarm,butdonot
tightenthem.
7.Ifthechainisnotconnected,connectthelinksby
pressingorhammeringtheclevispinsuppliedwith
thechainthroughthelinks.
Important:Toavoidbendingthechainlinks,
placeblocksunderandbetweenthelinkswhen
hammeringtheclevispinthrough.
8.Securetheclevispinwiththecotterpinsupplied
withthechain.
14
9.Loopthediggingchainovertheaugerdriveshaftand
ontothedrivesprocket,ensuringthatthedigging
teethpointforwardontheupperspan.
10.Settheupperspanofthechainintoplaceonthe
trencherboom,thenwrapthechainaroundthe
rollerattheendoftheboom.
11.Threadtheadjustmentboltintotheboomandturn
itinuntilthereis1-1/2to2-1/2inches(3.8to6.3
cm)ofslackinthechainonthebottomspan.
12.Threadthejamnutdowntheadjustingboltand
tightenitsecurelyagainsttheboom.
13.Torquethe2boltsandnutssecuringtheboomto
135to165ft-lb(183to223N-m).
14.Installthespoilsaugerusingthebolt,2saddle
washer,andnutyouremovedpreviously.
15.Torquetheboltandnutto75ft-lb(101N-m).
2
CheckingFluidLevels
NoPartsRequired
Procedure
Beforestartingtheengineforthersttime,checkthe
engineoilandhydraulicuidlevels;refertoOperation
formoreinformation.
3
ChargingtheBattery(Electric
StartModelsOnly)
NoPartsRequired
Procedure
Chargethebattery;refertoServicingtheBatteryin
Maintenanceformoreinformation.
ProductOverview
Figure5
1.Control
panel
4.Chain
guard
7.Boom10.Reverse
safety
plate
2.Engine
5.Chain
8.Trencher
head
3.Spoils
auger
6.Digging
teeth
9.Track
Controls
Becomefamiliarwithallthecontrols(Figure6)before
youstarttheengineandoperatethemachine.
G007801
5
6
7
8
3
4
1
2
Figure6
1.Tractioncontrol5.Throttlelever
2.Boomelevationlever
6.Chokelever
3.Trenchercontrollever7.Keyswitch
4.Referencebar
8.Hourmeter
KeySwitch,Model22972
Thekeyswitchhas2positions:offandrun.
Tostarttheengine,rotatethekeytotherunposition,
thenpulltherecoilhandleontheengine.
Tostoptheengine,rotatethekeytotheoffposition.
15
KeySwitch,ElectricStartModels
Thekeyswitchhasthreepositions:off,run,andstart.
Tostarttheengine,rotatethekeytothestartposition.
Releasethekeywhenenginestartsanditwillmove
automaticallytotherunposition.
Tostoptheengine,rotatethekeytotheoffposition.
ThrottleLever
Movethecontrolforwardtoincreasetheenginespeed
andrearwardtodecreasespeed.
ChokeLever
Beforestartingacoldengine,movethechokelever
forward.Aftertheenginestarts,regulatethechoketo
keeptheenginerunningsmoothly.Assoonaspossible,
movethechokeleverallthewayrearward.
Note:Awarmenginerequireslittleornochoking.
HourMeter
Whentheengineisoff,thehourmeterdisplaysthe
numberofhoursofoperationthathavebeenlogged
onthemachine.
ReferenceBar
Whendrivingthemachine,usethereferencebarasa
handleandaleveragepointforcontrollingthetraction
controlandthetrenchercontrollever.Toensure
smooth,controlledoperation,donottakebothhands
offofthereferencebarwhileoperatingthemachine.
TractionControl
Figure7
1.Referencebar(doesnotmovetogiveyouareferencepoint
andaxedhandletoholdwhileoperatingthetractionunit)
2.Tractioncontrol(movestocontrolthemachine)
Tomoveforward,movethetractioncontrolforward
(Figure8).
Figure8
Tomoverearward,movethetractioncontrol
rearward(Figure9).Whenreversing,lookbehind
forobstructionsandkeepyourhandsonthe
referencebar(Figure7).
Figure9
Toturnright,rotatethetractioncontrolclockwise
(
Figure10).
G008131
Figure10
Toturnleft,rotatethetractioncontrol
counterclockwise(
Figure11).
G008132
Figure11
Tostop,releasethetractioncontrol(Figure7).
16
Note:Thefartheryoumovethetractioncontrolin
anydirection,thefasterthemachinewillmoveinthat
direction.
BoomElevationLever
Tolowertheboom,slowlymovetheleverforward
(Figure12).
Toraisetheboom,slowlymovetheleverrearward
(Figure12).
Figure12
1.Lowertheboom2.Raisetheboom
BoomElevationLock
Theboomelevationlocksecurestheboomelevation
leversothatyoucannotpushitforward.Thishelps
toensurethatnoonewillaccidentallylowertheboom
duringmaintenance.Securetheboomwiththelock
anytimeyouneedtostopthemachinewiththeboom
raised.
Tosetthelock,liftuponitsoitclearstheholeinthe
controlpanelandswingittotherightinfrontofthe
boomelevationlever,pushingitdownintothelocked
position(
Figure13).
Figure13
1.Boomelevationlever2.Boomelevationlock
TrencherControlLever
Todigwiththetrencher,rotatetheleverrearwardand
pullitdowntothereferencebar(
Figure14,number1).
Toreversethetrencherhead,rotatetheleverrearward,
thenmoveitleftintotheupperslot(Figure14,number
2).
Ifyoureleasethelever,itwillautomaticallyreturnto
theneutralposition(Figure14,number3),stoppingthe
chain.
Figure14
1.Forward3.Neutral
2.Reverse
17
ParkingBrakeLever
Tosettheparkingbrake,pullthebrakelever
rearwardandup(
Figure15).
Toreleasethebrake,pulltheleverrearwardandthen
down(Figure15).
G007804
1
Figure15
1.Parkingbrakelever(inthereleasedposition)
Specications
Note:Specicationsanddesignaresubjecttochange
withoutnotice.
Width
33.8inches(86cm)
Length,with24inch(70
cm)boom
82.5inches(209.5cm)
Length,with36inch(91.4
cm)boom
92.6inches(235cm)
Length,with48inch(122
cm)boom(model22974
only)
111.2inches(282.5cm)
Height
46inches(117cm)
Weight(model22972)*1100lb(499Kg)
Weight(model22973)*1185lb(538Kg)
Weight(model22974)*1208lb(578Kg)
*A36inch(91.4cm)boomandchainwilladdabout60lbtothelistedweight.
Attachments/Accessories
AselectionofToroapprovedattachmentsand
accessoriesisavailableforusewiththemachineto
enhanceandexpanditscapabilities.Contactyour
AuthorizedServiceDealerorDistributororgoto
www.Toro.comforalistofallapprovedattachments
andaccessories.
Operation
Note:Determinetheleftandrightsidesofthe
machinefromthenormaloperatingposition.
Important:Beforeoperating,checkthefueland
oillevel,andremovedebrisfromthemachine.
Also,ensurethattheareaisclearofpeopleand
debris.Youshouldalsoknowandhavemarkedthe
locationsofallutilitylines.
AddingFuel
Useunleadedgasoline(87pumpoctaneminimum).
Leaded,regulargasolinemaybeusedifunleadedisnot
available.
DANGER
Incertainconditions,gasolineisextremely
ammableandhighlyexplosive.Areorexplosion
fromgasolinecanburnyouandothersandcan
damageproperty.
Fillthefueltankoutdoors,inanopenarea,
whentheengineiscold.Wipeupanygasoline
thatspills.
Neverllthefueltankinsideanenclosedtrailer.
Donotllthefueltankcompletelyfull.Add
gasolinetothefueltankuntilthelevelis1/4to
1/2inch(6to13mm)belowthebottomofthe
llerneck.Thisemptyspaceinthetankallows
gasolinetoexpand.
Neversmokewhenhandlinggasoline,andstay
awayfromanopenameorwheregasoline
fumesmaybeignitedbyaspark.
Storegasolineinanapprovedcontainerand
keepitoutofthereachofchildren.Neverbuy
morethana30-daysupplyofgasoline.
Donotoperatewithoutentireexhaustsystem
inplaceandinproperworkingcondition.
18
DANGER
Incertainconditionsduringfueling,static
electricitycanbereleasedcausingasparkwhich
canignitethegasolinevapors.Areorexplosion
fromgasolinecanburnyouandothersandcan
damageproperty.
Alwaysplacegasolinecontainersontheground
awayfromyourvehiclebeforelling.
Donotllgasolinecontainersinsideavehicle
oronatruckortrailerbedbecauseinterior
carpetsorplastictruckbedlinersmayinsulate
thecontainerandslowthelossofanystatic
charge.
Whenpractical,removegas-powered
equipmentfromthetruckortrailerandrefuel
theequipmentwithitswheelsontheground.
Ifthisisnotpossible,thenrefuelsuch
equipmentonatruckortrailerfromaportable
container,ratherthanfromagasolinedispenser
nozzle.
Ifagasolinedispensernozzlemustbeused,
keepthenozzleincontactwiththerimofthe
fueltankorcontaineropeningatalltimesuntil
fuelingiscomplete.
Important:Donotusemethanol,gasoline
containingmethanol,orgasoholcontainingmore
than10%ethanolbecausethefuelsystemcouldbe
damaged.Donotmixoilwithgasoline.
UsingStabilizer/Conditioner
Useafuelstabilizer/conditionerinthemachineto
providethefollowingbenets:
Keepsgasolinefreshduringstorageof90daysor
less.Forlongerstorageitisrecommendedthatthe
fueltankbedrained.
Cleanstheenginewhileitruns
Eliminatesgum-likevarnishbuildupinthefuel
system,whichcauseshardstarting
Important:Donotusefueladditivescontaining
methanolorethanol.
Addthecorrectamountofgasstabilizer/conditioner
tothegas.
Note:Afuelstabilizer/conditionerismosteffective
whenmixedwithfreshgasoline.Tominimizethe
chanceofvarnishdepositsinthefuelsystem,usefuel
stabilizeratalltimes.
FillingtheFuelTank
1.Parkthemachineonalevelsurface,lowerthe
boom,andstoptheengine.
2.Removethekeyandallowtheenginetocool.
3.Cleanaroundthefueltankcapandremoveit
(
Figure16).
Figure16
1.Fueltankcap
4.Addunleadedgasolinetothefueltank,untilthe
levelis1/4to1/2inchbelowthebottomofthe
llerneck.
Important:Thisspaceinthetankallows
gasolinetoexpand.Donotllthefueltank
completelyfull.
5.Installthefueltankcapsecurely.
6.Wipeupanygasolinethatmayhavespilled.
CheckingtheEngineOilLevel
ServiceInterval:Beforeeachuseordaily
1.Parkthemachineonalevelsurface,lowerthe
boom,andstoptheengine.
2.Removethekeyandallowtheenginetocool.
3.Cleanaroundtheoildipstick(
Figure17).
Figure17
1.Oilllerhole
3.Fullmark
2.Oildipstick
4.Addmark
4.Removethedipstickandwipetheendclean
(Figure17).
19
5.Slidethedipstickfullyintothedipsticktubewithout
threadingitintothellerneck(Figure17).
6.Pullthedipstickoutandlookattheend.The
oilshouldbebetweentheAddandFullmarks
(
Figure17).
7.IftheoilisbelowtheAddmark,add10w30engine
oiltothellerhole,checkingthelevelfrequently
withthedipstick,untiltheoillevelreachestheFull
mark.
8.Replacethedipstick.
CheckingtheHydraulicFluid
Level
ServiceInterval:Every25hours
HydraulicTankCapacity:6USgallons(23l)
Referto
ChangingtheHydraulicFluid(page41)for
hydraulicuidspecications.
1.Parkthemachineonalevelsurfaceandlowerthe
boom.
2.Stoptheengine,removethekey,andallowthe
enginetocool.
3.Lookintotheglassbubbleontherightsideofthe
machine.Ifyoucannotseehydraulicuidinthe
bubble,continuethisproceduretoadduid.
G007808
1
Figure18
1.Hydraulicuidcheckbubble
4.Removethecoverplate;refertoRemovingthe
CoverPlate.
5.Cleantheareaaroundthellerneckofthehydraulic
tankandremovethecapandlterfromtheller
neckusingasocket(Figure19).
Figure19
1.Fillerneckcap
2.Hydraulicuidlter
6.Ifthelevelislow ,adduiduntilitisvisibleinthe
glassbubble.
7.Installthecapandlteronthellerneckandtorque
boltontopto110to140inch-lb(13to15.5N-m).
20
  • Page 1 1
  • Page 2 2
  • Page 3 3
  • Page 4 4
  • Page 5 5
  • Page 6 6
  • Page 7 7
  • Page 8 8
  • Page 9 9
  • Page 10 10
  • Page 11 11
  • Page 12 12
  • Page 13 13
  • Page 14 14
  • Page 15 15
  • Page 16 16
  • Page 17 17
  • Page 18 18
  • Page 19 19
  • Page 20 20
  • Page 21 21
  • Page 22 22
  • Page 23 23
  • Page 24 24
  • Page 25 25
  • Page 26 26
  • Page 27 27
  • Page 28 28
  • Page 29 29
  • Page 30 30
  • Page 31 31
  • Page 32 32
  • Page 33 33
  • Page 34 34
  • Page 35 35
  • Page 36 36
  • Page 37 37
  • Page 38 38
  • Page 39 39
  • Page 40 40
  • Page 41 41
  • Page 42 42
  • Page 43 43
  • Page 44 44
  • Page 45 45
  • Page 46 46
  • Page 47 47
  • Page 48 48
  • Page 49 49
  • Page 50 50
  • Page 51 51
  • Page 52 52
  • Page 53 53
  • Page 54 54
  • Page 55 55
  • Page 56 56

Toro TRX-16 Trencher User manual

Category
Utility Vehicle
Type
User manual

Ask a question and I''ll find the answer in the document

Finding information in a document is now easier with AI