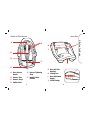
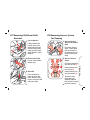
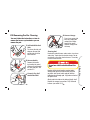
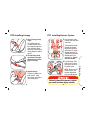
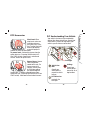
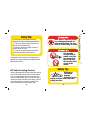
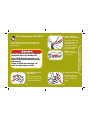
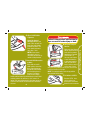
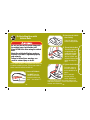
Maxi-Cosi Mico AP is a versatile and safe child restraint system designed to provide a secure and comfortable ride for your little one. Suitable for infants weighing between 5-22 lbs (2.3-10 kg) and measuring 19-29 inches (48-74 cm), it offers multiple recline positions for a customized fit. The easy-to-use design allows for quick installation in your vehicle using either the LATCH system or vehicle belts, ensuring a snug and secure fit.
Maxi-Cosi Mico AP is a versatile and safe child restraint system designed to provide a secure and comfortable ride for your little one. Suitable for infants weighing between 5-22 lbs (2.3-10 kg) and measuring 19-29 inches (48-74 cm), it offers multiple recline positions for a customized fit. The easy-to-use design allows for quick installation in your vehicle using either the LATCH system or vehicle belts, ensuring a snug and secure fit.


-
 1
1
-
 2
2
-
 3
3
-
 4
4
-
 5
5
-
 6
6
-
 7
7
-
 8
8
-
 9
9
-
 10
10
-
 11
11
-
 12
12
-
 13
13
-
 14
14
-
 15
15
-
 16
16
-
 17
17
-
 18
18
-
 19
19
-
 20
20
-
 21
21
-
 22
22
-
 23
23
-
 24
24
-
 25
25
-
 26
26
-
 27
27
-
 28
28
-
 29
29
-
 30
30
-
 31
31
-
 32
32
-
 33
33
-
 34
34


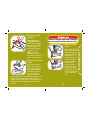
Maxi-Cosi Mico AP is a versatile and safe child restraint system designed to provide a secure and comfortable ride for your little one. Suitable for infants weighing between 5-22 lbs (2.3-10 kg) and measuring 19-29 inches (48-74 cm), it offers multiple recline positions for a customized fit. The easy-to-use design allows for quick installation in your vehicle using either the LATCH system or vehicle belts, ensuring a snug and secure fit.
Ask a question and I''ll find the answer in the document
Finding information in a document is now easier with AI
Related papers
Other documents
-
Cosco IC270 Operating instructions
-
-
-
-
-
-
-
-
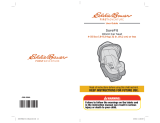 Eddie Bauer surefit User manual
-
