Page is loading ...

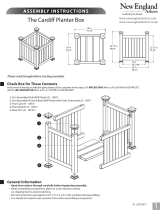
Check Boxes for These Contents (1 Box)
In the event of missing or defective parts please call our customer service dept. at
1 800 282 9346, ext #20
(Mon. to Fri. 8:00 AM to 4:00 PM EST).
(UK Tel: (44) 2038 687160 - Mon. to Fri. 1:00 PM to 10:00 PM GMT)
1. Lamp Post Top (1) - 5” x 5“x 58” (12.7 x 12.7 x 147.3 cm) - 10890 White , 14053 Brown
2. Post Coupler (1) - 10906 White, 14053 Brown
3. Lamp Post Bottom (1) - 5” x 5“x 14” (12.7 x 12.7 x 35.5 cm) - 10889 White, 14052 Brown
4. Post Cap (1) - 10789 White, 14051 Brown
5. Base Molding Trim Cap (1) - 10764 White, 14055 Brown
6. Base Molding Post (1) - 10174-1 White, 14058 Brown
7. Base Molding Bottom Insert (1) - 10765 White, 14057 Brown
8. 1-1/2” Self -Tapping Screws (4) - 20005 White, 20031 Brown
9. Vinyl Weld Glue (1) - 20000 White, 20038 Brown
10. Post Trim (1) - Included with the Sturbridge/Burton Lamp Post Only - 10698-1 White, 14029 Brown
Tools You Will Need
• Wheelbarrow or bucket (to mix concrete)
• Tape Measure
• Level
• Shovel
Purchased Separately
• Lamp.
• 4x4 Pressure treated lumber. - 8’ (2.4 m) long
• Two bags of pre-mix concrete. *
* Strongly recommended for the stability of this product.
General Information
• Read Instructions through carefully before beginning assembly.
• When handling components, place on a non-abrasive surface
(i.e. shipping box) to avoid scratching.
• We recommend an area approx 10’x 8’ (3m x 2.4m) for unobstructed handling.
Important Note:
• Please refer to local codes before installing outdoor lighting. UF-rated cable should be used for
underground wiring and all materials should be approved by the Underwriter’s Laborator (UL).
New England Arbors assumes no liability for errors, ommissions or the outcome of any project.
The Madison/Sturbridge/Trinity/Burton
Lamp Post
Please read through before starting assembly.
ASSEMBLY INSTRUCTIONS
1
1
Ver 5.1-022018
8
Not to Scale
4
9
Madison/Trinity Lamp Post Sturbridge/Burton Lamp Post
10
6
7
3
2
5
(7.62
cm)
(61 cm)
(13 cm)
(15 cm)
(18
3 cm)
(188 cm)

2
STEP TH RE E
Apply a generous amount of vinyl glue to the inside base of the post
cap and place over the top end of the lamp post as illustrated.
ST EP F OU R
Wood Post Installation
Dig 36 in. (91.5 cm) deep hole in the desired location. Verify the
depth of the hole to ensure that the 4x4 wood post will be buried
36 in. (91.5 cm) into the ground. Fill the hole 3/4 full with pre-mix
concrete (not included). Insert the post into the concrete and check
for level. Allow time for the concrete to set, then fill in the remainder
of the hole.
4
36”
(91.4 cm)
Level
66““
(15.25 cm)
3
ST EP T WO
Lamp Post Assembly
2
A
C
B
D
Apply a generous amount of vinyl glue to the ribbed surface of the post
coupler as shown and join the two posts as illustrated.
Slide the base molding over the lamp post. If you purchased the Madison/
Trinity Lamp Post, proceed to step three. If assembling the Sturbridge/
Burton Lamp post continue to step B.
Slide the post collar down measuring 12 inches from the top of the post.
Once desired height is achived, make a note of the position of the collar.
Slide the collar UP and out of the way, then apply a generous amount of
vinyl glue at the top of where the collar would sit.
Slide the collar back down to its desired height and allow some time for
the vinyl glue to set and cure.
A
B
C
ST EP O NE
Base Molding Assembly
Apply a generous amount of vinyl glue to the underside of the base mold-
ing and the top side of the base molding bottom insert and attach to the
base molding post as shown aside.
1
D
12"
(30.5 cm)

3
Lamp Post Installation
ST EP F IV E
A
B
C
Lamp Post Installation
ST EP S IX
Installing Lamp
OP TI ON AL
If necessary, pre-wire the lamp by running the wire inside the cavity
of the post through the universal 3 in. (7.62 cm)collar. If installing
a solar lamp, disregard this step.
Slide the lamp post assembly over the wood post.
Line up the one corner of the vinyl post up against the wood post and
fasten the two touching sides with the provided screws.
Follow the instructions included with the lamp (purchased
separately) and secure it to the round collar on top of the post. You
may need to modify how it attaches to the collar.
B
A
Wood
Post
Top View
C
C
Ensure the lamp post
wiring is inside this cavity.
North America Toll Free Phone: 1 80
0 282 9346
United Kingdom Tel: (44) 2038 687160
www.newenglandarbors.com
www.newenglandarbors.co.uk
/