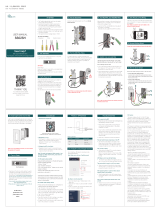
FGBHFS-101

Fibaro FGBHFS-101, Flood Sensor Owner's manual

  • Hello! I am an AI chatbot trained to assist you with the Fibaro FGBHFS-101 Owner's manual. I’ve already reviewed the document and can help you find the information you need or explain it in simple terms. Just ask your questions, and providing more details will help me assist you more effectively!
  • What is the Fibaro FGBHFS-101?
    How does the Fibaro FGBHFS-101 detect flooding?
    How does the Fibaro FGBHFS-101 detect tampering?
    How do I install the Fibaro FGBHFS-101?
    Can I extend the range of the Fibaro FGBHFS-101?
    How do I reset the Fibaro FGBHFS-101?
    What is the battery life of the Fibaro FGBHFS-101?
    What is the operating temperature range of the Fibaro FGBHFS-101?
CONTENTS
#1: Description and features 3
#2: Powering the accessory 4
#3: Pairing the accessory 5
#4: Physical installation 6
#5: Reset 7
#6: Functionalities 8
#7: Congurable parameters 9
#8: Specications 10
#9: Regulations 11
FIBARO FLOOD SENSOR
FGBHFS-101
OPERATING
MANUAL
EN
v1.1
2
Important safety information
Read this manual before attempting to install the device!
Failure to observe recommendations included in this manual
may be dangerous or cause a violation of the law. The manufacturer,
Fibar Group S.A. will not be held responsible for any loss or damage
resulting from not following the instructions of operating manual.
!
HomeKit technology
Apple HomeKit technology provides an easy, secure way to control
HomeKit-enabled accessories using Siri on your iPhone, iPad, or iPod
touch.
After installing your FIBARO Flood Sensor, congure it from a
compatible app with just a few simple steps.
You can even create your own custom scenes to control your home
settings. For example, you can create a scene to automatically turn
o the lights, lock your doors, close the garage door, and set the
thermostat to the desired temperature in just one step.
To control this HomeKit-enabled accessory, iOS 9.3.5 or later is
recommended.
Controlling this HomeKit-enabled accessory automatically and
away from home requires an Apple TV with tvOS 9.2 or later or
an iPad with iOS 9.3 or later set up as a home hub.
i
3
DESCRIPTION AND FEATURES
Main features of FIBARO Flood Sensor:
compatible with Apple HomeKit technology
Bluetooth® low energy technology for wireless communication
detects ooding
detects tampering using accelerometer or when the casing is opened
easy installation - simply put on a surface prone to ooding
may be installed anywhere - sensor can be extended using
an external probe (not included)
battery powered
indicates state using LED diode and buzzer
FIBARO Flood Sensor is a HomeKit-enabled water sensor using
Bluetooth® low energy technology.
Along with detecting ooding, the accessory measures the ambient
temperature.
Tampering is detected whenever the accessory is moved or casing is
opened.
Built-in LED indicator and an acoustic alarm signal ooding and
tampering. The LED can be also used to identify the accessory.
The accessory is designed to be placed on the oor or mounted on a
wall (in this case sensor should be extended using an external probe).
The accessory is sink-proof, which means it drifts on the water surface
and keeps on sending alarm signal in case of substantial inundation
of water.
#1: Description and features
4
POWERING THE ACCESSORY
#2: Powering the accessory
1. Turn the cover counter-clockwise and open it.
2. Remove the battery blocker.
3. The accessory will glow red – it is ready to be paired.
4. Close the cover and turn it clockwise.
NOTE
If the accessory blinks
green after powering,
it is already paired and
has to be reset to pair
again.
i
5
PAIRING THE ACCESSORY
#3: Pairing the accessory
1. Open the Settings app on your iOS device.
2. Go to the Bluetooth® section, and turn the Bluetooth® on.
3. Place the accessory next to your iOS device.
4. Open a HomeKit compatible app of your choosing on your iOS
device.
5. Open pairing window in your HomeKit app to detect available
accessories.
6. Choose Flood Sensor you wish to pair.
7. You can identify it - Flood Sensor will triple blink blue 3 times.
8. Find HomeKit Setup Code on the last page of Quick Start Guide
included in the box that looks like this:
9. Start pairing with your HomeKit app.
10. Point your iOS devices camera at the Setup Code to scan it or en-
ter the Setup Code manually.
11. If entered Setup Code is valid, the device will complete the setup
process.
12. Follow instructions displayed in the application.
XXX-XX-XXX
NOTE
Remember to keep
your HomeKit Setup
Code in safe place. You
may need it in case of
re-pairing.
i
6
PHYSICAL INSTALLATION
SENS 1
SENS 2
Extending Flood Sensor contacts with a wired probe:
NOTE
Mounting screws
shown in a diagram
are not included.
Choose a screw type
depending on the
building material it is
being attached to.
i
CAUTION
Sensors contacts are
dedicated to ood de-
tection only. Do not
connect external volt-
age!
!
#4: Physical installation
To install the Flood Sensor simply place it sensor on a surface prone
to ooding.
Three electrodes underneath the device should evenly touch the sur-
face.
If you want the accessory to be mounted on a wall or in a distance
from ooding source, sensor should be extended using an external
probe (not included).
We recommend using extension probes or cables designed to detect
water. Probes ends should be coated with non-corrosive metal.
Connection wires should not be longer than 3m and thicker than
18AWG (0.82mm
2
).
NOTE
Before completing
the installation it is
recommended to test
sensors operation by
placing the entire sen-
sor or sensor probe
onto water surface.
i
7
RESET
Resetting the Flood Sensor to factory defaults:
Reset procedure allows to restore the accessory back to its factory
settings including HomeKit pairing.
1. Open the cover.
2. Press the button 3 times then press and hold the button.
3. Wait for the LED indicator to glow yellow.
4. Release the button.
5. Click the button to conrm.
6. Accessory will glow red to conrm reset.
#5: Reset
Button
NOTE
Resetting the acces-
sory will not remove it
from the app.
We recommend re-
moving it manually
before pairing it again.
i
8
FUNCTIONALITIES
#6: Functionalities
Flooding detection:
The Flood Sensor alarms about ooding whenever water connects
sensors probes and reports it to your iOS device.
Until the ooding does not cease, the accessory constantly beeps and
blinks red signaling the alarm.
Tampering signalization is ignored during the alarm.
Tamper detection:
The Flood Sensor detects tampering when the accessory is moved
or casing is opened and reports it to your iOS device.
Tampering is indicated with an alternate blinking in red, blue and
white and one short beep.
Temperature measuring:
The Flood Sensor measures ambient temperature every 10 min-
utes. If the measured temperature diers from previously reported
by at least 1°C (1.8°F), accessory reports it to your iOS device.
Battery level measuring:
The Flood Sensor measures battery level every 24 hours and reports
it to your iOS device. Additionally, if battery level is below 15%, the
accessory will report low level battery status to your iOS device.
9
CONFIGURABLE PARAMETERS
#7: Congurable parameters
1. Tamper – sensor sensitivity
This parameter allows to set sensitivity of tamper detection.
The higher the value of this parameter, the higher the sensitivity.
If the installation surface is prone to vibrations, setting lower sensitiv-
ity is recommended.
Available settings: 0 – tamper disabled
1 – low sensitivity
2 – medium sensitivity
3 – high sensitivity
Default setting: 2 (medium sensitivity)
10
SPECIFICATIONS
Power supply:
Battery type:
EU directives compliance:
Radio protocol:
Radio frequency:
Range:
Operating temperature:
Measured temperature
range:
Temperature measuring
accuracy:
Dimensions (diameter x
height):
3.0V DC battery
CR123A
RoHS 2011/65/EU
RED 2014/53/EU
Bluetooth® low energy
2.4 GHz
up to 50m (free range)
(164 feet)
0-40°C (32-104°F)
0-40°C (32-104°F)
±0.5°C 0.9°F)
72 x 28 mm (2.8 x 1.1 inch)
#8: Specications
CAUTION
Using batteries other
than specied may
result in explosion.
Dispose of properly,
observing environ-
mental protection
rules.
!
11
REGULATIONS
#9: Regulations
This device complies with Part 15 of the FCC Rules
Operation is subject to the following two conditions:
1. This device may not cause harmful interference
2. This device must accept any interference received, including inter-
ference that may cause undesired operation. This equipment has been
tested and found to comply with the limits for a Class B digital device,
pursuant to part 15 of the FCC Rules. These limits are designed to pro-
vide reasonable protection against harmful interference in a residen-
tial installation. This equipment generates, uses and can radiate radio
frequency energy and, if not installed and used in accordance with the
instructions, may cause harmful interference to radio communications.
However, there is no guarantee that interference will not occur in a par-
ticular installation. If this equipment does cause harmful interference
to radio or television reception, which can be determined by turning
the equipment o and on, the user is encouraged to try to correct the
interference by one or more of the following measures:
Reorient or relocate the receiving antenna.
Increase the separation between the equipment and receiver.
Connect the equipment into an outlet on a circuit dierent from
that to which the receiver is connected.
Consult the dealer or an experienced radio/TV technician for help.
Note
Changes and modications not expressly approved by the manufac-
turer or registrant of this equipment can void your authority to operate
this equipment under Federal Communications Commission’s rules.
Industry Canada (IC) Compliance Notice
This device complies with Industry Canada license-exempt RSSs. Oper-
ation is subject to the following two conditions: (1) this device may not
cause interference, and (2) this device must accept any interference, in-
cluding interference that may cause undesired operation of the device.
Cet appareil est conforme aux normes d’exemption de licence RSS d’In-
dustry Canada. Son fonctionnement est soumis aux deux conditions
suivantes : (1) cet appareil ne doit pas causer d’interférence et (2) cet
appareil doit accepter toute interférence, notamment les interférences
qui peuvent aecter son fonctionnement.
Radio frequency (RF) exposure statement
This equipment should be installed and operated keeping the radiator
at least 20 cm or more away from persons body.
Cet équipement doit être installé et utilisé en gardant une distance de
20 cm ou plus entre le dispositif rayonnant et le corps.
12
REGULATIONS
DGT Warning Statement
Article 12
Without permission, any company, rm or user shall not alter the frequen-
cy, increase the power, or change the characteristics and functions of the
original design of the certied lower power frequency electric machinery.
Article 14
The application of low power frequency electric machineries shall not
aect the navigation safety nor interfere a legal communication, if an
interference is found, the service will be suspended until improvement
is made and the interference no longer exists.
第十二條
經型式認證合格之低功率射頻電機,非經許可,公司、商號或使用
者均不得擅自變更頻率、加大功率或變更原設計之特性及功能。
第十四條
低功率射頻電機之使用不得影響飛航安全及干擾合法通信;經發現
有干擾現象時,應立即停用,並改善至無干擾時方得繼續使用。
前項合法通信,指依電信法規定作業之無線電通信。
低功率射頻電機須忍受合法通信或工業、科學及醫療用電波輻射性
電機設備之干擾。
Legal Notices
All information, including, but not limited to, information regarding the
features, functionality, and/or other product specication are subject
to change without notice. Fibaro reserves all rights to revise or update
its products, software, or documentation without any obligation to no-
tify any individual or entity.
FIBARO and Fibar Group logo are trademarks of Fibar Group S.A.
The Bluetooth word mark and logos are registered trademarks owned
by Bluetooth SIG, Inc. and any use of such marks by Fibar Group S.A. is
under license.
Apple, iPhone, iPad, iPad Air, and iPod touch are trademarks of Apple
Inc., registered in the U.S. and other countries. HomeKit is a trademark
of Apple Inc.
All other brands and product names referred to herein are trademarks
of their respective holders.
Use of the Works with Apple HomeKit logo means that an electron-
ic accessory has been designed to connect specically to iPod touch,
iPhone, or iPad, respectively, and has been certied by the developer to
meet Apple performance standards. Apple is not responsible for the oper-
ation of this device or its compliance with safety and regulatory standards.
Warning
This product is not a toy. Keep away from children and animals!
Information according REACH
The included Panasonic CR123A battery contains 1,2-Dimethoxyeth-
ane substance. Normal use of the device does not expose the user to
a given substance.
13
REGULATIONS
Declaration of conformity
Hereby, Fibar Group S.A. declares that the device is in com-
pliance with the essential requirements and other relevant
provisions of Directive 2014/53/EU. The full text of the EU
declaration of conformity is available at the following internet address:
www.manuals.baro.com
WEEE Directive Compliance
Device labelled with this symbol should not be disposed with
other household wastes. It shall be handed over to the appli-
cable collection point for the recycling of waste electrical and
electronic equipment.
/