Page is loading ...

S1000-EW
S1000-RW
S1000-EB
S1000-RB
S900-EW
S900-RW
OWNER’S MANUAL

TABLE OF CONTENTS
This manual contains important safety information. Before operating the
unit, please read this manual thoroughly, and retain it for future reference.
Section 1 Product Features page 1
Section 2 Safety Precautions page 2-4
Section 3 Parts & Configuration page 5-7
Section 4 Installation page 8-11
Section 5 Operation page 12-18
Section 6 Specifications page 19
Section 7 Maintenance page 20-21
Section 8 Troubleshooting page 21-23
Section 9 Warranty Information page 24-25

PRODUCT FEATURES
Swash 900 and Swash 1000 Models:
Ergonomic heated seat –
with four temperature settings (High/Med/Low/Off).
Instant and endless warm water – the cutting-edge instant ceramic heating system
ensures an endless warm water stream for posterior and feminine washes while reducing
power consumption by up to 60% over conventional storage tank systems.
Dual stainless steel nozzles – separate stainless steel nozzles resist soiling and bacterial
contamination for enhanced hygiene. The dual nozzle configuration ensures accurate coverage
for all types of users.
Wireless remote control – the intuitive remote control comes with convenient mounting
bracket and includes its own Eco Mode to conserve battery life.
Wide spray option – 3 stage width settings widens the wash spray from a strong
concentrated stream to a soft spray for a more personal and thorough cleansing.
Positionable nozzles– each nozzle has 5 different positions to ensure the most comfortable
and complete cleansing.
Aerated wash spray - micro-bubbles introduced into the wash spray create a gentler, softer
cleansing action designed for sensitive skin. In addition, the aerated spray reduces overall
water consumption and is more effective in cleansing the skin.
Automatic Eco Mode – when engaged, the power saving Eco Mode function automatically
lowers the seat temperature settings to conserve energy.
Gentle closing seat and lid – “slam free” gentle closing seat and lid are user friendly.
Quick release seat – quick release push button for easy removal and cleaning of seat and toilet.
Swash 1000 Models - Additional Features
Warm air dryer –
includes adjustable temperature with 3 levels for a completely hands free
experience and toilet paper elimination.
Automatic deodorizer – active carbon deodorization begins automatically as soon as you
sit on the seat to neutralize odors at the source.
Nozzle sterilization – when activated, the silver oxide nano particle wash treatment has
powerful anti-fungal and anti-bacterial properties to keep the dual nozzles cleaner & more
hygienic for a longer nozzle life.
Nozzle oscillation – the move function provides a massaging, oscillating cleanse during the
wash cycle ensuring a thorough and comfortable cleansing.
1

SAFETY PRECAUTIONS
Danger: If not observed, serious injury or even death may occur as a result of
electrocution.
Warning: If these warnings are not observed, considerable physical injury or property
damage may occur as a result of burns, electrocution or fire.
Caution: If these cautions are not observed, slight physical or property damage may occur.
READ ALL INSTRUCTIONS BEFORE USING.
Save these instructions for future reference.
When using electrical products, especially when children are present, basic safety precautions
should always be taken.
Danger:
Failure to observe the following warnings may result in electric shock, fire, personal injury,
property damage or product damage:
• Do not use the product with a damaged power plug or loose electric outlet.
• Do not move the product or unplug it by pulling the power cord.
• Do not handle the power plug with wet hands.
• Do not forcefully bend the power cord or place heavy objects on it to prevent it from
being damaged or deformed.
• Do not connect and pull out the power plug repeatedly.
• Unplug the product before cleaning, repairing, inspecting, or replacing parts.
• Remove any dust or water from the power plug.
• Do not plug the appliance into an electrical outlet or power strip that is being used by too
many appliances. Use an electrical outlet adequate for the wattage of the product.
• If the power cord is damaged, do not attempt to repair, modify, or replace the cord yourself.
Call a Brondell Service Center.
• If the product produces a strange noise, a burnt smell, gets hot, or emits smoke,
unplug it immediately from the electrical outlet and call Brondell. Do not use the
product until it has been repaired.
• Do not insert a wire or sharp object in any product gaps or the warm air outlet.
• Do not place an electric heater near the product or dispose of any burning materials
in the toilet.
• Do not place any liquids or any flammable material on top of the product.
• Do not use the product in locations exposed to excessive moisture and do not splash
liquids onto the product.
2

3
• If foreign material enters the product, pull the power plug out of the electrical outlet,
turn off the main water valve, and call the Brondell Service Center.
• Do not disassemble, repair, or modify the product yourself.
• Do not use the product while wet or place the product where it can fall into a tub or sink.
• Do not reach for the product if it has fallen into water. Unplug the product
immediately and call the Brondell Service Center.
Warning:
Failure to observe the following warnings may result in electric shock, fire, personal injury,
property damage or product damage:
• Do not operate or store the unit in locations where flammable or combustible
materials are used.
• Do not use industrial water or gray water for the water supply as this may cause skin
damage or disease.
• Do not block the warm air outlet with your hand or other object.
• Turn off the main water supply valve when cleaning the filter.
• For children and seniors who may have difficulties with adjusting temperature or those
with sensitive skin or impaired heat sensitivity, set the temperature of wash spray, warm
air dryer, and seat to “low” or “off” to prevent burning.
• Close supervision is necessary when this product is used by children or persons
requiring general assistance.
• Do not press the buttons using excessive force.
• Do not stand or place heavy objects on the seat cover.
• Use this product for its intended use only, as described in this manual. Do not use any
attachments that are not recommended by Brondell.
• Do not use the product outdoors or operate where aerosol (spray) products are being
used or where it could be exposed to pure oxygen without proper ventilation.
• Connect this product to a properly grounded outlet only. Refer to the Grounding
Instructions.
Caution:
Failure to observe the following warnings may result in electric shock, fire, personal
injury, property damage or product damage:
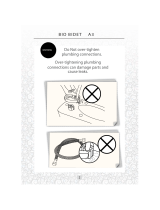
• Do not connect the main water to the hot water pipe (only connect to cold water supply).
• After the installation, make sure to check all water supply connections for leaks.
Rubber washers should be in place for the water connection hoses & T-Valve.
SAFETY PRECAUTIONS

4
• Do not open/close the seat cover using excessive force.
• Exercise caution that urine does not come into contact with the nozzles or warm air
dryer outlet – failure to do so may result in bad odors or malfunction.
• If the product will not be used for a long period of time unplug the power cord, close
the main water supply valve, and drain any water in the water tank.
• Do not pull out the bidet hose or connection hose using excessive force.
• Do not use thinner, benzene, acidic chemicals, chloride, or hydrochloric acid
detergent. This may result in corrosion to the metal parts or discoloration or scratches
to the bidet body.
• This appliance is not intended for use by persons [including children] with reduced
physical, sensory or mental capabilities, or lack of experience and knowledge, unless
they have been given supervision or instruction concerning use of the appliance by a
person responsible for their safety. Children should be supervised to ensure that they do
not play with the appliance.
Grounding & GFI Outlet Instructions
This product should only be used with a
grounded GFI (Ground Fault Interrupter)
outlet and a grounded 3 prong electrical
cord as shown in figure A. In the event of an
electrical short circuit, using a grounded GFI
outlet reduces the risk of electric shock. This
product is equipped with agrounded cord
and is for use on a nominal120V circuit only
(min 15 amps) and must be plugged into an
outlet that is properly grounded with a GFI
breaker as shown. Replace or repair a
damaged cord immediately.
Extension Cord
If it is necessary to temporarily use an extension cord, only use a heavy gauge extension
cord rated for at least 1500 Watts that has a three prong grounding plug. Replace or
repair a damaged cord immediately.
SAFETY PRECAUTIONS
Grounded GFI Outlet Bidet Seat Cord
with Grounding Pin
Grounding Pin
test
reset
Receptacle

PARTS & CONFIGURATION
The Swash 900 and the Swash 1000 have the following dimensions:
5
411 mm
(16.2 inch)
382 mm
(15 inch)
202 mm
(7.9 inch)
350 mm
(13.8 inch)
134 mm
(5.3 inch)
411 mm
(16.2 inch)
382 mm
(15 inch)
202 mm
(7.9 inch)
385 mm
(15.2 inch)
134 mm
(5.3 inch)
140 mm ~ 210 mm
(5.5 ~ 8.3 inch)
Rear fixing distance : 164 mm
(6.5 inch)
49 mm
(1.9 inch)
140 mm ~ 210 mm
(5.5 ~ 8.3 inch)
The Swash 900 and 1000: Round Size
The Swash 900 and 1000: Elongated Size
Bottom View Distance Between Mounting Holes

PARTS & CONFIGURATION
Product Configuration
1. Lid
2. Warning sticker
3. IR sensor
4. Nozzles
5. Body (seat) sensor
6. Bidet seat
7. Bidet hose
8. T-valve connector
9. Power cord
10. Production sticker
11. Drain plug
12. Quick release button
13. Mounting plate
14. Mesh filter
6
7
8
9
10
11
12
13
14

REMOTE CONTROL
7
Swash 900 Swash 1000
SpraySpray

INSTALLATION
Installation Parts
8
1. 2 ea Mounting Bolt
2. 2 ea Rubber Cone Washer
3. 2 ea Flat Washer
4. 2 ea Barrel Nut
5. Mounting Plate
6. 2 ea Adjustable Bracket
1
2
3
4
6
8
7
9
5
10
11
12
13
7. Rubber T-Valve Washer
8. T-Valve Connector
9. Bidet Hose
10. Remote Control w/ Wall Mount
11. 2 ea Remote Screw
12. 2 ea Remote Anchor
13. 3 AAA Batteries

9
Before Installation:
Check water supply line:
Check the line that connects the toilet tank to the water shut off valve. If it is a rigid pipe,
you may need to purchase a flexible hose to replace it before installing the Swash. The
length of the hose and the size of the connectors will vary.
Residual moisture is normal
Every product is tested with pure water during production to ensure the highest quality
and performance. It is normal to find a small amount of residual moisture on the product
and in the reservoir and filter.
Tools:
A Phillips head or standard screwdriver may be needed to remove the existing toilet seat
and a standard wrench may be needed for tight water supply connections.
Installation:
Please read these instructions carefully before installing the Swash. Failure to do so could
result in flooding, leaking or damage to the product.
1. Existing Toilet Seat Removal
a. Lift hinge covers and use a screwdriver to remove the mounting bolts.
b. Remove the toilet seat.
Note: Steps may vary by type of seat.
2. Turn Off Water Supply Valve and Flush Toilet
a. Turn water valve off completely to stop the flow of water.
b. Flush toilet and hold down handle to completely empty tank.
c. Disconnect water supply hose from toilet tank.
Important notes:
• You may wish to place a container under the tank to catch any excess water.
• Do not continue without completing the above steps. Failure to do so could result in
flooding, leaking or damage to the Swash.
3. Connect T-Valve to Water Supply Line and Toilet Tank
Note: Do not connect the T-Valve or bidet hose to a hot water line - only connect to
the cold water pipe, failure to do so could cause the bidet seat to malfunction or
become damaged.
Note: If your water supply line is rigid you may need to replace it before continuing.
INSTALLATION
Step 2c

10
a. Install the T-Valve with the rubber washer to the incoming water
connection on the bottom of your toilet tank. Be sure that you place
the flat edge of the rubber washer into the T-Valve against the metal
with the raised lip facing the toilet tank connection.
b. Connect the water supply line coming from the wall to the bottom
of the T-Valve.
4. Connect Bidet Hose to T-Valve
a. Connect one end of the bidet hose to the T-Valve and set aside.
5. Install Mounting Plate & Attach Swash
a. Place adjustable mounting plate over mounting holes on toilet,
flat side down, black rubber side of mounting plate should be
closest to the toilet tank and rubber should be against the ceramic.
b. Place adjustable metal brackets flat side down in the center of the
square opening in the mounting plate and insert mounting bolts
through adjustable metal brackets and mounting holes. Be sure
that the square mounting bolt head is even with sides of adjustable
metal bracket.
c. Slide rubber cone washer, flat washer, and then barrel nut onto
mounting bolts under the toilet bowl and tighten to keep mounting
plate in place.
d. Set the Swash flat on the toilet bowl in front of the mounting
plate, and slide seat onto plate until it is secure and “clicks”
into place.
e. If the seat appears too short or too long for the toilet, adjust the mounting plate
accordingly. To adjust the mounting plate, loosen barrel nut and slide seat forward or
backwards as needed. Once the seat is lined up properly, tighten barrel nuts to hold
in place.
6. Connect the Bidet Hose
a. Connect the bidet hose to the side of the bidet seat making
sure the hose is firmly connected. Take care not to twist the bidet
hose, excessively bend it, or strip the plastic screw threads
when screwing the hose onto the bidet seat.
7. Turn On Water Supply
a. Open the main water supply valve slowly and check for leaks.
b. Wait 5 minutes, check again and if there are no leaks continue.
INSTALLATION
Step 5d
Step 6
Steps 5b & 5c
Steps 3a & 3b

11
8. Connect Power
a. Plug the power cord into the electrical outlet.
Important: Make sure to only use a grounded GFI (ground fault interrupter) electrical
outlet. In the case of a short circuit, a grounded GFI outlet may help prevent electric
shock or injury. If using an extension cord is unavoidable, use one with grounding
terminals for 120V~/60 Hz or higher only.
Installing the Remote Control
1. Battery Installation
a. Separate the remote control from the magnetic wall mount by pulling apart gently.
b. Turn remote over and open the battery compartment by popping off the battery
cover with your finger or small coin. Insert three “AAA” type batteries (included) as
indicated inside battery compartment and replace battery cover.
c. To confirm the batteries are installed correctly, press the “Stop” button and you
should see the “Wide Spray” LED light turn on for a few seconds (note: the 2 other
LED lights may or may not turn on at this time depending on the current settings).
2. Mount Remote (optional)
a. Identify a location in the bathroom for the remote control
that is visible and reachable from the toilet.
b. Depending on the wall type, you can install using the
supplied screws and anchor mounts or use the provided
double stick tape on the back of the remote wall mount.
Make sure the remote mount is fully secure with either
method so that it does not fall and damage the remote control.
c. Place the remote control into the mount as shown.
INSTALLATION

12
OPERATION
Quick Reference Guide: Bidet Seat
Note: Basic functions such as Rear Cleansing
and Nozzle Cleaning can be used without the
remote by utilizing the auxiliary buttons shown here.
C
D
E
A
A
B
Remote IR Receiver
Receives signal
from remote control
A
C
D
E
B
Remote IR Receiver
Receives signal from
remote control
2 seconds to turn off.
Nozzle Cleaning button
When pressed, the nozzles fully extend allowing for easy cleaning.
Press again for the second nozzle to extend and once more to retract.
Seat Display
Seat Display
Auxiliary control panel
Auxiliary control panel

13
OPERATION
Quick Reference Guide: Remote Control
Spray
‘Wide Spray’ button
A
C
D
B
For the Swash 900 models
the Move, Dry, Sterilize,
and Deodorize functions
are excluded

14
OPERATION
Quick Reference Guide: Remote Control (Page 2)
A
B
DC
When the “Wide Spray” button is pressed,
the indicator cycles through the following
options: Concentrated Stream (Blue)
Medium Stream (Pink) Wide Stream (Red).
“Move” (Nozzle Oscillation) button
This button engages the oscillation
function on the front or rear nozzles
during a wash cycle. Nozzle oscillation
moves the wash wand back and forth to
clean a wider area. Swash 1000 models
only
‘Dry’ button
Use this button to engage 3 levels of the
warm air dryer. Swash 1000 models only
“Wide Spray” button
Use this button to control the width of the
water spray stream during the front or rear
wash cycle. You can select from 3 levels:
Concentrated Stream (Blue) Medium
Stream (Pink) Wide Stream (Red).
Spray
‘Wide Spray’ indicator
Swash 1000 models only
Swash 1000 models only

15
OPERATION
Using the Swash
Important note: The wash functions and the warm air dryer function will not work
unless the body sensor in the seat detects someone sitting down (skin conductivity
sensor). To override the safety sensor, please refer to the section in the manual called
“Configuring a Special Mode”.
Important note: The remote control will not operate the Swash if the batteries are weak,
dead, or not installed properly (remote requires 3 x AAA batteries to function).
Warm Water Wash
Sit on the seat and press the FRONT or REAR button on the remote to begin water flow.
The nozzles will self-clean and purge a small amount of water which will last for several
seconds prior to starting the wash function. The front or rear wand will then extend and
wash for approximately 1 minute, then turn off automatically.
To keep the wash continuing longer than 1 minute, press the FRONT or REAR button
again during the cleansing cycle. Each time your press the button during the cleansing
cycle the 1 minute cycle starts again.
If you would like to stop the wash before a 1 minute cycle ends, press STOP button to
discontinue flow.
While cleansing, users can adjust the water temperature, water pressure, spray width,
and nozzle position according to their preferences.
After the cleansing cycle, the nozzles will perform a self clean cycle purging water for
approximately 5 seconds.
** You cannot increase the water pressure level higher than level 2 under the following
conditions: Main water supply temperature is under 50 degrees F / 10 degrees C OR if
the rated power source is under 110V.**
Nozzle Positioning
While the cleansing function is operating, use the Nozzle Position up and down arrows
on the remote control to move the position of the nozzles and spray.

16
OPERATION
Water Flow / Water Pressure Adjustment
While the cleansing function is operating, press the Water Pressure/Dry Temp “+” and “-“
buttons on the remote control to increase or decrease the water pressure of the spray.
There are 3 water pressure levels: Low – Med – High.
Wide Spray
To adjust the spray width of the washing stream during a cleansing cycle, press the Wide
Spray button. The Wide Spray button has 3 levels indicated by lights on the remote
above Wide Spray button: Concentrated Stream (Blue)-> Medium Stream (Pink) -> Wide
Stream (Red).
Move (Nozzle Oscillation) Function – Swash 1000 Only
While the wash function is operating, press the MOVE button on the remote control to
start or stop the nozzle oscillation function (moving back and forth). This provides a
wider range of cleansing spray.
Warm Air Dryer – Swash 1000 Only
Once the wash cycle is complete, press the DRY button to activate the warm air dryer.
The dryer will run for approximately 2 minutes.
To keep the dryer continuing longer than 2 minutes, press the DRY button again during
the drying cycle. Each time your press the button during the drying cycle the 2 minute
cycle starts again.
If you would like to stop the dryer cycle before a 2 minute cycle ends, press STOP button
to discontinue.
Adjusting Seat, Water, and Dryer Temperature
Seat Temperature
Press Seat Temp. button to adjust the seat temperature to desired level. There are four
temperature levels indicated by lights on the remote above Seat Temp. button:
Low(blue) – Med(Pink) – High(Red) – Off(No Light).
Water Temperature
While wash function is operating, press Water Temp. button to adjust temperature to
desired level. There are four temperature levels indicated by lights on the remote above
Water Temp. button: Low(blue) – Med(Pink) – High(Red) – Off(No Light)

17
OPERATION
Warm Air Dryer Temperature – Swash 1000 Only
While air dryer function is operating, press the Water Pressure/Dry Temp. button “+” and
“-“ to adjust warm air dryer temperature to desired level. There are 4 levels for the warm
air dryer: Low – Med – High- Off.
Additional Features
Deodorization – Swash 1000 Only
When you sit down on the seat, the deodorizing function starts automatically on a low
setting. To activate the deodorizer on a high setting, press the Deodorize button on the
remote control. The deodorizing function will run on high for approximately 1 minute.
To stop the function prior to 1 minute, press STOP button at any time.
Nozzle Sterilization – Swash 1000 Only
To sterilize the stainless steel nozzles, press the Sterilize button on the remote control
and a cleansing silver oxide nano particle water treatment begins. The cleansing spray
will last for approximately 30 seconds. To stop the function prior to 30 seconds, press the
STOP button at any time. The silver oxide nano particle treatment system has powerful
anti-fungal and anti-bacterial properties to keep the nozzles clean and corrosion free.
Auxiliary Controls
There are 3 auxiliary buttons on the side of the Swash to be used if remote is unavailable
and to set Swash Special Modes:
1. Power button – Turns the product On/Off. Press and hold the button for at least 2
seconds to turn off the Swash. Note: if the Power button is pressed while front or rear
cleansing is operating, the cleansing function will stop.
2. Rear Cleansing – Selects the rear cleansing function.
3. Nozzle Cleaning – To better clean the nozzles, press this button, the nozzle will extend fully
for easy cleaning. Refer to Maintenance section for additional nozzle cleaning information.
Swash Special Mode Operation
Swash Eco Mode
When Eco Mode is selected: If the Seat Sensor is not activated and no buttons on
Remote have been active for approximately 10 minutes, the seat heater is automatically
set to Low temperature to reduce power consumption. Once Eco Mode is activated, the
Eco Mode light on the seat will turn blue and the other lights will turn off.

18
OPERATION
(If no buttons on the Remote control are pressed for approximately 5 seconds, the
remote display lights are turned off to conserve remote battery life).
Selecting/Cancelling Eco Mode
1. Press and hold down the “Power” and “Rear Cleansing” auxiliary buttons
simultaneously for approximately 5 seconds until all the seat display lights start flashing.
2. Press the “Rear Cleansing” button to Set or Cancel Eco Mode.
a. If Eco Mode indicator light is turned on, this indicates Eco Mode has been set.
b. If Eco Mode indicator light is turned off, this indicates Eco Mode has been cancelled.
3. The new setting will automatically be saved within 10 seconds if no other buttons are pressed.
Selecting/Cancelling Silent Mode
1. Press and hold down the “Power” and “Rear Cleansing” auxiliary buttons simultaneously for
approximately 5 seconds until all the seat display lights start flashing.
2. Press the “Power” button to Set or Cancel silent mode.
a. If Power indicator light is turned on, this indicates silent mode has been set.
b. If Power indicator light is turned off, this indicates silent mode has been cancelled.
3. The new setting will automatically be saved within 10 seconds if no other buttons are pressed.
Selecting/Cancelling Seat Sensor Lock Mode
This function bypasses the body sensor located in the seat and allows the wash functions and
dry functions to operate without the sensor being engaged. Use caution in this mode!
1. Press and hold down the “Power” and “Rear Cleansing” auxiliary buttons simultaneously for
approximately 5 seconds until all the seat display lights start flashing.
2. Press the “Nozzle Cleaning” button to Set or Cancel seat sensor lock mode.
a. If Seat Temp. indicator light is turned on, this indicates seat sensor lock mode has
been set.
b. If Seat Temp. indicator light is turned off, this indicates seat sensor lock mode has
been cancelled.
3. The new setting will automatically be saved within 10 seconds if no other buttons are pressed.
/