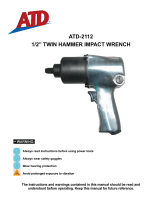
Foreseen Use
Of
The Tool
-
5040
The impact
wrench
is designed for the tightening and Imning of threaded fastener within the range as specified by
the
manufacturer.
It should
only
be used in conjunction
with
suitable impact type
3W
square female drive nut running sockets. Only use sockets
whii
are
of the impact
type.
It is allwed to
use
suitable extension bars, universal joints and socket adaptors beWn the square output drive of the ratchet wrench
and
the
female square drive
of
the socket.
Do not use the tool for any other purpose than
that
sptxified without consulting the manufacturer or the manufacturet's authorized
supplier. To do
$0
may
be
dangemus.
Never use an impact wrench as a hammer to dislodge or straighten cmss threaded fasteners. Never attempt to modify the tool for other
uses and never modify the td for
even
its recommended use as a nutrunner.
Work Stations
The
tool shoutd only be used as a handheld, hand operated tool.
lt
is
always recommended that
the
tool is used when stadng on a
solid
floor.
It
can be used in other positions,
but
before any such use, the operator must be in a secure position having a firm grip and footing
and be aware that when loosening fasteners the td can me quite quickly away from the fastener being undone. An allowance must
always
be
made for this rearward movement
so
as to avoid
the
possibility of hand'amhdy entrapment.
Putting Into Service
Air
Supply
Use a clean iubtkated air supply that will give a measured air pressure at the tool of
!XI
PSIG
(6.2
bar) when the tool is running with the
tri~erflW8r fully depressed. Use recammended hose Size and lenath. It is recommended that the tool is connected to the air supply as
s&m in figure
1.
Do
not connect the tool to the air line system withzut incorporating an easy to reach and operate air shut off valve.-he
air supply should
be
lubricated. It
is
strongly recommended that an air filter, regulator, lubricator
(FRL)
is
us&
as shown In Figure
I
as
thii
will supply clean, lubricated air at the correct pressure to the tool. Details of such equipment can
be
obtained from your supplier. If
such equipment is not used, then the tool shoukl be lubricated
by
shutting off
the
air supply to the td, depressurizing the line by pressing
--
the trigger on the td. Diinnect the air line and pour into the
hose
adaptor a teaspoonful (5ml) of a suitable pneumatic motor
lubricating oil preferably incorporating a rust inhibiior. Reconnect tool to air supply and run td slowly for a few seconds to albw air to
circulate the oil. If tool is used freauentlv. lubricate on
daii
basis and
if
tool starts to slow or lose mwer.
It
is
recommended that Wnt tight& &the threaded fasiener assembly be checked with a torque wrench.
It is recommended that
the
air pressure at the tool while the tool is tunning is
90
PSU6.2
bar.
Operating
The output of the impact wrench in prime working condition is governed
by
mainly three factors:
a) the input air pressure;
b) the time the impact wrench is operated on the jomt. Normai time for joints of average tension requirement
3
to
5
seconds;
c) the setting of the air regulator for a ghn joint at a given pressure operated for a given time.
The air regulator
(47)
can be used to regulate the output of the impact wrench if no other means of control is available. It is strongly
recommended that an external pressure regulator, ideally as parl
of
a
filterlregulatorflubricator
(FRL), is used to control air inlet pressure
so
that the pressure can
be
set to help control the tension requid to be applied to the threaded fastener joint.
There is
no
consistent, reliable toque adjustment on an impact wrench of this
type.
However, the air regulator can be used to adjust
tomue to the awmximate tiahtness of a
known
threaded
ioint.
To set the tool to the desired tome. select a nut or screw of known
tightness of the &me size, t6read pitch and thread condiik as those on the job.Turn air regulatoito low position, apply wrench to nut
and gradually increase power (turn regulator to admit mom air) until nut moves slightly in the direction it was originally set. The td is now
set to duplicate that tightness, note regulator setting for future use. When tightening nuts not requiring critical toque values, run nut up
flush and then tighten an addiional onequarler to onehalf turn (&it additional turning is necessary if gaskets are being clamped). For
additional power needed on disassembly work, turn regulator to its fully open position. This impact wrench is rated a
3/8"
bolt size.
Rating must be downgraded for spring
U
bolts, tie bolts, long cap screws, double depth nuts, badly rusted conditions and spring fasteners
as
they absorb much of the impact power. When posdtie, clamp or wedge the bolt to prevent springback.
Soak rusted nuts in penetrating oil and break rust seal before removing with impact wrench. If nut does not start to move in three to five
seconds use a larger size impact wrench. Do not use impact wrench beyond rated capacity as this will drastically reduce tool liie.
NOTE: Actual toque on a fastener is directly related to joint hardness, tool speed, condition of socket and the time the tool is allowed to
immct.
use the simplest possible tool-to-socket hook up. Every connection absoh energy and reduces paver.
The direction of mtation of
thii
tool
Is
contmlled
by
the throttle lever.
Be
sure that it is
known
whii
side
ol
the lever has to
be
pressed to
give the required direction of mtatiin before applying the impact wrench to the joint to be fastened or loosened.
For best resuns:
I)
Always
use
the correct
size
impact
type
socket.
2)
Use extra
deep
sockets in place of
extension
bars where possible.
3)
Do not use oversized, worn
or
cracked sockets.
4)
Hold the wrench so
the
socket
fits
squarely on the fastener. Hold the wrench firmly, but not too tightly, pressing slightly forward.
Dismantling
&
Assembly Instructions
Disconnect tool from air supply.
Pry off rubber nose guard
(I)
from motor housing
(5).
Remove oiler screw
(3)
and O-ring
(4)
and drain oil from the front end into a suitable
container. Grip the
tool in a vise locating on the square drive of
the
anvil
(12).
Unscrew
2
screws (50) and remove
2
lock
washers
(49)
and
retainer plate
(48).
Pull out air regulator
(47)
complete with O-ring
(46)
being careful not to lose ball
(44)
and spring
(45).Tap
pin
(36)
with
a suitable punch as
fas
as possible out of the assembly, but still allow the assembly to mtate. It is now necessary to grip the length of the
pin driven through the assembly and pull it out taking care not to deform it.
Lift
Off collar
(37)
and pull out inlet bushing
(43).
O-rings
(41)
and
(42)
may be removed from the stem on inlet bushing
(43).
Unscrew
2
cap screws
(39)
and
2
cap screws
(40)
and remove together
with
4
lock washers
(38)
to release
bat#
cap
(30)
and gasket
(29)
from the assembly. At this stage, remove throttle lever
(7)
together with
2
throttie Pins
(6).
Fmm back cap assembly pull off
2
plungers
(31)
and remove
2
Springs
(32)
and
2
valves
(33).
It is then possible to lever
out
2
valve seats
(34)
and
2
springs
(35)
taking care to protect
the
eyes as the springs can fly out when released. Pull out mtor pin
(22)
and extract the ayembly comprising
of
retaining ring
(28).
rear end plate
(26).
bearing
(27),
mtor
(24),6
mtor blades
(23)
and cylinder
(25).
Note at this tlme the way the cylinder
(25)
ir removed and note that it must be reassembled in the same way with the chamfer on the
outside diameter to end face at the fmnt end of
the
tool. Remove mtor blades
(23)
from mtor
(24),
take off retaining ring
(28)
and pull mtor
(24)
through rear end plate
(26)
and bearing
(27)
assembly. Using a suitable punch, bearing
(27)
may be removed from rear
end
plate
(261,
Pull out front end plate
(21)
complete with O-ring
(20)
and carefully pry off the O-ring, Remove bearing
(1 7)
and oil seal
(18)
from
front end plate
(21).
Remove retaining ring
(19)
from motor housing
(5)
and
take
out
the
complete hammer mechanism. Take off O-ring
(15)
from cage
(16)
to remove hammer
(14).
2
cage pins
(13)
and anvil
(12).
O-ring
(10)
may be levered
off
and O-ring
(I
1)
removed from
anvil
(12).
oil
seal
(2)
may be
hooked
out of and anvil bushing
(8)
pressed out of motor housing
(5).
Page
No
2