Page is loading ...

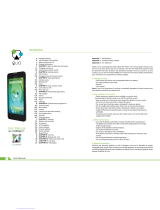
GSmart Guru GX
User Manual

Guru GX|1
Copyright
All mobile products by GIGA-BYTE COMMUNICATIONS INC. mentioned in this document,
including the device, accessories, software, text, music, and pictures, are owned by, or
authorized by original manufacturers to GIGA-BYTE COMMUNICATIONS INC. Reproduction,
transfer, distribution, or storage of part or all of the contents in this document in any form
without the prior written permission of GIGA-BYTE COMMUNICATIONS INC. is prohibited.
GIGA-BYTE COMMUNICATIONS INC.

Guru GX|2
General Information
This section contains important information on safe and efficient operation. Please read this
information before using the device. Ignorance of the following notices may lead to violations
of the law.
Before using the device, please make sure you have fully charged the battery.
Do NOT remove the battery from the device during charging.
Before inserting SIM card into the device, make sure that the device is switched off.
Keep the battery in low battery status for long time might cause battery over-discharged or
even reduce battery life. To maintain battery in good lifecycle please recharges it once in
low battery.
Please fully charge the battery if you are going to leave the phone without use for long time
to prevent battery goes over-discharged.
Do NOT attempt to dissemble the device on your own. This should be done by an
authorized person.
Use the device in accordance to instructions when in public facilities.
In some countries, it is a violation against the law to record phone conversations. Always
ask permission of the other party when you are going to record a conversation.
To protect your ears, turn down the volume before you use stereo headsets or other audio
devices.
To avoid damaging the touch screen and the device, do NOT apply excessive pressure on
them, and remove the device from your pants’ pocket before you sit down. It is also
recommended that you only use the stylus or your finger to interact with the touch screen.
It is not covered by the warranty that you crack the touch screen because of the improper
usage.
When you use the device for a long time, such as talking on the phone, browsing online, or
charging the battery, the device may become warm. In most cases, this condition is
normal.
Refer servicing to the provider, or an authorized technician under the following conditions:
1. The device has been damaged. 2. When you follow the instructions to use your device,
it does not operate normally. 3. The device has been exposed to water. 4. Liquid has been
spilled or an object has fallen onto the device.
Do NOT push unauthorized objects into slots and openings in your device.
The device should be placed away from heat sources such as stoves, radiators, heat
registers, or other products that produce heat.
Condensation may form on or within your device, when you move your device between
environments with very different temperature and/or humidity ranges. To avoid damaging
your device, make the moisture to evaporate before you use the device.
To avoid damaging your device, do NOT put your device on an unstable table, stand,
bracket, or other places.
Before you clean your device, unplug it, please. Use a damp cloth for cleaning, but do
NOT use water, liquid cleaners, or aerosol cleaners to clean the touch screen.

Guru GX|3
Table of Contents
Copyright
1
General Information
2
1. Getting Started 4
1.1 Your Phone
4
1.2 Installing or uninstalling the SIM Card, Battery, and Memory Card
4
1.3 Charging the Battery
6
1.4 Turning the Phone On or Off
6
1.5 Lock/Unlock
6
1.6 Contacts
7
1.7 The Home Screen
7
2. Phone Functions & Messages
11
2.1 Voice Calls
11
2.2 Creating and sending a text message
11
2.3 Multimedia Message
12
3.Wi-Fi & Bluetooth 13
3.1 Wi-Fi
13
3.2 Bluetooth
13
4.Multimedia Applications
14
4.1 Camera
14
4.2 Music
15
5. Pre-Installed Programs Introduction 16
6.Managing Your Phone 17
6.1 Protecting Your Phone
17
6.2 Reset Your Phone
18
7.Specifications
18

Guru GX|4
1. Getting Stared
1.1 Your Phone
This section introduces you to the hardware of the device.
No items No Items
1
Earphone Jack
10
Power Key
2
Receiver
11
SIM card slot/
Memory card
slot
3
Proximity Sensor/ Light
Sensor
12
Camera
4
Volume Key
13
Flash LED
5
Front Camera
14
Sub MIC
6
Display & Touch Screen
15
Battery Cover
7
Menu
16
Speaker
8
Home
17
Main MIC
9
Return
18
Micro-USB Port
1.2 Installing or uninstalling the SIM Card, Battery, and Memory Card
To install the SIM card
There are two SIM card slots. SIM1 use with Micro SIM card and SIM2 use with Nano SIM
card.
(1) Hold the phone face up.
(2) Insert the tip of the tray eject tool into the tray eject hole next to the SIM card slot.
(3) Push the tip all the way into the hole until the tray ejects, and then pull the tray out.
(4) Place the SIM card (contacts facing down) into the tray.
(5) Insert the card tray back into the slot.

Guru GX|5
To install the SIM1 card To install the SIM2 card
To remove the SIM card
Please turn off your phone first.
(1) Hold the phone face up and the top panel facing you.
(2) Insert the tip of the tray eject tool into the tray eject hole next to the SIM card slot.
(3) Push the tip all the way into the hole until the card tray ejects.
(4) Pull the card tray out, and remove the SIM card.
(5) Make sure that you insert the empty card tray back into the slot.
Battery
Your phone comes with a rechargeable battery. Battery life varies depending on the network,
used applications, and the type of connections attached to your phone.
Memory card
You may need a micro SD card to store photos, music, videos and other data. You can also
move certain apps to the storage card, if the apps support this feature.
The Memory card slot
is same slot with SIM2.
To install the memory card
(1) Hold the phone face up.
(2) Insert the tip of the tray eject tool into the tray eject hole next to the microSD card slot.
(3) Push the tip all the way into the hole until the microSD card tray ejects.
(4) Pull the microSD card tray out, and place the microSD card (contacts facing down) into the
tray.
(5) Insert the microSD card tray back into the slot.
To remove the memory card
(1) For safe removal, tap Applications tab > Settings > Storage > Unmount SD card > OK.
(2) Hold the phone face up and the top panel facing you.
(3) Insert the tip of the tray eject tool into the tray eject hole next to the microSD card slot.
(4) Push the tip all the way into the hole until the microSD card tray ejects.
(5) Pull the microSD card tray out, and remove the microSD card.
(6) Insert the microSD card tray back into the slot.

Guru GX|6
1.3 Charging the Battery
When you take your phone out of box for the first time, the battery isn’t at full power. Please
charge the battery fully before using.
(1) Connect the USB cable to the AC adapter, and then, connect to the device via the USB
cable.
(2) Plug the AC adapter to a socket to start the charge.
(3) For phone’s safety, please only use the original charger that comes with your device. Any
possible damage caused by using non-original charger or any other equipment will not be
under GIGABYTE Communication Inc.’s responsibility.
NOTE:
To ensure safety, do not remove the battery from the phone while the AC adapter is
connected or while it is being charged.
1.4 Turning the Phone on or off
To turn on your phone
Press and hold the power button until the phone shortly vibrates.
To turn off your phone
(1) Press and hold the power button for several seconds.
(2) A pop-up window appears, then tap “Power off”.
(3) Select “OK” to confirm.
To set your phone to the sleep mode
To set your phone to the sleep mode, press the power button briefly. It will turn the display off.
To turn the display on, press the power button briefly again.
1.5 Lock/Unlock
Unlock the device
Drag G icon on screen and slide to for unlocking the device.

Guru GX|7
LockScreen
(1) Tap Applications tab > .
(2) Tap “Activate” to turn on the function.
(3) Then, tap to lock screen.
1.6 Contacts
“Contacts” is your phonebook that you can store friends’ names, phone numbers, e-mail
addresses and other information. ”Contacts” can connect to your Google, corporate accounts,
and integrate your contact information.
Adding a Contact
(1) Tap Applications tab > .
(2) Tap > to add a new contact.
(3) Choose where you want to store the new contact with Google account, Phone, SIM1 or
SIM2.
(4) A new contact screen appears.
(5) Tap each field to fill out the contact information.
(6) Tap to save it.
NOTE:
The SIM card contact can’t add picture to contact information.
Searching for Contacts
On Contact Screen, follow the step to easily search for contacts:
• Tap to type the first few letters of the contact name to search. The list is filtered when
typing. When finishing searching, you could tap to go back to the contacts screen.
1.7 The Home Screen
On Home Screen, you can quickly access common features and view notifications of missed
calls, received messages, battery, and the status of the connection.
Default Home Screen: Main functions.
Icons Descriptions
Favorites Tray can keep your most
important shortcuts and folders.

Guru GX|8
You can slide the Home Screen from the left side to the right side or from the right side to the
left side to switch it. The icons located at the bottom of the home page have different functions:
Self-defined Home Screen: You can add the shortcuts and widgets.
Tap to launch Application Drawer.
Icons Functions
Tethering or hotspot active
Tap to turn on/ off network.
Enable/disable Wi-Fi.
Enable/disable Bluetooth.
Enable/disable Google Location Service™.
Enable/disable Data Synchronization.
Tap to adjust the brightness.

Guru GX|9
Status Icons
The icons of the status bar indicate different types of information. Tap the status bar and scroll
down to view notifications or view system information.
Types
Icons
Descriptions
Phone call
Call is in progress.
Your call is on hold.
Mute the call.
Speaker is on.
Missed call.
Volume
Vibration is on.
Wired headset connected.
Battery
Battery is full.
Battery is low.
Battery is very low.
Battery is charging.
Network
and
Connection
Maximum signal strength. Fewer bars indicate lower signal strength.
Left icon is SIM1 signal (WCDMA+GSM+4G). Right icon is SIM2
signal (GSM).
GPRS\EDGE\ 3G\ HSPA\ 4G is in progress.SIM1 supports GPRS\
EDGE\ 3G\ HSPA\ 4G networks.SIM2 supports GPRS\ EDGE
networks.
Wi-Fi is connected.
Wi-Fi is in progress.
Wi-Fi Network is activated.
Airplane mode.
Portable Wi-Fi hotspot is activated.
Both USB tethering and Portable Wi-Fi hotspot are activated.
Bluetooth is on.
The device is connected to PC via the USB cable.
Notification
New text message.
New e-mail.
New Gmail.
Alarm.
Event notification.

Guru GX|10
Types
Icons
Descriptions
General notification.
FM radio is on.
Playing a song.
Downloading an application.

Guru GX|11
2. Phone Functions &Messages
2.1 Voice Calls
To make a call from the Phone screen
(1) Go to the Phone screen.
(2) Use the keypad to input phone numbers.
(3) Tap to make the phone call.
NOTE:
1. Tap to delete a number. Tap and hold to erase entire numbers.
To make a call from Contacts
(1) Tap Applications tab > .
(2) Tap .
(3) Tap a contact you want to call.
To make emergency calls
You have to unlock your device before making an emergency call. Enter the international
emergency number 112 to make the emergency call.
Answering a call
When there is an incoming call:
The phone will ring with the ring volume is turned on.
A notification message will appear on the screen.
Ending a call
Tap . It’s the end icon to end a call.
2.2 Creating and sending a text message
Your phone offers several ways to create and send a new text message.
From Message screen
(1) Tap Applications tab > .
(2) Tap to create a new message.
(3) In the “Type name or number” field, enter the recipient’s phone numbers or tap to add
from your contacts.
(4) Type your message in the “Type text message” field.
(5) Tap to send your message.
From Contact screen
(1) Tap Applications tab > .
(2) Tap a contact to display the contact information.
(3) Tap the icon to send the message.
(4) Compose your message.
(5) Tap to send your message.
NOTE:
If you exit Messages before sending, unsent message will be saved as a draft
automatically.

Guru GX|12
Google keyboard
2.3 Multimedia Message
A Multimedia message or MMS can contain letters, an image, an audio, or a video file.
To send MMS from Message screen
(1) Tap Applications tab > .
(2) Tap to create a new message.
(3) Enter the recipient’s phone numbers in the “Type name or number” field
(4) Tap to attach picture, video, record audio, contact, pictures, videos, audio or calendar.
The message converts to a MMS message automatically.
(5) Enter your message with the on-screen keyboard in “Type text message” filed.
(6) Tap to send your message.
Icons Function
Tap to active Capital letter mode.
Tap to activate the symbols and numerical keyboard.
Tap to input symbols.
Tap to delete words.

Guru GX|13
3. Wi-Fi & Bluetooth
3.1 Wi-Fi
Your device can connect to the detected network through Wi-Fi.
(1) Tap Applications tab > > WLAN.
(2) Switch to turn “Wi-Fi” on or off.
To connect to a Wi-Fi network
(1) Tap “WLAN”, check Wi-Fi function and turn it on. Begin to search the available Wi-Fi
networks.
(2) Detected networks are displayed below. Tap one network then tap “Connect”.
(3) If you select an open network, the connection is established automatically.
(4) To connect a secured connection, you will be prompted for the password. Enter the
password then tap “Connect”.
(5) When Wi-Fi is connected, the connection icon will be displayed on the status bar.
To add Wi-Fi network
(1) Tap Applications tab > > WLAN.
(2) In Wi-Fi screen, tap . An on-screen window will pop-up.
(3) Follow the on-screen instructions and enter the necessary information, then tap “Save” to
save the settings.
3.2 Bluetooth
Bluetooth on your phone operates in three different modes:
On: Bluetooth is turned on. Your phone detects other Bluetooth devices, but your phone is
not visible to others.
Discoverable: Bluetooth is turned on and your phone is visible to other Bluetooth devices.
Off: Bluetooth is turned off.
To turn Bluetooth on or off
(1) Tap Applications tab > > Bluetooth.
(2) Switch or tap to turn it on.
(3) Tap “Bluetooth” to view the menu options.
(4) Tap the device’s name to make your device visible to others.
To connect to Bluetooth devices
A connection to a Bluetooth device is called a partnership. You need to pair and create a
partnership with a Bluetooth device to exchange information.
(1) Tap Applications tab > > Bluetooth.
(2) Tap “SEARCH FOR DEVICES” to search for a new device.
(3) Detected Bluetooth devices are displayed on the screen. Tap one device to connect.
(4) Start to pair, enter the password, and then tap “OK” to finish pairing.

Guru GX|14
4. Multimedia Applications
4.1 Camera
Your phone is equipped with an 13MP camera to take photos and videos.
Camera Function
Icon
Function
Icon
Function
Switch between
photo and video
mode.
Color Effect
mode.
Tap to take a
photo.
Display the flash
mode.
Tap to record a
video.
Switch between
rear and front
camera.
Displays the last
image.
Configure
camera settings.
Taking a photo
(1) Tap Applications tab > . The screen switches to landscape view automatically.
(2) Tap to take a picture.
Recording a video
(1) Tap Applications tab > .
(2) Switch to recorder mode.
(3) Aim the phone at the subject.
(4) Tap to start to record, tap again to stop recording.

Guru GX|15
4.2 Music
You have to copy your audio files to the storage card before playing music, because the music
player only plays audio files saved in the storage card of your phone. Tap Applications tab >
.
Playback screen: Displays the playback area with the playback controls.
Icon Function
To adjust the volume
Slide to go forward or backward
To play the song
To pause the song
Previous song
Next song
To switch play mode
To share the song
Add the song to favorites file

Guru GX|16
5. Pre-Installed Programs Introduction
Icons
Programs Description Icons
Programs Description
Best
Choice
Recommended the
best software and
functionality.
Browser
Browses the web
and download files
from Internet.
Calculator
Performs arithmetic
functions, such as
addition, subtraction,
multiplication, and
division, etc.
Calendar
Creates and tracks
schedule or
appointments.
Camera
Captures still images.
Chrome™
Browser service.
Clock
Sets up alarm clock.
People
Stores names,
numbers, e-mail,
and other
information.
Downloads
To view files and
items you've
downloaded.
Email
Sends and
receives e-mail
messages.
YouTube™
It is online video
streaming service that
to view, search, and
upload videos.
FM Radio
Listen to
music/news on the
FM Radio.
File Manager
Manages all files.
Gmail™
Web-based e-mail
service.
Gallery
Views and edits
photos and videos.
Google
Settings
Shortcuts to your
Google+ settings,
Maps& Latitude,
Location, Search,
and Ads.
Google
Google Now service.
Hangouts™
Instant messaging
program.
Google+™
Checks friends’
updates and post
updates of your own.
Messaging
Sends and
receives all types
of messages.
Play Music
Listening to your music
collection anywhere.
Sound
Recorder
Records a voice
note.
Maps™
Mapping service for
searching places you
want.
Play Games
Google game
center.
Music
Plays and manages
the music and audio
files.
Drive™
Google Drive
to store files with
Google Docs.
Play
Newsstand
News services.
Photos
Google service to
edit and back up
pictures.
Play Books™
E-book Store .
SIM Toolkit
It enables the
SIM to initiate
actions.
Play™ store
To find applications
which you can
download and install
on your phone.
Compass
Navigational
instrument for
finding directions.

Guru GX|17
Icons
Programs Description Icons
Programs Description
System
update
Checking the system
update information.
Battery
Doctor
To save juice and
extend battery life
significantly.
Voice
Search
Quickly to search your
phone, the web, and
nearby locations by
speaking.
News &
Weather
Understand news
and weather today
Clean Master
clearing cache,
residual files, privacy
data and uninstalling
apps.
WPS Office
Document
processing app
CM Security
Scan your device to
protect from virus
Phone
Makes and
receives phone
calls.
Lock Screen
C
ontrol how and when
the screen locks
Play Movies
& TV
Movie and TV
program player
Settings
Set up your phone
WirelesDisk
Connect your
phone and
computer with
Wi-Fi network.
Portable
Hotspot
Portable Hotspot
service.
Video player
Play videos.
6. Managing Your Phone
6.1 Protecting Your Phone
You can protect your phone from unauthorized users in a few different ways.
Set up PIN Protection
(1) Tap Applications tab > > Security > Screen lock > PIN.
(2) Enter your PIN, and then, tap “Continue”. Confirm your password, then, tap “OK”.
(3) If you want to disable screen lock security, please tap Application Drawer > > APPS
tab > Security > Screen lock. Confirm your PIN, and then, tap “Continue”. Tap “None” to
disable it.
Set up Unlock Pattern
You can further secure your data by locking the screen and requiring a screen unlock pattern
every time after your phone is turned on or it wakes up from the sleep mode every time (screen
is off ).
(1) Tap Applications tab > > Security > Screen lock > Pattern.
(2) Draw the unlock pattern by connecting at least four dots. Then tap “Continue”.
(3) Draw the unlock pattern again, and then, tap “Confirm”.
(4) If you want to disable the function, please tap Applications tab > > Security > Screen
lock. Confirm the saved pattern, and then, tap “None” to disable it.
Set up Face Unlock
You can use front-facing shot to verify your identity to unlock your phone.
(1) Tap Applications tab > > Security > Screen lock > Face Unlock.
(2) Tap Set it up > Continue.
(3) Show your face in front of your phone until face captured. Then tap continue.
(4) Set up Pattern or PIN as the backup lock.

Guru GX|18
(5) If you want to disable the function, please tap Applications tab > > Security > Screen
lock. Confirm the saved pattern, and then, tap “None” to disable it.
Enable the PIN of the SIM card
When the PIN is enabled, you are required to enter the PIN before using the phone.
(1) Tap Applications tab > > Security > Set up SIM/RUIM card lock.
(2) Tap “SIM1” or “SIM2”. (If SIM2 inserted).
(3) Check “Lock SIM card”. Input the PIN, and then, tap “OK”.
6.2 Reset Your Phone
With Clean Boot, you can reset your phone to its factory defaults. When you reset your phone,
the data stored in your phone may be erased.
(1) Tap Applications tab > > Reset to factory settings .
(2) Tap Factory data reset> Reset phone > Erase everything to reset the phone.
NOTE:
Before resetting your device, please remember to back up all your data and information.
7. Specifications
System Information
Platform Android™ 4.4
Processor
1.5GHz Octa Core
Memory
ROM 32GB/ RAM 2GB
Display
Size 5”
Resolutions
1920 x 1080pixels
Size
Dimensions 139 x 69 x 7 mm (L x W x H)
Weight 115 grams with battery
Power
Battery Li-ion pack 2300mAh
Power Adapter AC
input
100-240V, 50/60Hz,
0.2A max.
DC output 5V, 1A
Standby time
Up to 200 hours (It may vary depending on networks and the individual
usage.)
Talk time
Up to 14 hours (It may vary depending on networks and the individual
usage.)
Radio Band & Standard
LTE 800/1800/2600MHz(Band 3, Band 7, Band 20)
GSM/GPRS/EDGE 850/ 900/ 1800/1900 MHz
WCDMA/HSDPA 900/ 2100 MHz
Connectivity
GPS GPS, AGPS, GLONASS
Wi-Fi WLAN 802.11 b/g/n
Bluetooth Bluetooth 4.0
USB Micro USB

Guru GX|19
Audio Jack 3.5 mm stereo audio jack
Digital Camera
Rear Camera 13MP Color Camera with AF and Video Recording
Front Camera 5MP
External Memory
Memory Card Micro SD supports up to 64GB
Temperature
Operating 0°C to 40°C
SIM Card Slot
Dual SIM card slot.
NOTE:
1. Specifications and accessories may differ subject to different SKUs or/and regions.
The specification is subject to change without prior notice.
2. Mobile data interruption, unexpected error in CPU and high power consumption
could be caused by in-app AD in Android phone. We suggest you try to remove
those apps with AD which had been installed in your device for preventing any
abnormal situation happens and saving more power as well.
3. Memory comprises of approximately 5 GB firmware, plus 27 GB of “Phone storage”
for downloaded applications and their data, music, pictures, videos and documents.
If this document is modified, please download the latest version on GSmart official
website.www.gigabytecm.com
Android, Google, Google Play and other marks are trademarks of Google Inc.
/