Page is loading ...

User Guide
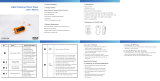
Take Your Music There
SOUN D W AV E MP3 PLAYER
©
©

TABLE OF CONTENTS
General Information
Safety First . . . . . . . . . . . . . . . . . . . . . . . . . . . . . . . . . . . . . . . . . . . . . . . . . . .
Use and Care . . . . . . . . . . . . . . . . . . . . . . . . . . . . . . . . . . . . . . . . . . . . . . . . .
System Requirements . . . . . . . . . . . . . . . . . . . . . . . . . . . . . . . . . . . . . . . .
Player Overview . . . . . . . . . . . . . . . . . . . . . . . . . . . . . . . . . . . . . . . . . . . . . .
Getting Started
Charging your MP3 Player . . . . . . . . . . . . . . . . . . . . . . . . . . . . . . . . . . . .
Before Loading Music on Player . . . . . . . . . . . . . . . . . . . . . . . . . . . . . . .
Basic Operations
Turning On Player . . . . . . . . . . . . . . . . . . . . . . . . . . . . . . . . . . . . . . . .
Menu Selections . . . . . . . . . . . . . . . . . . . . . . . . . . . . . . . . . . . . . . . . .
Screen Overview . . . . . . . . . . . . . . . . . . . . . . . . . . . . . . . . . . . . . . . . .
Battery Indicator . . . . . . . . . . . . . . . . . . . . . . . . . . . . . . . . . . . . . . . . .
Play/Pause/Stop Music . . . . . . . . . . . . . . . . . . . . . . . . . . . . . . . . . . .
Vol/Next/Prev . . . . . . . . . . . . . . . . . . . . . . . . . . . . . . . . . . . . . . . . . . . .
Digital Music & FM Settings Mode . . . . . . . . . . . . . . . . . . . . . . . . . . . . .
Advanced Settings . . . . . . . . . . . . . . . . . . . . . . . . . . . . . . . . . . . . . . . . . . .
System Settings . . . . . . . . . . . . . . . . . . . . . . . . . . . . . . . . . . . . . . . . . . . . . .
Loading Music . . . . . . . . . . . . . . . . . . . . . . . . . . . . . . . . . . . . . . . . . . . . . . .
Warranty . . . . . . . . . . . . . . . . . . . . . . . . . . . . . . . . . . . . . . . . . . . . . . . . . . . . .
FCC Information . . . . . . . . . . . . . . . . . . . . . . . . . . . . . . . . . . . . . . . . . . . . . .
Technical Specs . . . . . . . . . . . . . . . . . . . . . . . . . . . . . . . . . . . . . . . . . . . . . .
2
3
4
4
4
6
7
9
9
9
10
10
10
11
17
18
20
25
27
28

PRODUCT CARE
Safety First
For Customer Care, please visit us online at www.freestyleaudio.com
© Freestyle Audio LLC. All rights reserved.
Please read the warnings below carefully before using the product.
The company is not responsible for damage, data loss, or accidents occurring from not
fully following the warnings below.
1. Do not use the product for purposes
other than described in this manual.
2. Headset jack must be fully inserted
before unit is submerged in water.
3. Do not use the device or store it in
places with high temperature, humidity,
fast temperature change, or strong
magnetic fields.
4 Rinse player and earbuds with fresh
water after use in salt water or chlorine.
5. Do not disassemble your unit.
Disassembly will void your warranty.
6. Continuous use of earbuds for many
hours at high volumes may cause
permanent hearing loss.
8. Plug or unplug the earbuds and cable
by holding the plugs. Pulling out the
earbuds or USB cable by the cable can
cause damage to the unit.
9. When you plug the USB jack into the
computer or device, check that you are
plugging in the correct ends to avoid
damage to the computer or device.
10. Do not leave the USB jack plugged
into the computer.
11. Do not stress the connector part of the
USB jack while it is connected to the
device.
12. Maintain and keep the USB connection
of the device free of dirt.
13. When the device becomes dusty or dirty,
please wipe off with a soft cloth or clean
towel. Do not use chemicals or solvents.
14. Unit can be submerged in and out of
water while participating in active sports
up to 10 feet.
15. Your player is designed to float. The included
Freestyle Audio Floater should be attached to
your headphones to ensure when the
headphones are attached to the player both
will float. Failure to attach the floater to the
headset may limit buoyancy.
IMPORTANT SAFETY INFORMATION
Avoid listening at high volumes where outside sounds may
become inaudible. Exercise caution using unit while engaged
in activities (walking, jogging, cycling, surfing, snowboarding,
wakeboarding, swimming etc.) which may bring you in contact
with vehicular or pedestrian traffic. Avoid listening in situations
where hearing must not be impaired, for example while driving
or cycling, etc. Never use unit while operating a motorized
vehicle. It may create a traffic hazard and is illegal in many areas.
Do not listen at volumes high enough to injure ear. Some
studies have concluded that prolonged and extensive
exposure to noise in excess of 95dB may impair hearing.
3

1
2
System Requirements - What You Need
Use and Care
•
•
•
Intel Pentium II 300 MHZ or Higher
Salt water and chlorinated water are highly corrosive. Failure to adequately maintain
your player and waterproof headphones may significantly shorten their lifespan.
After each use, rinse your waterproof headphones and player thoroughly with fresh
water to remove any corrosive materials. Allow to air dry before using again.
An availiable USB port, the device will perform better on a direct USB port,
Operating Systems Supported:
Windows 2000/XP/Vista
Mac OS 9.6 and above
4
3
Player Overview
Earphone Jack & USB Interface
Note: Each buttons has
multiple functions.
D isplay Screen
V olume Button
Play / Pause
Track F orward
M enu
Track Back
not a Hub, Keyboard or Monitor port.

3
Player Overview
1. MENU
Shows the root menus: Music, FM, Player Settings
2. PLAY/PAUSE/POWER
Power On/Off, Play, Pause
3. VOL
Volume Control Option
Lock/Unlock all keys (when held)
4. PREV
Previous Song
Volume Down (Pressed after VOL button)
Rewind (when held)
5. NEXT
Next Song
Volume Up (pressed after VOL button)
Note: Length of time each button is pushed changes the functionality,
Short Press less than 2 seconds
Long Press 2 seconds – 5 seconds
Hold greater than 5 seconds
Double Press two quick presses
Note: From time to time it may be necessary to “reset your player”. To do this, simply
press and hold the Play/Pause and Menu B utton simultaneously for approximately 5 seconds.
The screen will go blank and the player will reset.
5
M ute (when double click ed)
F ast F orward (when held)
from here on out the duration that the button should be pressed
will be denoted as such:

4
Charging the MP3 Player by USB Cable
1. Connect USB cable into the earphone jack of your MP3 Player.
2. Connect the other end of the USB cable into a USB port on your computer.
3. A window up may appear on your screen upon connection
4. Charging will automatically begin when the Player is connected and your computer
is turned on. It takes about 5 - 7 hours to completely recharge a fully discharged
battery; initial charge may take longer. We recommend you perform your intial
5. While charging the battery, indicator status display will intermittently flash until
the process is complete. When the status display is a solid color, the mp3 player
is fully charged and ready to use.
PLAYER MUST BE FULLY CHARGED PRIOR TO INITIAL USE!
6
at this time you may close the window.
F aliure to fully charge player may significantly shorten battery life
N ote: M usic can be uploaded to the player during intial charge
charge overnight.

5
Before Loading Music on Player
• Your MP3 Player supports MP3, WMA, and Subscription music services.
• Your MP3 Player has two operating modes designed to provide specific song and file
capabilities:
• Portable Media Player (PMP) – designed to work with Microsoft Windows Media
Player (WMP) to load and manage your music files and playlists contained in WMP
onto the player. You can also ‘drag & drop’ or ‘copy & paste’ music files directly from
the hard drive of your computer onto your player in PMP mode.
• Portable Storage Device (PSD) – designed to load and manage music files directly
from the hard drive of your computer onto your player. PSD mode must be used
when connecting the player to a MAC computer or to load converted iTunes music
files onto the player (MAC or PC). You can also ‘drag & drop’ or ‘copy & paste’ music
files directly from the hard drive of your computer onto your player in PSD mode.
Note: If you are loading digital rights protected (DRM) songs or subscription
music service songs onto the player you must use Portable Media Player mode
for these songs to play.
Note: You can load non-music files for storage onto your player in either mode.
• The easiest way to recognize which mode the player is in is by the location of the battery
indicator on the screen while plugged into your computer or laptop.
• Top Left = PMP mode (Portable Media Player)
• Top Right = PSD mode (Portable Storage Device)
• To switch between the two modes short press the Play/Pause/On/Off button (middle top)
while device is connected to your computer. The unit will initially be in the Portable
Media Player mode.
7

5
Before Loading Music on Player
• To change the default mode from PMP mode to PSD mode when not connected
to a computer, long press the
<MENU> button and select SETTINGS.
Short Press the
<NEXT> button
and select from the menuONLINE DEVICE
under select
USB DISK (PSD)
and this will change
the default setting from the MEDIA DEVICE setting. If you want to reset it to
MEDIA DEVICE (PMP) simply repeat these steps and select the MEDIA DEVICE (PMP)
setting.
• Windows Media Player allows you to organize songs and playlist and then sync them
to the player. For more details and step-by-step instructions., please visit:
WMP9: http://www.microsoft.com/windows/windowsmedia/player/9series/howto.aspx
WMP10: http://www.microsoft.com/windows/windowsmedia/player/10/default.aspx
WMP11: http://www.microsoft.com/windows/windowsmedia/player/11/default.aspx
• Folders named Albums, Music, and Playlists are visible in both the PMP and PSD modes
on your player. If you use Windows Media Player to transfer music, the songs, albums and/or
playlists will be visible and stored in these folders in both PMP and PSD mode views.
Note: If you do not see the folders Albums, Music and Playlists in either mode you may
have your computer settings so you are not able to view all folders. To enable viewing
of all folders on your computer simply click the START button on your computer (bottom left)
and then click the MY COMPUTER button. Next click on the TOOLS dropdown menu and
select FOLDER OPTIONS. In the FOLDER OPTIONS click on the VIEW tab and turn on the
SHOW HIDDEN FILES AND FOLDERS option. You must click the APPLY and/or OK button
for this change to take effect.
8
ONLINE DEVICE

6
Basic Operations
Turn On
To turn the player on, long press the <PLAY> Button.
Menu Selections
The menu button has three options:
Long press <MENU> button to select between Music, FM and Settings. Press
<NEXT> OR <PREV> to view each option, and short press <MENU> to enter each
option mode and view the content of each. Long press <MENU> and exit to get
back to main menu.
EQ Mode
Repeat Mode
Bit/File Format
Song #
Play Time
Battery Indicator
Artist And Song Name
Music
FM Mode
Settings
9
Screen Overview
# Songs In
Playlist or Folder

6
Basic Operations
Battery Indicator
The battery indicator will deplete with use and show the amount of charge remaining
When the battery reaches 10% charge remaining the battery light will start flashing
indicating the need to recharge the battery. A fully charged battery will play up
to 18 hours of continuous music.
PLAY/PAUSE/STOP MUSIC
Short press <PLAY> to start music
When music is playing Short press
<PLAY> to pause the music
will continue to play from where it was paused
Long press <PLAY> to stop music from playing
VOL/NEXT/PREV
Short press <VOL> to enter the V olume menu,
Short press <PREV> to decrease volume
Short press <NEXT> to increase volume
Short press <MENU> to return to the play screen
Double press <VOL> to mute all sound
Long press <VOL> enable H old ( all keys locked ) Long P ress again to U nlock
Short press <NEXT/PREV> to play next/previous song
10

6
Basic Operations
Digital Music & FM Mode Settings
Digital Music Settings
In MUSIC mode you can select what music you want to listen to through a
options. L ong Press to return to the root menu, and select
Then short press <MENU> to enter any of the
subset listening options
(see diagram below).
Short press to enter the Playlist menu
Short press <PREV/NEXT> to select a playlist
Short press <MENU> to play the song in your selected playlist
You can listen to music by your loaded playlist, name of artist, album, genre or composer.
11
Exit
Delete All
Delete File
Local Folder
License Info
Genre
Album
Artist
Playlist
<MENU>
MUSIC
<PREV/NEXT>
v ariety of sort orders. U se the Buttons to cycle through the
<MENU>
Example:

6
Basic Operations
Song Play Order Options
Listen To All of Your Loaded Songs
Your mp3 player stores all music of your music in a folder called: LOCAL FOLDER
and will play songs in the order in which you have placed them onto the player.
If you turn the player off
it will restart at the song it left off on
You can create individual folders in the LOCAL FOLDER to organiz e songs from
various artists (similar to a playlist). These folders allow you to create custom play orders
To create a custom folder, the player can be in either Portable Media Player (PMP)
Portable Storage Device (PSD) mode while connected to your computer. The unit is
initially in the PMP mode.
To switch between the two modes press the Play/Pause/On/Off button
(middle top) while device is connected to your computer. The unit will initially
be in the Portable Media Player mode.
Then right click your mouse and select the NEW and then FOLDER options and
name your new custom folder. You can then drag and drop or copy and paste
songs into this folder and then move the folder into the MUSIC
folder to have this subset of songs from this folder available as a folder in the
LOCAL FOLDER setting available for listening.
While the player is playing a song simply short press <PLAY>to
PAUSE
. Then
short press <MENU> to go to LOCAL FOLDER to see a list of all the folders on the
mp3 player. You can scroll up and down using the NEXT and PREV buttons to view all
folders and when you find the one you want simply press and hold the MENU button and
it will load and play. If you turn the player off when you turn it back on it will resume play
in the exact spot of the song from the FOLDER you selected.
12

6
Basic Operations
Song Play Order Options (continued)
While the player is playing a song simply short press <PLAY>to the song.
PAUSE
.
Then short press <MENU> to go to PLAYLIST, ARTIST, or ALBUM. You can scroll up
and down using the <NEXT> and <PREV> buttons to view all available playlists, artists
or albums and when you find the one you want simply press and hold the <MENU>
button and it will load and play.
When you turn the player off, the next time you turn it on the player will reset to
the master local folder and start at the first song in the order in which you originally
placed them onto the player from the first to the last one added. You can once again
select a specific subset for your new listening session.
License Info
For any given song you can select the LICENSE INFO option to determine if there are
any play limitations on the song. For example, if the song is a WMA DRM protected
song it may only be allowed to be played a certain number of times or if it is a
subscription music DRM song it may only be able to play for a certain number of
days before you will need to SYNC with Windows Media Player (WMP) while
connected to the Internet to update the DRM license.
While the player is playing a song simply short press <PLAY> to set it to PAUSE.
Then short press <MENU> to go to LICENSE INFO to see if there are any limitations on
the song. If there are they will be listed and if there are not it will return to the song on
screen in the PAUSE mode.
13

6
Basic Operations
Song Play Order Options (continued)
Local Folder/Delete File/Delete All
.
Then short press <MENU> to go to LOCAL FOLDER and you can view all of the
individual artist folders, press the
DELETE FILE or to delete eitherDELETE ALL
individual folders, or all folders from the player as an alternative to
14
While the player is playing a song simply short press <PLAY>to the song.
PAUSE
doing this on your computer.

6
Basic Operations
FM Mode Setting
To listen to FM radio stations, simply select FM Mode in the <MENU> setting.
Short press <PREV/NEXT> to move up and down station band
Short press <MENU> to perform the following functions in FM MODE
• Save Save the radio station
• Delete Delete the radio station
• Delete All Delete all radio stations
• Auto Search Auto Search within band
• Normal Band 87-108MHz
• Exit Exit to main menu
Short press <PLAY> to scroll through and select a preset station
Long press <MENU> to exit to the root menu
15

6
Basic Operations
Settings
While music is playing, short press <MENU> to open the music settings menu.
Repeat
When a song is playing, short press <MENU>
Short press <NEXT> or <PREV> buttons, and select REPEAT.
Other options include: Normal, Repeat One, Folder, Repeat Folder, Repeat All, Random, Intro.
Folder Plays the songs in your selected folder
Repeat Folder Plays all songs in the folder, then repeats
Repeat All Plays all songs, then repeats them
Random Plays music files in current folder randomly (Shuffle)
Intro Plays first 10 seconds of each song in previous folder
Normal Plays all songs and then stops
Repeat One Repeats selected song
Equalizer Options
While playing music, short press <MENU>
Short press <NEXT> or <PREV> buttons and select EQUALIZER.
Options include: NATU (NATURAL), ROCK, POP, CLASSIC, SOFT, JAZZ, and DBB
16
Repeat
Equalizer
SRS WOW Mode
Exit

6
Basic Operations
Advanced Settings (optional)
Online Device
Simply long press <MENU> button and select SETTINGS.
Short press <NEXT> or <PREV> buttons and select Online Device.
You can then change default setting to either P SD or Media Device.
From time to time Freestyle Audio will offer updated software as new enhancements
become available as a download from our website, www.freestyleaudio.com/ support.php.
You will need to place your player in the P SD mode to do this. Detailed instructions
will be provided to download and update your software on our website when this is
offered.
SRS WOW Sound Enhancer Mode
While playing music, short press <MENU>
Short press <NEXT> or <PREV> buttons and select SRS WOW
This feature Improves sound quality and enhances bass options.
17
Note: SRS WOW will shorten battery life when turned on.

6
Basic Operations
System Settings
S ystem settings are used to customiz e the way your player f unctions and
SETTINGS mode in <MENU>
.
LCD Set
18
LCD Set
Language
Power Off
Online Device
Memory Info
DRM Time
Exit
provdes critical information about your player. To edit them select
To conserve the battery, the unit has a screen saver option. Go to SETTINGS, LCD SET
and SCREEN SAVER TIME to set a screen power down time. The unit will continue to
play when this option is selected.

6
Basic Operations
System Settings (continued)
Language
To view, go to SETTINGS mode in <MENU>. To set language
select LANGUAGE mode
Short press <NEXT/PREV> to select
Short press <MENU> to confirm
Long press <MENU> to exit
Available languages include:
English, French, German, Italian, Dutch, Portuguese, Spanish, Swedish, Czech, Polish, Finnish, Danish,
Hungarian, Slovak, Simple Chinese, Trad Chinese, Japanese, Korean, Russian, Hebrew and Thai.
Power Off
To conserve the battery, the unit has a POWER OFF timer option. Go to SETTINGS,
POWER OFF, and <MENU> to set the automatic power off time.
Online Device
Simply long press <MENU> button and select SETTINGS.
Short press <NEXT> or <PREV> buttons and select Online Device.
You can then change default setting to either USB or Media Device.
Memory info
To view how much memory is still available, go to SETTINGS mode in <MENU> and
select MEMORY INFO mode.
DRM Time
To view the date you last performed a SYNC with Windows Media Player (WMP) to
update the DRM and subscription music license which allows the mp3 player to
play protected songs go to SETTINGS mode in <MENU> and select DRM Time
mode.
19

7
Loading Music
General Information about your player modes and folders
It is best to work with only one of the two player modes to store and view your music to
ensure you can see all of your music files. If you are using Windows Media Player to transfer
music onto your player or a subscription music service you should use the PMP mode.
If you are transferring converted iTunes onto your player you should use the PSD mode.
Note: if you ‘drag and drop’ songs in PMP mode onto the player you should place them in
the songs folder. These songs are visible in the PMP mode only. If you ‘drag and drop’
songs in PSD mode onto the player you should place them in the songs folder. Similarly,
these songs are visible in the PSD mode only.
In PMP mode you will see an hour glass and % icon on the OLED screen after you load
music and disconnect you player from your computer. This denotes the generation of the
table of indexes of the songs on the player allowing you to view and then play your songs,
playlists, artists, albums, etc. When it reaches 100% this process is complete.
Folders named Albums, Music, and Playlists are visible in both the PMP and PSD modes
on your player. If you use Windows Media Player to transfer music, the songs, albums
and/or playlists will be visible and stored in these folders in both PMP and PSD mode views.
Note: If you do not see the folders Albums, Music and Playlists in either mode you may
have your computer settings so you are not able to view all folders. To enable viewing of all
folders simply click the START button on your computer (bottom left) and then click the
MY COMPUTER button. Next click on the TOOLS dropdown menu and select FOLDER
OPTIONS. In the FOLDER OPTIONS click on the VIEW tab and turn on the SHOW HIDDEN
FILES AND FOLDERS option. You must click the APPLY and/or OK button for this change
to take effect.
20
N OTE : DO N OT C H AN GE MODE S TO L OAD MUSIC IF YOU AR E N OT USIN G ITUN E S
/