Sluit als laatste de andere apparaten aan | Installez les autres périphériques en dernier | Letzter Schritt: Einrichten von Zubehör |
Ultimo: installazione delle altre periferiche | Configure los demás dispositivos en último lugar
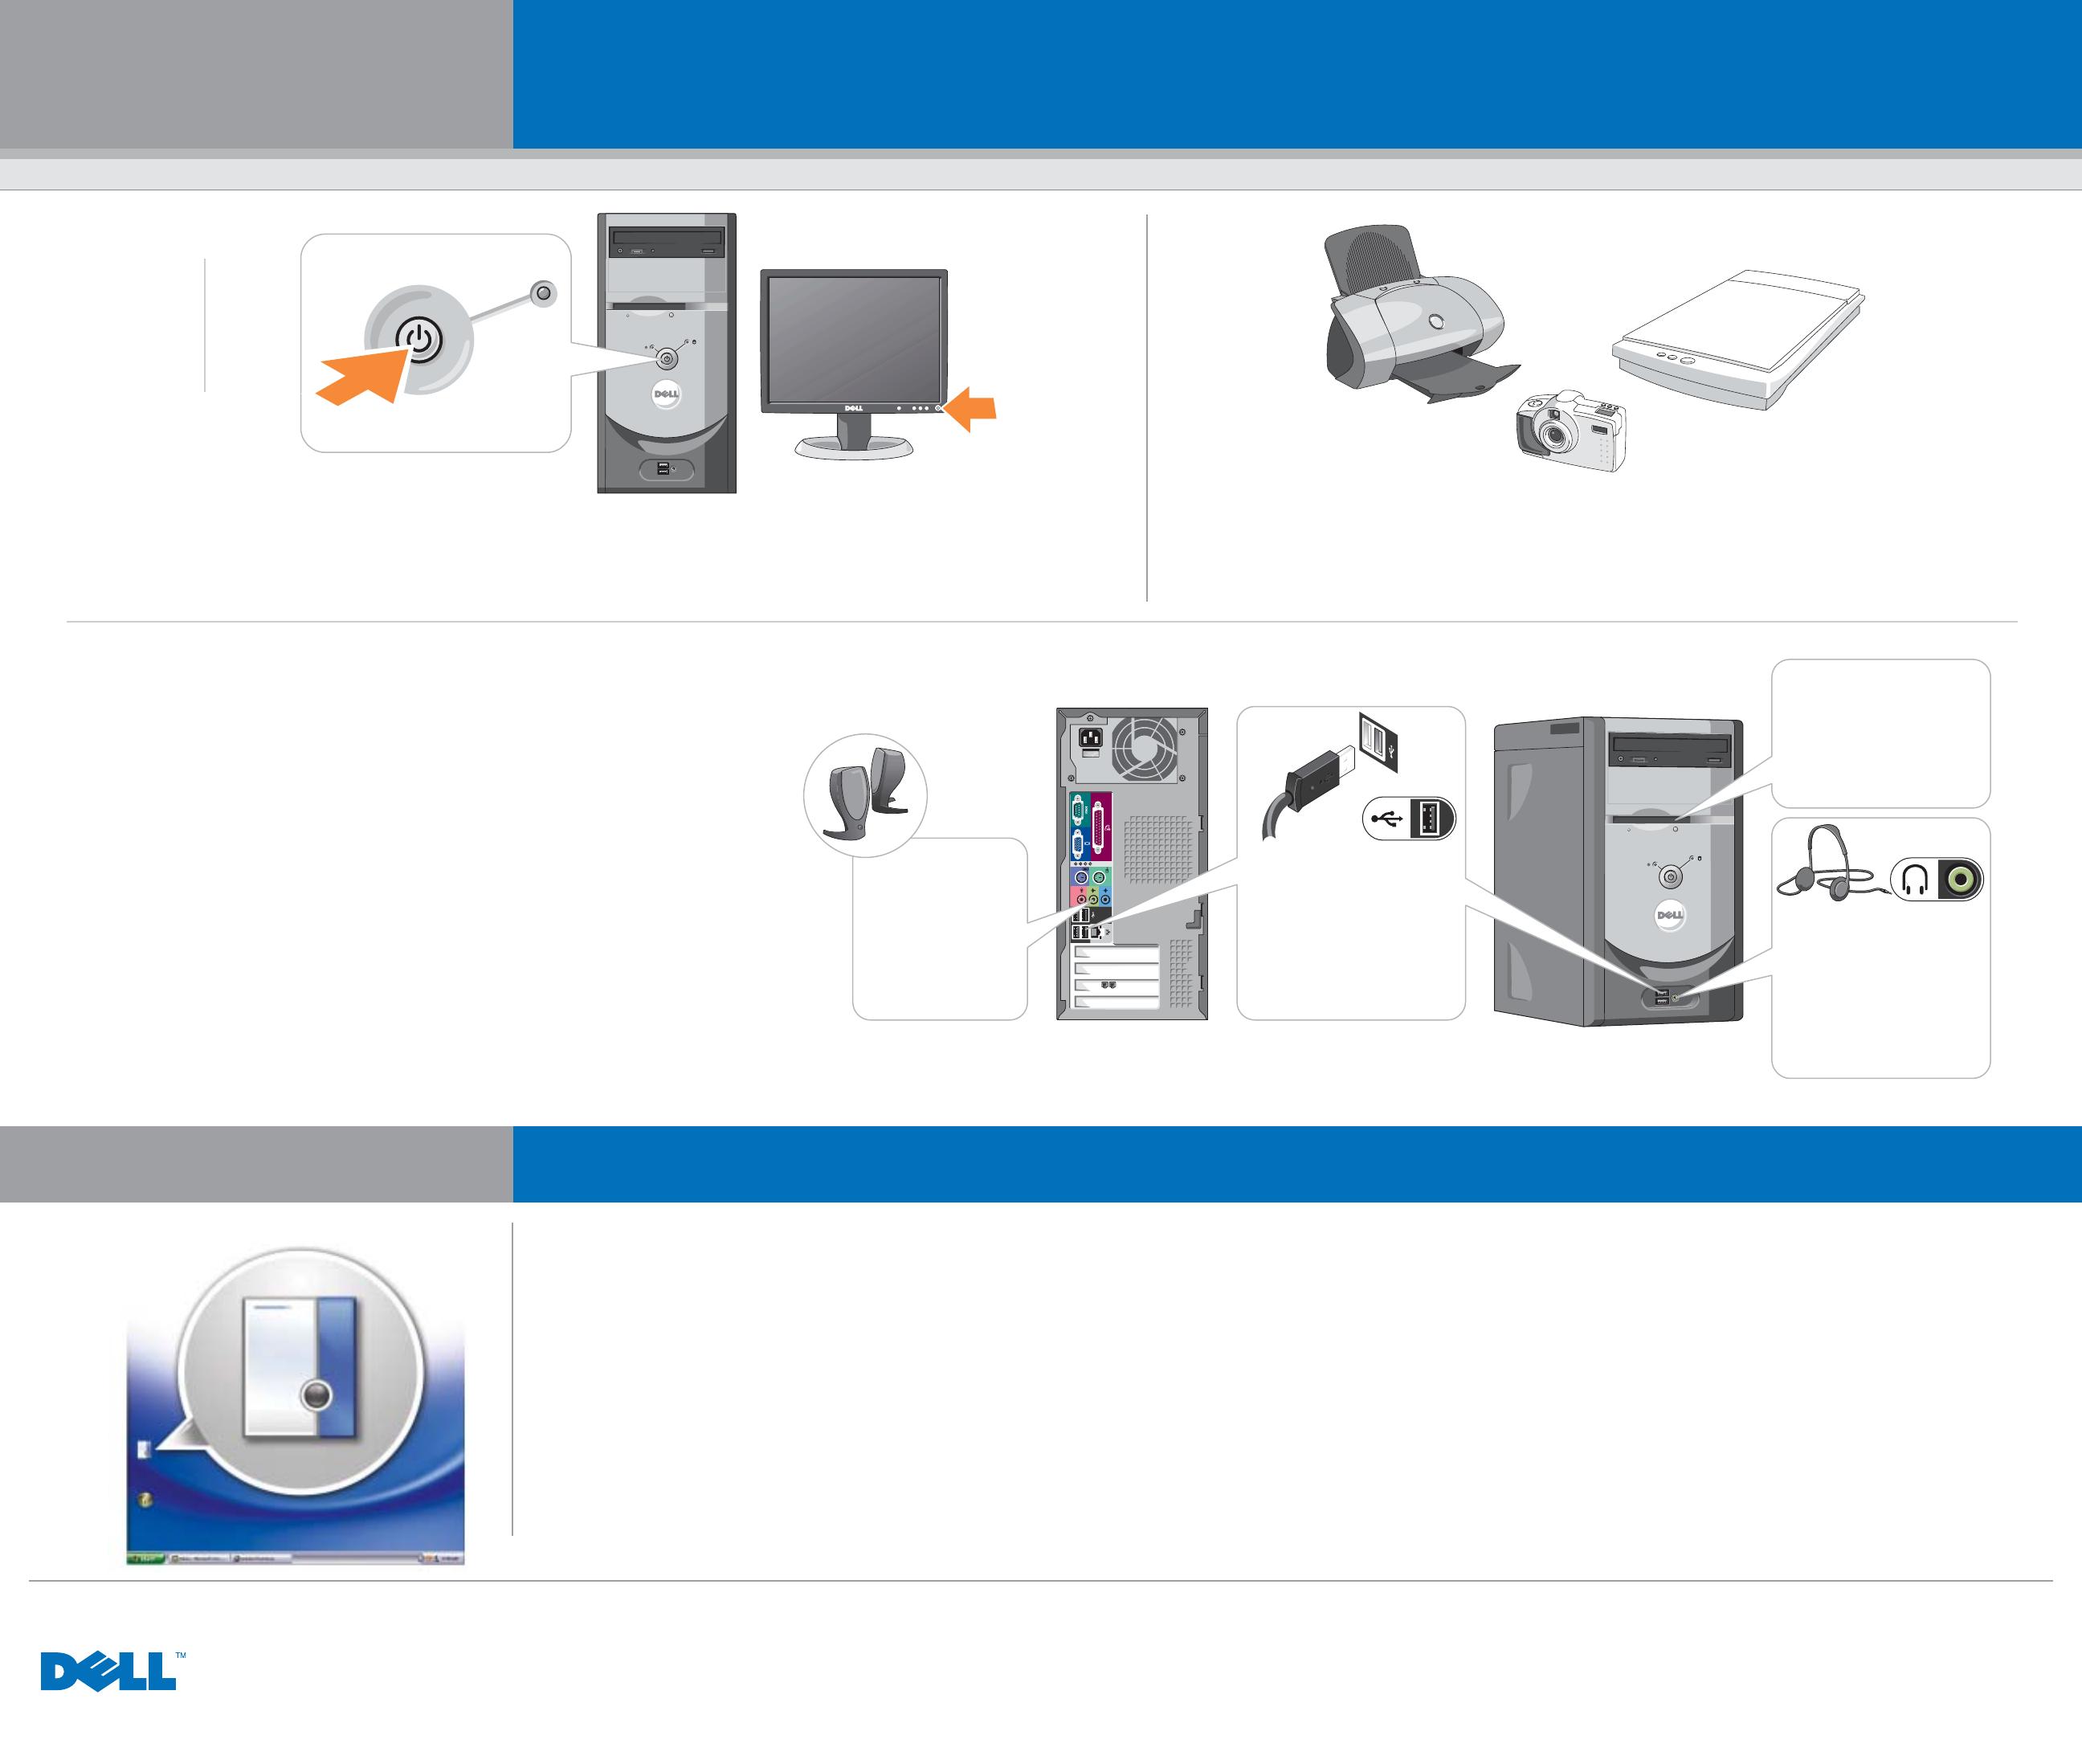
If your integrated sound connectors are covered by a cap, connect
your speakers to the optional sound-card connectors. Do not
remove the cap.
Als de connectors voor geïntegreerd geluid met een kapje zijn beveiligd, moet u de
speakers aansluiten op de optionele geluidskaartconnectors. Verwijder het kapje
niet.
Si vos connecteurs son intégré sont recouverts d'un capuchon, raccordez vos
haut-parleurs aux connecteurs de carte son en option. Ne retirez pas le capuchon.
Wenn die integrierten Audioanschlüsse mit Abdeckkappen versehen sind,
schließen Sie die Lautsprecher an den optionalen Sound-Kartenanschlüssen an.
Entfernen Sie nicht die Abdeckkappen.
Se i connettori audio integrato sono coperti da un cappuccio, collegare gli
altoparlanti ai connettori della scheda audio opzionale. Non rimuovere il
cappuccio.
Si los conectores de sonido integrado están cubiertos por una tapa, conecte los
altavoces a los conectores de tarjeta de sonido opcional. No quite la tapa.
Information in this document is subject to change without notice.
© 2004 Dell Inc. All rights reserved.
Reproduction in any manner whatsoever without the written
permission of Dell Inc. is strictly forbidden.
Dell
and the
DELL
logo are trademarks of Dell Inc.;
Microsoft
and
Windows
are registered trademarks of Microsoft Corporation.
Dell Inc. disclaims any proprietary interest in the marks and names
of others.
August 2004
De informatie in dit document kan zonder voorafgaande kennisgeving
worden gewijzigd.
© 2004 Dell Inc. Alle rechten voorbehouden.
Verveelvoudiging van dit materiaal, op welke wijze dan ook, is alleen
toegestaan na uitdrukkelijke, schriftelijke toestemming van Dell Inc.
Dell
en het
DELL
-logo zijn handelsmerk van Dell Inc.;
Microsoft
en
Windows
zijn gedeponeerde handelsmerk van Microsoft Corporation.
Dell Inc. heeft geen eigendomsrechten op de merken en namen van
anderen.
Augustus 2004
Les informations contenues dans ce document sont sujettes à
modification sans préavis.
© 2004 Dell Inc. Tous droits réservés.
La reproduction de ce document, de quelque manière que ce soit,
sans l'autorisation écrite de Dell Inc. est strictement interdite.
Dell
et le logo
DELL
sont des marques de Dell Inc. ;
Microsoft
et
Windows
sont des marques déposées de Microsoft Corporation.
Dell Inc. rejette tout intérêt propriétaire dans les marques et noms
appartenant à des tiers.
Août 2004
Die in diesem Dokument enthaltenen Informationen können sich
ohne vorherige Ankündigung ändern.
© 2004 Dell Inc. Alle Rechte vorbehalten.
Die Vervielfältigung oder Wiedergabe in jeglicher Weise ist ohne
schriftliche Genehmigung von Dell Inc. strengstens untersagt.
Dell
und das
DELL
Logo sind Markenzeichen von Dell Inc.;
Microsoft
und
Windows
sind eingetragene Markenzeichen der Microsoft
Corporation. Dell Inc. verzichtet auf alle Besitzrechte an Marken und
Namen, die nicht Eigentum von Dell sind.
August 2004
Le informazioni contenute in questo documento sono soggette a
modifica senza preavviso.
© 2004 Dell Inc. Tutti i diritti riservati.
È severamente vietata la riproduzione, con qualsiasi strumento, senza
l'autorizzazione scritta di Dell Inc.
Dell
ed il logo
DELL
sono marchi commerciali di Dell Inc.;
Microsoft
e
Windows
sono marchi depositati di Microsoft Corporation. Dell Inc.
nega qualsiasi partecipazione di proprietà relativa a marchi diversi da
quelli di sua proprietà.
Agosto 2004
La información contenida en este documento puede modificarse sin
aviso previo.
© 2004 Dell Inc. Todos los derechos reservados.
Queda prohibida su reproducción en cualquier medio sin la
autorización por escrito de Dell Inc.
Dell
y el logotipo de
DELL
son marcas comerciales de Dell Inc.;
Microsoft
y
Windows
son marcas comerciales registradas de
Microsoft Corporation. Dell Inc. renuncia a beneficiarse de los
derechos de propiedad de las marcas y nombres de otros.
Agosto 2004
To view your
Owner's Manual
: Double-click
the owner's manual icon on your
Microsoft
®
Windows
®
desktop.
To print your
Owner's Manual
: After you
complete printer setup, double-click the
owner's manual icon, and click the printer
icon in the toolbar.
For other information about your computer:
• Click the Start button and click
Help and Support.
• For help with the Windows
operating system, click Microsoft
Windows XP Tips.
U kunt de
Gebruikershandleiding
weergeven: door te dubbelklikken op het
desbetreffende pictogram op het
bureaublad van Microsoft
®
Windows
®
.
U kunt de
Gebruikershandleiding
afdrukken:
dubbelklik nadat de printersetup is voltooid
op het pictogram van de
gebruikershandleiding en klik vervolgens op
het printerpictogram in de werkbalk.
U vindt als volgt meer informatie over de
computer:
• Klik op Start en klik dan op Help en
ondersteuning.
• Voor hulp bij het besturingssysteem
Windows klikt u op Basiskennis van
Windows.
Pour afficher le
Manuel du propriétaire
:
Double-cliquez sur l'icône du manuel du
propriétaire située sur le bureau
Microsoft
®
Windows
®
.
Pour imprimer le
Manuel du propriétaire
:
Après l'installation de l'imprimante, double-
cliquez sur l'icône du manuel du
propriétaire, puis cliquez sur l'icône de
l'imprimante dans la barre d'outils.
Pour des informations supplémentaires sur
votre ordinateur :
• Cliquez sur le bouton Démarrer, puis sur
Aide et support.
• Pour obtenir de l'aide sur le système
d'exploitation Windows, cliquez sur
Astuces Microsoft Windows XP.
So erhalten Sie Zugang zum
Benutzer-
handbuch
: Doppelklicken Sie auf the das
Benutzerhandbuchsymbol auf dem
Microsoft
®
Windows
®
-Desktop.
So drucken Sie das
Benutzerhandbuch
aus:
Nachdem Sie das Drucker-Setup
abgeschlossen haben, doppelklicken Sie
auf das Benutzerhandbuchsymbol und
klicken Sie dann auf das Druckersymbol auf
der Symbolleiste.
Zusätzliche Informationen zu Ihrem Dell-
Computer:
• Klicken sie auf die Schaltfläche Start und
anschließend auf Hilfe und Support.
• Hilfe in Bezug auf das Windows-
Betriebssystem erhalten Sie, indem Sie
auf Microsoft Windows XP-Tipps klicken.
Per visualizzare il
Manuale del proprietario
:
fare doppio clic sull'icona del Manuale del
proprietario nel desktop di Microsoft
®
Windows
®
.
Per stampare il
Manuale del proprietario
:
dopo aver completato la configurazione
della stampante, fare doppio clic sull'icona
del Manuale del proprietario, quindi fare
clic sull'icona della stampante nella barra
degli strumenti.
Per altre informazioni sul computer:
• Fare clic sul pulsante Start e su Guida in
linea e supporto tecnico.
• Fare clic su Suggerimenti per Microsoft
Windows XP per istruzioni sull'uso del
sistema operativo Windows.
Para ver el
Manual del propietario
: Haga
doble clic en el icono del manual del
propietario en el escritorio de Microsoft
®
Windows
®
.
Para imprimir el
Manual del propietario
:
Una vez que haya terminado de configurar
la impresora, haga doble clic en el icono
del manual del usuario y, a continuación,
haga clic en el icono de impresora de la
barra de herramientas.
Para obtener más información sobre su
equipo:
• Haga clic en el botón Inicio y, a
continuación, haga clic en Ayuda y
soporte técnico.
• Para obtener ayuda con el sistema
operativo Windows, haga clic en
Consejos sobre Microsoft Windows XP.
Help and Support
Help en ondersteuning | Aide et support | Hilfe und Support | Guida in linea e supporto tecnico | Ayuda y asistencia técnica
optional floppy drive
optioneel diskettestation
disquette optionnelle
optionales Diskettenlaufwerk
unità disco floppy opzionale
unidad de disquete opcional
headphone connector
connector koptelefoon
connecteur pour casque
Kopfhöreranschluss
connettore della cuffia
conector para auriculares
front/back USB 2.0 connectors
voor/achter USB 2.0 verbindingen
connecteurs USB 2.0 avant/arrière
USB 2.0-Anschlüsse vorne/hinten
connettori USB 2.0 anteriori/posteriori
conectores USB 2.0 anteriores/posteriores
Connect other devices according to their documentation.
Sluit de andere apparaten aan zoals aangeduid in de documentatie.
Raccordez les autres périphériques comme indiqué dans leurs manuels.
Schließen Sie andere Geräte gemäß ihren Benutzeranleitungen an.
Collegare altre periferiche secondo la loro documentazione.
Conecte otros dispositivos según se indica en los manuales correspondientes.
integrated sound
geïntegreerd geluid
son intégré
Audio integriert
audio integrato
sonido integrado
Printed in Ireland.
Gedrukt in Ierland.
Imprimé en Irlande.
Gedruckt in Irland.
Stampato in Irlanda.
Impreso en Irlanda.
Turn on the computer and monitor.
Zet de computer en het scherm aan.
Mettez l'ordinateur et le moniteur sous tension.
Schalten Sie den Computer und den Monitor ein.
Accendere il computer ed il monitor.
Encienda el equipo y el monitor.
6
Set Up Other Devices Last

