Aqua Medic pH controller Operating instructions

Type
Operating instructions

This manual is also suitable for

Aqua Medic pH controller

Below you will find brief product information for Aqua Medic pH controller.

The Aqua Medic pH controller is a device that allows you to continuously monitor the pH value of your aquarium water. It comes with a pH electrode with BNC connection, buffer solutions pH 7 and pH 4, and an Allen key for calibration. The device has a 12 V socket and can be connected to a power supply unit.

The pH controller is easy to use. Simply connect the pH electrode to the device, insert the electrode into the aquarium water, and turn the calibration knobs to pH 7 and pH 4. The device will then display the pH value of the water.

1
pH monitor
D Bedienungsanleitung
Vor Gebrauch aufmerksam lesen! S. 2-3
ENG Operation manual
Please read the manual carefully before use! P. 4-5
F Mode d’emploi
Veuillez lire soigneusement les instructions d’avant utilisation ! P. 6-7
NL Gebruiksaanwijzing
Lees de handleiding voor gebruik zorgvuldig door! P. 8-9
ES Manual de instrucciones
Por favor lea el manual cuidadosamente! P. 10-11
RUS Инструкция по эксплуатации
Пожалуйста, внимательно ознакомьтесь с инструкцией
по эксплуатации! C. 12-13
Konformitätserklärung S. 14
Produkt Info AB Aqua Medic GmbH
Gewerbepark 24, 49143 Bissendorf, Germany
_____________________________________________________________________________________
2
Bedienungsanleitung D
Mit dem Kauf dieses digitalen pH Messgerätes haben Sie sich für ein Qualitätsinstrument entschieden. Es ist
speziell für den aquaristischen Gebrauch entwickelt worden. Mit diesem Gerät sind Sie in der Lage, den pH-Wert
Ihres Aquariums kontinuierlich zu überwachen.
1. Grundlagen
Der pH-Wert ist eine elektrische Messgröße, die ein Maß für den Säuregehalt des Wassers ist.
2. Lieferumfang
- Aqua Medic pH monitor
- pH Elektrode mit BNC-Anschluss
- Pufferlösung pH 7
- Pufferlösung pH 4
- Inbus
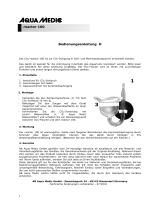
Abb. 1: pH monitor mit pH Elektrode
1. Anzeige
2. Eichknopf pH 7
3. Eichknopf pH 4
4. Anschluss für Elektrode (BNC-Stecker)
5. 12 V-Buchse
6. pH-Elektrode
3. Inbetriebnahme und Eichung
1. 12-V-Stecker vom Netzgerät in die Buchse des pH monitors (Nr. 5) stecken und Netzgerät danach in
die Steckdose stecken.
2. pH-Elektrode anschließen (Nr. 4).
3
3. Elektrode in Pufferlösung pH 7 tauchen. Nachdem sich der Messwert stabilisiert hat, was einige Zeit in
Anspruch nehmen kann, am Drehknopf (Nr. 2) Anzeige mit beiliegendem Inbus durch geringfügiges Drehen
auf pH 7 stellen. Inbus vorsichtig mit kurzer Seite einstecken. Beim Herausziehen Stellknopf nicht verdrehen.
4. Elektrode mit entsalztem Wasser spülen.
5. Elektrode in Pufferlösung pH 4 tauchen. Nach Stabilisierung des Messwerts die Anzeige auf pH 4 (Nr. 3)
einstellen.
6. Sonde mit entsalztem Wasser reinigen und erneut in Pufferlösung pH 7 stellen. Warten bis der pH-Wert stabil
ist. Sollte pH 7 nicht erreicht werden, Kalibriervorgang eventuell mehrfach wiederholen.
Das Gerät ist nach erfolgreicher Kalibrierung betriebsbereit.
Um einen störungsfreien Betrieb zu gewährleisten, sollte das Gerät wenigstens alle 4 Wochen neu
geeicht und die Sonde gereinigt werden. Die Messung mit dem pH monitor ist nur so genau wie die
Kalibrierung. Die Elektrode sollte maximal soweit ins Wasser eintauchen, dass der Kopf nicht benetzt
wird. Ideal ist die Benutzung eines Aqua Medic Elektrodenhalters.
Das Gerät muss vor Feuchtigkeit, Spritz- oder Kondenswasser geschützt werden.
4. Störungen
- Das Gerät zeigt falschen Wert an:
Elektrode neu kalibrieren.
- Die Elektrode lässt sich nicht mehr kalibrieren:
Lässt sich die Elektrode nicht mehr kalibrieren, muss sie erneuert werden. pH-Elektroden haben nur eine
begrenzte Lebensdauer - je nach Benutzung ca. 1 - 3 Jahre.
5. Technische Daten
Messbereich: pH 0 - 14
Auflösung: 0,01 pH
Arbeitstemperatur: 0 - 50 °C
Luftfeuchtigkeit: unter 80%
Stromanschluss: Input: 100 - 240 V, 50/60 Hz AC, Output 12 V DC
6. Garantiebedingungen
AB Aqua Medic GmbH gewährt dem Erstkäufer eine 24-monatige Garantie ab Kaufdatum auf alle Material-und
Verarbeitungsfehler des Gerätes. Sie gilt nicht bei Verschleißteilen. Im Übrigen stehen dem Verbraucher die
gesetzlichen Rechte zu; diese werden durch die Garantie nicht eingeschränkt. Als Garantienachweis gilt der
Original-Kaufbeleg. Während der Garantiezeit werden wir das Produkt kostenlos durch den Einbau neuer oder
erneuerter Teile instand setzen. Die Garantie deckt ausschließlich Material-und Verarbeitungsfehler, die bei
bestimmungsgemäßem Gebrauch auftreten. Sie gilt nicht bei Schäden durch Transporte, unsachgemäße
Behandlung, falschen Einbau, Fahrlässigkeit oder Eingriffen durch Veränderungen, die von nicht autorisierter
Stelle vorgenommen wurden. Im Fall, dass während oder nach Ablauf der Garantiezeit Probleme mit
dem Gerät auftreten, wenden Sie sich bitte an den Fachhändler. Alle weiteren Schritte werden
zwischen dem Fachhändler und Aqua Medic geklärt. Alle Reklamationen & Retouren, die nicht über
den Fachhandel zu uns eingesandt werden, können nicht bearbeitet werden. AB Aqua Medic haftet nicht
für Folgeschäden, die durch den Gebrauch des Gerätes entstehen.
AB Aqua Medic GmbH - Gewerbepark 24 - 49143 Bissendorf/Germany
- Technische Änderungen vorbehalten – Stand 04/2020/v3
4
Operation Manual ENG
With the purchase of this digital pH monitor, you have decided to work with a quality instrument. It has been
especially developed for aquarium use. With this unit, you are able to control the pH value of your aquarium
water.
1. Theory
The pH value is an electric value that is a parameter for the acidity of water.
2. Delivery
- Aqua Medic pH monitor
- pH electrode with BNC-connection
- Buffer solution pH 7
- Buffer solution pH 4
- Allen key
Fig. 1: pH monitor with pH electrode
1. Display
2. Calibration knob, pH 7
3. Calibration knob, pH 4
4. Connection for electrode (BNC-plug)
5. 12 V socket
6. pH electrode
3. Starting and calibration
1. Put the 12 V plug of the power supply unit into the socket of the pH monitor (No. 5) and then plug the power
supply unit into the power socket.
2. Connect the pH electrode (No. 4).
5
3. Insert the electrode into the buffering solution pH 7. After the measured value has itself stabilized, which
may take some time, turn the knob (No. 2) with the included Allen key to pH 7 with a small turn of the knob.
Carefully insert the Allen key with the short side. Do not turn knob when pulling the Allen key out.
4. Flush electrode with distilled water.
5. Insert electrode in buffer solution pH 4. After stabilization of the measured value, set the display to pH 4
(No. 3).
6. Clean the probe with distilled water and put it into the buffer solution pH 7 again. Wait until the pH value is
stable. If pH 7 is not reached, repeat the calibration procedure several times.
The unit is ready for use after successful calibration.
To ensure a trouble-free use, the unit should be recalibrated and the probe be cleaned at least every
4 weeks. Measuring with a pH-controller is only as exact as the calibration. The electrode shall be
emerged into water at most that the top part remains dry. Best is using the Aqua Medic electrode
holder.
The unit must be protected against moisture, splash or condensation water.
4. Troubles
- The unit shows wrong values on the display:
Recalibrate the electrode.
- The electrode cannot be recalibrated:
If the electrode cannot be recalibrated, it has to be renewed. pH electrodes have only a limited life span,
depending on kind of use between 1 and 3 years.
5. Technical Data
Measuring range: pH 0 - 14
Resolution: 0.01 pH
Working temperature: 0 – 50 °C
Humidity: below 80%
Power connection: input: 100 – 240 V, 50/60 Hz AC, output: 12 V DC
6. Warranty conditions
AB Aqua Medic GmbH grants the first-time user a 24-month guarantee from the date of purchase on all material
and manufacturing defects of the device. Incidentally, the consumer has legal rights; these are not limited by
this warranty. This warranty does not cover user serviceable parts, due to normal wear & tear ie: impellers or
drive wheels etc. The original invoice or receipt is required as proof of purchase. During the warranty period,
we will repair the product for free by installing new or renewed parts. This warranty only covers material and
processing faults that occur when used as intended. It does not apply to damage caused by transport, improper
handling, incorrect installation, negligence, interference or repairs made by unauthorized persons. In case of
a fault with the unit during or after the warranty period, please contact your dealer. All further steps
are clarified between the dealer and AB Aqua Medic. All complaints and returns that are not sent to
us via specialist dealers cannot be processed. AB Aqua Medic is not liable for consequential damages
resulting from the use of any of our products.
AB Aqua Medic GmbH - Gewerbepark 24 - 49143 Bissendorf/Germany
- Technical changes reserved - 04/2020/v3
6
Mode d’emploi F
Avec l’achat de cet appareil de mesure digital du pH vous avez opté pour un instrument de qualité. Il a été
spécialement développé pour l’usage aquariophile. Avec cet appareil vous êtes en mesure de vérifier en continue
la valeur du pH de votre aquarium.
1. Bases
La valeur du pH est représentée par un paramètre électrique, qui est une mesure de l’acidité de l’eau.
2. Contenu du colis
- Aqua Medic pH monitor
- Électrode pH avec raccord BNC
- Solution de tampon pH 7
- Solution de tampon pH 4
- Clé Allen
Image 1: monitor pH avec électrode pH
1. Affichage
2. Bouton d'étalonnage pH 7
3. Bouton d'étalonnage pH 4
4. Raccord pour électrode (prise BNC)
5. Prise 12 V
6. Électrode pH
3. Mise en route et étalonnage
1. Raccorder la prise 12 V du monitor pH (n° 5) et brancher ensuite le bloc d'alimentation au secteur.
2. Raccorder l'électrode (n° 4).
3. Plonger l'électrode dans la solution tampon pH 7. Après que la valeur de mesure s'est stabilisée, ce qui peut
prendre un certain temps, ajuster à l'aide de la clé Allen le bouton d'étalonnage (n° 2) à la valeur pH 7.
Insérer la clé Allen soigneusement avec le côté court. Veiller à ne pas dérégler la valeur en enlevant la clé.
4. Rincer l'électrode à l'eau douce.
7
5. Plonger l'électrode dans la solution tampon pH 4. Après que la valeur de mesure se soit stabilisée, régler à
la valeur pH 4 (n° 3).
6. Rincer à nouveau l'électrode à l'eau douce et replonger la dans la solution tampon pH 7. Attendre jusqu'à ce
que la valeur de mesure se soit stabilisée. Si la valeur pH 7 n'est pas atteinte, merci de répéter le processus
d'étalonnage à plusieurs reprises si nécessaire.
Après une calibration réussie, l'appareil est prêt pour l'utilisation.
Afin de garantir un fonctionnement parfait, veuillez étalonner l'appareil et nettoyer l'électrode au
moins une fois par mois. Les mesures n'ont que l'exactitude de l'étalonnage. L'électrode ne doit pas
être plongée totalement dans l’eau, il ne faut pas que la tête soit mouillée. L’idéal consiste à utiliser
un support d'électrode Aqua Medic.
L'appareil doit être protégé de l'humidité, de l'eau projetée et condensée.
4. Problèmes
- L’appareil affiche une valeur erronée:
Calibrer de nouveau l’électrode.
- Il n’est plus possible d’étalonner l’électrode:
S’il n’est plus possible de calibrer l’électrode, il faut la remplacer. Les électrodes pH ont une durée de vie
limitée, en fonction de l’utilisation environ 1 à 3 ans.
5. Données techniques
Zone de mesure: pH 0 - 14
Résolution: 0,01 pH
Température de fonctionnement: 0 - 50 °C
Humidité air: inférieure à 80%
Tension électrique: Input: 100 – 240 V, 50/60 Hz AC, Output: 12 V DC
6. Conditions de garantie
AB Aqua Medic GmbH garantit l’appareil au premier acheteur durant 24 mois à partir de la date d’achat contre
tout défaut matériel ou de fabrication. Il ne s'applique pas aux pièces d'usure telles que le tuyau de pompe, le
tourniquet et le moteur. Le consommateur bénéficie par ailleurs des droits légaux ; celles-ci ne sont pas limités
par la garantie. Le ticket de caisse original tient lieu de preuve d’achat. Durant cette période l’appareil est
gratuitement remis en état par le remplacement de pièces neuves ou reconditionnées par nos soins. La garantie
couvre uniquement les fauts de matériel ou de fabrication qui peuvent survenir lors d'une utilisation adéquate.
Elle n’est pas valable en cas de dommages dus au transport ou à une manipulation non conforme, à de
lanégligence, à une mauvaise installation ou à des manipulations/modifications effectués par des personnes non
autorisées. En cas de problème durant ou après l’écoulement de la période de garantie, veuillez-vous
adresser à votre revendeur spécialisé. Toutes les étapes ultérieures seront traitées entre le
revendeur spécialisé et AB Aqua Medic. Toutes les réclamations et retours qui ne nous parviennent
pas par le revendeur spécialisé ne peuvent pas être traités. AB Aqua Medic GmbH n’est pas responsable
pour les dommages indirects liés à l’utilisation de l’appareil.
AB Aqua Medic GmbH - Gewerbepark 24 - 49143 Bissendorf/Allemagne
- Sous réserve de toute modification - 04/2020/v3
8
Handleiding NL
Met de aanschaf van deze digitale pH monitor, heeft u besloten om met een kwaliteitsinstrument te werken. Dit
apparaat is speciaal ontworpen voor gebruik in een aquarium. Met dit instrument kunt u de pH meten van uw
aquarium water.
1. Theorie
De pH-waarde is een elektrische waarde welke een parameter is voor de zuurgraad van water.
2. De levering
- Aqua Medic pH monitor
- pH electrode met BNC-verbinding
- Buffer oplossing pH 7
- Buffer oplossing pH 4
- Inbussleutel
Fig. 1: pH monitor met pH electrode
1. Display
2. Kalibratie knop, pH 7
3. Kalibratie knop, pH 4
4. Connectie voor de electrode (BNC-plug)
5. 12 V stekker
6. pH electrode
3. Starten en kalibratie
1. Steek de 12 V stekker van de voeding in de aansluiting van de pH monitor en steek dan de voeding in het
stopcontact.
2. Verbind de pH electrode (nr. 4).
9
3. Steek de electrode in de buffer oplossing pH 7. Als de waarde is gestabiliseerd, en dit kan even duren, draai
dan de knop (nr. 2) met de inbussleutel naar de waarde pH 7. Plaats de inbussleutel voorzichtig met de korte
zijde. Draai niet aan de knop terwijl u de inbussleutel verwijderd.
4. Spoel de electrode met gedestilleerd water.
5. Steek de electrode in buffer oplossing pH 4. Na stabiliseren, zet dan de waarde op pH 4 (nr. 3).
6. Reinig de electrode met gedestilleerd water en plaats hem opnieuw in buffer 7. Wacht tot de waarde stabiel
is. Als de waarde nog geen pH 7 aangeeft, herhaal dan het kalibreren enkele malen.
Het instrument is klaar voor gebruik als de kalibratie succesvol was.
Om zeker te zijn dat het instrument zonder problemen werkt, moet deze regelmatig opnieuw
gekalibreerd worden. Dit dient, even als het schoonmaken van de electrode, tenminste elke 4 weken
gedaan te worden. Meten met de pH controller is net zo betrouwbaar als de betrouwbaarheid van de
kalibratie. De electrode moet zover in het water gestoken dat in ieder geval het bovenste gedeelte
in ieder geval droog blijft. Het beste is het om de Aqua Medic electrode houder te gebruiken.
De unit moet beschermd worden tegen vocht, spatwater en condenswater.
4. Problemen
- Het apparaat toont verkeerde waardes op de display:
Her-kalibreer de electrode.
- De electrode kan niet gekalibreerd worden:
Als de electrode niet gekalibreerd kan worden moet deze vervangen worden. pH electrodes hebben maar een
beperkte levensduur. Afhankelijk van gebruik meestal tussen de 1 en 3 jaar.
5. Technische gegevens
Meetbereik: pH 0 - 14
Resolutie: 0.01 pH
Werk temperatuur: 0 - 50° C
Vochtigheid: lager dan 80%
Stroomverbinding: input: 100 – 240 V, 50/60 Hz AC, output: 12 V DC
6. Garantie voorwaarden
AB Aqua Medic GmbH verleent een garantie van 24 maanden vanaf de aankoopdatum tegen alle defecten in
materiaal of afwerking van het apparaat. Deze garantie geldt niet voor onderdelen die aan normale sluitage tgv
normaal gebruik onderhevig zijn. Garantie wordt alleen verleend door het bewijs van de originele aankoopbon
te overleggen. Gedurende deze periode zal het product kosteloos worden gerepareerd door nieuwe of
gereviseerde onderdelen set. In het geval dat er problemen optreden met het apparaat tijdens of na de
garantieperiode, neem dan contact op met uw dealer. Deze garantie geldt alleen voor de oorspronkelijke koper.
Dit geldt alleen voor materiaal-en fabricagefouten die bij normaal gebruik ontstaan. Het is niet van toepassing
op schade veroorzaakt door transport of onjuiste behandeling, nalatigheid, onjuiste installatie, wijzigingen of
wijzigingen die zijn gemaakt door onbevoegden. Alle vervolgstappen zullen afgehandeld worden tussen AB Aqua
Medic en de dealer. Alle klachten en retour gestuurde apparaten dienen via de dealer aan ons toegstuurd te
worden. AB Aqua Medic GmbH is niet aansprakelijk voor eventuele gevolgschade voortvloeiend uit het gebruik
van het apparaat.
AB Aqua Medic GmbH - Gewerbepark 24 - 49143 Bissendorf/Germany
- Technische veranderingen ondervoorbehoud - 04/2020/v3
10
Manual de Instrucciones ES
Al comprar este monitor digital de pH, usted ha decidido trabajar con un instrumento de calidad. Ha sido
diseñado especialmente para uso en acuarios. Mediante este instrumento, usted será capaz de medir el pH de
su acuario.
1. Teoría
El pH es un valor eléctrico que es un parámetro de la acidez del agua.
2. Entrega
- Aqua Medic pH monitor
- Electrodo de pH con conexión BNC
- Solución buffer de pH 7
- Solución buffer de pH 4
- Llave Allen
Fig. 1: pH monitor con electrode de pH
1. Pantalla
2. Tornillo de calibración, pH 7
3. Tornillo de calibración, pH 4
4. Conexión para electrodo (Conector BNC)
5. Toma de 12 V
6. Electrodo de pH
3. Inicio y calibración
1. Coloque el enchufe de 12 V de la fuente de alimentación en el zócalo del monitor de pH (n°. 5) y luego
enchufe la fuente de alimentación a la toma de corriente.
2. Conecte el electrodo de pH (n°. 4).
11
3. Inserte el electrodo en la solución buffer de pH 7. Una vez que el valor medido se haya estabilizado por
mismo, lo que puede llevar algún tiempo, gire el tornillo (n°. 2) con la llave Allen incluida a pH 7 con un
pequeño giro del tornillo. Inserte con cuidado la llave Allen por el lado corto. No gire el tornillo cuando retire
la llave Allen.
4. Lave el electrodo con agua destilada.
5. Inserte el electrodo en la solución buffer pH 4. Después de la estabilización del valor medido, configure la
pantalla a pH 4 (nº. 3).
6. Limpie la sonda con agua destilada y vuelva a colocarla en la solución buffer pH 7. Espere hasta que el valor
de pH sea estable. Si no se alcanza el pH 7, repita el procedimiento de calibración varias veces.
La unidad está lista para usar después de una calibración exitosa.
Para garantizar un uso sin problemas, la unidad debe recalibrarse y la sonda debe limpiarse al menos
cada 4 semanas. La medición con un controlador de pH es tan exacta como la calibración. El electrodo
debe emerger del agua de forma que la parte superior permanezca seca. Lo mejor es usar el porta
electrodos Aqua Medic.
La unidad debe estar protegida contra la humedad, salpicaduras o agua de condensación.
4. Problemas
- La unidad muestra valores incorrectos en la pantalla:
Recalibre el electrodo.
- El electrodo no puede ser recalibrado:
Si el electrodo no puede ser recalibrado, debe cambiarse. Los electrodos de pH tienen una vida útil limitada,
dependiendo del tipo de uso, de entre 1 y 3 años.
5. Datos Técnicos
Rango de medición: pH 0 - 14
Resolución: 0.01 pH
Temperatura de trabajo: 0 – 50 °C
Humedad: menor del 80%
Conexión eléctrica: entrada: 100 – 240 V, 50/60 Hz AC, salida: 12 V DC
6. Condiciones de garantía
AB Aqua Medic GmbH concede al usuario que lo use por primera vez una garantía de 24 meses a partir de la
fecha de compra para todos los defectos de material y fabricación del aparato. Por otra parte, el consumidor
tiene derechos legales; estos no están limitados por esta garantía. Esta garantía no cubre las piezas consumibles,
debido al desgaste normal, por ejemplo: rotores o ruedas motrices, etc. Se requiere la factura o recibo original
como prueba de compra. Durante el período de garantía, repararemos el producto de forma gratuita mediante
la instalación de piezas nuevas o renovadas. Esta garantía solo cubre los defectos de material y de procesamiento
que se producen cuando se utilizan según lo previsto. No se aplica a los daños causados por transporte,
manipulación inadecuada, instalación incorrecta, negligencia, interferencia o reparaciones realizadas por
personas no autorizadas. En caso de fallo de la unidad durante o después del período de garantía, por
favor póngase en contacto con su distribuidor. Todos los pasos siguientes se resuelven entre el
distribuidor y AB Aqua Medic. Todas las reclamaciones y devoluciones que no se nos envíen a través
de distribuidores especializados no podrán ser procesadas. AB Aqua Medic no se hace responsable de los
daños resultantes del uso de cualquiera de nuestros productos.
AB Aqua Medic GmbH - Gewerbepark 24 - 49143 Bissendorf/Germany
- Cambios técnicos reservados - 04/2020/v3
12
Инструкция по эксплуатации RUS
Приобретая данный цифровой измерительный прибор для точного измерения значения рН, Вы получаете
высококачественный продукт, который был специально разработан для применения в аквариумистике и
протестирован специалистами. С помощью этого прибора Вы сможете непрерывно следить за состоянием
значения рН в Вашем аквариуме.
1. Исходные данные
Значение рН является электрическим цифровым показателем кислотности воды.
2. Комплект поставки
- Aqua Medic pH монитор
- pH–электрод с BNC-разъемом
- буферный раствор pH 7
- буферный раствор pH 4
- шестигранный ключ
Рис. 1: pH монитор с pH электродом
1. дисплей
2. калибровочная кнопка pH 7
3. калибровочная кнопка pH 4
4. разъем для электрода (BNC-штепсель)
5. 12-В-штепсельная розетка
6. pH-электрод
3. Подключение и регулировка
1. 12-В-штепсель источника питания вставить в штепсельную розетку рН монитора (№ 5), затем включить
источник питания в розетку.
2. Подсоединить pH-электрод (№. 4).
13
3. Электрод погрузить в буферный раствор рН 7.Через некоторое время, после стабилизации цифрового
показателя, потом легким поворотом регулирующей кнопки (№ 2), с помощью приложенного
шестигранного ключа, настроить дисплей на рН 7. Шестигранный ключ нужно вставлять осторожно
короткой стороной, при снятии не перекрутить кнопку установки.
4. Электрод промыть пресной водой.
5. Погрузить электрод в буферный раствор рН 4. После стабилизации цифрового показателя установить
дисплей на рН 4 (№ 3).
6. Электрод промыть пресной водой и снова опустить в буферный раствор рН 7. Подождать, пока
стабилизируется рН 7. Если рН 7 не достигнуто, необходимо многократное повторение процесса
калибровки.
После успешного процесса калибровки прибор готов к эксплуатации.
Для обеспечения бесперебойной работы, прибор необходимо не менее чем один раз в месяц
заново калибровать и очищать электроды. Точность измерений с помощью рН монитора зависит
от точности калибровки. Максимальное погружение электрода в воду должно быть таким, чтобы
головка оставалась сухой. Идеальным вариантом является использование электрододержателя
фирмы Aqua Medic.
Прибор должен быть защищен от влаги, брызг и конденсата.
4. Неполадки
- Прибор показывает неправильное значение:
Провести калибровку электрода заново.
- Электрод больше не поддается калибровке:
Если электрод больше не поддается калибровке, его необходимо заменить. рН электроды имеют
определенный срок эксплуатации – в зависимости от интенсивности использования: от 1 до 3 лет.
5. Технические характеристики
Диапазон измерения: pH 0 - 14
Раствор: 0,01 pH
Рабочая температура: 0 - 50 °C
Влажность воздуха: до 80%
Источник тока: вход: 100 - 240 В, 50/60 Hz AC, выход 12 В DC
6. Гарантия
AB Aqua Medic GmbH предоставляет 24-месячную гарантию со дня приобретения на все дефекты по
материалам и на все производственные дефекты прибора. Подтверждением гарантии служит оригинал
чека на покупку. В течение гарантийного срока мы бесплатно отремонтируем изделие, установив новые
или обновленные детали. Гарантия распространяется только на дефекты по материалам и
производственные дефекты, возникающие при использовании по назначению. Она не действительна при
повреждениях во время транспортировки или при ненадлежащем обращении, халатности, неправильном
монтаже, а также при вмешательстве и изменениях, произведенных в несанкционированных местах. В
случае проблем с прибором, возникших в период или после гарантийного срока, пожалуйста,
обращайтесь к дилеру. Все дальнейшие шаги решаются дилером и фирмой AB Aqua Medic. Все
жалобы и возвраты, которые не отправлены нам через специализированных дилеров, не
принимаются к рассмотрению. AB Aqua Medic GmbH не несет ответственности за повторные
повреждения, возникающие при использовании прибора.
AB Aqua Medic GmbH - Gewerbepark 24 - 49143 Bissendorf/Germany
- оставляем за собой право на технические изменения конструкции - 04/2020/v3
14
  • Page 1 1
  • Page 2 2
  • Page 3 3
  • Page 4 4
  • Page 5 5
  • Page 6 6
  • Page 7 7
  • Page 8 8
  • Page 9 9
  • Page 10 10
  • Page 11 11
  • Page 12 12
  • Page 13 13
  • Page 14 14

Aqua Medic pH controller Operating instructions

Type
Operating instructions
This manual is also suitable for

Aqua Medic pH controller

Below you will find brief product information for Aqua Medic pH controller.

The Aqua Medic pH controller is a device that allows you to continuously monitor the pH value of your aquarium water. It comes with a pH electrode with BNC connection, buffer solutions pH 7 and pH 4, and an Allen key for calibration. The device has a 12 V socket and can be connected to a power supply unit.

The pH controller is easy to use. Simply connect the pH electrode to the device, insert the electrode into the aquarium water, and turn the calibration knobs to pH 7 and pH 4. The device will then display the pH value of the water.

Ask a question and I''ll find the answer in the document

Finding information in a document is now easier with AI