Page is loading ...

THANK YOU
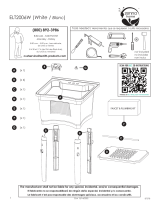
INSTALLATION AND CARE GUIDE
TWO-HANDLE KITCHEN FAUCET
We appreciate the trust and condence you have placed in Glacier Bay through the purchase of this kitchen
faucet. We strive to continually create quality products designed to enhance your home. Visit us online to see
our full line of products available for your home improvement needs. Thank you for choosing Glacier Bay!
HOMEDEPOT.COM
Questions, problems, missing parts?
Before returning to the store, call Glacier Bay Customer Service
8 a.m. - 7 p.m., EST, Monday - Friday
9 a.m. - 6 p.m., EST, Saturday
1-855-HD-GLACIER (1-855-434-5224)
HOMEDEPOT.COM
5/2017REV.02
Model#
HD67568-1101
HD67568-1108D2
67568-1127H2
SKU#
771298
771299
752346

2
Table of Contents
Important Information .............................2
Warranty ...................................................2
Pre-Installation .........................................2
Planning Installation ..............................2
Package Contents ..................................3
Installation ................................................4
Care and Cleaning ....................................6
Service Parts
...........................................
7
Troubleshooting........................................6
Tools and Hardware Required ...............2
Important Information
□ Observe all local plumbing and building codes.
□ Cover the sink drain to avoid losing any parts.
□ Review the care and cleaning section included in this guide.
Pre-Installation
PLANNING INSTALLATION
Before beginning the installation of this product, ensure all parts are present. Compare parts with the Package
Contents list. If any part is missing or damaged, do not attempt to install the product. Contact Customer Service
for replacement parts
TOOLS AND HARDWARE REQUIRED
Adjustable
wrench
Safety
goggles
Channel
lock pliers
(2) Supply
lines
SILICONE
Silicone
sealant
Operation...................................................5
Warranty
LIMITED LIFETIME WARRANTY
Glacier Bay products are manufactured with superior quality standards and workmanship and are backed by our
limited lifetime warranty. Glacier Bay products are warranted to the original consumer purchaser to be free of
defects in materials or workmanship. We will replace FREE OF CHARGE any product or parts that prove defective.
Simply, return the product / part to any of The Home Depot retail locations or call 1-855-HD-GLACIER (1-855-434-
5224) to receive the replacement item. Proof of purchase (original sales receipt) from the original consumer
purchaser must be made available for all Glacier Bay warranty claims.
This warranty excludes incidental/inconsequential damages and failures due to misuse, abuse or normal wear and
tear. This warranty excludes all industrial, commercial & business usage, whose purchasers are hereby, extended
duration of warranty.
Some states and provinces do not allow the exclusion or limitation of incidental or consequential damages, so the
above limitations may not apply to you. This warranty gives you specic legal rights and you may also have other
rights that vary from state to state and province to province. Please see a store or contact 1-855-HD-GLACIER for
more details.

3
Pre-Installation (continued)
PACKAGE CONTENTS
Part Description Quantity
A
1
Faucet
B 1
Gasket
D 1
Side sprayer
E 1
Sprayer ange
F 1
Sprayer mounting nut
C 2
Faucet mounting nut
HOMEDEPOT.COM
Please contact 1-855-HD-GLACIER for further assistance.
A
B
C
D
E
F

Installation
4
1
Installing the sprayer support
CAUTION: Always shut off the water supply before
removing an existing faucet or replacing any part of a
faucet. Open the faucet handle to relieve water pressure
and ensure that the water is completely shut off.
□ Shut off the water supply. Remove the old
faucet.
□ Insert the sprayer ange (E) through the far
right hole on the sink.
□ Screw the sprayer mounting nut (F) onto the
sprayer ange (E) shank from underneath the
sink, and hand tighten. Do not overtighten.
□ Clean the mounting surface.
□ Insert the side sprayer (D) hose down through
the sprayer ange (E) and sink. Align the
tabs (1 & 2) on the quick connects (3). Push the
quick connector housing rmly upward and
snap it onto the receiving tube tab. Pull down
the hose moderately to ensure the connection
has been made.
E
F
2
Installing the faucet assembly
□ Ensure the gasket (B) is on the bottom of the
new faucet (A). Place the faucet (A) through
the mounting holes in the sink.
NOTE: If the sink is uneven, use silicone under the
gasket (B).
3
2
1
B
A
E
D

HOMEDEPOT.COM
Please contact 1-855-HD-GLACIER for further assistance.
5
Installation (continued)
4
Making the water supply
connections
□ Use 1/2 in. I.P.S. faucet connections (2), or use
supply line coupling nuts (3) (not included) with
a 3/8 in. O.D. ball-nose riser (1).
□ Use wrenches to tighten the connections. Do not
overtighten.
3
Tightening the faucet assembly
□ Secure the faucet (A) to the sink using the
mounting nuts (C) provided. Hand tighten only.
C
A
1
2
3
1
A
1
Flushing and checking for leaks
IMPORTANT: After installation is complete, remove the
aerator from the faucet (A) to ush the water lines. Do not
lose the gasket (1) in the aerator.
□ Ensure the faucet (A) handles are in the off
position and turn on the water supply to check
for leaks. If you discover any leaks, check your
connections to ensure they are installed properly.
□ Remove the aerator and housing (if applicable).
Turn on the hot and cold handles to allow the
water to run for at least one minute. This
ushes away any debris that could cause
damage to internal parts.
□ Turn off the water and reinstall the aerator and
housing (if applicable).
Operation

6
Operation (continued)
Troubleshooting
Problem Possible Cause Solution
There are leaks from the
handle.
The bonnet nut has come loose and/or the
washer is dirty or damaged.
□ Tighten the bonnet nut.
□ Clean or replace the washer.
The aerator has an
irregular or reduced
water ow.
□ Remove the aerator and
check for debris.
□
Ensure that the rubber washer
is properly installed.
The water will not shut off
completely.
The cartridge is dirty or broken. □ Remove the handle to check
the cartridge.
□ Clean or replace.
The aerator is dirty or mis-tted.
NOTE: Refer to the service parts section in this manual for
a detailed drawing showing the location of the parts listed
below.
2
Removing the quick connector
□ If it is necessary to remove the quick connector
(1), squeeze the tabs (2) on the quick connector
and then pull down to disconnect.
Squeeze
2
Pull
down
1
1
Care and Cleaning
□ To clean, wipe down with a damp cloth and dry with a towel.
□ Do not use abrasive cleaners, steel wool, or harsh chemicals when cleaning this faucet, or the warranty will
be voided.

7
Service Parts
*Specify Finish
Part Description Part Number
1 RP80373*
2 Index RP80374*
3 Screw RP50154
4 Handle RP13304*
5 Inverter RP64044
6 Bonnet nut RP70435
7 Washer RP64124
8 Cartridge H RP20067
9 Cartridge C
RP20068
Index
11 Mounting nut RP56001
12 Aerator RP30124*
13 O-ring RP60008
14 Wearable ring RP70077
16 Diverter RP70007
17 Block RP70421
19 Side spray RP36069*
Part Description Part Number
15 Clip RP70023
10 Gasket RP70488
18 O-ring RP60002
Many replacement cartridges, aerators, and drain
assemblies can be purchased at your local The
Home Depot store or online at HOMEDEPOT.COM
Faucet ID tags can be
found by removing
the hot water handle
3
4
6
5
9
13
7
8
12
14
11
2
10
15
1
18
17
16
19

Questions, problems, missing parts?
Before returning to the store, call Glacier Bay Customer Service
8 a.m. - 7 p.m., EST, Monday - Friday
9 a.m. - 6 p.m., EST, Saturday
1-855-HD-GLACIER (1-855-434-5224)
HOMEDEPOT.COM
Retain this manual for future use.
/