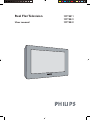
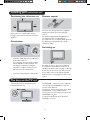
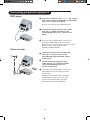
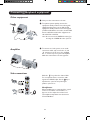
Philips 29PT8842S offers a range of features to enhance your TV viewing experience. With its Picture Scanning modes, you can select Auto, 100 Hz Digital Scan, or Progressive Scan to optimize image quality. Connect your digital devices via YPbPr Digital High Definition input for sharper visuals. Utilize the Personal Zapping feature to create a list of your favorite channels for quick access. Enjoy customizable audio settings with Smart Sound modes like Theatre, Music, and Voice. Activate Incredible Surround for an immersive audio experience.
Philips 29PT8842S offers a range of features to enhance your TV viewing experience. With its Picture Scanning modes, you can select Auto, 100 Hz Digital Scan, or Progressive Scan to optimize image quality. Connect your digital devices via YPbPr Digital High Definition input for sharper visuals. Utilize the Personal Zapping feature to create a list of your favorite channels for quick access. Enjoy customizable audio settings with Smart Sound modes like Theatre, Music, and Voice. Activate Incredible Surround for an immersive audio experience.


-
 1
1
-
 2
2
-
 3
3
-
 4
4
-
 5
5
-
 6
6
-
 7
7
-
 8
8
-
 9
9
-
 10
10
-
 11
11
-
 12
12
-
 13
13
-
 14
14
-
 15
15
-
 16
16
-
 17
17
-
 18
18
-
 19
19
-
 20
20


Philips 29PT8842S offers a range of features to enhance your TV viewing experience. With its Picture Scanning modes, you can select Auto, 100 Hz Digital Scan, or Progressive Scan to optimize image quality. Connect your digital devices via YPbPr Digital High Definition input for sharper visuals. Utilize the Personal Zapping feature to create a list of your favorite channels for quick access. Enjoy customizable audio settings with Smart Sound modes like Theatre, Music, and Voice. Activate Incredible Surround for an immersive audio experience.
Ask a question and I''ll find the answer in the document
Finding information in a document is now easier with AI
Related papers
-
Philips 29PT8836/94 User manual
-
-
Philips 34PT8845 User manual
-
-
-
-
-
Philips 21PT2325/71 User manual
-
-
Other documents
-
Grundig Color Television Elegance 37 LXW 94-8616 Dolby User manual
-
Technicolor - Thomson Universal Remote 32VT68N User manual
-
-
-
-
Beko tr7854070200 User manual
-
-
-
-