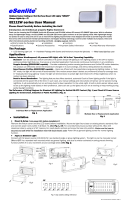
Page is loading ...

Rev. EE110W serise 06292017 Page 1
®
EE110WMC User Manual
(Please Read Carefully Before Installing the Unit!)
Thank you for choosing the EE110WMC (built with Smart RF-sensor) LED mini light. With its
effortless setup and lightweight design, the EE110WMC LED mini light can meet with diverse lighting requirements and conform to all lighting needs. Featured with
Doppler Sensing Technology, this product is designed to provide long-term, trouble-free, environmental-friendly LED-illumination. With worldwide patent pending,
currently the patents of this product has been filed and granted in multiple countries and regions, including US, European, and China. All rights reserved.
Applications
This product features with built-in SMART sensor and 72 pieces of high-brightness LED illuminators with total power of 10watts/up to
900+Lm. Backed by the most advanced motion sensing technology, the light will immediately illuminates when motion been detected,
and automatically turn off when motion disappear according to pre-selected delay setting . The light fit for a wide range of applications
and mounting locations, especially for small-area coverage illumination such as garage, storage, working room, restroom, aisle stairs,
closet, corner of the hallway and so on.
AC-powered motion-activated LED mini-Lights, with manual switch ON-OFF control:
Standard - Simply connect the light with AC power source (120/220V AC) as standard lighting system, the light will served as a manually
switch-controlled, AC-powered LED light, providing always-on lighting with built-on pre-set delay illumination function for energy saving in
most locations. Suggested deep switch setting: S1-“1”, S2-“0”; S3, 4, 5- all “0”; S6- “1”; S7& 8-“0” (only for this application).
Daly basis Dusk to Dawn Automatic with Sensing Illumination –The built-in photocell enables the light to offer adjustable, switch-
free Dusk-to-Dawn illumination as motion-sensing lights for security & safety purpose. Simply replace your existing light with EE110WMC.
After AC power connected, make sure the power is always available and stays ON. With certain settings, the light will be enable to
illuminate when nighttime comes under darkness condition, and disable the illumination automatically when dawn comes.
Settings
Users can adjust settings to meet their specific requirements by using the dip switches. Use S1 and 2 to adjust sensitivity level &
coverage area; use S3, 4, and 5 to adjust delay time; Use S6,7, and 8 to adjust ambient light level that enable the light.
Doppler Sensing (outstanding motion sensing performance)–Outperform current PIR motion sensing technology, Doppler/Microwave
sensor can detect movement through most non-metallic obstacles, even before the objective enter into the coverage area. The coverage
area ranges between 6.5 to 45 feet diameter when it mounted 8.5-11.5 feet above the ground. Users can adjust motion sensor coverage
area and sensitivity level by using dip switch 1 and 2. Please refer below chart as the dip switch setting rules for sensitivity adjustment.
Please noted that a high sensitive setting may contribute to frequent detection and wrong trigger that were resulted from wind & trees,
animal movements, or grid & electrical equipment intervene. During testing process, adjust the sensitivity to appropriate level. If the light
doesn’t work as described, lower the sensitivity first and see if the light can work appropriately. Meanwhile, please temporarily leave the
coverage area after setup, and re-enter the coverage area. Otherwise, the sensor will always detect your movement. If you plans to install
more than one unit, a distance of 12-14 ft is required between each light in order to avoid the mutual intervene and error trigger.
Delay Time Settings After the light been triggered, it can stay ON for 12 seconds to 11 minutes, depend on your own settings. If preset
delay time is about to pass but movement continues, the timer will be reset and the light will continues lighting. Use dip switch 3, 4 and 5
to adjust your preferred delay time. The shortest delay time is recommended for testing process in order to shorten the testing time.
Operating Ambient Light Level (Dip switch S5 Setup)
By using dip switch 6,7 and 8, users are allowed to set their preferred ambient light level to trigger the light. If users prefer the light to
work even during daytime, the largest LUX setting is needed. In contrast, if the user hope the light start to work only under extreme dark
environment, the minimum LUX setting is recommended. The dip switch setting rules for ambient light level control can be find as below
Installation
Turn power OFF before installation, As DIY setup, suggest to consult your local professional electric installer, engineer and by electric code.
Secure the light fixture base on the existing electric standard J-Box/directly mount on the surface, connect/insert power wires (N & L /H) into the
terminals (no Ground wire required), or connect with North American standard cables (Black – Hot; White – Neutral)
For concrete/brick/stucco surface without the J-Box, drill clearance holes by using a 3/16" masonry bit first, and then insert plastic anchors and
secure the base with provided screws. Make sure the installation compliant with local electric code.
Turn power ON so the light will be able to work with normal lighting functions.
Delay Time Setting
Ambient Light Level (LUX) Setting
Sensitivity & Detection Range Setting

Important Safety Information
Do not dispose of this plastic unit in fire. This may result in an explosion.
Do not expose the light to fire or intense heat as the battery may explode.
Do not immerse in water.
Never look directly into the light or shine it into another person’s eyes.
Follow proper safety tips to prevent from falling off a ladder.
Consult your local construction/bulding safety guide if needed for installing the light fixture on a building.
One Year Limited Warranty
EESGI guarantees this product to be free from defects in material & workmanship for (1) year.
This warranty does not apply to damage from misuse or incorrect installation/ connection.
This warranty does not cover accessories, bulbs, batteries, high voltage accidents, alterations, unauthorized use or
repair, neglect, misuse, abuse, damages or defects resulting from normal wear and tear (including chips, fading
scratches, abrasions or discoloration due to usage or sun exposure), or failure to follow instructions for care and
maintenance, fire, flood, and Acts of God.
This warranty does not include liability for incidental or consequential damages.
EESGI is not responsible for any damages in excess of the retail purchase price of the product under any
circumstances. The consumer is responsible for the installation of, removal of, and reinstallation of the product.
Rev. EE110W series 06292017 Page 2
Specifications
Sensor Information
/


