Page is loading ...

THANK YOU
y through the purchase of this dining set. We strive to continually create
quality products designed to enhance your home. Visit us online to see our full line of products available for your home improvement needs.
Thank you for choosing Hampton Bay!
1003183454
Model KTS60EH
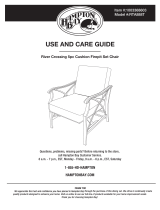
USE AND CARE GUIDE
Crestridge Padded Sling Spring Dining Chair - Taupe Putty (2-Pack)
Questions, problems, missing parts? Before returning to the store,
call Hampton Bay Customer Service.
8 a.m. - 7 p.m., EST, Monday - Friday, 9 a.m. - 6 p.m., EST, Saturday
HAMPTONBAY.COM
1-855-HD-HAMPTON

2
Table of Contents
Warranty ........................................................................ 2
What is Covered ...................................................................... 2
What is Not Covered ................................................................ 2
Planning Assembly .................................................................. 3
Hardware Included .................................................................. 3
Warranty
2 YEAR FRAME AND 2 YEAR FABRIC LIMITED WARRANTY
WHAT IS COVERED
We warrant the frames to be free of manufacturing defects to the original purchaser for two years, and a two year limited warranty for the fabric.
WHAT IS NOT COVERED
Contact the
Customer
Service Team at 1-855-HD-HAMPTON or visit www.hamptonbay.com.
Safety Informat on i
PRODUCT CAUTION
This set was made for the explicit purpose of providing outdoor functions and is not to be used as a toy. This product is intended for normal
outdoor use; however, the manufacturer recommends storing and / or covering this set when any formidable / severe weather is approaching.
hildren under
the age of 10, near the product, should be supervised by a competent adult at all times.
SAFETY WARNINGS
It remains the customer’s responsibility for freight and packaging charges to and from our service center. This warranty does not cover
s warranty. We
reserve the right to make substitutions with similar merchandise, if the model in question is no longer in production.
Safety Information ............... ........................................ 2
Product Caution .............................. ...................................... 2
WARNING: Weight limit for the chairs is 250 lb (113.39 kg)
for each seat.
WARNING: Please keep children out of the assembly
area before assembly.
CAUTION: When not in use, secure the product in a cool
and covered location.
!
WARNING: Do not place heavy objects on the chair.
Safety Warnings ............................ ... ..................................... 2
Table of Contents ... ....................................................... 2
Pre-Assembly ................................................................ 3
Chair Package Contents.......................................................... 4
Chair Assembly.................................................. ...........5
Care and Cleaning........................................................ 9
WARRANTY PRINTED IN THE MANUAL IS NOT VALID FOR USA.

3
Pre-Assembly
PLANNING ASSEMBLY
Read all instructions before assembly.
To avoid damaging this product, assemble it on a soft, non-abrasive surface such as carpet or cardboard.
NOTE: More than one person may be required to
assemble this product.
HARDWARE INCLUDED
NOTE: Hardware not shown to actual size.
AA M6x35 BOLT
6+1
BB
CC
DD
EE
AA BB CC DD
EE
Part
Description
Quantity
1
4 mm ALLEN KEY WRENCH
4+1
8+1
2
M6x16 BOLT
d6.5xD13x1.0 WASHER
STEEL WASHER d7.8xD31x6.0
HAMPTONBAY.COM
Please contact 1-855-HD-HAMPTON for further assistance.

Part Description Quantity
A Seat Assembly 1
1
1
1
B Left Leg
C Right Leg
D Support
A
D
4
Pre-Assembly (continued)
CHAIR PACKAGE CONTENTS
B
C

l
5
Chair Assembly
1
Connecting the chair support to the chair legs
Insert the support (D) to the legs (B and C). Fasten them by using M6x35 bolts (AA) and steel washers (DD).
C
D
B
L
R
AA
Loosely tighten all the bolts using the hex wrench (EE).NOTE:
DD
HAMPTONBAY.COM
Please contact 1-855-HD-HAMPTON for further assistance.

l
6
Chair Assembly (continued)
2
Connecting the chair seat assembly to the chair legs
B
C
A
Loosely tighten all the bolts using the hex wrench (EE). Keep 3mm Gap. Don’t fully tighten the Bolts.NOTE:
BB
At the front of the chair, fasten the seat assembly (A) to legs (B and C) by using M6x16 bolts (BB) and d6.5xD13x1.0 washers (CC).
BB
CC
CC

l
7
Chair Assembly (continued)
3
Connecting the chair seat assembly to the chair legs
At the back of the chair, fasten the seat assembly (A) to legs (B and C) by using M6x35 bolts (AA) and d6.5xD13x1.0 washers (CC).
B
C
A
Loosely tighten all the bolts using the hex wrench (EE).NOTE:
CC
AA
HAMPTONBAY.COM
Please contact 1-855-HD-HAMPTON for further assistance.

l
8
Chair Assembly (continued)
4
Tightening the bolts
Turn the chair to its upright position.
Care and Cleaning
For best results, clean the set with a damp cloth and dry thoroughly. This will help prevent mildew by removing dirt
particles that may accumulate.
Do not clean with abrasive materials, bleach, or solvents.
Store the set in a dry, sheltered place when not in use.
Keep the set away from re, extreme heat, freezing conditions, and inclement weather such as rain, hail, sleet,
snow, or wind.
Once all of the bolts are in place, fully tighten the bolts.
Ensure all connections are secure before use.

Questions, problems, missing parts? Before returning to the store,
call Hampton Bay Customer Service.
8 a.m. - 7 p.m., EST, Monday - Friday, 9 a.m. - 6 p.m., EST, Saturday
1-855-HD-HAMPTON
HAMPTONBAY.COM
Retain this manual for future use.
/