Mircom LT-6060 Installation guide

Type
Installation guide
1
LT-6060 Installation Instructions for RB-MD-750
MD-750 Replacement Core Board
This document describes how to remove the old core board and install the replacement MD-
750 core board on the main board.
A. Power down the main board
1. Disconnect the batteries from the board.
2. Disconnect AC power going to the board.
B. Remove the old core board
Caution: To prevent damage to the boards, always hold them by the edges.
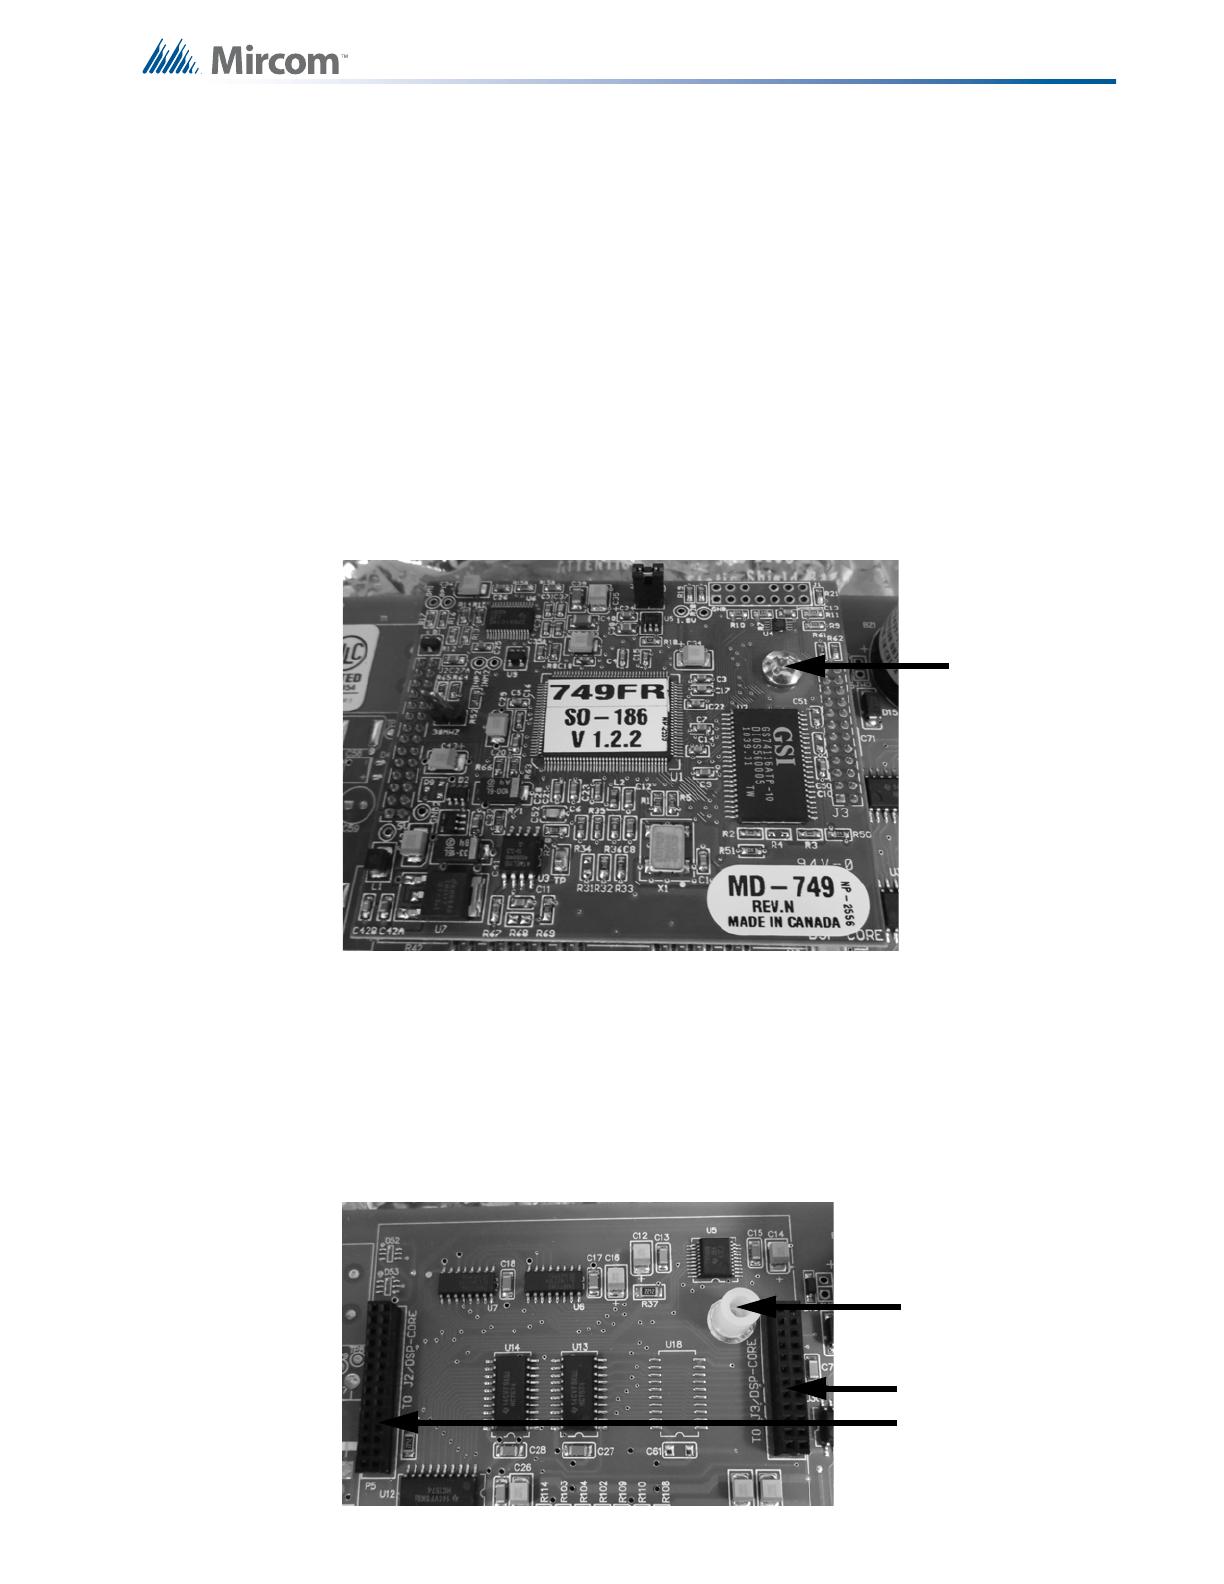
1. Remove the screw on the old core board.
2. Gently wiggle the old core board (pull one side and then the other in a repetitive motion)
until it is free of its connectors.
C. Attach the replacement MD-750 core board
Caution: To prevent damage to the boards, always hold them by the edges.
1. Remove the replacement MD-750 core board from the anti-static bag.
2. On the main board, align the washer over the screw hole.
screw
washer
holes for
core board
2
LT-6060 Installation Instructions for RB-MD-750
The replacement MD-750 core board has 12 sets of pins on the right side and 14 sets of
pins on the left side. These pins go in the holes on the main board.
3. Align the replacement MD-750 core board over the main board so that the screw hole
and pins on the core board align with the holes on the main board.
The labels on the replacement MD-750 must be the right way up and the screw hole
must be on the right.
4. Gently push the replacement MD-750 down so that the pins go in the holes.
5. Insert and tighten the screw.
D. Power up the main board
1. Connect AC power to the board.
2. Connect the batteries to the board.
pins on the left side of the MD-750 holes on the main board
screw hole
on MD-750
pins on
holes on
main board
MD-750
  • Page 1 1
  • Page 2 2

Mircom LT-6060 Installation guide

Type
Installation guide

Ask a question and I''ll find the answer in the document

Finding information in a document is now easier with AI