Page is loading ...

1
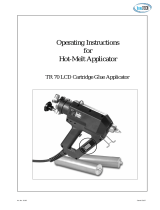
PPA 300A - PNEUMATIC APPLICATOR FOR RATIO-PAK CARTRIDGES
OPERATING INSTRUCTIONS
1. AIR CONNECTION
Connect an air line to the applicator using the nut and tailpipe supplied or with a fitting that has a
compatible screw thread.
2. LOAD CARTRIDGE PACK
2.1 Prepare cartridge for dispensing by removing the plastic plugs and fitting the static mixing nozzle.
2.2 Ensure the pushers of the applicator are fully retracted.
2.3 Holding the static mixing nozzle, insert the back of the cartridge over the pushers to rest on the lip
of the cartridge support discs. Compress the cartridges against the cartridge support discs and rotate
the front of the cartridge to rest squarely in the front plate.
3. OPERATION OF THE TRIGGER
By pulling the trigger, a cushion of compressed air is built up inside the cylinder which initiates the
flow of adhesive. On releasing the trigger, the adhesive flow stops as the compressed air escapes
through a quick exhaust valve.
4. ADJUSTING THE ADHESIVE FLOW
This is achieved with the pressure regulator at the rear of the applicator. Turn the knob of the regulator
clockwise to increase the flow of adhesive and anti-clockwise to decrease the speed of flow.
5. UNLOADING THE CARTRIDGE PACK
Return the cartridges pushers to their fully retracted state. This is achieved by pulling the butt trigger
and depressing the return button at the same time. This button is situated at the rear of the cylinder just
forward of the regulator. When the cartridge pushers have returned fully, release the trigger first, then
the return button.
6. CAUTIONARY NOTES
6.1 The line pressure connected to the applicator should not exceed 145 p.s.i. (10 bar).
6.2 Always disconnect the air line prior to dismantling the applicator or changing the ratio-plates.
6.3 For trouble free operation, clean the applicator of all adhesive residue after use with the adhesive
manufacturers recommended solvent.
6.4 It is recommended that protective eye glasses are worn when using any pneumatic tool.
PTO
7. USING DIFFERENT RATIO COMBINATIONS

2
The PPA 300A has been designed to accommodate different combinations of Ratio-Pak cartridges. In
it’s standard form the applicator is delivered with the parts required to dispense ratios of 1:1 using
300ml + 300ml and 2:1 using 300ml + 150ml cartridge packs.
Parts are available to set the applicator up to dispense the 4:1 ratio-Pak (300ml +75ml). To obtain these
parts contact your supplier and ask for Ratio kit _ 7XP015
7. CHANGING THE APPLICATOR FOR DIFFERENT RATIO COMBINATIONS
7.1 Remove the cartridge pushers by first loosening the locknuts with a 13mm A/F spanner. Remove
the locknuts, cartridge support discs and springs.
7.2 Withdraw the frame and rod assembly from the cylinder by unscrewing and removing the 4
hexagonal bolts with a 13mm A/f spanner.
7.3 Separate the frame and rod assembly from the cylinder by remove the ratio-plate connected to the
piston face by unscrewing the socket headed cap screw with a 6mm A/F Allen Key.
7.4 Remove the plunger rods from the piston ratio-plate by firstly loosening the locknuts.
7.5 Remove the ratio-plate and gasket that is recessed in the bulkhead using a 10mm A/F spanner.
7.6 Ascertain which set of plungers, support discs, ratio plates, seals and the holes you will need. This
is best done by trying each part in, and the configuration of, the cartridge set you are about to use
7.7 Re-assemble in reverse order to the steps described above,
15 April 1999
/