GUIDELINES FOR PAINTING PRIMED WINWORKS SHUTTERS
Surface Preparation Specifications
• Shuttersshouldbecleanofanyoil,grease,dirtoranycontaminantsthatmaybepresentfromshippingandhandling.
Amildsolventcleanermaybeused.
• Lightsandingisrecommendedwitha360gritsandpaper,inordertoprovideaslightproleforproperadhesionofpaint.
• Itisimportantthatonedoesnotaggressivelysandthroughorentirelyremovetheprimercoat.
• WerecommendthatyouuseahighqualityUrethane,Alkydor100%Acrylictopcoat.
• Youshouldapplytwotopcoatsinaccordancetothepaintmanufacturers’recommendationsinordertoprovide
appropriatepaintmils.
• Werecommendthatshuttersshouldbepaintedsoonaftersanding.Ifthetimeframeexceedsthirtydays,shuttersmust
beresandedbeforetopcoatisapplied.
Theneedforpropersurfacepreparationpriortopaintingcannotbestressedenough.INCOMPLETE OR IMPROPER SURFACE PREPARATION
IS THE PRIMARY CAUSE OF COATING FAILURES.Thesurfaceshouldbepreparedinwhateverwayisnecessarysothatitwillreceivethepaint
properly.Theconditionofthesurfaceplaysanimportantroleinachievingthedegreeofadhesionrequiredforeffectiveperformance.
Primed Shutters
Contraventanas Imprimadas
INSTALLATION INSTRUCTIONS
• Twelve(12)3
"
inchscrewsareincluded.
• Usefour(4)screwsforeachshutterlessthan49
"
inheight.
• Usesix(6)screwsforeachshutter49
"
orgreaterinheight.
• Drilla1/8
"
diameterpilotholethroughthefaceofthestile1inchfromtheedgeoftheshutterineachcorner.
• Forshutters49
"
orgreaterinheight;alsodrilla1/8
"
diameterpilotholethroughthefaceofthestile1inchfromtheedgeof
eachshutterhalfwayupfromthebottom.
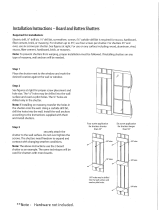
• Placetheshutternexttothewindowandmarkwherethepre-drilledpilotholeslineupagainstthesiding.
• *Drilla1/8
"
diameterholeintothesidingwherethescrewswillpassthroughtheshutterandenterthesiding.
• Placeeachshutternexttothewindowandlineupthepre-drilledpilotholesontheshutterwiththepre-drilledholesinthesiding.
• Insertthescrewintothepre-drilledholesoneachshutteranddrivethescrewintotheshutteruntilthescrewheadisflush
withthefaceoftheshutter.
*
For masonry siding you will need to use a hammer drill to pre-drill a 1/8 " diameter hole.
INSTRUCCIONES DE INSTALACIÓN
• Incluyedoce(12)tornillosde7,62cm.
• Usacuatro(4)tornillosparacadacontraventanademenosde1,24mdealto.
• Usaseis(6)tornillosparacadacontraventanade1,24momásdealto.
• Taladraorificiospilotode31,75mmdediámetroenlacaradeltravesaño,aunadistanciade2,54cmdelbordedecadaesquinadelacontraventana.
• Paracontraventanasde1,24momásdealto,taladratambiénunorificiopilotode31,75mmdediámetroenlacaradeltravesaño,aunadistancia
de2,54cmdelbordedecadacontraventanadesdelaparteinferiorhaciaarribahastalamitad.
• Colocalacontraventanaalladodelaventanaymarcaelpuntodondelosorificiospretaladradossealineanconlamoldura.
• *Taladraunorificiode31,75mmdediámetroenlamoldura,dondelostornillosatravesaránlacontraventanaypenetraránlamoldura.
• Colocacadacontraventanaalladodecadaventanayalinealosorificiospilotodelacontraventanaconlosorificiospretaladradosenlamoldura.
• Insertalostornillosenlosorificiospretaladradosdecadacontraventanayatorníllaloshastaquelacabezadeltornilloestearas
delacontraventana.
* Para molduras de mampostería necesitarás usar un taladro percutor para pretaladrar el orificio de 31,75 mm de diámetro.
INSTRUCCIONES PARA PINTAR LAS CONTRAVENTANAS IMPRIMADAS WINWORKS
EspecificacionesparalaPreparacióndelaSuperficie
• Lascontraventanasdebenestarlimpiasdetodoaceite,grasa,suciedadocontaminantequepudieranestarpresentesdebidoalmanejoyelenvío.
Puedeusarseunlimpiadorsolventesuave.
• Serecomiendalijarligeramenteconpapeldelijadegrano360,paracrearunperfiladecuadoparaquelapinturaseadhiera.
• Esimportantenolijarenérgicamenteoremoverlacapadeimprimador.
• RecomendamoselusodeunrevestimientodeUretano,Álcideo100%deAcrílicodealtacalidad.
• Debesaplicardoscapassuperioressegúnlasrecomendacionesdelfabricantedelapinturaparalograrelespesoradecuado.
• Recomendamosquelascontraventanassepintenlomásprontoposibledespuésdelijar.Sipasaranmásdetreintadíassedebenvolveralijar
antesdeaplicarlacapasuperior.
Nosedebesubestimarlaimportanciadepreparararlasuperficieantesdepintar.LAPREPARACIÓNINADECUADAOINCOMPLETADELASUPERFICIE
ESLACAUSAPRINCIPALDEQUEELREVESTIMIENTOFALLE.Lasuperficiedebeprepararsesegúnseanecesarioparaquelapinturaseadhiera
apropiadamente.Lacondicióndelasuperficiejuegaunpapelimportanteparalograrungradodeadhesiónquepermitaunrendimientoefectivo.


