Page is loading ...

Notebook PC
User’s Guide


Notational Conventions
Throughout this manual, the following conventions are used to distinguish elements of text.
Note:
Warning !
Tip :
Caution:
identifies important information that, if not followed,
may result in loss of data or damage to the computer.
Important !
Keyboard keys are shown in a bold typeset. For example:
Press Enter to complete.
When keys are joined by a plus sign (+), press the first key, and, while keeping the first key down, press
the remaining keys, finally release all the keys. When necessary, keys are also shown in graphics.
Any title, command, setup item, or button that you can see on the screen is shown in boldface.
Tips and information for special situations.
Important information that must be followed for safe operation.
Tips and useful information for completing tasks.
Vital information that must be followed to prevent
damage to data, components or persons.

Overview
Introducing the Notebook PC
Chapter - 1
Knowing the Parts
Chapter - 2
Getting Started
Chapter - 3
Using the Notebook PC
Troubleshooting
Chapter - 4
Chapter - 5
1-1
2-1
3-1
4-1
5-1

TAKING CARE OF YOUR NOTEBOOK PC
To prevent possible overheating of the computer's
processor, make sure you don't block the openings
provided for ventilation.
DO NOT press or touch the display panel.
DO NOT place on uneven or unstable work
surfaces.
DO NOT use your notebook computer under
harsh conditions.
DO NOT expose to direct sunlight.
DO NOT use or store in extreme
temperatures.
DO NOT subject the computer to magnetic
fields.
DO NOT place or drop objects on the computer
and DO NOT apply heavy pressure on it.

If you are traveling with your computer,
remember to carry it as hand luggage. Do not
check it in as baggage.
DO NOT spray water or any other cleaning fluids
directly on the display.
DO NOT slam your notebook shut and never
pick up or hold your notebook by the display.
DO NOT expose to dust and/or corrosive
chemicals.
DO NOT tamper with the batteries. Keep them
away from children.
DO NOT place near fire or other sources of heat.
DO NOT expose the computer to rain or
moisture.
Avoid sudden changes in temperature or humidity
by keeping it away fromA/C and heating vents.

User's Guide
Introducing the Notebook PC
Introducing the Notebook PC
Chapter - 1
1-1
Congratulation on the purchase of new HCL Notebook Computer!
Transportation Precautions
To prepare the Notebook PC for transport, you should turn it OFF and disconnect all
external peripherals to prevent damage to the connectors. The hard disk drive's head
retracts when the power is turned OFF to prevent scratching of the hard disk surface
during transport. Therefore, you should not transport the Notebook PC while the
power is still ON. Close the display panel to protect the keyboard and display panel.
Operating Environment
Since users are likely to maintain the same posture for a long period of time when using the computer,
they will be exhausted more easily if compared with other users engaged in other general operations.
This section will illustrate the suggested posture and the operating environment for the use of the
computer.
Health Management
Take a 2 to 3-minute break every 30 minutes after you have operated the machine for a long time.
Sedentariness will also cause stress. Do some gentle gymnastics during your break for recreation. When
you have symptoms such as eyestrain, sleepiness, dizziness, stiff in the shoulders, or numbness of the
wrists or hands, have a rest right away. In case these symptoms remain the next day, please contact your
doctor as soon as possible.

User's Guide
Introducing the Notebook PC
1-2
Posture When You Are Using the Computer
Please use the computer with your body relaxed and with a good sitting posture. For this, please pay
attention to the following tips.
! Adjust the height of the desk and the chair to look down from a position a little bit higher than the
screen.
! Adjust the chair until you can lean your back closely on the chair and sit down with your back
stretched.
! Relax with no strength put onto your shoulders and bend your knees comfortably.
! Put your wrist comfortably to keep it parallel to the desk.
Your eyes will feel tired easily if you cannot see the screen clearly. Pay attention to the following tips and
adjust the screen constantly to ensure its clear visibility.
Use appropriate lighting
Use the same appropriate lighting that is intended for office use when you use the computer.

User's Guide
Introducing the Notebook PC
1-3
Adjust the angle of the display to the position with which you can see the display
clearly
You won't see the screen clearly if the display reflects light. In addition, the visibility of the display varies
with the angle due to its feature. Adjust the angle of the display to ensure its clear visibility.
Clean the display
A dusty display makes the screen hard to see clearly. Wipe gently with a soft, dry cloth to clean the display
regularly.
Important !
This machine is a precision machine. For the place of installation and operation, please read carefully the
section “For the Correct Use of this Product and Your Safety” to ensure the correct operation.
Cover Your Notebook PC
You can purchase an optional carrying case to protect it from dirt, water, shock, and scratches.
Note :
The Notebook surface is easily dulled if not properly cared for. Be careful not to rub or scrap the Notebook PC
surfaces when transporting your Notebook PC.
Cover Your Batteries
If you intend to use battery power, be sure to fully charge your battery pack and any optional battery packs
before going on long trips. Remember that the power adapter charges the battery pack as long as it is
plugged into the computer and an AC power source. Be aware that it takes much longer to charge the
battery pack when the Notebook PC is in use.

User's Guide
Introducing the Notebook PC
1-4
Important Safety Instructions
Portable computers take the most beating from end users. This section gives you detailed information
about how to maintain a safe working environment while using the notebook computer. You can maintain
its condition and performance by following these guidelines. Please read it carefully to ensure maximum
safety.
— Before cleaning the notebook computer, make sure it is disconnected from any external power
supplies (i.e. AC adapter, car adapter and so on).
— When cleaning, do not use liquid or sprayed detergent for cleaning. Instead, use moisture sheet or a
cloth for cleaning.
— Use your Notebook where the socket outlet is nearby and easily accessible.
— Please keep the notebook computer away from humidity.
— Lay the notebook computer on a reliable surface when installing. A drop or fall may cause injury.
— The openings on the enclosure are for air convection hence the notebook computer can be
protected from overheating. DO NOT COVER THE OPENINGS.
— Be careful of using power supply. The notebook computer has specific power requirements.
— Use only a power adapter approved for use with this notebook computer.
— While unplugging the power cord, disconnect it by the plug head, not by its wire.

— Make sure the socket and any extension cords you may use can support the total current load of all
the connected devices.
— Place the power cord in such a way that people can not step on it. Do not place anything over the
power cord.
— All cautions and warnings on the notebook computer should be noted.
— If the notebook computer is not in use for a long time, disconnect it from mains to avoid possible
damage by transient over-voltage.
— Never pour any liquid into openings as this may cause fire or electrical shock.
— Never open the body of notebook computer. For safety reason, the notebook computer should only
be opened by qualified service personnel.
— Do not leave this notebook computer in an environment unconditioned. Storage temperature above
60ºC (140ºF) may damage the notebook computer.
— To avoid any damage to the internal device, you should first disconnect the AC adapter and remove
the battery pack from the notebook when replacing any internal device.
User's Guide
Introducing the Notebook PC
1-5

Airplane Precautions
Contact your airlines personnel if you want to use the Notebook PC in the airplane. Most airlines will have
restrictions for using electronic devices. Most airlines will allow electronic use only between and not
during takeoffs and landings.
Caution :
There are three main types of airport security devices: X-ray machines (used on items placed on conveyor
belts), magnetic detectors (used on people walking through security checks), and magnetic wands (hand-
held devices used on people or individual items). You can send your Notebook PC and diskettes through
airport X-ray machines. However, it is recommended that you do not send your Notebook PC or diskettes
through airport magnetic detectors or expose them to magnetic wands.
Cleaning Your Computer
When it is necessary to clean the plastic case and keyboard, use a soft, lint-free cloth, slightly dampened
with a mild detergent solution or use the contents of any commercially available computer cleaning kit.
Never use alcohol, petroleum-based solvents, or harsh detergents to clean the notebook. Also never
spray any liquids directly on the computer case, keyboard, or screen. If the liquid-crystal display (LCD)
screen has become smeared or dusty, clean the screen by first applying a mild glass cleaner to a soft,
clean, lint-free cloth, and gently wipe the glass. Never apply liquids directly on the screen surface.
Moreover, do not use paper towels to clean the display screen. Paper can scratch the display screen
matte.
User's Guide
Introducing the Notebook PC
1-6

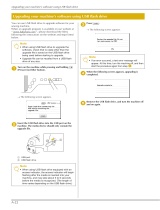
Preparing your Notebook PC
These are only quick instructions for using your Notebook PC. Read the later pages for detailed
information on using your notebook PC.
Important :
When opening, do not force the display panel down to the table or else the hinges may break! Never lift the
notebook PC by the display panel!
User's Guide
Introducing the Notebook PC
1-7
1. Install the battery pack 2. Connect the AC Power Adapter
3. Open the Display Panel 4. Turn ON the Notebook PC

Front side of the Notebook
The notebook computer is compact with features on every side. First, look at the inside of the system. The
following sections describe inside features.
User's Guide
Knowing the Parts
Knowing the Parts
Chapter - 2
2-1
3. Color Wide Screen LCD Display
4. Power Button
5. Keyboard
6. Touchpad Click Buttons
8. LED Status Indicators
9. TouchPad
7. Built-in Stereo Speakers
1. Webcam
2. Integrated Microphones

Before you Start
User's Guide
Knowing the Parts
2-2
1. Webcam (On Selected Models)
The Webcam is 2000K pixels. It can be used as a communication device that transmits instant image
through network for video conferencing and other interactive applications.
2. Integrated Microphones
Integrated array microphone for instant voice recording and simultaneous voice narrations and video
conferencing.
3. Color Wide Screen LCD Display
The notebook computer comes with a color LCD that you can adjust for a comfortable viewing position.
The LCD is 14.1” TFT color LCD with 1280x800 (Wide XGA) resolution panel. The features of the Color
LCD Display are summarized as follows:
TFT color LCD with Widescreen 14.1” 1280x800 (Wide XGA) resolution panels. Capable of displaying
16M colors (32-bit true color).
4. Power Button
The power switch allows powering ON and OFF the Notebook PC and recovering from Standby. In
windows Vista, this button can also be used to safely turn OFF the Notebook PC. The power switch only
works when the display panel is opened.
5. Keyboard
Standard QWERTY-key layout and full-sized 86 keys keyboard with Windows embedded numeric
keypad, Function Keys, inverted "T" cursor arrow keys, and separate page screen control keys.
6. Touchpad Click Buttons
The buttons below the TouchPad correspond to the left and right buttons on a standard mouse.
(On Selected Models)

User's Guide
Knowing the Parts
2-3
7. Built-in Stereo Speakers
Integrated left and right mini stereo speakers for audio output. The built-in stereo speaker system allows
you to hear audio without additional attachments. The multimedia sound system features an integrated
digital audio controller that produces rich, vibrant sound (results improved with external stereo
headphones or speakers). Audio features are software controlled.
8. LED Status Indicators
The Status indicator lights correspond to specific operating modes. These modes are: Power
on/Suspend status, battery/AC adapter status, hard drive activity (HDD), Num Lock, Caps Lock, and
Wireless LAN activity. Description of the status appears in the latter part of this chapter.
9. Touchpad
The Touchpad with its buttons is a pointing device that provides the same Function as a desktop mouse.
The two select buttons located at each side support tapping selection and dragging functions. Simply
move your fingertip over the touchpad to control the position of the cursor. Use the selection buttons
below the touchpad to select menu items.

NOTEBOOK STATUS ICONS
The status indicator lights correspond to specific operating modes. These modes are: Power on/
Suspend status, Battery/AC Adapter status, hard drive activity (HDD), Num Lock, Caps Lock, and
Wireless LAN activity.
1. Power Indicator
Lets you know that power to the system is turned on. This LED is positioned so that you can see the power
state whether the LCD panel is opened or closed.
Glows in orange when the system is powered on.
Blinks in orange when the system is in Standby mode.
User's Guide
Knowing the Parts
2-4
6. Wireless LAN/Bluetooth
1. Power Indicator
3. Drive Access
4.Num Lock
5. Caps Lock
2.Battery Charging LED

2. Battery Charging LED
Lights to indicate battery in charging status.
Glows in orange to indicate that the battery is in charging.
Glows in green to indicate the battery is fully charged.
3. Drive Access
When LED blinks in orange color, It indicates that the system is accessing the Hard Disk.
4. Num Lock
When LED glows in orange indicates that the Num Lock key on the keyboard is activated. When
activated, the embedded numeric keypad will be enabled.
5. Caps Lock
When LED glows in orange indicates that the Caps Lock key on the keyboard is activated. When
activated, all alphabet keys typed in will be in uppercase or capital letters.
6. Wireless LAN/Bluetooth - Activity Indicator
When LED glows in orange indicates that the Wireless LAN Function is activated.
When LED blinks in orange indicates that the Bluetooth/ Wireless LAN is being accessed. When LED is
off Wireless LAN(only) is not activated.
User's Guide
Knowing the Parts
2-5

The Left Side of the Notebook
1. ExpressCard Slot
One 26pin Express card slot is available to support one ExpressCard/34mm or one ExpressCard/54mm
expansion card. This new interface is faster by using a serial bus supporting USB 2.0 and PCI Express
instead of the slower parallel bus used in the PC card slot. (Not compatible with previous PCMCIA cards.)
2. VGA Port
The 15-pin D-sub monitor port supports a standard VGA-compatible device such as a monitor or projector
to allow viewing on a larger external display.
User's Guide
Knowing the Parts
2-6
2. VGA Port
3. Air-Outlet Vent
6. 4 in 1 Card Slot
5. e-SATA/USB combo port
4. LAN (RJ-45) Port
1. Express Card Slot

User's Guide
Knowing the Parts
2-7
3. Air-Outlet Vent
Emits the heat out of your computer and keeps it within operating temperature.
Important :
Make sure that paper, books, clothing, cables or other objects do not block any of the air vents or else
overheating of the Notebook PC may occur.
4. LAN (RJ-45) Port
RJ-45 LAN Port is an internal 10/100 ethernet (or) 10/100/1000Mbps ethernet LAN module (depends on
selected model) connects your computer to other computers/networks through a local area network
(LAN).
5. e-SATA/USB Combo Port
The e-SATA/USB combo port allows you to connect an external device such as an external hard disk
drive or optical drive.
6. 4 in 1 card slot
The built-in card reader supports four types of memory card, such as Memory Stick(MS-Pro), Multi Media
/