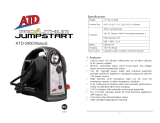
Denver JST-10010 User manual

Type
User manual

The Denver JST-10010 is a multifunctional jump starter and power bank that packs a powerful 10000mAh/37Wh lithium-ion battery, capable of jumpstarting vehicles with up to 300A cranking current and 480A peak current, making it suitable for most cars, motorcycles, and boats. With its nine safety protections, including short circuit, reverse polarity, and over-voltage protection, the JST-10010 ensures safe and reliable operation. You can also use it as a power bank to charge your electronic devices, thanks to its multiple USB charging ports and a dedicated 12V/16V/19V output port for laptops.

The Denver JST-10010 is a multifunctional jump starter and power bank that packs a powerful 10000mAh/37Wh lithium-ion battery, capable of jumpstarting vehicles with up to 300A cranking current and 480A peak current, making it suitable for most cars, motorcycles, and boats. With its nine safety protections, including short circuit, reverse polarity, and over-voltage protection, the JST-10010 ensures safe and reliable operation. You can also use it as a power bank to charge your electronic devices, thanks to its multiple USB charging ports and a dedicated 12V/16V/19V output port for laptops.

Multi-functional Jump Starter and Power Bank
Instruction Manual
Facebook.com/denverelectronics
Contents
Precaution ........................................................................................... 4
Safety Instructions/Warnings .................................................................... 4
General Warnings ..................................................................................... 4
Product Package ................................................................................... 6
Product Diagram .................................................................................. 7
Additional Functions ............................................................................ 7
LCD Screen ................................................................................................ 7
LED Flashlight ............................................................................................ 8
Specification ........................................................................................ 9
Smart Clamp Functions ........................................................................ 9
EN .............................................................................................................. 9
Safety Instructions .................................................................................. 10
Nine Safety Protections ........................................................................... 10
How to Charge Jump Starter ............................................................... 12
Safety Instructions .................................................................................. 12
Charging Procedures ............................................................................... 13
Safety Protections ................................................................................... 14
Why cannot the appliance be charged? .................................................. 14
Using the Appliance as a Jump Starter ............................................... 15
Caution Before Using .............................................................................. 15
Jumpstarting Procedure as Below ........................................................... 16
Caution When Using ............................................................................... 17
Caution After Using ................................................................................. 18
Charge Electronic Products ................................................................. 19
Specyfikacja wtyczki laptopa .............................................................. 20
FAQ .................................................................................................... 21
Precaution
We appreciated your recent purchase of our product. Please read this
manual deliberately before utilizing the appliance and hold it for future
reference.
Safety Instructions/Warnings
Before using this unit, read and see all safety instructions and warnings
carefully, basic safety precautions ought to dependably be taken after to
diminish the danger of flame, leaking batteries, injury, and materials
harm.
General Warnings
1. The appliance not expected for use by people with reduced physical,
tactile, or mental capacities.
2. Children or Adults ailing in experience and information additionally
should not work this machine unless he/she has given supervision or
guideline concerning the correct use and notices of the apparatus by
a man in charge of their security.
3. Use in a dry area as it were. Try not to permit the apparatus to wind
up wet.
4. Do not submerge the apparatus in water.
5. Do not open the appliance to flame, serious warmth or combustible
fluids.
6. Do not open the appliance to supplant the inside battery. No client
replaceable parts are inside the jump starter.
7. Do not use this item where there are combustible vapor, gasses or
dust present.
8. To reduce the risk of damaging plugs and cords, never pull the cable
to remove the plug from a socket outlet.
9. Dropping, hitting or applying excessive amounts of force to the hope
starter may damage the unit. And this could bring about loss of
operation, electric fire or another undesired result.
10. Use just the charging connectors, and jumpstarting clamp gave in
this package. Unapproved parts may bring about actual harm or
damage.
11. If the fluid of item sprinkles into eyes or skins, do not rub the eyes,
wash promptly with clean water and look for quick restorative
consideration.
12. Never open of dismantle the machines as it will void your guarantee.
13. Separate gathering. This item should not discard with ordinary
household waste. Isolate accumulations of utilized items and
packaging permits materials to be reused and used once more.
Reuse of reused materials forestalls genetic contamination and
lessens the interest for crude materials.
Product Package
1. AC adapter
2. Car charger
3. USB cable
4. Smart clamp
5. Jump starter
6. User manual
7. EVA zipper bag
8. Laptop cable
9. Laptop plug
Product Diagram
EN EN
LED Flashlight LED Flashlight
Jumping port Jumping port
Input port Input port
Capacity indicator Capacity indicator
USB charging ports USB charging ports
Power button (Master switch) Power button (Master switch)
12V/16V/19V-3.5A output port 12V/16V/19V-3.5A output port
Additional Functions
LCD Screen
Press the power button, LCD will show battery level, output and battery
symbol. When you utilize the appliance to charge your devices, the
output voltage and current will be indicated on the LCD screen.
1. When charging jump starter, the charging symbol “IN” will flash on
LCD; When completely charged, the battery level is 100%.
2. When utilizing USB charging, LCD will show current for 5 seconds and
after that change to battery level. At the point when the battery level
is lower than 20%, the battery symbol will glimmer to remind users
charging.
3. If press power button and LCD does not display, it implies the battery
has run out, the internal circuit will begin battery core protection
naturally. Users require charge jump starter soon to keep cell center
from harming for long-term self-consuming.
LED Flashlight
Keep pressing the power button for 3-5 seconds to start the LED
flashlight. There are three modes of LED lights, follow steps:
1
st
Press: Normal white light
2
nd
Press: Slow white strobe light
3
rd
Press: Quick white strobe light
4
th
Press: Shut down flashlight
Specification
Battery Capacity: 10000mAh/37Wh
Battery Type: Lithium-ion battery cell
Starting voltage: 12V
Output: 5V/2A max 3A; 12V/16V/19V-3.5A
Input: 15V/1A
Cranking current: 300A
Peak current: 480A
Life Cycle: ≥500
Flashlight Power: 1W
Flashlight Lumens: 1W
Charging Time: 15V AC adapter takes 6-8hrs to full charge
Working temperature: -20 - 60°C
Humidity: 10-90%
Smart Clamp Functions
EN EN
Indicator Indicator
EC5 Socket EC5 Socket
Safety Instructions
1. Gdy inteligentny zacisk zaczyna wymuszpracę, nie należy podłącz
razem czerwonego i czarnego zacisku, gdyż spowoduje to krótkie
spięcie i uszkodzenie rozrusznika.
2. If the product expands, please quit utilizing it.
Nine Safety Protections
1. Short Circuit Protection
When short circuit happens, the indicator red light of smart clamp will be
on and alarm sound, the clamp will shut down output automatically.
2. Reverse Polarity Protection
The smart clamp can test whether the auto battery positive and negative
interface accurately with the red and black clamp, if they associate
inaccurately, the red indicator light will be on and alarm sound, clamp
shut down output automatically.
3. Ochrona przed ładowaniem zwrotnym
Inteligentny zacisk może ładować akumulator samochodu poza
rozrusznikiem. W przeciwnym razie mogłoby nastąpić uszkodzenie
rozrusznika.
4. Low-Voltage Protection
Normally the car battery voltage is 12V, its possible the incoming voltage
of car battery is too low when jump starter starts the car because of low
capacity. The indicator red light will be on and the smart clamp will shut
down output automatically to keep the car battery being damaged.
5. Over-Voltage Protection
Normalnie napięcie akumulatora samochodowego wynosi 12 V. Jeśli
napięcie przekroczy 12 V, to rozrusznik uruchomi pojazd, by rozładować.
Zapali się czerwony wskaźnik świetlny, a inteligentny zacisk
automatycznie wyłączy ładowanie, by zapobiec uszkodzeniu akumulatora
samochodowego.
6. Internal IC Components Malfunction Alarm
If there is any problem with inside IC components, the indicator red light
will be on, and the smart clamp alarm sound consequently.
7. Clamp Dropping Alarm When Jumpstarting
While jumpstarting the auto, the indicator red light will be on and the
smart clamp alarm sound consequently if the clamp drops from the
terminals.
8. Compulsively Manual Switch Mode
Nie należy przeprowadz tej czynności bez profesjonalnych instrukcji,
gdyż w przeciwnym razie może to spowodować uszkodzenie rozrusznika,
a nawet spowodować wypadek.
9. Test Car Battery Quality
The smart clamp can check auto battery quality. When car battery has
been damaged, the indicator red light will be on and alarm sound
automatically, clamp shut down output automatically.
How to Charge Jump Starter
Safety Instructions
1. Nie należy korzystać z innej wtyczki ładującej. By ładować
rozrusznik, należy korzystać wyłącznie z dołączonej
ładowarki.
2. Należy wyłączyć wszystkie urządzenia ładujące, by
zagwarantować krótszy czas ładowania i zabezpieczyć
wykorzystanie akumulatora.
3. Please do not jumpstart the auto while charging the
appliance.
4. Be far from any unsafe source while charging the appliance,
for example, combustible exhaust, gasses or water and so
on.
5. Keep the temperature between 0°C - 40°C while charging.
6. During charging, if the product is warmth staining, please
quit utilizing it, it might prompt to fluid spilling, smoking or
smoldering.
7. Przeciętnie pełne ładowanie zajmuje 6 godzin. Nie należy
ładować urządzenia dłużej niż 10 godzin, gdyż może to
spowodować uszkodzenie produktu.
8. Należy upewnić się, że złącze jest prawidłowe, a adapter AC
jest dobrze podłączony do gniazdka ściennego. Jeśli
urządzenie nie jest ładowane, należy skontaktować się ze
sprzedawcą.
9. Należy pamiętać, by co trzy miesiące sprawdzać, czy
wszystko jest w porządku z urządzeniem oraz ładować je co
sześć miesięcy.
Charging Procedures
Technique 1: Technique 2:
Connect AC adapter Plugged
into a socket Outlet to 15V
input port Of the jump starter
to Start charging.
Connect one end of car
charger to 15V input port of
the jump starter, then connect
the other end to Cigarette
lighter port to start charging.
Safety Protections
1. Over Current Protection
2. Over-Voltage Protection
3. Short Circuit protection
Jeśli wystąpi prąd przetężeniowy, zbyt wysokie napięcie lub krótkie
spięcie, urządzenie automatycznie odłączy wejście/wyjście zasilanie i
przejdzie do trybu ochrony, by zapobiec uszkodzeniu obu urządzeń.
Należy usunąć z urządzenia wszystkie zaciski i przechowywać je w
chłodnym i suchym miejscu. Po ładowaniu można ponownie włączyć
urządzenie.
Cautions:
1. Do not charge device immediately after starting.
2. Do not plug in clamp into device when charging.
3. Do not charge device over 10 hours.
Why cannot the appliance be charged?
1. Check whether the jump starter has been connected well with the
charger and whether the charger has been plugged into power socket
well.
2. Make sure the cable interfaces well with jump starter and auto
cigarette light port.
3. If above all is well, the appliance still can’t be charged, please contact
sale after service for help.
Using the Appliance as a Jump Starter
Caution Before Using
1. Vehicles may have electrical and electronic systems that may be
damaged if subjected to high starting voltages and voltage crests.
Before connection the appliance to the vehicle, read the vehicle’s
owner’s manual to confirm that external-starting assistance is
allowed.
2. Before use, check the appliance for damaged or defective parts.
Check for breakage of parts, damage to switches and whatever other
conditions that may influence its operation.
3. Do not use the appliance if any part is damaged or flawed and
contact after service for assistant.
4. Before starting the vehicle, check the battery level at least at 50%.
5. Check whether the item expands, distorts and smells peculiarly.
6. Clear up the dust on the electrodes of your auto battery before jump
starting.
7. Before starting the vehicle, please ensure the air conditioning, car
audio and other electronic gadget are closed off.
8. The appliance is not intended to utilize as a replacement for a
vehicular battery. Try not to endeavor to work a vehicle that does
not have a cell introduced.
9. The appliance can jumpstart any 12-volt vehicles, for example,
motorcycles, autos, jeeps, steamships and so forth.
10. Remember there is an auto-off component on the jump starter.
What if you don’t attempt to start your car within 30 seconds, it will
consequently close itself off.
11. Before starting your car, make sure the vehicle is in neutral with the
parking brake applied.
Jumpstarting Procedure as Below
1. Tightly interface the red clip to auto battery positive (+), black clip to
negative (-), normally the green and red indicator light of smart clamp
will flash alternately. If the connection is not correct, only red
indicator will be on and alarm sound.
2. Open the rubber lid of jump start port, connect the EC5 of clamp to
the port.
3. Start Auto: The appliance can start vehicle (up to 4.0L petrol or 2.0L
diesel motor) up to 20 times with 480A peak current.
4. After starting auto, the green indicator light will be off and the red
indicator light is still on, smart clamp alarm sound. Remove the clamp
from auto battery instantly.
5. Finally, remove the EC5 of clamp from the jump starter port.
Ważne:
Jeśli inteligentny zacisk włączy alarm, może być konieczne odłączenie
zacisku od akumulatora, odłączenie inteligentnego zacisku od rozrusznika
i ponownie zacząć czynności od początku.
Caution When Using
1. Tightly interface the car clip plug, or it will influence starting vehicles,
even cause car plastic liquefy down.
2. Each starting vehicle interim to 10 seconds, the constantly starting
times is not more than 20 times.
3. If starting vehicle constantly for 3 times, regardless it doesn’t succeed,
please check whether the clip is free or interfaces accurately and
whether the operation is right. What if despite everything it doesn’t
prevail after one more attempt, please contact customer service for
help.
4. Po uruchomieniu nie należy podłączać obydwu zacisków, gdyż może
to zagrozić bezpieczeństwu.
Caution After Using
1. When you are not utilizing it, store it in a dry place, well-ventilated
place out of the reach of children.
2. Children should not have access to stored appliance.
3. The appliance should be out of direct sunlight, heat and moisture.
4. Before of self-consuming, we recommend that you check the
appliance every 3 months and recharge it every half year to
guarantee satisfactory performance when needed.
5. Never allow the red and black clamp to touch each other or another
common metal conductor. We suggest storing the jump starter in the
box in which it was initially received. Always be sure re-wrap cables
and re-holster clamp after each use and before extended storage.
Charge Electronic Products
The jump starter has 3 USB outputs: 5V/3A max and 12V/16V/19V 3.5A
1. USB output: The appliance can charge most of the 5V input devices,
such as Apple/iPhone, Android smartphones, iPad, tablet PC, a game
machine, MP3/MP4, GPS, digital cameras etc.
2. 12V/16V/19V 3.5A output: Before turning on the main switch, short
press it and you can switch the output between 19V 16V and 12V
with light indicators on. Different digital devices require different
voltage. For example, laptop may need 19V or 16V. So before use
please confirm your required voltage. 12V/3.5A can power 12V tools
like radios, navigation equipment, camcorders, etc.
Notice:
If the power cannot charge the electronic products, please
contact customer service after confirming the connection cable
and port are excellent without damage.
Specyfikacja wtyczki laptopa
EN PL
Laptop Plug specification Specyfikacja wtyczki laptopa
A: 6.0*1.4 - Sony, Fujitsu, Samsung A: 6.0*1.4 - Sony, Fujitsu, Samsung
C: 5.5*2.5 - Dell, IBM, Acer,
Toshiba. etc.
C: 5.5*2.5 - Dell, IBM, Acer,
Toshiba. etc.
D: 5.5*2.1 - Acer, IBM, Toshiba,
Lenovo, etc.
D: 5.5*2.1 - Acer, IBM, Toshiba,
Lenovo, etc.
E: 5.5*1.7 --Acer, Sony E: 5.5*1.7 --Acer, Sony
H: 5.0*1.0 - Samsung H: 5.0*1.0 - Samsung
F: 4.8*1.7 -HP, ASUS, etc. F: 4.8*1.7 -HP, ASUS, etc.
I: 7.4.0.6 -HP, Dell I: 7.4.0.6 -HP, Dell
K: 7.9*0.9 -Lenovo, IBM K: 7.9*0.9 -Lenovo, IBM
  • Page 1 1
  • Page 2 2
  • Page 3 3
  • Page 4 4
  • Page 5 5
  • Page 6 6
  • Page 7 7
  • Page 8 8
  • Page 9 9
  • Page 10 10
  • Page 11 11
  • Page 12 12
  • Page 13 13
  • Page 14 14
  • Page 15 15
  • Page 16 16
  • Page 17 17
  • Page 18 18
  • Page 19 19
  • Page 20 20
  • Page 21 21
  • Page 22 22

Denver JST-10010 User manual

Type
User manual

The Denver JST-10010 is a multifunctional jump starter and power bank that packs a powerful 10000mAh/37Wh lithium-ion battery, capable of jumpstarting vehicles with up to 300A cranking current and 480A peak current, making it suitable for most cars, motorcycles, and boats. With its nine safety protections, including short circuit, reverse polarity, and over-voltage protection, the JST-10010 ensures safe and reliable operation. You can also use it as a power bank to charge your electronic devices, thanks to its multiple USB charging ports and a dedicated 12V/16V/19V output port for laptops.

Ask a question and I''ll find the answer in the document

Finding information in a document is now easier with AI

in other languages