Explore Scientific TDM Adapter for MEADE LX200ACF Owner's manual
- Type
- Owner's manual
This manual is also suitable for
Explore Scientific TDM Adapter for MEADE LX200ACF
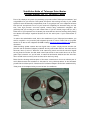
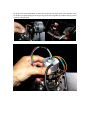
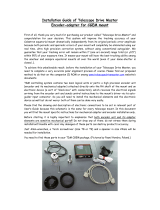
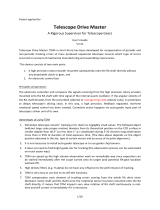
The Explore Scientific TDM Adapter for MEADE LX200ACF is a high-precision encoder-adapter that can dramatically improve the tracking accuracy of your LX200 equatorial mount. It does this by eliminating both periodic and aperiodic errors, resulting in tracking errors of within 1" (one arc-second) range total (or ±0.5”) within 95% of your exposure time. This makes it one of the most accurate tracking systems available for amateur and semipro equatorial mounts.
The TDM Adapter is easy to install and requires no modification to your mount. It comes with a detailed installation guide that will walk you through the process step-by-step. Once installed, the TDM Adapter will work seamlessly with your mount's autoguider input connector.
Explore Scientific TDM Adapter for MEADE LX200ACF
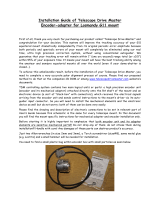
The Explore Scientific TDM Adapter for MEADE LX200ACF is a high-precision encoder-adapter that can dramatically improve the tracking accuracy of your LX200 equatorial mount. It does this by eliminating both periodic and aperiodic errors, resulting in tracking errors of within 1" (one arc-second) range total (or ±0.5”) within 95% of your exposure time. This makes it one of the most accurate tracking systems available for amateur and semipro equatorial mounts.
The TDM Adapter is easy to install and requires no modification to your mount. It comes with a detailed installation guide that will walk you through the process step-by-step. Once installed, the TDM Adapter will work seamlessly with your mount's autoguider input connector.


-
 1
1
-
 2
2
-
 3
3
-
 4
4
-
 5
5
-
 6
6
-
 7
7
-
 8
8
-
 9
9
-
 10
10
-
 11
11
-
 12
12


Explore Scientific TDM Adapter for MEADE LX200ACF Owner's manual
- Type
- Owner's manual
- This manual is also suitable for
Explore Scientific TDM Adapter for MEADE LX200ACF
The Explore Scientific TDM Adapter for MEADE LX200ACF is a high-precision encoder-adapter that can dramatically improve the tracking accuracy of your LX200 equatorial mount. It does this by eliminating both periodic and aperiodic errors, resulting in tracking errors of within 1" (one arc-second) range total (or ±0.5”) within 95% of your exposure time. This makes it one of the most accurate tracking systems available for amateur and semipro equatorial mounts.
The TDM Adapter is easy to install and requires no modification to your mount. It comes with a detailed installation guide that will walk you through the process step-by-step. Once installed, the TDM Adapter will work seamlessly with your mount's autoguider input connector.
Ask a question and I''ll find the answer in the document
Finding information in a document is now easier with AI
Related papers


Other documents
-
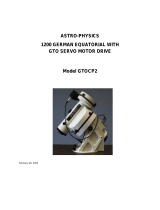 ASTRO-PHYSICS Telescope GTOCP2 User manual
-
Meade LX200 R User manual
-
Meade LX200-ACF_manual 01.10 Owner's manual
-
-
JMI Telescopes NGC-miniMAX User manual
-
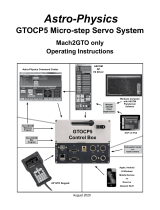 ASTRO-PHYSICS GTOCP5 Operating Instructions Manual
-
iOptron #3500 User manual
-
Orion 9791 User manual
-
-
Allen-Bradley Guardmaster CIP Safety Encoder Installation Instructions Manual

