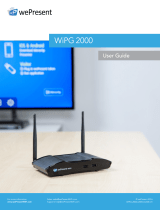
WePresent wePresent WiCS-2100 User guide

Type
User guide

This manual is also suitable for

WiCS-2100
User's Manual
Version: 09
2
WiCS-2100 User’s Manual
Table of Contents
1
Overview ...................................................................................................................................... 4
2 Package Contents ...................................................................................................................... 6
3 Physical Details ........................................................................................................................... 6
4 What You (Might) Need ............................................................................................................. 8
5 Hardware Installation ................................................................................................................ 8
6 Download the MirrorOp (Sender) App ................................................................................. 10
7 Standby Screen of the Projector/Display ............................................................................ 12
8 Main Button and Toolbar ........................................................................................................ 13
8.1 Main Button, User-List Button and Toolbar in the Standby Mode ............................ 13
8.2 Toolbar in the Whiteboard Mode ..................................................................................... 15
8.3 Toolbar in the Projection Mode ........................................................................................ 15
8.4 Auto Layout .......................................................................................................................... 16
8.5 Remote Control/Remote Touch Control (UMT) ........................................................... 16
9 Web Management .................................................................................................................... 17
9.1 Home Page ........................................................................................................................... 17
9.1.1 Get MirrorOp (Sender) ........................................................................................................ 18
9.1.2 Moderator ............................................................................................................................. 18
9.1.3 WebSlides .............................................................................................................................. 20
9.1.4 HTTPS self-signed certificate ........................................................................................... 20
9.2 Admin Page (wePresent Configurator) ........................................................................... 24
9.2.1 Personalization & Display .................................................................................................. 25
9.2.1.1 Wallpaper (Standby Screen Image) ............................................................................. 25
9.2.1.2 Display & Login ................................................................................................................ 26
9.2.1.3 Energy Savers .................................................................................................................. 27
9.2.2 Wi-Fi & Network .................................................................................................................. 27
9.2.2.1 Wi-Fi Settings ................................................................................................................... 27
9.2.2.2 Network Settings ............................................................................................................ 29
9.2.3 System & Service.................................................................................................................. 32
9.2.3.1 System Information ........................................................................................................ 32
9.2.3.2 Date & Time ..................................................................................................................... 33
9.2.3.3 Change Passwords ......................................................................................................... 33
9.2.3.4 Service Management...................................................................................................... 34
9.2.3.5 SharePod Pairing ............................................................................................................. 35
9.2.3.6 SNMP ................................................................................................................................. 36
9.2.4 Support & Updates .............................................................................................................. 36
9.2.4.1 Firmware Updates ........................................................................................................... 37
9.2.4.2 Troubleshoot ................................................................................................................... 37
9.2.5 Log out of Admin Page ....................................................................................................... 38
3
WiCS-2100 User’s Manual
10 Using MirrorOp (Sender) to Start Projection ...................................................................... 39
10.1 Start the MirrorOp application .......................................................................................... 39
10.2 Main User Interface of MirrorOp (Sender) ...................................................................... 40
10.3 A Complete User’s Guide on MirrorOp (Sender) ........................................................... 40
11 Moderator Preview & Control ................................................................................................ 42
11.1 On-Screen Moderation: ..................................................................................................... 42
11.2 Web-Based Moderation: .................................................................................................... 42
11.3 “Student Monitor” (Moderation via MirrorOp Sender UI): ........................................... 42
12 Use the SidePad Function with MirrorOp Receiver ........................................................... 46
13 Launch WebSlides .................................................................................................................... 52
14 Wall-Mount Kit .......................................................................................................................... 55
15 Frequently Asked Questions .................................................................................................. 56
16 Disposal Information ............................................................................................................... 60
17 Open Source Software Used in WiCS-2100 ....................................................................... 61
4
WiCS-2100 User’s Manual
1 Overview
WiCS-2100 is an advanced wireless presentation system which optimizes the collaborative
experience with more intuitive solutions. Among its outstanding features, the most
distinguished ones are auto layout, enhanced cross-platform capability and advanced OSD
control.
WiCS-2100 Feature Highlights:
Icon Feature
Description
MirrorOp
(Sender)
MirrorOp Sender for Windows, Mac and Chrome
Win: Windows 7/8/10
Mac: macOS 10.9 and above
Chrome OS
MirrorOp Presenter
High-quality presentation (Word, Excel, PowerPoint,
PDF, Photo, Camera, Web Browser) via Android and
iOS devices.
MirrorOp Receiver
(the SidePad Function)
Control the projecting PC or Mac via iOS or Android
devices
WebSlides
Broadcast slides to the audience (multiple login
devices) via WiFi and web browser.
Audience can save the projecting slides for
taking notes.
Access to WebSlides can be secured with a
password.
Auto Layout
Automatic arrangement of (up to 4) projected device
screens in the display layout.
AirPlay/
Google Cast Support
Device screens can be projected to the display directly
via AirPlay or Google Cast.
One to Many Distribution
Project the screen to up to four receiver devices at the
same time.
(Please refer to MirrorOp Sender Users
Manual.)
Moderator Preview &
Control/Conference
Control/Student Monitor
The moderator can control who is projecting via
OSD (on-screen display), web browser and
MirrorOp Sender UI (User Interface).
Thumbnail preview of all (up to 32) login senders
device screens is available on OSD and MirrorOp
5
WiCS-2100 User’s Manual
Basic Features:
WiFi 802.11 a/b/g/n/ac (switchable dual-band; 2.4GHz or 5GHz)
Power over Ethernet
Wireless screen/audio projection
Support up to 32 concurrent login users
Remote control
Multi-touch support (UMT) - support USB HID touch devices compatible with
Windows 7/8/10
Multi-touch support (UoIP) - support USB HID touch devices compatible with
Windows 7/8/10
Extended desktop support for both Windows and Mac
Web management (including the software download and device settings)
Customizable standby screen: replace the entire standby screen image with any
image of your choice)
Provide session security login and WiFi WPA PSK/WPA2 PSK to protect
presentation contents and maintain office network security
HDMI video output
Support the AP (Access Point)/Station/AP & Station mode
Support SSDP discovery protocol
Sender UI.
Remote Control/UMT
(Universal Multi-Touch)
(Driverless) remote/touch control through network.
[Support USB HID touch devices compatible with
Windows 7/8/10]
Plug & Show
You can create your own USB Plug & Show token
(USB drive). Just plug the token into your PC/Mac, and
a presentation can be started in seconds (no software
installation is required).
6
WiCS-2100 User’s Manual
2 Package Contents
wePresent WiCS-2100 (Base Unit)
Power Adapter (DC +12V, 2A)
[Manufacturer: Asian Power Devices Inc./Model: WA-24Q12R]
Wall-Mount Kit
Quick Start Guide
Warranty Card
CE DoC and Warning Statement
3 Physical Details
Front
Description
Standby button: press the button to enter the standby mode
LED indicator: redsystem loading; blue – system ready;
breathing blue standby mode
USB host 2.0 port for USB thumb drive/mouse/keyboard/touch
device
Standby Button and LED Indicator
USB Port
7
WiCS-2100 User’s Manual
Rear
Description
USB Port (Rear)
USB host 2.0 port for USB thumb drive/mouse/keyboard/touch
device
Ethernet Port
10/100/1000M RJ-45 port
For PoE (Power over Ethernet)
HDMI Port
Standard-A, HDMI 1.4b output
Audio Jack
3.5mm audio jack, stereo analog output
Power Jack
DC 12V in
Reset Button
Power on the WiCS-2100, and long press the reset button for
8~10 seconds until the WiCS-2100 reboots.
Note:
(a) The function of the ITE (Information Technology Equipment) being investigated to IEC
60950-1 is considered not likely to require connection to an Ethernet network with
outside plant routing, including campus environment; and
(b) The installation instructions clearly state that the ITE is to be connected only to PoE
networks without routing to the outside plant.
Reset Button
Ethernet
Port
Power Jack
USB Port
HDMI
Port
Audio Jack
8
WiCS-2100 User’s Manual
4 What You (Might) Need
Projector/display with HDMI interface
(Required)
Ethernet cable (Required if you want to
disable the WiFi of the WiCS-2100)
Windows or Mac computer
Apple iPhone, iPad or iPod touch
Android phone or tablet
Speaker
USB mouse/keyboard
USB HID touch screen/IWB device
5 Hardware Installation
1) Connect the WiCS-2100 to the projector/display through the HDMI port and turn on the
projector/display power.
2) Connect the power adapter to the WiCS-2100 to turn on the device. The system is ready
when the LED indicator turns blue.
* The default standby screen as shown below will be displayed when the system is
ready.
3) If you disable the WiFi of the WiCS-2100, you need to connect the device to an existing
IT network through an Ethernet cable.
4) Insert the speaker cable to the WiCS-2100 audio jack for enhanced audio output.
5) Attach the USB mouse/keyboard/touch screen to the WiCS-2100 front/rear USB port
for OSD (On-Screen Display) control or remote control.
9
WiCS-2100 User’s Manual
SSID
Hostname
IP Address
10
WiCS-2100 User’s Manual
6 Download the MirrorOp (Sender) App
Windows Phone/Windows RT not supported by MirrorOp
1) Make sure your PC/Mac is WiFi-enabled, and connect your PC/Mac to the WiCS-2100
through WiFi. You can find the WiFi network name (SSID) of your WiCS-2100 device on
the standby screen of the projector/display. [Default SSID is WiCS-2100-xxx (xxx are the
last three characters of the MAC ID shown on the bottom of the WiCS-2100)]
Windows Mac
2) Open the browser of your computer, and enter the IP address or the device hostname in
the address bar (URL bar) of the browser. You can find the IP address and hostname on
the standby screen of the projector/display. [Default IP address is 192.168.100.10;
default hostname is WiCS-2100-xxx (xxx are the last three characters of the MAC ID
shown on the bottom of the WiCS-2100)]
3) You can see the “Home” page as below. Click Portable Softwareor “Installerto
download the portable version or installed version of the MirrorOp (Sender) app for
Windows (Windows 7/8/10) or Mac (macOS 10.9 and above). [Please disable the “Smart
Screen Filter” on the IE browser; otherwise you might not be able to download the app.]
11
WiCS-2100 User’s Manual
Note:
The difference between the portable version and installed version of the MirrorOp
Sender app lies in the following:
(a) The installed version of the MirrorOp Sender app supports the
UoIP (USB over IP)
and SidePad
features of the connected WiCS-2100 device, but the portable
version does not.
[These differences only apply to Windows users.]
The UoIP feature of the WiCS-2100 allows users to remotely control the
projecting PC from the display using specialhand gestures. (Special hand
gestures are used in some game apps and interactive whiteboard apps.)
Please be aware that UoIP needs to be enabled in the settings of the MirrorOp
Sender app before you use this function.
[MirrorOp Sender -> ->
Preferences -> Advanced -> (Remote USB Support) -> Simulate as local
USB]
(b)
The portable version of the MirrorOp Sender app can locate and connect to
the target WiCS-2100 device automatically (if your PC/Mac and the
WiCS-2100 are on the same intranet).
Guest users are recommended to
download the portable version as they can start a presentation without any
application installation or device discovery.
(c) Internal users are suggested to download the installed version of MirrorOp Sender
if there are a number of WiCS-2100 devices deployed on their company/school
networks and they need to connect to different WiCS-2100 devices from time to
time. If they use the portable version, the MirrorOp Sender app will automatically
locate the original WiCS-2100 device (via which the MirrorOp Sender app was
downloaded) and they may need to search for their target device manually.
4) If you have installed the MirrorOp Sender app on your computer, you can click “Device
Profile” to download an MOP file. The downloaded MOP file provides a quick way to
connect to a predefined receiver. A user can double click on the MOP file, and it will
connect to the predefined WiCS-2100 device automatically.
12
WiCS-2100 User’s Manual
7 Standby Screen of the Projector/Display
The following information will be shown on the standby screen of the projector/display: (a)
software download instructions; (b) code (login code/passcode) [if there is one (the login
code is not required by default)]; (c) (device) hostname; (d) SSID (WiFi network name)
[Default hostname/SSID is WiCS-2100-xxx (xxx are the last three characters of the MAC
ID shown on the bottom of the WiCS-2100 device)]
; (e) IP (address)
13
WiCS-2100 User’s Manual
8 Main Button and Toolbar
8.1 Main Button, User-List Button and Toolbar in the Standby Mode
1) You can see a main button ( ) on the lower right corner of the standby screen. Click
on it, and you will see a toolbar as shown below.
Button Description
Create a Plug & Show token (USB drive): copy the Plug &
Show MirrorOp application (portable software) for Windows
and Mac to the attached USB drive.*
Disable or enable moderation/conference control
Whiteboard
Touchscreen Calibration: This option will be visible only if
you long press the main button ( ).** Use your finger to
accurately touch the dots as they appear.
* Just insert the Plug & Show token (USB drive) into your PC/Mac, and a presentation can
be started in seconds (no software installation is required).
** You may need to long press the main button ( ) with a mouse, as the touchscreen may
not respond to touch correctly before it is calibrated.
2) When any user logs in, you will see the user-list button located beside the main
button. Click to enter the user list. The user list shows device names and device
screens of all (up to 32) login users in thumbnail view.
3) Right above the user list, you will see the following icons:
14
WiCS-2100 User’s Manual
Open/Close
User List
Disconnect
ALL Users
Stop All
Projection
Next Page of
User List
Previous Page
of User List
4) On each device thumbnail, you will see the following icons:
One device
screen projected
Full Screen Stop Project Disconnect
Multiple device
screens projected
Auto
Layout
Full Screen Stop Project Disconnect
15
WiCS-2100 User’s Manual
8.2 Toolbar in the Whiteboard Mode
Click on the button to enter the whiteboard mode. You will see the following icons:
Marker Color Marker
Size
Eraser Clear Save
Annotations*
Open File**
Exit
* Save annotations (the current image) as a JPG file to the attached USB drive. (You need
to insert the USB drive into the Base Unit first.)
** Open a file from the attached USB drive.
8.3 Toolbar in the Projection Mode
When any user projects his/her device screen, the system will enter the projection mode.
You will then see the following icons:
Disable or enable moderation/conference control
Save annotations as a JPG file to the attached USB drive (*You need to
insert the USB drive into the Base Unit first.)
Clear
Eraser
Marker (red, yellow, green, blue): to annotate in an opaque color
Highlighter (yellow): to annotate in a semi-transpaernt color
Remote control (Remotely control the projecting computer
from the
display)
Pointer
Whiteboard
16
WiCS-2100 User’s Manual
8.4 Auto Layout
Auto Layout” enables automatic arrangement of (up to 4) projected device screens in the
display layout. This function is available when multiple device screens are projected to the
display. Click the “auto layout” button , and the display layout will change automatically
according to the number of projected device screens.
Auto
Layout
1 device screen
projected
2 device screens
projected
3 device screens
projected
4 device screens
projected
8.5 Remote Control/Remote Touch Control (UMT)
WiCS-2100 supports remote control, including remote touch control (UMT). Users can
remotely control the projecting computer from the display via a mouse, keyboard or touch
screen.
Note:
The UMT (universal multi-touch) function can only support USB HID touch devices
compatible with Windows 7/8/10. Therefore, when the operating system of the sender
device is macOS, touch events on the projector/display screen are translated into
mouse events on the screen of the sender device. [Please be aware that Windows 7
can only provide limited multi-touch capability for specific applications.]
Each USB port on the WiCS-2100 device can supply up to 5V/0.5A power. Additional
power supply is required if the attached HID device needs more power.
17
WiCS-2100 User’s Manual
9 Web Management
9.1
Home Page
1) Make sure your PC/Mac is WiFi-enabled, and connect your PC/Mac to the WiCS-2100
device through WiFi. You can find the SSID (WiFi network name) of the WiCS-2100 on
the standby screen of the projector/display.
[Default SSID is WiCS-2100-xxx (xxx are
the last three characters of the MAC ID shown on the bottom of the WiCS-2100
device)]
Windows Mac
2) Open the browser of your PC/Mac, and enter the IP address or hostname of the
WiCS-2100 in the address bar (URL bar) of the browser. You can find the IP address and
host name on the standby screen of the projector/display.
[Default IP address is
192.168.100.10; default host name is WiCS-2100-xxx (xxx are the last three
characters of the MAC ID shown on the bottom of the WiCS-2100 device).]
Note:
If you want to enter the hostname in the URL bar, please put “https://” before the
hostname, such as https://WiCS-2100-3AD.
3) You can see the “Home” page as below.
18
WiCS-2100 User’s Manual
9.1.1 Get MirrorOp (Sender)
Please refer to
6. Download the MirrorOp (Sender) app”
.
9.1.2 Moderator
1) Enter the password and then click “Login”.
(Default password: moderator)
19
WiCS-2100 User’s Manual
2) After login, you can see a user-list which indicates all the users connected to the
WiCS-2100.
3) There are two columns: “Name” and “Play Control”.
4) Play Control: (a) (project); (b) / (full screen/auto layout); (c) (stop); (d)
(disconnect).
5) Uncheck the “Allow control from this page only”, and the web page moderator control
will be disabled. Either users can project their screens to the WiCS-2100 freely, or the
moderator control can be done via the on-screen user list.
6) Click “Show Login Code”, and the login code (passcode) will be shown.
20
WiCS-2100 User’s Manual
9.1.3 WebSlides
1) Click the “Watch Presentation” button to enter the WebSlides page.
(No password is
required by default. Type the password if you have set one.)
2) You can start to capture the current projecting screen.
3) Please refer to
13. Launch WebSlides”
for more information.
9.1.4 HTTPS self-signed certificate
1) When you enter the IP address or hostname of the WiCS-2100 in the URL bar of the
browser, you will get a security warning message as shown below. If you want to avoid
HTTPS security warnings like this, you can install a HTTPS self-signed certificate on your
  • Page 1 1
  • Page 2 2
  • Page 3 3
  • Page 4 4
  • Page 5 5
  • Page 6 6
  • Page 7 7
  • Page 8 8
  • Page 9 9
  • Page 10 10
  • Page 11 11
  • Page 12 12
  • Page 13 13
  • Page 14 14
  • Page 15 15
  • Page 16 16
  • Page 17 17
  • Page 18 18
  • Page 19 19
  • Page 20 20
  • Page 21 21
  • Page 22 22
  • Page 23 23
  • Page 24 24
  • Page 25 25
  • Page 26 26
  • Page 27 27
  • Page 28 28
  • Page 29 29
  • Page 30 30
  • Page 31 31
  • Page 32 32
  • Page 33 33
  • Page 34 34
  • Page 35 35
  • Page 36 36
  • Page 37 37
  • Page 38 38
  • Page 39 39
  • Page 40 40
  • Page 41 41
  • Page 42 42
  • Page 43 43
  • Page 44 44
  • Page 45 45
  • Page 46 46
  • Page 47 47
  • Page 48 48
  • Page 49 49
  • Page 50 50
  • Page 51 51
  • Page 52 52
  • Page 53 53
  • Page 54 54
  • Page 55 55
  • Page 56 56
  • Page 57 57
  • Page 58 58
  • Page 59 59
  • Page 60 60
  • Page 61 61

WePresent wePresent WiCS-2100 User guide

Type
User guide
This manual is also suitable for

Ask a question and I''ll find the answer in the document

Finding information in a document is now easier with AI