Page is loading ...


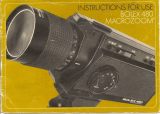
Description
screw
14
Film counter
with
adjustable start
position and memory crown
Frame selector
Fade switch
Syncro-flash
Remote- control socket
Remote
and for
fitting
6
Toggleswitch
zoom
7
4-position
automatic
setting, locking and correction of
the aperture
+battery test
8 Toggle
switch
for manual setting
of the aperture
9 Knob for adjusting the
built-
in
timer
10 Viewfinderstray-light prevention
switch
11 Adjustable eyepiece
12 Rubber eyecup
13
Switch
for use
with
frame
selector
Your
camera
is
supplied
with:
1 Aspheron super
wide-angle
U
v\
....
vv'tJv
II Y
50 cm remote-c'ontrol
sunshade
those used in the
cepiers.
- ,
....
""
....
to(~uslna
ring
and
zoom
to the fixed
focus
'tJvv
IJU~-Iv
13):
• press the battery connecting
switch
34*
against the
pistol
grip:
• press on the release: everything
situated between
about
6 feet
and
infinity
will
be'sharp
and
properly
exposed
provided
the
lighting
conditions are normal.


27 Film cartridge housing catch
28 Button for setting filming speed
of 45 frames/second
29 Film plane guide
30 ActionLight
31
ActionLight
32 . n
n
33
34
batteries
35 Battery recharging
36 Eyepiece locking ring
37 Handstrap
N.B.
We strongly recommend you to
film
at least one cartridge mine
the results before lea a trip or
filming an important event
with
your
new
camera. This
will
help you get to
know
it and, if you have any ques-
tions, give you an
opportunity
of
seeing your Bolex dealer and asking
his advice or help.
2

He'tle;K
VlevvtHldEH
\i'Vltlh
large
• Focusing by split-image range-
finder.
Diaphragm
•
Automatic
diaphragm controtled
by servomotor (f/1.8 to
f/22;
and up
to
f/64
for fades).
• Possibility of manual control and
locking of the diaphragm.
• Bridge-connected CdS cell;
through-the-fens
light
measurement.
• Correction of the exposure level
setting for backlight shots.
• Film speeds:
25 and 100
ASA
(15 and 21
DIN),
daylight;
40 and 160
ASA
(18 and 23
DIN),
artificial light.
Mechanism
• filming speeds: 9, 18, 24
f.p.s.
• Single-frame filming.
• Electromagnetic release.
• Shutter opening to 190°.
• General
power
by 5 1.5 Vbatteries.
• ilfty of using Ni-Cdbatteries
recha ble in the camera.
•
Automatic
general
switch
on the
pistol grip.
• Film counter
with
adjustable start
position and memory crown.
• Exposure times
1 9 f.p.s. 18 f.p.5. 24 f.p.5. 45 f.p.5.
1/175
1/175
1/345
1/455
1/855

4

• Put the holder back in the housing,
the side marked
with
an
arrow
facing
5

N.B.!
er
lea
.
ordinary
or
rechargeable
batteries
in
the
camera
if
you
are
not
using
it
for
some
time.
Any caused
by the electrolyte inside
camera our
guarantee.

Between
two
make sure
that
the bar is in the position so
asto avoid unnecessary
wear
on the
batteries.
To
the
mtime
to
adjust
automatically,
the
batteries
must
be
connected
up
about
2
seconds
before
you
press
on
the
release.
7

for
tn~~
Olur[)ose
Cln
t:oo
you a
per
second:
on screen,
when
projecting
at the normal speed of

at adjustable
0.2 seconds to 1 minute. To
film
a
sin e at a time using the
variotimer:
the battery connecting
to the rear;
9


The
counter
shows
you
how
much
of the 50 ft. has
been starts
the and moves
to-
wards 1/1 position as the
film
unwinds.
The
counter
automatically
returns
"a"
whenever
you take
out
the
cartridge.
It
for one reason or other,
you
wish
to take
out
a partially
exposed cartridge, first of all turn. the
memory
disk
until
the mark
(white
dot)
is opposite the end of the red
band.
When
you re-insert the
partially exposed cartridge in the
camera,
all you have to do is turn the
central
regulating
knob
until
the red
11


Automatic
setting
of
the
aperture
Your camera is equipped
with
a
device for the
automatic
setting of
the correct aperture,
with
through-
the-lens (TTL) measurement of the
light,
which
allows to concen-
trate on filming having to
worry
about
changes in lighting.
It automatically takes into
account
the sensitivity of the film used (see
Technical Specifications).
For automatic adjustment of the
aperture, set the
switch
to
"auto":
naturallythe device
works
only
when
13

t
j
s
than
in
be
unlC1er-e)(PCJsel:t
If
the
red
shaded
the
left
of
the
after
the
value
14

Locking
the
diaphragm
and
manual
setting
A special
10
system makes it
possible to keep aparticularaperture.
set for the main
subject
You can
make use of this feature to
film
scenes
with
violent
lig
contrasts. for a person
~T;:lnrtlnf1
in
front
bright
the
PH)lelctl()n.the latter
under- or
to obtain a
the
alalpnlra~~m
locKlnq system. proceed
• zoom in on the main subject
(to
the exclusion of
background)
until
it of the visible
field in the
\JICI\A/1-lnl"10r
• lock the diaphragm by
turning
the
art··ufsHnn
switch
to
"stop"
; a black
needle then appear in the field
of view, at the
top
on the
left;
• using the zoom, zoom
out
again
to the desired framing and film.
Once you have finished
filming,
you
must
switch
back to
automatic
adjustment of the aperture
(position
marked"
auto")
; the black needIe
visible in the
viewfinder
is there to
remind you.
15

Automatic
justment
of
the
exposure
time
according
to
the
• in
almost
all cases,
it
will
be
vitaltouseatri
will
there-
fore have
16

nalrtlC:lJI;:trlv usefuI
actually
N.B.
The the
the steadier your
foca I lengths between 40 and
mm, we recommend you,
whenever possible, to use a
tripod
or a steady support.
17

18
/


