Draper 115mm Angle Grinder Operating instructions
- Category
- Power tools
- Type
- Operating instructions
This manual is also suitable for
Draper 115mm Angle Grinder
The Draper 115mm Angle Grinder is a powerful and versatile tool that can be used for a variety of tasks, including grinding, cutting, and polishing. With its 650W motor and 11,000rpm no-load speed, it can quickly and easily remove material from metal, concrete, and other hard surfaces. The grinder also features a variety of safety features, including a lock-on switch, a spindle lock, and a protective guard, to help keep you safe while you work.
Here are some of the tasks that you can use the Draper 115mm Angle Grinder for:
- Grinding: The grinder can be used to remove material from metal, concrete, and other hard surfaces. This can be useful for tasks such as shaping metal, smoothing rough edges, or removing rust.


-
 1
1
-
 2
2
-
 3
3
-
 4
4
-
 5
5
-
 6
6
-
 7
7
-
 8
8
-
 9
9
-
 10
10
-
 11
11
-
 12
12
-
 13
13
-
 14
14
-
 15
15
-
 16
16
-
 17
17
-
 18
18
-
 19
19
-
 20
20


Draper 115mm Angle Grinder Operating instructions
- Category
- Power tools
- Type
- Operating instructions
- This manual is also suitable for
Draper 115mm Angle Grinder
The Draper 115mm Angle Grinder is a powerful and versatile tool that can be used for a variety of tasks, including grinding, cutting, and polishing. With its 650W motor and 11,000rpm no-load speed, it can quickly and easily remove material from metal, concrete, and other hard surfaces. The grinder also features a variety of safety features, including a lock-on switch, a spindle lock, and a protective guard, to help keep you safe while you work.
Here are some of the tasks that you can use the Draper 115mm Angle Grinder for:
- Grinding: The grinder can be used to remove material from metal, concrete, and other hard surfaces. This can be useful for tasks such as shaping metal, smoothing rough edges, or removing rust.
Ask a question and I''ll find the answer in the document
Finding information in a document is now easier with AI
Related papers
-
Draper 115mm Angle Grinder Operating instructions
-
-
-
-
-
-
-
-
-
Other documents
-
HQ W7-60461-BLN Datasheet
-
-
-
HQ W7-60461N Datasheet
-
-
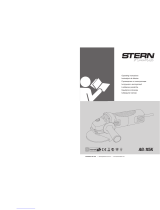 Stern AG-115K Operating instructions
-
Silverline 264153 User manual
-
Record Power RSBG6 Original Instruction Manual
-
Euroboor AGR.840 User manual
-
 HSS Hire Hire Shops 631 Operating & Safety Manual

