CONGRATULATIONS on
your
purchase
of
this
Brinly
Attachment.
It has been
designed,
enqlneered,
and
manufactured
to
give
you
the
best
possible
dependability
and
performance.
Please read and retain
this
manual. The instructions
will
enable
you
to
assemble
and
maintain
your
Attachment
properly.
Always
observe
the
uSAFETY
RULES
II
•
Should
the
need ever
exist
for
repair
parts,
order
through
most
any
Lawn
and. Garden dealer,
using
part
number and
description.
RULES FOR SAFE OPERATION
•
Know
controls
and
how
to
stop
quickly, READ THE
·OWNER
15
MANUAL.
• Do
not
allow children to operate ·the vehicle, do
not allow adults to operate
without
proper
instruction
cr
without
having read the owner's manual.
• Do
not
carry passengers. Keep children and pets
a safe distance away.
• Always wear substantial footwear. Do
not
wear
loose fitting clothinq that can
get
caught in moving
parts.
~
• Keep your eyes and mind on your tractor
/attach~
ment and area being covered. Do
not
let other in-
terest
distract
you.
• Stay alert for holes in the terrain and other
hidden
hazards.
..
Do
not
drive close
to
creeks, ditches and public
highways. . .
• Watch
out
for
traffic
when crossing or near
roadways..·
.
•
VVhen
usinq anv
attachment,
don't
allow
anyone
near the. vehicle
while in operation.
• Keep the vehicle and
attachment
in
good
operating
condition and keep
safety
devices in place. .
• Keep all nuts,
bolts
and screws
tight
to
be sure
the equipment is in safe working condition.
e The
vehicle
and attachment should qe stopped and
inspected
for
damage after
strtkinq
a foreign object.
The
damage
should be repaired before restarting and
operating the equipment.
• See tractor equipment owner's
manual
for safe
operation of the equipment.
WARNING!
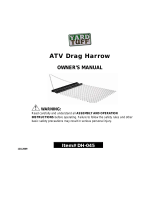
• DO NOT allow anyone to ride on Disk Harrow.
The blades are sharp and personal injury could result.
• DISK BLADES HAVE SHARP EDGES.
ASSEMBLE AND OPERATE THE DISK HARROW WITH CAUTI·ON.
LOOK FOR THIS SYMBOL TO POINT OUT IMPORTANT
SAFETY PRECAUTIONS. IT MEANS - ATTENTION!
BECOME ALERT! YOUR SAFETY IS INVOLVED.
CUSTOMER RES
NSIBILITIES
..
Read
and
obser.ve the IlSAFETY RULES".
•
Follow
a regular schedule in maintaining, caring for
and using your Disk Harrow.
T
WARRANTY..c
•••••••••••••••••••••••••••••••••••••••••••••
1
SAFETY
RULES
~
2
ASSEMBLY 4
&5
LE OF CONTENTS
OPERATION 6
CUSTOMER RESPONSiBILITY 7
REPAIR
PARTS ! 8
TANDEM DISK 6
2