Page is loading ...

-0-
Important Cautions
About running-in of a motorcycle
The first 1000 km operation is very important in the entire service life of
a motorcycle. A correct running-in can guarantee both the longest service life
and the best performance of the vehicle. Proper running-in can polish
machined surfaces to form correct seals and mating surfaces.
Careful and patient running-in can make the motorcycle stable in riding
and optimize performance. It is important not to do any operation which may
overheat engine components.
For specific running-in method, please refer to "Running-in of a new
vehicle".
Please carefully read the manual and strictly observe all instructions or
descriptions.
Special attention should be paid to the contents emphasized with the
terms of "warning" "Precaution" and "note", etc.
Warning…… Concerns personal safety. Ignoring it may result in
accident.
Precaution…… Refers to operational methods that must be followed
or measures that should be taken, so as to prevent damage.
Note…… Refers to special explanations to make maintenance or
important descriptions more explicit.
The operation manual should be deemed as a permanent document of
the motorcycle. When transfer the vehicle to others, the instruction manual
should also be transferred to the new owner.

-1-
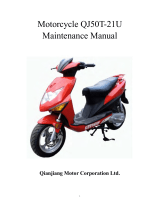
This manual pertains to the following models:
QM110GY QM125GY
QM125GY-2 QM125GY-2B
QM125GY-2C QM200GY

-2-
QM200GY-B QM200GY-BA
The instruction manual takes QM200GY as example. There are some
differences among various models. For any unconformity between your
vehicle and the instruction manual, the real vehicle should prevail

-3-
Foreword
Thank you for your choosing QingQi brand GY series motorcycles. In
design, development and manufacture this series, our company applies the
latest advanced technology and equipment to provide you with a motorcycle
that is reliable in performance, unique in design and elegant in appearance.
Motorcycle riding is one of the most exciting sports. Motorcycles are an ideal
means of transport and can give you infinite riding pleasure. Before riding
your motorcycle, please familiarize yourself with all stipulations and
requirements mentioned in this instruction manual.
The instruction manual deals in the correct use and maintenance of your
motorcycle. Observing the following guideline will help guarantee years of
trouble-free use. The distributor has skillful and well trained technical
professionals to provide the best maintenance and service to your motorcycle.
Executed standards:
Q/QM021021-2007
Jinan QingQi Motorcycle Co. Ltd.

-4-
Contents
Chapter 1 User Instructions ....................................................................... 5
Chapter 2 Installation Position of Parts ...................................................... 7
Chapter 3 Control Part .............................................................................. 8
Chapter 4 Instructions on Fuel and Engine Oil ......................................... 15
Chapter 5 Running-in of New Motorcycle ............................................... 16
Chapter 6 Inspection before Riding ......................................................... 18
Chapter 7 Riding Essentials .................................................................... 19
Chapter 8 Inspection and Maintenance .................................................... 23
Chapter 9 Measures to Reduce Pollution ................................................. 39
Chapter 10 Troubleshooting .................................................................... 40
Chapter 11 Storage Method ..................................................................... 43
Chapter 12 Circuit Diagram .................................................................... 45
Chapter 13 Parameter List....................................................................... 46
Chapter 1 User Instructions

-5-
Instructions on safe motorcycle riding
There should be a condition for the motorcycle to serve your well. The
condition is paying attention to safety at any time. Therefore, please observe
traffic laws and follow the six points below.
Wear safety helmet
Safe riding starts from wearing a safety helmet. This is an important
factor in motorcycle riding. A high-quality safety helmet is the first thing of
personal protection in motorcycle riding. The most serious traffic accident is
head injury. Therefore, be sure to wear a safety helmet to drive a motorcycle,
and wear a pair of proper protective glasses.
Please be familiar with the vehicle structure
Your riding technique and your understanding of mechanical knowledge
are the basis of safe riding. Make exercises in a spacious place without other
vehicle and make yourself fully familiar with your motorcycle and control
method. Be sure to keep in mind that, skill comes from practice.
Understand the limit of your safe speed
Riding speed depends on road surface conditions, your skills and the
weather. Understanding the limit may prevent accident. At any time, accident
may be prevented as long as riding in the range of your skill.
Wear well-fitting dress
Loose and fancy dress may make you uncomfortable and unsafe in your
riding. Riding on the cradle, a well-fitting dress may give you freedom for
activities of your arms and legs. Gloves, boots and safety helmet will show
that you are qualified driver. High quality and tight dress shouldbe your
selection.
Pay more attention to safety during riding in rainy weather
Wet roads are dangerous. Please note that, in rainy days, the braking
distance is two times as much as that in dry weather. Stay away from manhole
covers, paint marks or oily surfaces to prevent slipping. Avoid abrupt steering
during acceleration. Be careful when drive over railways and bridges and keep
a safe distance with any vehicle in front.
Inspection before riding
Please carefully read all instructions in "inspection before riding" of the
manual to guarantee the safety of you and passengers.
Position of serial numbers

-6-
Chassis number (or VIN code) Engine number
Position of metal nameplate
Chassis number (or VIN code) and engine number is necessary for
registration of your motorcycle. Such numbers are needed with order
components or service, to allow the distributor to provide you with better
service.
Chassis number (or VIN code) is on the head tube of chassis. Engine
number is on the left side of crankcase. Metal nameplate is on the head tube of
chassis, showing the main technical parameters, manufacturer and date of
production of the motorcycle.
Write the numbers in the spaces below, for future reference.
Chassis number:
Engine number:
Chapter 2 Installation Position of Parts

-7-
Handle bar instrument
1Clutch lever
2Left handlebar switch
3Speedometer
4Ignition switch
5Tachometer
6Right handlebar switch
7Accelerator grip
8Front brake lever
9Rearview mirror
Left side view
1Fuel tank switch
2Carburetor
3Gear lever
4Side stand
Right side view
1Rear brake pedal
2Kickback start lever
3Spark plug

-8-
Chapter 3 Control Part
Key
Two keys are provided. Please
use one key and put the other in a
safe place for future use.
Instrument panel
Odometer (1) ecords the total
distance that the motorcycle has
traveled since it was used.
Speedometer (2) shows the moving
speed in km per hour.
Turning signal lamp (3) When left
turning signal lamp is ON, the left
turning signal indicator on the panel
" " and turning signal lamp
will flash.
When right turning signal lamp
is ON, the right turning signal
indicator on the panel " " and
turning signal lamp will flash.
Precaution:
If one of front and rear turning
lights is damaged, the indicators on
the instrument panel and the turning
lights may be lit consistently, or may
flash fast or slow. Then, timely
locate the cause and carry out
troubleshooting.
Tachometer (4) It shows the engine
rotation speed in number of
revolutions per minute.
Trip meter (5) Trip meter is a kind of
odometer that can be reset. It is
installed in odometer. It is mainly
used to measure short distances or
for calculation of fuel consumption.
Reset knob (6) Turn it
counterclockwise to reset the
mileage number on the trip meter to
zero.
High beam indicator lamp (7) When
the head light is in high beam, the
indicator is lit.
Neutral gear indicator lamp (8) when
the transmission is in neutral
position, the indicator will be lit.
When any other gear is engaged, the
indicator goes OFF.
Ignition switch

-9-
The ignition switch has two
positions:
" " (OFF) position All circuits
are disconnected and the key can be
removed.
" " (ON) position All igniting
circuits are ON and the engine can
be started. The key cannot be
removed in this position.
Steering lock
To lock the steering handlebar,
turn the handlebar to left, insert the
key and turn it clockwise.
Warning:
When the steering handlebar is
locked, never move the motorcycle
or you may lose balance.
Left handlebar control system
Dimmer switch (1) When dimmer
switch is turned up to " " (high
beam) position, the head light is in
high beam and the high beam
indicator lamp on the instrument
panel is lit. On contrary, when it is
turned down to " " (low beam)
position, the low beam is lit.
Lighting switch (2)
" " ON position When the
switch is turned to this position, the
head light, front position light,
instrument panel light and rear tail
light will be lit.
" " parking light position
When the switch is turned to this
position, the front position light,
instrument panel light and rear tail
light will be lit.
" OFF position All the head light,
front position light, instrument panel
light and rear tail light go OFF.
Turning signal operation (3) When
the switch is turned to left " "
position, the left turning signal lamp
is lit and the indicator lamp on
instrument panel flashes. When the
switch is turned to right " "
position, the right turning signal
lamp is lit and the indicator lamp on
instrument panel flashes.
Warning:
Whenever you are going to
change lane or make a turn, turn ON
the turning signal lamp. After lane
change or turning, timely turn the

-10-
signal light OFF.
Horn button (4) Press " " button
and the horn will sound.
Clutch lever (5) To start the engine
or make a gear shifting, press the
lever to release the drive system and
cut off the clutch.
Right handlebar control system
Front brake lever (1)
To apply front wheel brake,
slowly press the brake lever on the
right handlebar. As the motorcycle
adopts hydraulic brakingdo not
press it abruptly or forcefully.
When the brake lever is pressed,
the brake light will be lit
automatically.
Engine shutdown switch (2)
The switch is a rocker switch,
located on the tip of right handlebar
control panel, with the rockshaft at
the center of the rocker. When it is
pressed in " " start position, the
switch is turned and the engine can
be started. It is an emergency switch.
If the switch is pressed in " "
position, the starting circuit is
completely cut off and the starter
motor cannot be started. Do not put
the switch in this position during
riding.
Accelerator grip (3)
Accelerator grip is used to
control the engine speed. To
accelerate, turn the grip towards
yourself. To decelerate, turn the grip
away from yourself.
Electric start button (4)
Press" " button to turn on
the start motor circuit. During
starting, put in neutral gear position
to cut off transmission and guarantee
safety.
Warning
The starter motor should be
operated not more than 5 seconds.
Heavy discharge may cause overheat
to circuit and starter motor. If
starting is failed after several
attempts, stop to check the fuel
supply system and starting circuit
(refer to "Troubleshooting").
Fuel tank cap

-11-
To open fuel tank cap, insert the
key and turn it clockwise. Then, the
fuel tank cap can be removed
together with the key. To replace the
cap, align the arrow on the cap and
press the cap, together with the key,
into the fuel tank cap hole until a
click sound is heard. Then, remove
the key.
(1) Gasoline level (2) Filler
Warning
Do not fill the tank excessively.
Never splash fuel to hot engine. No
fuel should be left on the upper part
of the filler, or the fuel may
overflow when fuel temperature
risess and expands, causing hazard.
During fuel refilling, shutdown
the engine and turn the key to OFF
position. Smoking or lighting fire is
strictly forbidden during fuel
refilling.
Gear lever
The motorcycle is provided
with a 5-speed gear transmission.
The gear lever connects to a ratchet
mechanism in the transmission.
After selecting a gear, the gear lever
returns to the home positionso that
the next gear can be selected. The
neutral gear is between the low gear
and two speed gear. From neutral
position, press downs the gear lever
to engage a low gear. Raise the gear
lever one step to move forward a
gear. Owing to the ratchet
mechanismit cannot move two or
more gears up or down in one
operation. To shift from 2-speed gear
to low gear, or from low gear to
2-speed gear, it passes the neutral
position but not stays there. To
engage to neutral gearstop it in the
middle of moving from low gear to
2-speed gear.
Precaution
When the transmission is in
neutral position, the neutral indicator
lamp is lit on the instrument board.

-12-
Despite the lamp is lit, be careful to
release the clutch lever slowly to
make sure if the transmission is
really in neutral position.
When engaging into a low gear
during high speed riding, the
engagement of clutch may make a
sudden increase in engine speed.
Before engaging a low gear, slow
down the motorcycle to prevent
unnecessary wear of components in
transmission system.
QM110GY adopts 4-speed gear
transmission. The operation is the
same as mentioned above.
Rear brake pedal
Press down this pedal to apply
rear wheel brake, and the brake
indicator light is lit.
Stand
The vehicle is provided with a
side stand on the left side.
To support the motorcycle with
the side stand, put your foot on the
tip of side stand and press it
forcefully, until the stand rotates
fully and is blocked by the stopper.
Precaution
When parking the motorcycle
on a slope, make sure the motorcycle
is headed toward upper slope to
avoid sliding of the side stand. It is
also advisable to engage the first
gear to prevent the side stand from
sliding.
Warning
Before starting, check if the
side stand is retracted to normal
position, without loosing.
Carburetor enrichment lever
To help starting, the vehicle is
provided with carburetor enrichment
system Equivalent vacuum
diaphragm carburetorTo start a cold

-13-
engine, pull out the enrichment lever.
After starting, push the lever to a
half way and allow the engine to
warm up to a proper temperature,
before pushing the enrichment lever
to its home position. Plunger
carburetorTo start a cold engine,
raise the enrichment lever to the
highest position. After starting,
lower the lever to a half way and
allow the engine to warm up to a
proper temperature, before returning
the enrichment lever to its home
position. (3) Wire type enrichment
plunger carburetor: To start a cold
engine, put the wire handle forward
to the end position. After starting,
put the handle to a middle position
and allow the engine to warm up to a
proper temperature, before returning
the enrichment handle back to its
home position.
Note
The enrichment system is
designed for starting a cold engine.
When temperature is low, the
warming time be extended
properly (if no warming is made, the
speed transition may become poor).
During riding, the enrichment
system should be shutoff; otherwise
the fuel consumption may be
increased. The correct enrichment
shutoff status is For vacuum
carburetor, fully push in the lever
For plunger carburetor, lower the
lever to the endFor wire type
enrichment carburetor, turn it to the
front end.
Warning
After using the enrichment
system, shutoff it timely to prevent
overheat that may damage the
silencer elbow.
Kickback start lever
If your motorcycle has this
device, please refer to the following
contents.
The kickback start lever is
installed on the right side of the
motor. Owing to motorial kickback
starting mechanism, the engine can
be started in any gear position
provided the clutch is released.
Warning
After the engine is started,
check if the start lever has returned
to its normal position.
Do not use the kick starter and
electric starter at the same time.

-14-
Fuel switch
The vehicle is provided with
manual fuel valve. There are three
positions “ ” (Open)
“”(Reserve) “ ” (Close).
“” Open position
Generally, the fuel switch is in
this position. When the accelerator
grip is rotated, fuel flows from valve
to carburetor.
“ ” Reserve position
If the fuel level is too low, turn
the fuel switch to this position and a
certain amount of fuel in reserve can
be available.
“ ” Close position
Turn the fuel switch to this
position after the engine is
shutdown.
Precaution
If the fuel switch is in “ ”
Open position for a long time, fuel
may overflow from carburetor to
engine. Fuel in engine may cause
serious mechanic damage during
engine starting
Note
Every time after turning the
fuel switch to reserve position, refill
the fuel tank immediately to the
nearest gas station and return the
fuel switch to open position.
Tool kit
The tools box is below the
cradle on the rear left side of the
motorcycle.

-15-
Chapter 4
Instructions on fuel
and engine oil
1. Fuel
! Warning
Gasoline is inflammable and
explosive. When handling gasoline,
attention should be paid to prevent
burnt or accident.
In places where gasoline is
stored or handled, shutdown the
engine, do not smoke, and keep
away from naked flame or
spark.
Refueling should be made in a
well ventilated place. After
refueling, immediately clean off
any gasoline outside the fuel
tank.
Please #93 or #95
(GB17930-1999) unleaded gasoline.
This may prolong the service life of
spark plug.
Note!
If the engine produces ping
noise, it may be caused by using of
improper fuel. Replace with correct
fuel.
Ethanol gasoline
If ethanol gasoline is used,
please use #90 or higher conforming
to GB18351-2004. Do not use
methanol gasoline, even though it
may contain cosolvent and
anti-corrosion agent.
Note!
If ethanol gasoline is exposed to
water excessively, ethanol may be
separated, resulting in decrease of
gasoline octane number. Therefore,
the storage time should not be too
long.
Before using ethanol gasoline for
the first time, make a through
cleaning of the fuel supply system
and fuel tank.
Always buy a proper amount of
ethanol gasoline. Once there is a
poor fuel tank sealing or a long
storage time, moisture content may
increase, causing low octane number
and resulting in difficult ignition or
weak power.
2. Lubricant
(Please refer to Regular
Maintenance Table)
Use high quality 4-stroke
engine oil to prolong engine life.
Engine oil should be SE or SD
product in API classification. Engine
oil of proper viscosity should be
used according to local air
temperature. There are three
viscosity levels suitable for the
engine, namely, SAE15W-40,
SAE10W-30 and SAE5W-30. Refer
to the figure below:

-16-
-4 14 50 68 86
32
104 -22
F
Temperature
Viscosity grade
API classification
SG High
Low
SF
SE
SD
SE or SF level SAE10W-30
4-stroke lubricant is recommended.
Note
Lubricant should be replaced
at 1000km or about one month for
the first time, every 3000km
thereafter. Oil volume is 850ml for
replacement or 1300ml after
overhaul.
The quality of engine oil is a
major factor affecting the service life
of engine. Replace engine oil
according to the maintenance period
stated in maintenance table (please
refer to Page 19). When riding in
dusty areas, engine oil should be
replaced more frequently than the
stipulations in the maintenance table.
Explanation:
During cold weather in
northeast and northwest China, it is
advisable for user to use high quality
low temperature lubricating oil. SE
10W-30 or SF 5W-30 is
recommended. For temperature
below -35°C, the following use time,
API SG or higher class 5W-30
lubricant of notable brand is
recommended.
Warning:
Inferior lubricant may cause
irretrievable loss to the engine and
seriously shorten the service life of
engine.
Chapter 5
Running-in of new
motorcycle
The importance of correct new
vehicle running-in was mentioned in
Foreword. The correct running-in
method is as follows.
Maximum speed
The maximum speed during
running-in period is shown in the
table.
First 800 km <5000 rpm
At 1600 km <7500 rpm
After 1600 km <10000 rpm
Changes of engine speed
Do not drive at a constant
engine speed for a long time. For a
better running-in, properly increase
and reduce the throttle opening.

-17-
Change engine speed from time to
time to let various engine parts get
"bearing" pressure. When the
pressure is "unloaded", the engine
parts will cool down, helping the
fitting of different parts. During
running-in period, engine load may
be properly increased. Apply some
load to engine parts to guarantee
good fitting. This is every important,
but do not apply excessive load to
the engine.
Avoid riding at a low speeds
Running at a certain low engine
speed (with light load) can only
polish the parts but cannot get a
good running-in. So long as the
upper limit of recommended throttle
opening is not exceeded, drive the
vehicle in various gears with proper
acceleration. However, never drive
at the maximum acceleration during
the first 1600 km.
Circulating oil before riding
After starting of warm or cold
engine and before applying load or
riding, let the engine run at idle
speed for an adequate time. This
allows lubricant to flow to all import
engine parts, so as to reduce wearing
and increase the service life. This
also helps the engine to warm-up
sufficiently.
First maintenance inspection
The maintenance of the first
1000 km is the most important.
During running-in period, all engine
parts have been run-in and other
parts engaged. Then, all parts should
be adjusted, all fasteners be
tightened, contaminated engine oil
be replaced and filter element be
replaced.
Timely making 1000 km
maintenance can guarantee a long
engine life and the best engine
performance.
Precaution
1000 km maintenance should
be carried out according to the
"Troubleshooting" in the manual.
Pay special attention to the
"precaution" and "warning" in the
section.

-18-
Chapter 6 Inspection before Riding
Before riding, make sure to carefully check the following items. Never
ignore the importance of the inspection.
Contents Purpose
Steering
handlebar
1Smooth
2Free steering
3No loose
Lighting Operate all lamps -- head light, tail light, brake light,
instrument board lighting lamp, turning signal lamps
Transmission
oil Proper oil level
Brake
1Adjust clearance of rear brake pedal and front brake
lever
2No "spongy" feeling
3No leakage
Indicators Neutral gear, gear position, oil level indicators (or turning
signal indicators)
Accelerator 1Proper free play in accelerator wire
2Free fuel flow and reliable accelerator throttle valve
returning to closed position
Tires 1Correct air pressure
2Proper tread pattern depth
3No injury or cut
Horn Correct function
Clutch 1Proper free play in clutch wire
2Smooth operation and full releasing.
Fuel Adequate fuel for the distance to drive.
Drive chain 1Proper tightness
2Proper lubrication

-19-
Chapter 7 Riding Essentials
Warning
If it is the first time for you to drive this type of motorcycle, you are
advised to practice on a road away from highways, until you have completely
been familiar with the control and operation of the vehicle.
Before riding, make sure that the side stand is returned to the uplift
position.
Do not make gear shifting or deceleration in course of turning. Slow
down to a safe speed before turning.
Do not shift into a low gear during turning.
It is dangerous to drive a motorcycle with a single hand. While riding,
take a firm but relaxed hold of the handlebar with both hands and put your
feet on the foot board. In any event, never free both hands from the handlebar.
On a wet road, the friction force is low and so is the brake force and
turning capability. Therefore, decelerate in advance.
Observe the traffic laws and speed limit.
Engine starting
Make sure the fuel switch is in open position and the engine shutdown
switch in " " position. Insert the ignition key in ignition switch and turn
it to ON position. If the transmission is in neutral position, the neutral
indicator lamp is lit.
Warning
Make it a habit to engage the neutral gear and firmly press the clutch
lever before starting the engine. This can prevent dash forward in case of
mistaking gear engagement.
1Press the electric starting button for ignition. Never rotate the accelerator
grip when pressing the starting button.
Note
After engine ignition, immediately release the starting button, to avoid
adverse effects to the engine.
If the engine is not started after 5 seconds, wait for 10 seconds before
making another attempt to prevent damaging the battery.
In case of failure in engine starting after two or three attempts, rotate the
accelerator grip for 1/8 or 1/4 turns and try again.
A motorcycle not used for a long time and poor atomizing fuel may
/