RainPoint ITV105 User manual

Type
User manual

RainPoint ITV105 is an automatic water timer designed to make watering your garden a breeze. With its intuitive interface, you can easily set up watering schedules that adapt to your plants' needs. Program the start time, duration, and frequency of watering, and let the timer take care of the rest. The RainPoint ITV105 also features a rain delay function that allows you to postpone watering during rainy periods, conserving water and preventing overwatering. Additionally, the manual watering mode lets you give your plants a quick boost of water whenever needed.

RainPoint ITV105 is an automatic water timer designed to make watering your garden a breeze. With its intuitive interface, you can easily set up watering schedules that adapt to your plants' needs. Program the start time, duration, and frequency of watering, and let the timer take care of the rest. The RainPoint ITV105 also features a rain delay function that allows you to postpone watering during rainy periods, conserving water and preventing overwatering. Additionally, the manual watering mode lets you give your plants a quick boost of water whenever needed.

USER MANUAL
Model: ITV105
English Español
Email
seice@rainpointus.com
WhatsApp
+1 626-780-5952
Free Hotline
US: 1-833-381-5659 (EN)
EU: +44 800-808-5337 (EN DE)
Save the user manual for future reference
If you have any questions, please contact us to get suppo
WARM TIPS
PLEASE READ BEFORE USING
FOR ANY PROBLEMS DURING USE, PLEASE CONTACT US:
Web: www.rainpointonline.com
Email: seice@rainpointus.com
WhatsApp: +1 626-780-5952
US Free Hotline(English):
+1 833-381-5659(MON-FRI 9:30 AM-5:30 PM PST)
UK Free Hotline(English Deutsch):
+44 800-808-5337(MON-FRI 9:00 AM-5:00 PM CET )
Don’t use the water timer when the temperature is
below 37°F(3°C), and please store the timer indoors
to avoid potential freezing damage.
The lter traps di paicles, preventing them from
entering the timer and causing clogging. Please
clean the lter regularly and replace it if worn.
To ensure a longer lifespan, please use 2 new AAA
alkaline batteries (not included). Don’t mix new and
old alkaline, standard (carbon-zinc), or rechargeable
batteries.
Only use with clean cold water.
Please activate the water timer before rst use or
after a period of inactivity (Refer to page 6:
ACTIVATE THE TIMER BEFORE USE).
- 01 -
EN
PRODUCT OVERVIEW
At A GLANCE
BIG LCD
SCREEN
OK/MANUAL
BUTTON
DIAL
DELAY/+
BUTTON - BUTTON
FILTER
HOSE TAP
CONNECTION
OUTLET
Rotate the dial to customize your watering schedule.
DIAL:
OK / MANUAL BUTTON:
DELAY / + BUTTON :
- BUTTON :
Use "OK" to conrm the time.
Use "+" to adjust the time. When the
Use "-" to adjust the time.
When the dial is turned to "ON", press and hold "MANUAL"
to water manually.
dial is turned to "ON", press and hold "DELAY" to activate
Rain Delay.
- 02 -
EN
SPECIFICATION
SET CLOCK
DIAL POSITION FUNCTION
Working Water Pressure
Max Flow Rate
0.5bar-8bar (7.25 psi-116.03 psi)
10 Gal/Min (35L/Min)
Waterproof Level IP54
Working Temperature 37.4℉-122℉ (3℃-50℃)
Watering Frequency Eve 1-12 hours or
eve 1-7 days
Water Inlet
Water Outlet
Watering Duration From 1 minute to 3 hours 59
minutes (4 hours)
NH (US) for 3/4" taps
For 3/4" standard garden hose
BSP(EU) for 3/4" or 1" taps
Power By 2 AAA (1.5V) alkaline batteries
(Not Included)
Set the current time
(US defaults to 12-hour clock)
Determine how long to water
(water duration)
Choose how often you will
water (water frequency)
START TIME
HOW LONG
HOW OFTEN
Timer runs according to
your customized schedule
Turn o all watering
ON
OFF
Select what time you would
like to sta watering
- 03 -
EN
PRODUCT INSTALLATION
INSTALLING THE BATTERIES
Note:
Install the batte tray cover securely after installing the batte
to ensure waterproong.
When the timer is not used for a long time, please remove the
batteries and dispose of them properly.
Replace batteries when the low batte indicator appears on
display.
Don’t dispose of batteries in re. Batteries may explode or leak.
To ensure a longer lifespan, please use 2 new AAA alkaline
batteries (not included). Don’t mix new and old alkaline,
standard (carbon-zinc), or rechargeable batteries.
1) Remove the batte compament
cover on the back of the timer.
2) Inse 2 new AAA (1.5V) alkaline
batteries (not included).
3) Put the batte compament cover
back on the timer and press rmly to
make sure it is completely sealed.
- 04 -
EN
INSTALLING THE TIMER
Note:
1) Turn o the garden faucet.
2) Wrap Teon Tape around the faucet threads.
3) Screw the timer to the garden faucet
and make the display as veical as
possible to the ground to prevent
rainwater from accumulating and
leaking into the interior.
4) Wrap Teon Tape around the threads
of the timer outlet.
5) Screw the garden hose to the timer
outlet.
6) Turn on the faucet after programming
the timer.
Tips: If the connection between the timer and the faucet or hose is not
tight or leaking, wrap more Teon Tape(thread seal tape) to make them
tight.
Please do not use tools, only install the timer by hand.
When expecting freezing temperatures, timers should be removed
from the hose faucet and stored indoors to avoid potential freeze
damage.
Please install the lter properly and
keep it clean as follows.
- 05 -
EN
Note:
ACTIVATE THE TIMER BEFORE USE
Please activate the device before using it for the first time or
after a period of inactivity.
Activation steps:
When testing, please keep away from the water timer outlet to
avoid being splashed and wet.
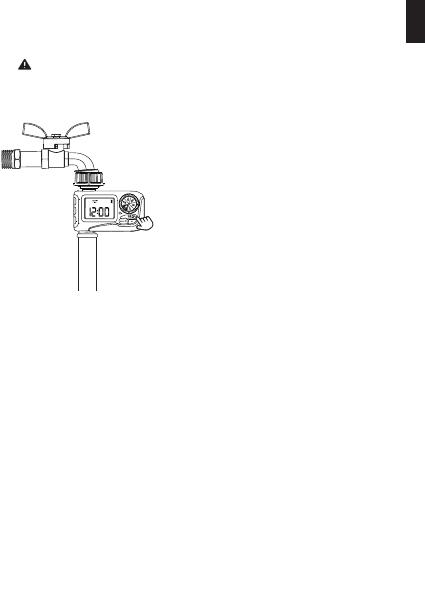
1. Keep the garden faucet turned o.
2. Turn the timer dial to "ON".
3. Press and hold the "MANUAL" button for
3-5s to enter Manual Watering Mode.
4. When the screen ashes, press the "OK"
button to run manual watering.
5. After hearing the "click" sound or waiting for
about 5 secs, the valve in the timer is
opened, then turn the dial to "OFF" to close
the valve.
6. Repeat step 2 - 5 for 3-5 times.
7. Test: Turn on the faucet a little bit, and then
repeat step 2-5 to check if the water ow
out or shut o as expected.
If yes, the timer valve is normal, please use it with condence!
If not, please repeat the above steps several times or contact
RAINPOINT suppo team immediately.
- 06 -
EN
PROGRAMMING YOUR TIMER
1) Turn the dial to SET CLOCK.
2) Use the "+" and "-" buttons to set the current exact time, including
AM and PM.(US defaults to 12-hour clock, EU defaults to 24-hour
clock)
3) Use the "OK" button to conrm and switch between hours or
minutes.
4) Turn the dial clockwise to save the changes in this STEP and go to
next STEP.
Tips: When the setup of this STEP is nished, please turn the dial to
save the changes instead of press the "OK" button. If you press
the "OK" button after setting, it will return to the previous setting
instead of saving it.
STEP 1: SET CLOCK
- 07 -
EN
1) Turn dial to START TIME.
2) Use the "+" and "-" buttons, to set the time you want to sta
watering, including AM and PM.
4) Turn the dial clockwise to save the changes in this STEP and go to
next STEP.
3) Use the "OK" button to switch time ( Hours or Minutes).
Tips: When the setup of this STEP is nished, please turn the dial to
save the changes instead of press the "OK" button. If you press
the "OK" button after setting, it will return to the previous setting
instead of saving it.
STEP 2: START TIME
- 08 -
EN
1) Turn dial to HOW LONG.
2) Use the "+" and "-" buttons, to select watering duration from
1 minute to 3 hours 59 minutes.
4) Turn the dial clockwise to save the changes in this STEP and go to
next STEP.
3) Using the "OK" button to switch time ( Hours or Minutes).
Tips: When the setup of this STEP is nished, please turn the dial to
save the changes instead of press the "OK" button. If you press
the "OK" button after setting, it will return to the previous
setting instead of saving it.
STEP 3: HOW LONG
- 09 -
EN
1) Turn the dial to HOW OFTEN.
2) Use "+" and "-" buttons, to set your watering frequency. You
can choose to water eve 1 to 12 hours, or eve 1 to 7 days.
3) Turn the dial clockwise to save the changes in this STEP and go to
next STEP.
EVERY
WEEK
SUNDAY MONDAY TUESDAY WEDNESDAY THURSDAY FRIDAY SATURDAY

WEEK
ONE
WEEK
TWO
WEEK
ONE
WEEK
TWO

SUNDAY MONDAY TUESDAY WEDNESDAY THURSDAY FRIDAY SATURDAY

Tips: When the setup of this STEP is nished, please turn the dial to
save the changes instead of press the "OK" button. If you press
the "OK" button after setting, it will return to the previous
setting instead of saving it.
STEP 4: HOW OFTEN
- 10 -
EN
1) Turn dial to "ON".
2) The LCD screen will display the current time and the next time to
sta watering.
5
Current Time Next Watering Sta Time
CONGRATULATIONS!
Your timer has now been programmed successfully. It will sta
watering automatically based on the programmed sta time,
duration and frequency.
Now you can keep the faucet turned on and trust the timer to do
the watering!
STEP 5: AUTOMATIC WATERING
- 11 -
EN
ADDITIONAL FUNCTIONS
RAIN DELAY
1) With the dial on "ON", press "DELAY" button for 3-5s to sta the
delay watering function.
2) There will be a delay period on the screen which default " "24H
You can press button "+" or "-" to choose the delay period from
24H, 48H, and 72H.
Rain delay allows you to postpone watering for a set period of time,
and it will not interrupt your original schedule.
To access the rain delay, follow the steps below.
Setting rain delay 24/48/72H Peorming rain delay
3) Press "OK" button to run the delay function after selecting the
delay time, and all watering plans will be skipped during this period.
4) To remove rain delay, hold the "DELAY" button for 3-5s again to
resume your programmed watering schedule.
Please remember to press the "OK" button after selecting the
rain delay time to sta the rain delay program. Otherwise, the
rain delay setting will automatically exit after the screen ashes
for 3-5s.
Note:
- 12 -
EN
MANUAL / HAND WATERING
Peorming manual wateringSetting manual watering
1min~8hrs
This function allows you to manually water without interrupting your set
watering schedule. To access this feature, please follow the steps below.
Please remember to press the "OK" button after setting the
manual watering time to sta manual watering. Otherwise, the
manual watering setting will be automatically exited after the
screen ashes for about 3-5s.
Note:
1) Turn the dial to "ON".
2) Press and hold the "MANUAL" button for 3-5s to enter the Manual
Watering Mode.
3) Press the "+" or "-" buttons to adjust the manual watering time from
1 minute to 8 hours.
(The default manual watering time is 10 minutes.)
4) After setting the watering time, press the "OK" button to sta
manual watering and the pattern will be displayed on the screen.
5) If you need to stop the manual watering, please hold the "MANUAL"
button for 3-5s to exit the manual watering mode and restore the
original watering program.
(Or you can turn the dial to "OFF" to stop the manual watering, but
please remember to turn the dial to "ON" again to restore the
original watering program.)
- 13 -
EN
OFF MODE
BATTERY STATUS
1) If you wish to stop the watering plan for an extended period,
turn the dial to "OFF". (Your settings are saved)
2) The timer will not water automatically while in OFF mode. (The
screen will display the word OFF in large letters).
3) To sta watering automatically again, turn the dial back to "ON"
to resume your programmed watering schedule.
Full Low Power
When the low batte indicator appears on display. the valve
will close automatically to avoid leakage. Please replace the
batte in time in case of interrupting the normal operation.
Batte Status will be displayed as following:
- 14 -
EN
Problem Possible Cause Possible Solution
1. No lter or not be
placed horizontally
2. The faucet is not the
standard 3/4"
The water inlet
leakage
1. Long time in storage
and transpoation
make the valve
inactive
2. Valve blockage
1. After setting manual
watering or rain delay
time, without pressing
OK button to save and
run.
The water
won't stop/ow
out
No response
for manual/rain
delay function
1. Keep the tap turned
o and turn the timer
dial to ON;
2. Run the manual
watering for 5-7s and
stop it;
3. Repeat the Step 2 for 3
to 5 times;
4. T using it normally.
1. Press OK button again
after the time is set to
conrm.
1. Mixed use of old and
new batteries
2. Use the carbon
batteries or
rechargeable
batteries
Sho batte
life
1. Use new alkaline
batteries.
2. Rechargeable batteries
and carbon batteries
have a sho life, use
the alkaline batteries
instead of them.
1. Add a lter and make
sure it's placed
horizontally in the inlet.
2. Make sure the faucet
is a standard 3/4" faucet.
3. Wrap Teon tape on the
tap making it tight.
- 15 -
TROUBLESHOOTING
EN
1. Filter blockage
2. Inlet pressure not
sucient to suppo
watering needs
Low water
pressure
LCD screen
does not
display
1. The batte is
exhausted
2. The display is
exposed to direct
sunlight
1. Replace new 2*AAA
alkaline batteries and
installed correctly.
2. Avoid direct sunlight,
and obsee if the
batte is too low.
1. Check if the lter is
clogged, if so, clean
or replace the lter.
2. Make sure the timer is
installed properly and
not cross-threaded.
3. Installation of a
booster pump or other
auxilia equipment of
increasing pressure.
If you need help in using the timer, please feel free to contact us.
US Free Hotline(English): +1 833-381-5659
(MON-FRI 9:30 AM-5:30 PM PST)
UK Free Hotline(English Deutsch): +44 800-808-5337
(MON-FRI 9:00 AM-5:00 PM CET )
Email: seice@rainpointus.com
WhatsApp: +1 626-780-5952
- 16 -
EN
CLEANING YOUR TIMER
filter
After a period of use, impurities or di in the water may accumulate in
the timer. Therefore, the timer should be cleaned regularly to ensure its
proper operation.
Please follow these steps to clean the timer.
1. Turn o the garden faucet and remove the timer. Check whether the
lter at the timer water inlet has accumulated impurities.
2. If the lter is diy, please take it out of the timer and rinse it with
running water.
3. Turn on the Manual Watering Mode of the timer to open the valve
and check whether the water pipe of the timer is blocked. If it is
blocked, please clean it gently with a small cleaning brush.
- 17 -
EN
WARNINGS
1) For outdoor use only. Placing the timer in the sheltered outdoors will
prolong its lifetime.
2) To avoid damage, please tighten it without using tools.
3) The lter should be placed horizontally in the water inlet to prevent
leakage.
4) When low power, please replace the batteries to avoid the
interruption of normal operation; when replacing the batteries,
please make sure that the batte tray is d.
5) When the timer is not in use, please remove the batteries and store
it indoors.
6) Don’t use the timer under the temperature more than 120℉(50℃),
or less than 38℉(3℃).
7) Don’t subject the product to extreme force and shock.
8) Severe electrical shock could result if water is sprayed into outlets or
sources of electrical current. Never immerse the product in water.
This product is MADE IN CHINA and conforms to the national standards
of the United States, Britain, Germany and France. Please use this
product correctly. If it needs to be discarded, please properly dispose
according to the national requirements. Please protect the
environment.
EC REP
NAME:VIAJE ELECTRONIC COMPANY LIMITED
ADDRESS:E588, 13 ADELAIDE ROAD, DUBLIN,
D02 P950, IRELAND
- 18 -
EN
WARRANTY
CUSTOMER SERVICE
RainPoint provides a 1-year warranty against manufacturing defects in
materials and workmanship from the date of purchase.
During the warranty period , we’ll replace free of charge the product
found to be defective under reasonable use and seice as determined
solely by RainPoint.
To place a warranty request, please email us with your order ID at
seice@rainpointus.com and we’ll respond within 24 hours.
LOT NO.: XXXXX (on the back of the timer)
US Free Hotline(English): +1 833-381-5659
(MON-FRI 9:30 AM-5:30 PM PST)
UK Free Hotline(English Deutsch): +44 800-808-5337
(MON-FRI 9:00 AM-5:00 PM CET )
Email: seice@rainpointus.com
WhatsApp: +1 626-780-5952
Still have trouble with setup , please search for " RainPoint " on Youtube
for installation videos!
If the user manual doesn’t have what you're looking for or you need
other help, please contact us before returning the product to the store
and let us know the LOT NO. of your device.
- 19 -
EN
  • Page 1 1
  • Page 2 2
  • Page 3 3
  • Page 4 4
  • Page 5 5
  • Page 6 6
  • Page 7 7
  • Page 8 8
  • Page 9 9
  • Page 10 10
  • Page 11 11
  • Page 12 12
  • Page 13 13
  • Page 14 14
  • Page 15 15
  • Page 16 16
  • Page 17 17
  • Page 18 18
  • Page 19 19
  • Page 20 20
  • Page 21 21
  • Page 22 22
  • Page 23 23
  • Page 24 24
  • Page 25 25
  • Page 26 26
  • Page 27 27
  • Page 28 28
  • Page 29 29
  • Page 30 30
  • Page 31 31
  • Page 32 32
  • Page 33 33
  • Page 34 34
  • Page 35 35
  • Page 36 36
  • Page 37 37
  • Page 38 38
  • Page 39 39
  • Page 40 40

RainPoint ITV105 User manual

Type
User manual

RainPoint ITV105 is an automatic water timer designed to make watering your garden a breeze. With its intuitive interface, you can easily set up watering schedules that adapt to your plants' needs. Program the start time, duration, and frequency of watering, and let the timer take care of the rest. The RainPoint ITV105 also features a rain delay function that allows you to postpone watering during rainy periods, conserving water and preventing overwatering. Additionally, the manual watering mode lets you give your plants a quick boost of water whenever needed.

Ask a question and I''ll find the answer in the document

Finding information in a document is now easier with AI

in other languages