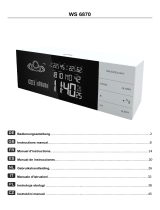
Techno line Model Owner's manual

Category
Weather stations
Type
Owner's manual

This manual is also suitable for

EN. 2
FEATURE LIST
4.7” / 120mm (diagonal) display with 1.1” time digits
Radio controlled time / date sets itself
Alarm 1 and Alarm 2
Programmable Snooze
Dimmer for nighttime viewing
Color forecast : Sunny, Partly Cloudy, Cloudy, Rainy, Stormy
12 hour forecast based on changing air pressure
Tendency indicator of weather forecast
Indoor-outdoor temperature and humidity (RH%)
Max-Min records of temperature and humidity
Month-Date Calendar interchangeable with Air pressure readout (in hPA)
Degree C/F readout
12/24 hour time format
433Mhz wireless outdoor transmitter (one transmitter is included)
Up to 100-feet transmission of outdoor temperature and humidity
Auto scrolling of outdoor temperatures and humidity of different transmitters
Low battery indicator of outdoor transmitter
Can expand to use with two additional outdoor transmitters (not included)
Weather station powered by external AC/DC adaptor
Batteries : 3 “AAA” alkaline for backup of the main weather station (not included)
2 “AAA” alkaline for outdoor transmitter (not included)
ENVIRONMENTAL RECEPTION EFFECTS
Your weather station obtains the accurate time with wireless technology. Same as all wireless
devices, the receiving ability maybe affected by, but not limited to, the following circumstances:-
z Long transmitting distance
z Nearby mountains and valleys
z Among tall buildings
z Near railway, high voltage cable etc.
z Near freeway, airport, etc
z Near construction site
z Inside concrete buildings
z Near electrical appliances
z Near computers and TV’s
z Inside moving vehicles
z Near metallic structures
EN. 3
Place your weather station at a location with optimal signal, i.e. close to a window and way from
metal surfaces or electrical appliances.
QUICK SETUP
Step 1:
Insert the AC/DC adaptor to any 220-240V AC household outlet. Then insert the DC jack to the back
case of your weather station.
Step 2:
Keep your weather station and wireless outdoor transmitter next to each other. Slide open the battery
cover at the back of your wireless outdoor transmitter, then insert 2 x AAA alkaline batteries to the
battery compartment. Make sure the Channel selector is at 1 position. Replace the battery cover.
Make sure (Channel 1) is displayed under the outdoor temperature and humidity. You could
press c / CHANNEL to select Channel 1.
Your weather station will receive data signal from the outdoor transmitter in few seconds. Then place
your outdoor transmitter in a dry and shaded area.
Installing backup batteries
Your weather station requires 3 “AAA” alkaline batteries to provide backup power to it in the event of
a temporary power interruption.
Place your weather station face down on a flat surface.
1. Slide and remove the battery cover at the bottom of your weather station.
2. Insert 3 “AAA” alkaline batteries into the battery compartment by observing the “+” and “-“ polarity
as indicated.
3. Replace the battery cover.
If the AC main power is interrupted, the backlight will go off. The backup batteries will keep the time and
all settings of your weather station. Press once to turn on the backlight for 5 seconds.
Remarks:
Keep in mind that your outdoor transmitter has a 30-meter open air transmission with no obstructions.
Actual transmission range will vary depending on what is in the path of the signal. Each obstruction
(roof,
walls, floors, ceilings, thick trees, etc.) will effectively cut signal range in half.
Insert the holder to the bottom of the outdoor transmitter for desktop or insert it to the back of the
transmitter for wall mount purpose.
EN. 4
DCF SIGNAL RECEPTION AND SIGNAL INDICATOR
After your weather station is powered up, it starts to receive DCF signal. The icon flashes.
Weak or no DCF signal (only icon flashing)
Receiving strong DCF signal ( icon flashing)
Successful Reception ( icon becomes static)
Failed Reception ( icon disappear)
Remark: when your weather station is receiving the radio controlled time signal, all buttons except the
snooze / light button do not function.
DCF TIME SIGNAL RECEPTION
Your weather station will automatically update itself to the exact time after receipt of the DCF time
code. The weather station will automatically attempt to receive the DCF signal every night at 1:00 am,
2:00 am, 3:00 am, 4:00 am and onwards. If it receives DCF signal at 3:00 am it will stop receiving
until 1:00 am next day.
To start DCF reception manually, press WAVE / – (°C/°F) button for 2 seconds. To stop DCF
reception, press and hold WAVE / – (°C/°F) for 2 seconds.
TO SET YOUR WEATHER STATION MANUALLY
The setting of your weather station comes into the sequence of Time Zone, 12/24 hour, hours,
minutes, year, month, date, month-date/date-month display and snooze duration.
1. Press and hold for 2 seconds, time digits change to “00”. Press c / d to set the time
zone:
-01 GMT 00 hour (e.g. UK)
00 GMT +1 hour (e.g. Germany)
01 GMT +2 hour (e.g. Finland)
2. Then press again, time digits change to “24Hr“ and flash. Press c or d to select
“12 Hr” time format. When 12Hr time format is selected, PM indicator will be displayed.
3. Then press once again, “0” the hour digits flash. Press c or d button to
set the hours. Press and hold c / d will accelerate your setting faster.
4. Then press once again, “00”the minute digits flash. Press c or d button to
set the minutes. Press and hold c / d will accelerate your setting faster.
EN. 5
5. Then press once again, “Yr” and “2013” digits flash. Press c or d button to
set the year.
6. Then press once again, month digits flash. Press c or d button to set the month.
7. Then press once again, date digits flash. Press c or d button to set the date.
8. Then press once again, “m”, “d”, month-date digits flash. Press c or d to select
month-datem” “d” or date-month “d” “m” calendar display.
9. Then press once again, “SN” and “05” digits flash. Press c or d button to set the
snooze duration from 5 minutes to 60 minutes.
10. Press to return to normal mode, or it will return to normal mode in around 10
seconds if no further press of any other buttons.
TO SET ALARM TIME
1. Press once, time digits change to alarm time digits “6:00” and “A1”. Then press
and hold for 2 seconds, the alarm hour digits flash. Press c or d to set the hours of
your desired alarm time.
EN. 6
2. Then press once again, the alarm minute digits flash. Press c or d button to set the
minutes of your desired alarm time.
3. Press once, time digits change to alarm time digits “6:00” and “A2” is
displayed. Then repeat the above in Alarm 1 setting.
3. Your weather station will automatically return to normal mode in around 10 seconds if no further
buttons are pressed.
TO TURN ON OR OFF YOUR DAILY ALARM
Simply press to turn on or off the Alarm 1, Alarm 2, or Alarm 1 & 2.
When Alarm 1 is turned on, the appears. When Alarm 2 is turned on, the appears.
TO USE SNOOZE ALARM
When time reaches your set alarm time, your weather station will give a beep sound to wake you up.
The corresponding or will flash.
1) Press once to stop the alarm temporarily, the corresponding or keeps
flashing.
The alarm will beep again according to your set snooze duration.
2) When the alarm is sounding, press once, the alarm beep will stop, or
become static, alarm will beep again at the same time next day.
Alarm Duration: 2 minutes
TO USE THE DIMMER
Press button once to adjust the display brightness for nighttime viewing.
TO DISPLAY TEMPERATURE IN DEGREE °C OR °F
Simply press WAVE / d (°C/°F) to display temperature in degree °C or degree °F.
WEATHER FORECAST AND PRESSURE TREND INDICATOR
Your weather station has a built-in barometric sensor which measures the change of the air pressure
EN. 7
over time. Your weather station takes around 12 hours to gather and average air- pressure readings
to provide a weather forecast for next 12 hours.
WEATHER ICONS
There are five possible types of weather icons that will be displayed:
SUNNY
RAINY
PARTLY
CLOUDY
STORMY
CLOUDY
FROST ALERT
Frost Alert Icon appears
when outdoor temperature
is below +3°C
AIR PRESSURE TENDENCY INDICATORS
When the arrow appears, the air pressure is increasing, the weather is expected to improve.
When the arrow appears, the air pressure is decreasing, the weather is expected to become
worse.
When the arrow appears, the air pressure change is stable.
Remarks: Moving your weather station from one floor of a building to another floor will affect the
accuracy
of your weather station, which should operate at the same altitude all the time. If you move it to a new
location, it will take 12 hours to get stable and accurate again.
Our weather station provides next 12 hours weather forecast. It may not match with the current
weather condition outside.
TO DISPLAY AIR PRESSURE READOUT
Press and hold until the calendar display shows the air pressure readout in hPa. Press and
hold again to revert back to calendar display.
TO READ MAXIMUM-MINUMUM IN-OUT TEMPERATURES AND HUMIDITIES
Simply press the to view the maximum indoor-outdoor temperatures and humidities records
with “MAX” icons appearing on the display. Press again to view the minimum indoor-outdoor
temperatures and humidities and the air pressure with “MIN” icons appearing on the display.
EN. 8
When the maximums or minimums are displayed, press and hold the to reset both records
and it will start to record the maximums and minimums again.
IF YOU LOSE THE OUTDOOR TEMPERATURE AND HUMIDITY
When the outdoor temperature and humidity digits show '---", the wireless transmission is either
interrupted or lost. Press and hold the c / CHANNEL button to start searching for the signal from the
outdoor transmitter with the flashing.
If you continue to lose the outdoor temperature and humidity display, which could happen in extreme
cold weather, try placing the transmitter in a different location until you have smooth transmission of
temperature / humidity data.
HOW TO SYNCHRONIZE YOUR WEATHER STATION WITH ANOTHER OUTDOOR
TRANSMITTER
1. Press c / CHANNEL at the back of your weather station, icon appears under your outdoor
temperature and humidity.
2. Press and hold c / CHANNEL until the icon blinks, your weather station is searching for the
signal of another outdoor transmitter at Channel 2.
3. Slide open the battery door of your second transmitter, slide the switch to the middle position
marked with 2, then insert two AAA batteries into the battery compartment by observing the correct
+/- polarity. Replace the battery cover.
4. The outdoor temperature and humidity of your second transmitter will appear on the LCD together
with icon within few seconds. If the data still does not appear, press RESET at the front of your
second transmitter once.
5. To synchronize your weather station with a third outdoor sensor, repeat the same step by choosing
on your weather station and select 3 on your third transmitter.
AUTO SCROLLING THE OUTDOOR TEMPERATURE AND HUMIDITY OF
DIFFERENT TRANSMITTER
Press c / CHANNEL frequently until the icon flashes. Then the outdoor temperature and humidity
of different outdoor transmitter will be displayed for few seconds alternately with , , flashing.
To stop the auto scrolling, press c / CHANNEL once to go back to constant display of the temperature
and humidity of the transmitter, the icon remains static on the display.
LOW BATTERY INDICATION OF YOUR OUTDOOR TRANSMITTER
The icon will appear to indicate the battery level of your outdoor transmitter is getting low. You may
need to replace the batteries of your outdoor transmitter with new ones.
Extreme cold weather (e.g. below 14 °F) will also cause low battery voltage.
EN. 9
TROUBLESHOOTING
In case your weather station clock shows irrelevant information or digits, it maybe affected by
electrostatic discharge or interferences from other devices. Use a sharp object to press RESET. Your
unit will be reset to default settings and you need to set the time, calendar and alarm time again.
Problem Solution
LCD is blank
1. Press RESET on the weather station.
2. Replace fresh batteries in your weather station.
No Outdoor Temperature and
Humidity is displayed
1. Press and hold c / CHANNEL on the weather station.
2. Press and hold c / CHANNEL, then press RESET on
the outdoor transmitter.
3. Make sure the correct channel is selected on your
weather station (default setting is
– Channel 1)
4. Observe if the Low Battery icon appears on the left of the
outdoor temperature. If yes, replace batteries in outdoor
sensor with fresh alkaline batteries.
5. No other interfering sources are being used (such as
computer monitors, TV sets, headphones, or speakers)
in the path of signal from the outdoor sensor. The signal
travels in a straight line; an electrical source near that
“line” may cause interference.
Temperature, humidity, or air
pressure is incorrect
1. Press RESET on the weather station.
2. Make sure your weather station and the outdoor
transmitter are away from sources of heat / cold / direct
sunshine.
CARE OF YOUR WEATHER STATION
1. Do not expose the unit to extreme temperature, water or direct sunlight.
2. Avoid contact with any corrosive materials.
3. Do not subject the unit to excessive force, dust or humidity.
4. Do not open the inner back case or tamper with any components of this unit.
5. Do not plug in any other AC/DC adaptor with incorrect specifications or voltage.
SPECIFICATIONS:
Temperature Range
Indoor +32°F to +122°F (0°C to +50°C) (display shows HH.H / LL.L if out of this range)
Outdoor -58°F to +158°F (-50°C to +70°C) (display shows HH.H / LL.L if out of this range)
Humidity Range
Indoor 20% - 95%
Outdoor 20% - 95%
Temperature Resolution 0.2°F / 0.1°C
RH% Resolution 1%
Temperature & Humidity measure every 30 seconds
Air Pressure Range 850 hPa to 1050 hPa
Alarm Duration 2 minutes
Snooze Duration 5 minutes
EN. 10
Consideration of duty according to the battery law
Old batteries do not belong to domestic waste because they could cause damages of
health and environment. You can return used batteries free of charge to your dealer
and collection points. As end-user you are committed by law to bring back needed batteries to
distributors and other collecting points!
ES. 1
WS6440 - ESTACIÓN METEOROLÓGICA
MANUAL DE INSTRUCCIONES
PL. 1
WS6440 - STACJA POGODOWA
INSTRUKCJA OBSŁUGI
  • Page 1 1
  • Page 2 2
  • Page 3 3
  • Page 4 4
  • Page 5 5
  • Page 6 6
  • Page 7 7
  • Page 8 8
  • Page 9 9
  • Page 10 10
  • Page 11 11
  • Page 12 12
  • Page 13 13
  • Page 14 14
  • Page 15 15
  • Page 16 16
  • Page 17 17
  • Page 18 18
  • Page 19 19
  • Page 20 20
  • Page 21 21
  • Page 22 22
  • Page 23 23
  • Page 24 24
  • Page 25 25
  • Page 26 26
  • Page 27 27
  • Page 28 28
  • Page 29 29
  • Page 30 30
  • Page 31 31
  • Page 32 32
  • Page 33 33
  • Page 34 34
  • Page 35 35
  • Page 36 36
  • Page 37 37
  • Page 38 38
  • Page 39 39
  • Page 40 40
  • Page 41 41
  • Page 42 42
  • Page 43 43
  • Page 44 44
  • Page 45 45
  • Page 46 46
  • Page 47 47
  • Page 48 48
  • Page 49 49
  • Page 50 50
  • Page 51 51
  • Page 52 52
  • Page 53 53
  • Page 54 54
  • Page 55 55
  • Page 56 56
  • Page 57 57
  • Page 58 58
  • Page 59 59
  • Page 60 60
  • Page 61 61
  • Page 62 62
  • Page 63 63
  • Page 64 64
  • Page 65 65
  • Page 66 66
  • Page 67 67
  • Page 68 68
  • Page 69 69
  • Page 70 70
  • Page 71 71
  • Page 72 72
  • Page 73 73
  • Page 74 74
  • Page 75 75
  • Page 76 76
  • Page 77 77
  • Page 78 78
  • Page 79 79
  • Page 80 80

Techno line Model Owner's manual

Category
Weather stations
Type
Owner's manual
This manual is also suitable for

Ask a question and I''ll find the answer in the document

Finding information in a document is now easier with AI