Intenso 4GB Video Shooter 2.4" Owner's manual
- Category
- MP3/MP4 players
- Type
- Owner's manual
This manual is also suitable for
Page is loading ...
Page is loading ...
Page is loading ...
Page is loading ...
Page is loading ...
Page is loading ...
Page is loading ...
Page is loading ...
Page is loading ...
Page is loading ...
Page is loading ...
Page is loading ...
Page is loading ...
Page is loading ...
Page is loading ...
Page is loading ...
Page is loading ...
Page is loading ...
Page is loading ...
Page is loading ...
Page is loading ...
Page is loading ...
Page is loading ...
Page is loading ...
Page is loading ...

Seite 1 von 22 EN
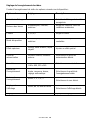
1. Table of contents
1. Table of contents ................................................................................................... 1
2. Instructions............................................................................................................. 2
3. Functions ............................................................................................................... 2
4. Package content .................................................................................................... 2
5. Before use.............................................................................................................. 3
6. First steps .............................................................................................................. 6
7. Main Menu ............................................................................................................. 6
8. Playing music ......................................................................................................... 7
9. Picture .................................................................................................................... 9
10. Video .................................................................................................................... 11
11. Integrate Digital Camera ...................................................................................... 12
12. Using the device as PC camera ........................................................................... 15
13. FM Radio ............................................................................................................. 15
14. Record ................................................................................................................. 17
15. View Folders ........................................................................................................ 18
16. Editing the Player’s Settings ................................................................................ 18
17. Troubleshooting ................................................................................................... 20
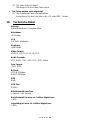
18. Technical data ...................................................................................................... 21
19. Please observe what follows ................................................................................ 22

Seite 2 von 22 EN
2. Instructions
Avoid a strong collision of the device.
Do not use the device in extremely cold, hot, humid or dusty places. Do not expose
it to direct insolation.
Carry out frequent data backups to avoid a possible data loss.
Avoid the use in strong magnetic fields.
Protect the device from humidity. If humidity penetrates the device, please switch it
off immediately and clean and dry the device.
Please do not use chemical solutions to clean the device. In this case please use a
dry cloth.
We are not responsible for damages or data loss in case of a failure malfunction
caused by a faulty operation, the reparation of the device by one’s own hand or the
battery change.
Please do not decompose the device into smaller parts and do not try to repair it by
yourself, because in this case the guarantee expires.
If you use earphones or headsets on full blast you could cause a durable damage to
your hearing.
3. Functions
MP3 & WMA Player
Video Player
Camera: to take pictures and record videos
Possible to connect PCs and Webcams
JPEG / BMP picture viewer
Directory navigation
Rechargeable Li-polymer battery
User-specific settings
Removable medium
4. Package content
Please check the package content for completeness
Intenso Video Player
Stereo headset
USB cable
Instruction manual + guarantee certificate

Seite 3 von 22 EN
5. Before use
Connect with the PC
With the operating systems Windows 98/SE please install a driver before you connect the
player with the PC. (The download is available on the following website: www.intenso.de).
For the operating systems WIN 2000/XP/ME/Vista/Windows 7 the installation of the driver
is not needed.
Please go ahead as follows:
(1) Connect the player with the USB connection of the PC.
(2) The window “Intenso” will open. Now you can save the data from your hard disk on
the removable medium.
Safe removal from the PC
For Windows 2000/XP/ME/Vista/Windows 7:
Click with the right mouse button down right in the task bar on the symbol “Remove
hardware securely”. In the displayed context menu please select the point “Remove USB
mass storage device driver“ with the left mouse button. Please make sure that the data
transmission has been completed.
Now you can remove the device.
For Windows 98/SE:
Select the device in the „device manager“ with the left mouse button. Now click on the
menu point “Remove“. Make sure also here that the data transmission has been
completed.
Now the device can by disconnected from the computer.
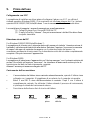
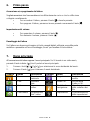
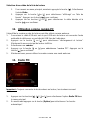
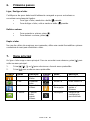
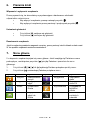
Charging batteries
The Player's battery is automatically charged if the player is connected to the
computer. Please ensure the computer is switched on.
Within 3 hours approx. 80 % of the battery is charged. After 5 hours the Player is
completely charged. If you use the Player while it is being charged, it’s charging
time will increase.
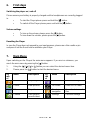
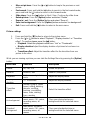
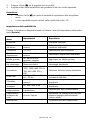
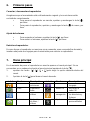
Below you find the Player’s different charging states.
Full
2/3 full
1/2 full
Battery
weak
Empty

Seite 4 von 22 EN
Please Note:
When charging the local room temperature should be between 0°C and 35°C.
Please charge the Player before you use it for the first time or after you have not
used it for longer time.
Please charge the Player if the display shows “Battery weak”.
Please mind that the battery’s lifetime may reduce if you discharge or overcharge it.
The battery may completely discharge if the device has not been used for more
than 3 months. Due to this reason, please charge the Player completely at least
every 3 months.
If you will not use your device for longer times, please store it at a room
temperature of 23 ±5 °C and air humidity of 65 ± 20% to maintain the battery’s
quality.

Seite 5 von 22 EN
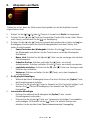
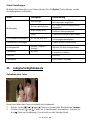
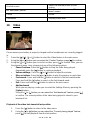
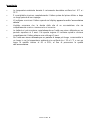
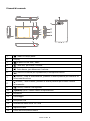
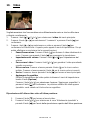
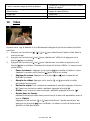
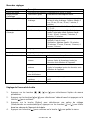
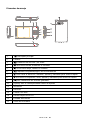
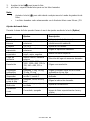
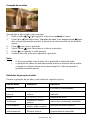
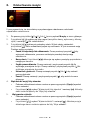
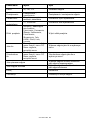
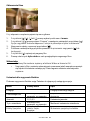
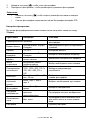
Operating controls
1.
[ ] Power On/Off
2.
Display
3.
[ ] Take picture / record videos
4.
[ ] Up button, turn up volume
5.
[ ] Down button, turn down volume
6.
[ ] Play/Pause/Continue, Confirm - button
7.
[ ] Right / forward button: press and hold = fast forward
8.
[ ] Right / forward button: press and hold = fast forward
9.
[ ] Exit; recorded files are stored
10.
[Option] Opens the relevant settings menu
11.
Microphone
12.
Reset
13.
Mini USB Port
14.
Micro SD Card slot
15.
Headphone input
16.
Camera lens

Seite 6 von 22 EN
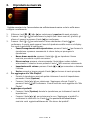
6. First steps
Switching the player on / and off
Please ensure your battery is properly charged and the headphones are correctly plugged
in.
To start the Player please press and hold the [ ] button.
To switch off the Player please press and hold the [ ] button.
Volume settings
To turn up the volume, please press the [ ] button.
To turn down the volume, please press the [ ] button.
Resetting the Player
In case the Player does not respond to your input anymore, please use a thin needle or pin
and press it into the Reset hole to reinitialise your Player.
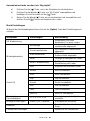
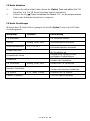
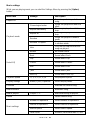
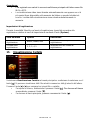
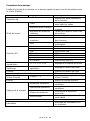
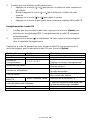
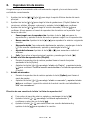
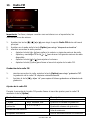
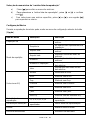
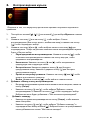
7. Main Menu
Upon switching on the Players the main menu appears. If you are in a submenu, you
reach the main menu by pressing the [ ] button.
1. Using the [ ], [ ], [ ] or [ ] button you can select the desired menu item.
2. Please press the [ ] button to start the desired menu.
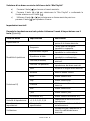
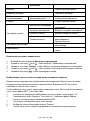
Sy
mb
ol
Name
Description
Sy
mb
ol
Name
Description
Music
Play songs.
Record
Voice recording
Picture
View pictures.
FM Radio
Listen to FM Radio
Video
Play videos.
Directory
navigation
View directories and
files
Camera
Take picture /
record videos
Settings
Personal settings

Seite 7 von 22 EN
8. Playing music
Please ensure your battery is properly charged and the headphones are correctly plugged
in.
1. In the main menu you can select your desired Music using the [ ], [ ], [ ] or [ ]
button.
2. Using the [ ] or [ ] button you can select your desired Playlist (All songs, Artist,
Album or Genre); press [ ] to confirm.
3. Using the [ ] or [ ] button you can select the desired song; press [ ] to confirm. Now
you see the Music Playback Menu on the display. Here you have the following
options:
Pause/Continue Playback: Using the [ ] button you can stop the music, by
repeatedly pressing this button you can continue playing the music.
New song: Press the [ ] or [ ] button to play the previous or next song.
Fast search: Press and hold the [ ] button for fast rewind. Press and hold the
[ ] button for fast forward.
Volume settings: Press the [ ] or [ ] button to turn down or up the volume.
Exit: Press and hold the [ ] button to return to the main menu.
4. Add to My playlist:
While you are playing music you can start the Settings Menu by pressing the
[Option] button.
Using the [ ] or [ ] button you can select the “Add to Playlist” feature; press [ ]
to confirm. The relevant song added to “My Playlist”.
5. Add bookmark
While playing music please press the [Option] button to start the Settings Menu.
Using the [ ] or [ ] button you can select the “Add bookmark” feature, to confirm
press the [ ] button. The current position of the current song is added to the list
“My bookmark list“.
Selecting a song from the “My playlist” list
a) Press and hold the [ ] button to return to the music menu.
b) Press the [ ] or [ ] button to select “My Playlist” and confirm your selection
using the [ ] button.
c) Press the [ ] or [ ] button to select a particular song and press the [ ] button to
play this song.

Seite 8 von 22 EN
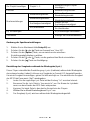
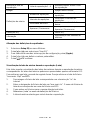
Music settings
While you are playing music you can start the Settings Menu by pressing the [Option]
button.
Menu item
Settings
Description
Repeat AB
Repeat a particular part of a
song.
Playback mode
Chronological order
Songs are played one after the
other.
Repeat individually
The song is played as infinite
loop.
Repeat all
All songs are played as infinite
loop.
Random
Songs are played in random
mode.
Random + Repeat
Songs are repeated and played
in random mode
Intro
Only the first few seconds of a
song are played
Select EQ
Normal
No sound effects.
Rock
Sound effect Rock.
Pop
Sound effect Pop.
Classic
Sound effect Classic.
Soft
Sound effect Soft.
Jazz
Sound effect Jazz.
User EQ
Sound effect User EQ.
Playback speed
-4, 3,-2,-1,0,1,2,3,4
Set playback speed.
Display settings
Album, Lyrics, Equalizer
Select display mode.
Evaluate
Evaluate the current song.
Add bookmark
Bookmark song.
Add to playlist
Playlist 1 - 5
Add current song to playlist.
Delete
Delete current song.
Music settings
Number of repetitions
Select number of repetitions.
Interval of repetitions
Select interval of repetitions.
Search speed
Select search speed.
Fade in/out
Activate / deactivate fade in / out.

Seite 9 von 22 EN
EQ settings
Adjsut EQ settings.
Information
Display of song details.
Edit Equalizer Settings:
1. In the music menu please select Setup EQ.
2. Press the [ ] or [ ] button to select “User EQ”.
3. Please press the [Option] button to select your desired menu items.
4. Press the [ ] or [ ] button to select the values desired.
5. To confirm please press the [ ] button.
Display song text with playback (Lyrics)
This Player can display the lyrics (song texts) of songs while they are being played. It is
only possible to display song texts in LRC format.
To add song texts proceed as follows. Example: You want to display the song text of the
MP3 file “love music. Mp3”:
1. Download the relevant lyrics file (“.lrc”) from the Internet.
2. Rename this file into “love music.lrc”. The name of this lyrics file must correspond
to the name of the MP3 file.
3. Copy both files into the same directory of the Player.
4. In the Music Settings Menu please select “Lyrics”.
5. Now, the song text (Lyrics) is displayed while the song is being played.
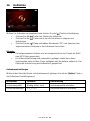
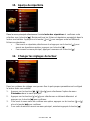
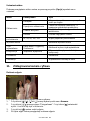
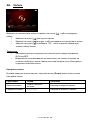
9. Picture
1. In the main menu you can select the menu item Picture using the [ ], [ ], [ ] or [ ]
button.
2. Using the [ ] or [ ] button you can select the “Content” feature; press [ ] to confirm.
3. To select a picture please press the [ ], [ ], [ ] or [ ] button; to confirm press [ ].
Now the picture is shown as full screen.

Seite 10 von 22 EN
Miss out pictures: Press the [ ] or [ ] button to leap to the previous or next
picture.
Fast search: Press and hold the [ ] button to search in the fast rewind mode;
press and hold the [ ] button to search in fast forward mode.
Slide show: Press the [ ] button to Start / Stop / Continue the slide show.
Rotate picture: Press the [Option] button and select “Rotate”.
Zoom in / out: Press the [Option] button and select “Zoom in”.
Select as background: Press the [Option] button and select “as background”.
Exit: Press and hold the [ ] button to return to the main menu.
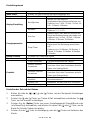
Picture settings
1. Press and hold the [ ] button to return to the picture menu.
2. Press the [ ] or [ ] button to select “Playback”, “Display duration” or “Transition
effect”. To confirm please press the [ ] button.
Playback: Select the playback mode from: “List” or “Thumbnails“.
Display duration Adjust the display duration of pictures to be shown in a
slide show.
Transition effect: Adjust the transition effect for the transition from one
picture to the other.
While you are viewing a picture you can start the Settings Menu by pressing the [Option]
button.
Menu item
Selection
Description
Rotate
90, 180, 270
Rotate the picture.
Zoom in
Zoom in / out:
Zoom in / out picture.
Playback:
Full screen, original size,
scale
Adjust the display mode.
Display
duration
1 – 10 seconds
Adjust the display duration.
Transition
effect:
Normal, flying in, chess
board, cutting, deleting,
jalousie, scrolling,
pushing, crossfading,
wave, cube, rotating,
lines, random
Select the transition effect.
As background
Main menu, list menu,
music menu, FM - menu,
recording menu, all
menus
Place your desired picture as
background into the selected menu.
Standard
background
Main menu, list menu,
music menu, FM - menu,
recording menu, all
menus
Place your standard picture as
background into the selected menu.

Seite 11 von 22 EN
As start screen
Select the desired picture as start
screen.
As “shut down” picture
Select the desired picture as “Shut
down” screen.
Delete
Delete
Information
Display picture data
10. Video
Please ensure your battery is properly charged and the headphones are correctly plugged
in.
1. Press the [ ], [ ], [ ] or [ ] button to select the Video feature in the main menu.
2. Using the [ ] or [ ] button you can select the “Content” feature; press [ ] to confirm.
3. Using the [ ] or [ ] button you can select a video; press [ ] to confirm. Now, you see
the playback menu. Here, please pick one of the following options:
Pause/Continue: Press the [ ] button to Stop the video being played.
Repeatedly press the [ ] button to continue playback.
Volume settings: Press the [ ] or [ ] button to adjust the volume.
Miss out videos: Press the [ ] or [ ] button to play the previous or next video.
Fast search: Press and hold the [ ] button to search in the fast rewind mode.
Press and hold the [ ] button to search in the fast forward mode.
Exit: Press and hold the [ ] button to return to the main menu.
Add bookmark
While you are playing a video you can start the Settings Menu by pressing the
[Option] button.
Using the [ ] or [ ] button you can select the “Add bookmark” feature; press [ ]
to confirm. The current position of the video being played is stored in your
bookmark list.
Playback of the video last viewed at last position
1. Press the [ ] button to return to the video menu.
2. Using the [ ] or [ ] button you can select the “Currently being played” feature;
press [ ] to start playback from the last position.

Seite 12 von 22 EN
Video settings
While you are watching a video you can start the Settings Menu by pressing the [Option]
button.
Menu
Menu item
Description
Playback:
Chronological order
Videos are played one after the other.
Repeat individually
The video is played as infinite loop.
Repeat all
All videos are played as infinite loop.
Random
Videos are played in random mode.
Search speed
x2, x4, x8, x16, x32
Select search speed.
Add bookmark
Bookmark song.
Display mode:
Full screen, original,
scaled
Select the display mode.
Continue
On, Off
Activate and/or deactivate the Continue
feature.
Delete
Delete.
Information
Display picture data
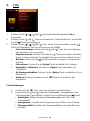
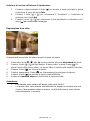
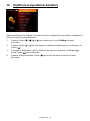
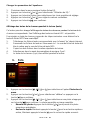
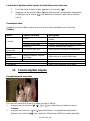
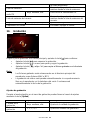
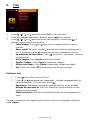
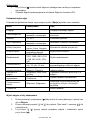
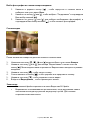
11. Integrate Digital Camera
Taking pictures
Upon switching on the Players the main menu appears.
1. Using the [ ], [ ], [ ] or [ ] button you can select the menu item Camera.
2. Press the [ ] or [ ] button to select the “Take a picture” feature. To confirm please
press the [ ] button. Now you see the Standby menu.
3. To take a picture please press the [ ] button.
4. Please change into the Picture mode to view the pictures taken.

Seite 13 von 22 EN
Please note:
Press the [ ] button to start the "Take a picture" mode (possible in all menus).
The pictures taken are stored in the picture folder as JPG files.
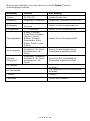
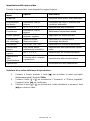
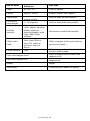
Picture mode settings
While you are taking pictures you can start the Settings Menu by pressing the [Option]
button.
Menu item
Settings
Description
Preview
Thumbnail of the picture taken.
White balance
Automatic, indoors,
outdoors
Colour balancing to environmental
conditions.
Brightness
1,2,3,4,5
Adjusting the brightness.
Exposure mode
Automatic, indoors,
outdoors
Select your preferred exposure.
Special effect
Off, black & white, sepia,
negative
Add a special effect
Memory
location
Internal memory, external
memory
Select the memory location desired.
Resolution
2048 x 1536, 1600 x
1200, 1280 x 960, 1024 x
768, 640 x 480, 320 x
240
Please select a resolution.
Automatic
release
Off, 5 sec., 10 sec., 15
sec., 20 sec.
Please select the interval the picture is
automatically taken.
Release sound
Off, sound 1, sound 2,
sound 3
Select the desired sound.
Picture
information
Off, date, date & time
Select your preferred type of
representation.
Display settings
Full screen, original,
scaled
Adjustment of display settings.
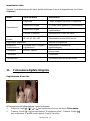
Facial
recognition
On, Off
Activate the facial recognition for very
clear and pin sharp facial pictures.
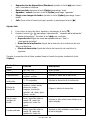
Settings
Settings menu
Selecting pictures from a playback list
1. Press and hold the [ ] button to return to the main menu and select the menu
item Picture.
2. Using the [ ] or [ ] button you can select the “Content” feature; press [ ] to
confirm.
3. Using the [ ] or [ ] button you can select the picture desired, to view the picture
press the [ ] button.

Seite 14 von 22 EN
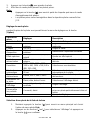
Recording videos
Upon switching on the Player the main menu is displayed.
1. Using the [ ], [ ], [ ] or [ ] button you can select the menu item Camera.
2. Press the [ ] or [ ] button to select “Video recording” and, thereafter, press [ ]. Now
the video recording menu is opened. Video recording is in Standby mode.
3. Please press the [ ] button to start recording the video.
4. Please repeatedly press the [ ] button to pause recording the video.
5. Press the [ ] button to store the recorded video.
6. Change to Video Mode to view the stored recordings.
Please note:
The stored file is stored in the video directory as AVI file.
Video recording is automatically paused if the internal memory is full or the
internal battery is empty. The recording date is automatically stored.
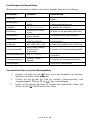
Video recording settings
While recording a video you can choose from the following options.
Menu item
Options
Description
Preview
Thumbnail of the videos recorded.
White balance
Automatic, indoors,
outdoors
Colour balancing to environmental
conditions.
Brightness
-3, -2, -1, 0, 1, 2, 3
Adjusting the brightness.
Exposure
Automatic, indoors,
outdoors
Select the appropriate type of exposure
Special effect
Off, black & white, sepia,
negative
Add a special effect
Memory
location
Internal memory, external
memory
Select the memory location desired.
Resolution
640 x 480, 320 x 240
Selection of the desired resolution.

Seite 15 von 22 EN
Quality of
recording
High, medium, low,
automatic adjustment
Adjustment of recording quality.
Volume of
recording
Off, 1, 2, 3, 4, 5
Setting the desired volume.
Display settings
Full screen, original,
scaled
Adjustment of display settings
Settings
Settings menu
Selecting a video from the playback list.
1. Press and hold the [ ] button to return to the main menu. Here, select the entry
Video.
2. Press the [ ] or [ ] button to select the “Content” or “Bookmark list” feature. To
confirm please press the [ ] button.
3. Using the [ ] or [ ] button you can select the desired video; press [ ] to start
the video.
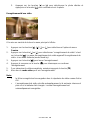
12. Using the device as PC camera
The camera lens on the Player’s rear panel can be used as webcam.
1. Connect the mini USB cable with the mini USB port of the Player and put the other
end into a free USB slot of the computer.
2. Press the [ ] or [ ] button to select “Charge and Play”. Now, the main menu is
displayed on the Player.
3. Please select the Camera.
4. Press the [ ] or [ ] button to select “PC Camera”. To confirm please press the [ ]
button.
5. Now you can use the Camera as PC Camera.
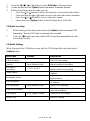
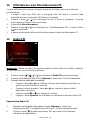
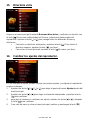
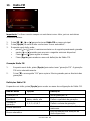
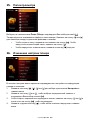
13. FM Radio
Please Note: Please always connect your headphones with the Player, since they are
used as antenna.

Seite 16 von 22 EN
1. Press the [ ], [ ], [ ] or [ ] button to select FM Radio in the main menu.
2. In radio mode press the [Option] button and select “Automatic Search”.
3. While you are listening to the radio you can:
Press the [ ] or [ ] button to leap to the previous or next stored radio station.
Press and hold the [ ] or [ ] button to search the next radio station available.
Press the [ ] or [ ] button to turn up / down the volume.
Please press the [Option] button to start Settings Menu FM Radio.
FM Radio recording
1. While listening to the radio please press the [Option] button and select “FM
Recording”. Now the FM Radio is automatically recorded.
2. Press the [ ] button and, then, select “OK” to copy the recorded file into the
Recording Directory.
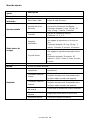
FM Radio Settings
While listening to the FM Radio you can start the FM Settings Menu by pressing the
[Option] button.
Menu item
Options
Description
FM Recording
Start FM Recording.
Quality
Low, Medium, High
Adjust quality of recording.
Volume of
recording
1, 2, 3, 4, 5,6,7
Adjust volume of recording.
Store station
Store the current station in the list of
stations.
Automatic search
Search automatically for available
radio stations.
List of stations
Check or select a station from the list
of stations.
FM Sensitivity
Low, Medium, High
Adjust FM Sensitivity.
User list of stations
Check or select a station from the
user list of stations.
FM Region
USA, Japan, Europe
Selection of FM Region.
Mute / Play
Mute or Unmute

Seite 17 von 22 EN
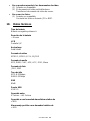
14. Record
In the main menu please select Recording; to confirm press [ ].
Please press the [ ] button to start recording.
Please repeatedly press the [ ] button to pause or continue recording the
station.
Press the [ ] button and, then, select “OK” to store the recorded file into the
Recording Directory.
Please note:
The recorded files are stored in the Player’s main directory as WAV or MP3 file.
Video recording is automatically stopped as soon as there is no free memory
capacity on the Player available or the battery is empty. The recording date is
automatically stored.
Recording settings
In the Recording Menu (while in Stand-by Mode) you can change into the Recording
Settings Menu using the [Option] button.
Menu item
Options
Description
Quality of recording
Low, Medium, High
Adjust quality of recording.
Volume of
recording
1, 2, 3, 4, 5
Adjust volume of recording.

Seite 18 von 22 EN
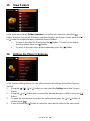
15. View Folders
In the main menu please Folder Overview and confirm your selection using the [ ]
button. Now you can see all directories and files stored on the Player. Please press the [ ]
or [ ] button to navigate between individual files and folders.
To open a directory tick it and press the [ ] button. To return to the higher
directory please press the [ ] button.
To return to the main menu please repeatedly press the [ ] button.
16. Editing the Player’s Settings
In the System Settings Menu you can edit your personal settings and set the Player as
desired.
1. Using the [ ], [ ], [ ] or [ ] button you can select the Setting menu item (in main
menu).
2. Using the [ ] or [ ] button you can select the element desired; confirm it using the [ ]
button.
3. To open the sub-menu or to confirm an option please press the [ ] or [ ] button; to
confirm press [ ].
4. Press and hold the [ ] button to leave this menu and to return to the main menu.

Seite 19 von 22 EN
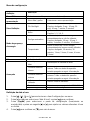
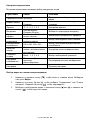
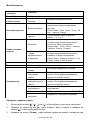
Settings menu
Setting Date and Time
1. Using the [ ], [ ], [ ] or [ ] button you can select the menu item Settings.
2. Using the [ ] or [ ] button you can select the “Date & Time” feature, to confirm press
the [ ] button.
3. Please press the [Option] button to select a settings item (hour/minute or
year/month/day); then press the [ ] or [ ] button to set the date and time values.
4. To confirm please press the [ ] button; or press [ ] to leave the menu.
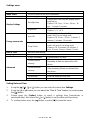
Settings
Description
Menu Effect
Select an effect for the menu transitions.
Main Menu Display
Menu list / grid
Please select the menu type
Display Settings
Backlight time
Please select how long the display light is
switched on.
Options: Off, 5 sec., 10 sec., 20 sec., 30
sec., 1 minute, 5 minutes.
Brightness
Please set the brightness of the display.
Options: 1, 2, 3, 4, 5.
Energy saver mode
Auto Off
Please select the time the Player is to
switch off if it is not being used.
Options: Off, 10 sec., 30 sec., 1 minute, 3
minutes, 5 minutes, 10 minutes.
Sleep Timer
Please select the time the Player is to
switch off (even if it is being used).
Options: Off, 10 minutes, 30 minutes, 1
hour, 2 hours, 3 hours, 4 hours, 5 hours.
Date & Time
Date and time settings
Language
Set the desired language.
Advanced
Player information
System details of Player
Format internal
memory
Select formatting the internal memory. After
formatting all data are deleted from the
device.
Format external
memory
Select formatting the external memory.
After formatting all data are deleted from
the device.
Set user name
Here, please enter the desired user name.
System test
Select to delete all DRM HDS.
Factory settings
Reset to factory settings

Seite 20 von 22 EN
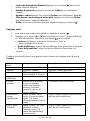
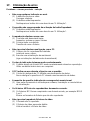
17. Troubleshooting
Problem – possible causes – problem solving
There is nothing on the display.
(1) The battery is empty.
Charge the battery.
(2) The keys are locked.
Unlock the key lock as described in the paragraph „6. Operation“.
The device does not react, if you press the play key.
(1) The keys are locked.
Unlock the key lock as described in the paragraph „6. Operation“.
There is no sound during the play back.
(1) The volume is too low.
Raise the volume in the volume menu.
(2) The audio file is damaged
Please transfer the files again
There is no connection with the PC.
(1) The driver was not installed correctly
Install the driver again.
(2) Please carry out an update of the main board
(In this context, observe the instructions of the main board producer)
The displayed time value always changes.
(1) The bit rate of the MP3 files changes during the play back.
Please use a unified bit rate for the compression.
The PC displays an error message during the connection with the device
(1) The player was disconnected from the PC during the data transmission.
Please do not disconnect the device during the data transmission in any case.
The device memory indicated does not correspond to the real memory.
(1) A part of the memory is used for software, formatting and display
characteristics.
The MP3 files are not reproduced properly.
(1) The MP3 files were compressed in a wrong format, for example in MPEG 1 or
2.
Delete the file formats if they are not supported.
Video data cannot be reproduced.
(1) The format is not supported.
(2) The video file is damaged.
Transfer your video file again.
Page is loading ...
Page is loading ...
Page is loading ...
Page is loading ...
Page is loading ...
Page is loading ...
Page is loading ...
Page is loading ...
Page is loading ...
Page is loading ...
Page is loading ...
Page is loading ...
Page is loading ...
Page is loading ...
Page is loading ...
Page is loading ...
Page is loading ...
Page is loading ...
Page is loading ...
Page is loading ...
Page is loading ...
Page is loading ...
Page is loading ...
Page is loading ...
Page is loading ...
Page is loading ...
Page is loading ...
Page is loading ...
Page is loading ...
Page is loading ...
Page is loading ...
Page is loading ...
Page is loading ...
Page is loading ...
Page is loading ...
Page is loading ...
Page is loading ...
Page is loading ...
Page is loading ...
Page is loading ...
Page is loading ...
Page is loading ...
Page is loading ...
Page is loading ...
Page is loading ...
Page is loading ...
Page is loading ...
Page is loading ...
Page is loading ...
Page is loading ...
Page is loading ...
Page is loading ...
Page is loading ...
Page is loading ...
Page is loading ...
Page is loading ...
Page is loading ...
Page is loading ...
Page is loading ...
Page is loading ...
Page is loading ...
Page is loading ...
Page is loading ...
Page is loading ...
Page is loading ...
Page is loading ...
Page is loading ...
Page is loading ...
Page is loading ...
Page is loading ...
Page is loading ...
Page is loading ...
Page is loading ...
Page is loading ...
Page is loading ...
Page is loading ...
Page is loading ...
Page is loading ...
Page is loading ...
Page is loading ...
Page is loading ...
Page is loading ...
Page is loading ...
Page is loading ...
Page is loading ...
Page is loading ...
Page is loading ...
Page is loading ...
Page is loading ...
Page is loading ...
Page is loading ...
Page is loading ...
Page is loading ...
Page is loading ...
Page is loading ...
Page is loading ...
Page is loading ...
Page is loading ...
Page is loading ...
Page is loading ...
Page is loading ...
Page is loading ...
Page is loading ...
Page is loading ...
Page is loading ...
Page is loading ...
Page is loading ...
Page is loading ...
Page is loading ...
Page is loading ...
Page is loading ...
Page is loading ...
Page is loading ...
Page is loading ...
Page is loading ...
Page is loading ...
Page is loading ...
Page is loading ...
Page is loading ...
Page is loading ...
Page is loading ...
Page is loading ...
Page is loading ...
Page is loading ...
Page is loading ...
Page is loading ...
Page is loading ...
Page is loading ...
Page is loading ...
Page is loading ...
Page is loading ...
Page is loading ...
Page is loading ...
Page is loading ...
Page is loading ...
Page is loading ...
Page is loading ...
Page is loading ...
Page is loading ...
Page is loading ...
Page is loading ...
Page is loading ...
-
 1
1
-
 2
2
-
 3
3
-
 4
4
-
 5
5
-
 6
6
-
 7
7
-
 8
8
-
 9
9
-
 10
10
-
 11
11
-
 12
12
-
 13
13
-
 14
14
-
 15
15
-
 16
16
-
 17
17
-
 18
18
-
 19
19
-
 20
20
-
 21
21
-
 22
22
-
 23
23
-
 24
24
-
 25
25
-
 26
26
-
 27
27
-
 28
28
-
 29
29
-
 30
30
-
 31
31
-
 32
32
-
 33
33
-
 34
34
-
 35
35
-
 36
36
-
 37
37
-
 38
38
-
 39
39
-
 40
40
-
 41
41
-
 42
42
-
 43
43
-
 44
44
-
 45
45
-
 46
46
-
 47
47
-
 48
48
-
 49
49
-
 50
50
-
 51
51
-
 52
52
-
 53
53
-
 54
54
-
 55
55
-
 56
56
-
 57
57
-
 58
58
-
 59
59
-
 60
60
-
 61
61
-
 62
62
-
 63
63
-
 64
64
-
 65
65
-
 66
66
-
 67
67
-
 68
68
-
 69
69
-
 70
70
-
 71
71
-
 72
72
-
 73
73
-
 74
74
-
 75
75
-
 76
76
-
 77
77
-
 78
78
-
 79
79
-
 80
80
-
 81
81
-
 82
82
-
 83
83
-
 84
84
-
 85
85
-
 86
86
-
 87
87
-
 88
88
-
 89
89
-
 90
90
-
 91
91
-
 92
92
-
 93
93
-
 94
94
-
 95
95
-
 96
96
-
 97
97
-
 98
98
-
 99
99
-
 100
100
-
 101
101
-
 102
102
-
 103
103
-
 104
104
-
 105
105
-
 106
106
-
 107
107
-
 108
108
-
 109
109
-
 110
110
-
 111
111
-
 112
112
-
 113
113
-
 114
114
-
 115
115
-
 116
116
-
 117
117
-
 118
118
-
 119
119
-
 120
120
-
 121
121
-
 122
122
-
 123
123
-
 124
124
-
 125
125
-
 126
126
-
 127
127
-
 128
128
-
 129
129
-
 130
130
-
 131
131
-
 132
132
-
 133
133
-
 134
134
-
 135
135
-
 136
136
-
 137
137
-
 138
138
-
 139
139
-
 140
140
-
 141
141
-
 142
142
-
 143
143
-
 144
144
-
 145
145
-
 146
146
-
 147
147
-
 148
148
-
 149
149
-
 150
150
-
 151
151
-
 152
152
-
 153
153
-
 154
154
-
 155
155
-
 156
156
-
 157
157
-
 158
158
-
 159
159
-
 160
160
-
 161
161
-
 162
162
-
 163
163
-
 164
164
-
 165
165
-
 166
166
-
 167
167
-
 168
168
-
 169
169
-
 170
170
-
 171
171
-
 172
172
-
 173
173
-
 174
174
-
 175
175
-
 176
176
-
 177
177
-
 178
178
-
 179
179
-
 180
180
-
 181
181
-
 182
182
-
 183
183
-
 184
184
-
 185
185
-
 186
186
-
 187
187


Intenso 4GB Video Shooter 2.4" Owner's manual
- Category
- MP3/MP4 players
- Type
- Owner's manual
- This manual is also suitable for
Ask a question and I''ll find the answer in the document
Finding information in a document is now easier with AI
in other languages
- italiano: Intenso 4GB Video Shooter 2.4" Manuale del proprietario
- français: Intenso 4GB Video Shooter 2.4" Le manuel du propriétaire
- español: Intenso 4GB Video Shooter 2.4" El manual del propietario
- Deutsch: Intenso 4GB Video Shooter 2.4" Bedienungsanleitung
- русский: Intenso 4GB Video Shooter 2.4" Инструкция по применению
- português: Intenso 4GB Video Shooter 2.4" Manual do proprietário
- polski: Intenso 4GB Video Shooter 2.4" Instrukcja obsługi
Related papers
-
Intenso Video Jumper 1.8" Owner's manual
-
-
Intenso Video Rider User manual
-
-
Intenso Music Runner Owner's manual
-
Intenso Video Driver 2 0 Owner's manual
-
Intenso Video Rocker 1.5" Owner's manual
-
Intenso 8GB Video Cruiser Specification
-
-
