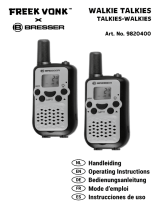
Motorola XT460 Operating instructions

Category
Two-way radios
Type
Operating instructions
XT460 Display model
Quick Start Guide
Two-Way Radios
En
g
lish
1
CONTENTS
CONTENTS
Contents. . . . . . . . . . . . . . . . . . . . . . . . . . . . . . . . . . . . . 1
Safety . . . . . . . . . . . . . . . . . . . . . . . . . . . . . . . . . . . . . . . 2
Batteries and Chargers Safety Information . . . . . . . . 3
Operational Safety Guidelines. . . . . . . . . . . . . . . . . . . . . .3
Radio Overview . . . . . . . . . . . . . . . . . . . . . . . . . . . . . . . 4
Parts Of The Radio . . . . . . . . . . . . . . . . . . . . . . . . . . . . . .4
On/Off/Volume Knob. . . . . . . . . . . . . . . . . . . . . . . . . .5
Microphone . . . . . . . . . . . . . . . . . . . . . . . . . . . . . . . . .5
Antenna. . . . . . . . . . . . . . . . . . . . . . . . . . . . . . . . . . . .5
Accessory Connector . . . . . . . . . . . . . . . . . . . . . . . . .5
Model Label . . . . . . . . . . . . . . . . . . . . . . . . . . . . . . . .5
LED Indicator . . . . . . . . . . . . . . . . . . . . . . . . . . . . . . .5
Front Buttons . . . . . . . . . . . . . . . . . . . . . . . . . . . . . . .5
Side Buttons . . . . . . . . . . . . . . . . . . . . . . . . . . . . . . . .6
Batteries and Chargers. . . . . . . . . . . . . . . . . . . . . . . . . 7
Installing the Lithium-Ion (Li-Ion) Battery . . . . . . . . . .7
Removing the Lithium-Ion (Li-Ion) Battery . . . . . . . . .7
Holster. . . . . . . . . . . . . . . . . . . . . . . . . . . . . . . . . . . . .7
Power Supply, Adaptors and Drop-in Tray Charger . .8
Charging with the Drop-in Tray Single Unit Charger. .9
Charging a Standard Battery . . . . . . . . . . . . . . . . . . .9
Drop-in Tray Single Unit Charger LED Indicators . . .10
Getting Started . . . . . . . . . . . . . . . . . . . . . . . . . . . . . . 11
Turning Radio ON/OFF . . . . . . . . . . . . . . . . . . . . . . . . . .11
Adjusting Volume . . . . . . . . . . . . . . . . . . . . . . . . . . . . . .11
Reading The Display. . . . . . . . . . . . . . . . . . . . . . . . . . . .11
Selecting A Channel . . . . . . . . . . . . . . . . . . . . . . . . . . . .11
Talking And Monitoring . . . . . . . . . . . . . . . . . . . . . . . . . .11
Talk Range . . . . . . . . . . . . . . . . . . . . . . . . . . . . . . . . . . .12
Reset To Factory Defaults. . . . . . . . . . . . . . . . . . . . 14
Programming Features . . . . . . . . . . . . . . . . . . . . . . . . 15
Entering Programming Mode. . . . . . . . . . . . . . . . . . 15
CPS (Computer Programming Software). . . . . . . . . . . . 15
Use And Care . . . . . . . . . . . . . . . . . . . . . . . . . . . . . . . . 17
En
g
lish
2
SAFETY
SAFETY
PRODUCT SAFETY AND RF
EXPOSURE COMPLIANCE
ATTENTION!
This radio is restricted to occupational use only to satisfy
ICNIRP/FCC RF energy exposure requirements.
For a list of Motorola-approved antennas, batteries, and
other accessories, visit the following website which lists
approved accessories:
http://www.motorolasolutions.com
Before using this product, read the
operating instructions and RF energy
awareness information contained in the
Product Safety and RF Exposure
booklet enclosed with your radio.
!
C a u t i o n
En
g
lish
3
BATTERIES AND CHARGERS
SAFETY INFORMATION
BATTERIES AND
CHARGERS SAFETY
INFORMATION
This document contains important safety and operating
instructions. Read these instructions carefully and save
them for future reference.
Before using the battery charger, read all the instructions
and cautionary markings on
the charger,
the battery, and
the radio using the battery
1. To reduce risk of injury, charge only the rechargeable
Motorola-authorized batteries. Other batteries may explode,
causing personal injury and damage.
2. Use of accessories not recommended by Motorola may
result in risk of fire, electric shock, or injury.
3. To reduce risk of damage to the electric plug and cord, pull
by the plug rather than the cord when disconnecting the
charger.
4. An extension cord should not be used unless absolutely
necessary. Use of an improper extension cord could result in
risk of fire and electric shock. If an extension cord must be
used, make sure that the cord size is 18AWG for lengths up
to 6.5 feet (2.0 m), and 16AWG for lengths up to 9.8 feet (3.0
m).
5. To reduce risk of fire, electric shock, or injury, do not operate
the charger if it has been broken or damaged in any way.
Take it to a qualified Motorola service representative.
6. Do not disassemble the charger; it is not repairable and
replacement parts are not available. Disassembly of the
charger may result in risk of electrical shock or fire.
7. To reduce risk of electric shock, unplug the charger from the
AC outlet before attempting any maintenance or cleaning
OPERATIONAL SAFETY GUIDELINES
Turn the radio OFF when charging battery.
The charger is not suitable for outdoor use. Use only in dry
locations/conditions.
Connect charger only to an appropriately fused and wired
supply of the correct voltage (as specified on the product).
Disconnect charger from line voltage by removing main
plug.
The outlet to which this equipment is connected should be
nearby and easily accessible.
Maximum ambient temperature around the power supply
equipment must not exceed 40°C (104°F).
Make sure that the cord is located where it will not be
stepped on, tripped over, or subjected to water, damage,
or stress.
En
g
lish
4
RADIO OVERVIEW
RADIO OVERVIEW
PARTS OF THE RADIO
Antenna
Audio Accessory 2
Pin Connector
Battery
PTT
(Push-To-Talk)
SB1 - Monitor
SB2 - Scan/Nuisance
Channel Delete
Display
Left Navigation Arrow/
Programmable Button A
Menu
Right Navigation Arrow/
Programmable Button B
Microphone
Channel
Selector Knob
On/Off/
Volume Knob
LED Indicator
064
T
X
l
ebaL
led
o
M
En
g
lish
5
RADIO OVERVIEW
On/Off/Volume Knob
Used to turn the radio ON or OFF and to adjust the radio’s
volume.
Microphone
Speaks clearly into the microphone when sending a
message.
Antenna
The radio’s antenna is non-removable.
Accessory Connector
Used to connect compatible audio accessories.
Model Label
Indicate the model of the radio.
LED Indicator
Used to give battery status, power-up status, radio call
information and scan status.
Front Buttons
Button
Gives access to set up features like VOX/iVOX levels, etc.
It also allows you to move through all the features while in
Programming Mode.
Default set to preset Channel 1.
Programmable Button
Allows you to choose level or toggle options for features
the Menu is on.
Default set to generate current programmed call tone.
En
g
lish
6
RADIO OVERVIEW
Programmable Button
Allows you to choose level or toggle options for features
the Menu is on.
Default set to Backlight Mode.
Note: A short press of either Programmable Button (A or B)
tunes the radio to the preset channel and the radio will
play a good chirp. You can assign different functions to
these buttons via the CPS. For example: Backlight Time
Out, Reverse Burst, Scan/Nuisance Channel Delete,
Monitor and Call Tones. To learn more about how to
program these buttons, refer to “Entering Programming
Mode” on page 15 and “CPS (Computer Programming
Software)” on page 15.
Side Buttons
Push-To-Talk (PTT) Button
Press and hold down this button to talk, release it to listen.
Side Button 1 (SB1)
The Side Button 1 is a general button that can be
configured by the CPS. Default set to Monitor Mode.
Side Button 2 (SB2)
The Side Button 2 is a general button that can be
configured by the CPS. Default set to Scan/Nuisance
Channel Mode.
En
g
lish
7
BATTERIES AND CHARGERS
BATTERIES AND
CHARGERS
Installing the Lithium-Ion (Li-Ion) Battery
1. Turn OFF the radio.
2. With the Motorola logo facing up on the battery pack, insert
the tabs at the bottom of the battery with the slots at the
bottom of the radio’s body.
3. Press down on the battery, top first, towards the radio until a
click is heard.
Removing the Lithium-Ion (Li-Ion) Battery
1. Turn OFF the radio.
2. Push down the battery latch and hold it depressed while
removing the battery.
3. Pull the battery away from the radio.
Holster
XT420 and XT460 will be coming with Holster instead of
Belt Clip to improve the wearability.
Detach
Press Latch
Slots
Tabs
Attach
Press Until Click
En
g
lish
8
BATTERIES AND CHARGERS
Power Supply, Adaptors and Drop-in Tray
Charger
Your radio comes with one Drop-in Tray Charger, one
Power Supply (also known as Transformer) and a set of
adaptors.
Your Power Supply is capable of switching to suit any of
the adaptors that comes with your radio package.
The Adaptor you install depends on the region you’re
located.
Once you have identified the Adaptor that matches your
electrical outlet, proceed to install it as follows:
Slide down the Adaptor grooves into the Power Supply
until it snaps into place.
Slide the Adaptor upward to remove.
Note: The adaptor shown in the pictures are for illustration
purposes only. The adaptor you install may be different.
When acquiring additional Charger or Power Supply, make
sure you have the similar Drop-in Tray Charger and Power
Supply set.
Drop-in Tray Charger
Power Supply
PUSH
PUS
H
PUSH
PUSH
Power Supply
Power Supply
Adaptor
Adaptor
En
g
lish
9
BATTERIES AND CHARGERS
Charging with the Drop-in Tray Single Unit
Charger
1. Place the Drop-in Tray Single Unit Charger on a flat surface.
2. Insert the connector of the Power Supply into the port on the
side of the Drop-in Tray Single Unit Charger.
3. Plug the AC Adaptor into a power outlet.
4. Insert the radio into the Drop-in Tray Single Unit Charger with
the radio facing the front, as shown.
Note: When charging a battery attached to a radio, turn the
radio OFF to ensure a full charge. See “Operational
Safety Guidelines” on page 3 for more information.
Charging a Standard Battery
The Drop-in Tray Single Unit Charger is designed to
charge either the battery (with the radio or with radio and
holster on) or a standalone battery.
Power Supply
(Transformer)
Drop-in Tray Charger
Drop-in Tray
Charger
Port
Table 1: Motorola Authorized Batteries
Part Number Description
PMNN4434_R Standard Li-Ion Battery
PMNN4453_R High Capacity Li-Ion Battery
En
g
lish
10
BATTERIES AND CHARGERS
Drop-in Tray Single Unit Charger LED Indicators
(*) Normally, re-positioning the battery pack will correct this issue.
(**) Battery temperature is too warm or too cold or wrong power voltage is being used.
If there is NO LED indication:
1. Check if the radio with battery, or the battery alone, is inserted correctly.
2. Ensure that the power supply cable is securely plugged into the charger socket.
3. Confirm that the battery being used with the radio is listed in Table 1.
Table 2: Charger LED Indicator
Status LED Status Comments
Power On Green for approx. 1 sec
Charging Steady red
Charge Complete Steady green
Battery Fault (*)
Red fast flash
Waiting to charge (**)
Amber slow flash
Battery Level Status
Flash red 1 time
Battery low
Flash amber 2 times
Battery medium
Flash green 3 times
Battery high
En
g
lish
11
GETTING STARTED
GETTING STARTED
For the following explanations, refer to “Parts Of The
Radio” on page 4 of the user guide.
TURNING RADIO ON/OFF
To turn ON the radio, rotate the ON/OFF/Volume Knob
clockwise. The radio plays one of the following:
Power up tone and channel number announcement, or
Battery level and channel number announcements, or
Silent (Audible tones disabled)
The LED blinks red briefly.
To turn the radio OFF, rotate the ON/OFF/Volume Knob
counterwise until you hear a ‘click’ and the radio LED
indicator turns OFF.
ADJUSTING VOLUME
Turn the ON/OFF/Volume Knob clockwise to increase the
volume, or counterclockwise to decrease the volume.
Note: Do not hold the radio too close to the ear when it is at a
high volume setting or when adjusting the volume setting.
READING THE DISPLAY
Note: The radio display shown here is for icon location only.
Each radio display may appear different (channel and
code) based on the pre-programmed radio defaults and
features available in the model or region. Pressing any
button, except the PTT button, will turn on the backlight.
SELECTING A CHANNEL
Use the Channel Selector Knob to access a specific
channel.
During powering on or switching channel, the voice
annunciation will confirm the channel number.
Program each channel separately. Each channel has its
own Frequency, Interference Eliminator Code and Scan
Settings.
TALKING AND MONITORING
It is important to monitor for traffic before transmitting to
avoid ‘talking over’ someone who is already transmitting.
To monitor, press and hold the SB1(*) button to access
channel traffic. If no activity is present, you will hear ‘static’.
To release, press the SB1 button again. Once channel
traffic has cleared, proceed with your call by pressing the
PTT button. When transmitting, the radio LED will be solid
red.
Note: In order to listen to all activities on a current channel,
short press the SB1 button in order to set the CTCSS/
DPL code to 0. This feature is called “CTCSS/DPL Defeat
(Squelch set to SILENT)”.
(*) This assumes SB1 button has not been programmed for a
different mode.
Hi Power
Battery
Level
Channel
Indicator
Frequency
Indicator
Interference
Eliminator Code
Indicator
Keypad
Lock
Signal
Strength
Scramble
Vox /
iVox
Repeater/Talkaround
Channel Number
Programming
Mode Indicator
Scan
En
g
lish
12
GETTING STARTED
RECEIVING A CALL
1. Select a channel by rotating the Channel Selector Knob until
you reach the desired channel.
2. Make sure the PTT button is released and listen for voice
activity.
3. The LED Indicator blinks RED while the radio is receiving a
call.
4. To respond, hold the radio vertically 1 to 2 inches (2.5 to
5 cm) from mouth. Press the PTT button to talk; release it to
listen.
Note: Please note that when radio is receiving or transmitting,
LED is always RED.
Note: Interference Eliminator Codes are referred also as
CTCSS/DPL codes or PL/DPL codes
TALK RANGE
XT Series radios have been designed to maximize
performance and improve transmission range in the field. It
is recommended that you do no use the radios closer than
1.5 meters apart, to avoid interference. XT460 coverage is
16.250 square meters, 13 floors and 9 KM in flat areas.
Talk range depends on the terrain. It will be affected by
concrete structures, heavy foliage and by operating radios
indoors or in vehicles. Optimal range occurs in flat, open
areas with up to 9 kilometers of coverage. Medium range
occurs when buildings and trees are in the way. Minimal
range occurs when dense foliage and mountains obstruct
the communication path.
To establish a proper two-way communication, the
Channel, Frequency and Interference Eliminator Codes
must be the same on both radios. This depends on the
stored profile that has been pre-programmed on the radio:
1. Channel: Current channel that the radio is using, depending
upon radio model.
2. Frequency: The frequency the radio uses to transmit/
receive.
3. Interference Eliminator Code: These codes help minimize
interference by providing a choice of code combinations.
4. Scramble Code: Codes that make the transmissions sound
garbled to anyone listening who is not set to that specific
code.
5. Bandwidth: Some frequencies have selectable channel
spacing, which must match other radios for optimum audio
quality.
For details of how to set up frequencies and CTCSS/DPL
codes in the channels, refer to “Entering Programming
Mode” on page 15
En
g
lish
13
GETTING STARTED
RADIO LED INDICATORS
RADIO STATUS LED INDICATION
Channel Alias Edit Red heartbeat
Cloning Mode Two Orange Heartbeats
Cloning In Progress Solid Orange
Fatal Error at Power up One Green Blink, One Orange Blink, One Green Blink, then repeat for 4 seconds
Low Battery Orange Hearbeat
Low Battery Shutdown Fast Orange Heartbeat
Monitor LED is OFF
Power-Up Solid Red for 2 seconds
‘Idle’ Programming Mode /Channel
Mode
Green Heartbeat
Scan Mode Fast Red Heartbeat
Transmit (Tx)/Receive (RX) Solid Red
Transmit in Low Power Select Solid Orange
VOX/iVOX Mode Double Red Heartbeats
Note: Channel Alias Edit only applies to Display Models
En
g
lish
14
GETTING STARTED
Reset To Factory Defaults
Reset To Factory Defaults will set back all radio features to
the original factory default settings. To do so, press the
PTT, SB1 and SB2 button simultaneously while turning ON
the radio until you hear a high tone chirp beep.
En
g
lish
15
PROGRAMMING FEATURES
PROGRAMMING
FEATURES
Entering Programming Mode
Programming Mode is special radio mode that allows you
to program basic radio’s features by using the radio’s
panel programming.
To enter Programming Mode, press and hold the PTT
Button and the SB1 Button simultaneously for 3 seconds,
while turning ON the radio. A unique tone sounds,
indicating the radio has entered Programming Mode. The
radio LED blinks a green heartbeat.
Note: The default Programming Mode is set to ‘Idle
Programming Mode.
When the radio is set to Programming Mode, the icon
displays and the current channel aliasing name blinks to
indicate that you can rotate the Channel Selector Knob to
select the channel you want to program.
In Programming Mode, the radio is capable of setting
values for each channel by toggling between the different
programming modes available:
•Frequencies,
•CTCSS/DPL codes (Interference Eliminator Code),
•Scramble,
•Bandwidth,
•Maximum Channels,
•Call Tone,
•Microphone Gain and,
•Scan.
To move along the different Programming Selection Mode
without saving changes, short press the PTT Button or
Button.
To save changes, long press the PTT Button. The radio
returns to ‘Idle’ Programming Mode.
When in ‘Idle’ Programming Mode, long press the PTT
button to exit the Programming Mode.
Whenever you wrap around to the beginning of the
Programming Mode options, the radio automatically saves
all changes made, even if you turn OFF the radio.
Exit the Programming Mode without saving changes (as
long as you have not wrap around to the beginning of the
Programming Mode options) by turning OFF the radio.
CPS (COMPUTER PROGRAMMING
SOFTWARE)
XT Series radios are programmable using the CPS. The
CPS is downloadable for free at
www.motorolasolutions.com.
CPS Programming Cable
USB Ports
Radio to be
programmed
Drop-in
Charger Tray
En
g
lish
16
PROGRAMMING FEATURES
CPS allows the user to program Frequencies, PL/DPL
codes as well as other features such as Direct Frequency
Input, Repeater/Talk Around, Select, Time-Out Timer,
Power Select, Battery Type Select, Scan List, Call Tones,
Scramble, Reverse Burst, etc.
CPS is a very useful tool as it can lock the frontpanel radio
programming or restrict any specific radio feature to be
changed (to avoid preset radio values to be accidentally
erased).
It also provides security by giving the option to set up a
password for profile radio’s management. Please refer to
Features Summary Chart Section at the end of the User’s
Guide for more details.
Note: (*) CPS Programming Cable is an accessory sold
separately. For part number information, refer to the
Accessories Section.
See CPS CD for detailed information on CPS.
En
g
lish
17
USE AND CARE
USE AND CARE
If the radio is submerged in water...
Turn radio OFF and
remove batteries
Dry with soft cloth Do not use radio until
completely dry
Use a soft damp cloth to clean
the exterior
Do not immerse in water Do not use alcohol or
cleaning solutions
En
g
lish
18
USE AND CARE
Notes
MOTOROLA, MOTO, MOTOROLA SOLUTIONS and the Stylized M logo are trademarks or registered trademarks of Motorola
Trademark Holdings, LLC and are used under license. All other trademarks are the property of their respective owners.
© 2013 Motorola Solutions, Inc. All rights reserved.
ɍɤ
ɪ
ɚʀɧɫɶɤɚ
1
ɁɆȱɋɌ
ɁɆȱɋɌ
Ɂɦɿɫɬ. . . . . . . . . . . . . . . . . . . . . . . . . . . . . . . . . . . . . . . . 1
ȼɿɞɨɦɨɫɬɿ ɳɨɞɨ ɛɟɡɩɟɤɢ. . . . . . . . . . . . . . . . . . . . . . . 2
ȱɧɮɨɪɦɚɰɿɹ ɡ ɬɟɯɧɿɤɢ ɛɟɡɩɟɤɢ ɩɪɢ ɪɨɛɨɬɿ ɡ
ɚɤɭɦɭɥɹɬɨɪɚɦɢ ɬɚ ɡɚɪɹɞɧɢɦɢ
ɩɪɢɫɬɪɨɹɦɢ. . . . . . . . . . . . . . . . . . . . . . . . . . . . . . . . . . 3
ȱɧɫɬɪɭɤɰɿɹ ɡ ɛɟɡɩɟɱɧɨʀ ɟɤɫɩɥɭɚɬɚɰɿʀ . . . . . . . . . . . . . . . .3
Ɂɚɝɚɥɶɧɢɣ ɨɝɥɹɞ ɪɚɞɿɨɫɬɚɧɰɿʀ . . . . . . . . . . . . . . . . . . 4
Ʉɨɦɩɨɧɟɧɬɢ ɪɚɞɿɨɫɬɚɧɰɿʀ . . . . . . . . . . . . . . . . . . . . . . . . .4
Ɋɭɱɤɚ «ɍȼȱɆɄ./ȼɂɆɄ./Ƚɭɱɧɿɫɬɶ». . . . . . . . . . . . . . . .5
Ɇɿɤɪɨɮɨɧ . . . . . . . . . . . . . . . . . . . . . . . . . . . . . . . . . .5
Ⱥɧɬɟɧɚ . . . . . . . . . . . . . . . . . . . . . . . . . . . . . . . . . . . .5
Ɋɨɡ'ɽɦ ɞɥɹ ɚɤɫɟɫɭɚɪɿɜ . . . . . . . . . . . . . . . . . . . . . . . .5
ɇɚɤɥɟɣɤɚ ɡ ɧɚɡɜɨɸ ɦɨɞɟɥɿ . . . . . . . . . . . . . . . . . . . .5
ɋɜɿɬɥɨɞɿɨɞɧɢɣ ɿɧɞɢɤɚɬɨɪ. . . . . . . . . . . . . . . . . . . . . .5
ɉɟɪɟɞɧɿ ɤɧɨɩɤɢ . . . . . . . . . . . . . . . . . . . . . . . . . . . . .5
Ȼɿɱɧɿ ɤɧɨɩɤɢ . . . . . . . . . . . . . . . . . . . . . . . . . . . . . . . .6
Ⱥɤɭɦɭɥɹɬɨɪɢ ɬɚ ɡɚɪɹɞɧɿ ɩɪɢɫɬɪɨʀ . . . . . . . . . . . . . . 7
ȼɫɬɚɧɨɜɥɟɧɧɹ ɥɿɬɿɣ-ɿɨɧɧɨɝɨ
(Li-Ion)
ɚɤɭɦɭɥɹɬɨɪɚ. . . . . . . . . . . . . . . . . . . . . . . . . . . . . .7
ȼɢɣɦɚɧɧɹ ɥɿɬɿɣ-ɿɨɧɧɨɝɨ (Li-Ion) ɚɤɭɦɭɥɹɬɨɪɚ. . . . . .7
ɑɨɯɨɥ . . . . . . . . . . . . . . . . . . . . . . . . . . . . . . . . . . . . .7
Ȼɥɨɤ ɠɢɜɥɟɧɧɹ, ɚɞɚɩɬɟɪɢ ɬɚ ɡɚɪɹɞɧɢɣ ɩɪɢɫɬɪɿɣ ɡ
ɩɿɞɫɬɚɜɤɨɸ . . . . . . . . . . . . . . . . . . . . . . . . . . . . . . .8
Ɂɚɪɹɞɠɚɧɧɹ ɡɚ ɞɨɩɨɦɨɝɨɸ ɨɞɧɨɦɿɫɧɨɝɨ ɡɚɪɹɞɧɨɝɨ
ɩɪɢɫɬɪɨɸ ɡ ɩɿɞɫɬɚɜɤɨɸ . . . . . . . . . . . . . . . . . . . . .9
Ɂɚɪɹɞɠɚɧɧɹ ɚɤɭɦɭɥɹɬɨɪɚ ɫɬɚɧɞɚɪɬɧɨʀ ɽɦɧɨɫɬɿ . . .9
ɋɜɿɬɥɨɞɿɨɞɧɿ ɿɧɞɢɤɚɬɨɪɢ ɡɚɪɹɞɧɨɝɨ ɩɪɢɫɬɪɨɸ ɿɡ
ɥɨɬɤɨɦ ɧɚ ɨɞɢɧ ɩɪɢɫɬɪɿɣ . . . . . . . . . . . . . . . . . . .10
ɉɿɞɝɨɬɨɜɤɚ ɞɨ ɪɨɛɨɬɢ . . . . . . . . . . . . . . . . . . . . . . . . 11
ȼɆɂɄȺɇɇə/ȼɂɆɂɄȺɇɇə ɪɚɞɿɨɫɬɚɧɰɿʀ . . . . . . . . . . . 11
Ɋɟɝɭɥɸɜɚɧɧɹ ɝɭɱɧɨɫɬɿ. . . . . . . . . . . . . . . . . . . . . . . . . . 11
ɉɨɤɚɡɚɧɧɹ ɞɢɫɩɥɟɹ . . . . . . . . . . . . . . . . . . . . . . . . . . . 11
ȼɢɛɿɪ ɪɚɞɿɨɤɚɧɚɥɭ . . . . . . . . . . . . . . . . . . . . . . . . . . . . 11
ɉɪɢɣɨɦ ɜɢɤɥɢɤɭ . . . . . . . . . . . . . . . . . . . . . . . . . . . . . . 12
Ⱦɚɥɶɧɿɫɬɶ
ɜɢɤɥɢɤɭ. . . . . . . . . . . . . . . . . . . . . . . . . . . . . 12
ɋɜɿɬɥɨɞɿɨɞɧɿ ɿɧɞɢɤɚɬɨɪɢ ɪɚɞɿɨɫɬɚɧɰɿʀ . . . . . . . . . . . . . 13
ȼɿɞɧɨɜɥɟɧɧɹ ɫɬɚɧɞɚɪɬɧɢɯ ɧɚɥɚɲɬɭɜɚɧɶ . . . . . . . 14
ɉɪɨɝɪɚɦɨɜɚɧɿ ɮɭɧɤɰɿʀ . . . . . . . . . . . . . . . . . . . . . . . . 15
ɉɟɪɟɯɿɞ ɞɨ ɪɟɠɢɦɭ ɩɪɨɝɪɚɦɭɜɚɧɧɹ . . . . . . . . . . . 15
Ʉɨɦɩ'ɸɬɟɪɧɟ ɩɪɨɝɪɚɦɧɟ ɡɚɛɟɡɩɟɱɟɧɧɹ CPS . . . . . . . 15
ȿɤɫɩɥɭɚɬɚɰɿɹ ɬɚ ɞɨɝɥɹɞ. . . . . . . . . . . . . . . . . . . . . . . 17
  • Page 1 1
  • Page 2 2
  • Page 3 3
  • Page 4 4
  • Page 5 5
  • Page 6 6
  • Page 7 7
  • Page 8 8
  • Page 9 9
  • Page 10 10
  • Page 11 11
  • Page 12 12
  • Page 13 13
  • Page 14 14
  • Page 15 15
  • Page 16 16
  • Page 17 17
  • Page 18 18
  • Page 19 19
  • Page 20 20
  • Page 21 21
  • Page 22 22
  • Page 23 23
  • Page 24 24
  • Page 25 25
  • Page 26 26
  • Page 27 27
  • Page 28 28
  • Page 29 29
  • Page 30 30
  • Page 31 31
  • Page 32 32
  • Page 33 33
  • Page 34 34
  • Page 35 35
  • Page 36 36
  • Page 37 37
  • Page 38 38
  • Page 39 39
  • Page 40 40
  • Page 41 41
  • Page 42 42
  • Page 43 43
  • Page 44 44
  • Page 45 45
  • Page 46 46
  • Page 47 47
  • Page 48 48
  • Page 49 49
  • Page 50 50
  • Page 51 51
  • Page 52 52
  • Page 53 53
  • Page 54 54
  • Page 55 55
  • Page 56 56
  • Page 57 57
  • Page 58 58
  • Page 59 59
  • Page 60 60
  • Page 61 61
  • Page 62 62
  • Page 63 63
  • Page 64 64
  • Page 65 65
  • Page 66 66
  • Page 67 67
  • Page 68 68
  • Page 69 69
  • Page 70 70
  • Page 71 71
  • Page 72 72
  • Page 73 73
  • Page 74 74
  • Page 75 75
  • Page 76 76
  • Page 77 77
  • Page 78 78
  • Page 79 79
  • Page 80 80
  • Page 81 81
  • Page 82 82
  • Page 83 83
  • Page 84 84
  • Page 85 85
  • Page 86 86
  • Page 87 87
  • Page 88 88
  • Page 89 89
  • Page 90 90
  • Page 91 91
  • Page 92 92
  • Page 93 93
  • Page 94 94
  • Page 95 95
  • Page 96 96
  • Page 97 97
  • Page 98 98
  • Page 99 99
  • Page 100 100
  • Page 101 101
  • Page 102 102
  • Page 103 103
  • Page 104 104
  • Page 105 105
  • Page 106 106
  • Page 107 107
  • Page 108 108
  • Page 109 109
  • Page 110 110
  • Page 111 111
  • Page 112 112
  • Page 113 113
  • Page 114 114
  • Page 115 115
  • Page 116 116
  • Page 117 117
  • Page 118 118
  • Page 119 119
  • Page 120 120
  • Page 121 121
  • Page 122 122
  • Page 123 123
  • Page 124 124
  • Page 125 125
  • Page 126 126
  • Page 127 127
  • Page 128 128
  • Page 129 129
  • Page 130 130
  • Page 131 131
  • Page 132 132
  • Page 133 133
  • Page 134 134
  • Page 135 135
  • Page 136 136
  • Page 137 137
  • Page 138 138
  • Page 139 139
  • Page 140 140
  • Page 141 141
  • Page 142 142
  • Page 143 143
  • Page 144 144
  • Page 145 145
  • Page 146 146
  • Page 147 147
  • Page 148 148
  • Page 149 149
  • Page 150 150
  • Page 151 151
  • Page 152 152
  • Page 153 153
  • Page 154 154
  • Page 155 155
  • Page 156 156
  • Page 157 157
  • Page 158 158
  • Page 159 159
  • Page 160 160
  • Page 161 161
  • Page 162 162
  • Page 163 163
  • Page 164 164
  • Page 165 165
  • Page 166 166
  • Page 167 167
  • Page 168 168
  • Page 169 169
  • Page 170 170
  • Page 171 171
  • Page 172 172
  • Page 173 173
  • Page 174 174
  • Page 175 175
  • Page 176 176
  • Page 177 177
  • Page 178 178
  • Page 179 179
  • Page 180 180
  • Page 181 181
  • Page 182 182
  • Page 183 183
  • Page 184 184
  • Page 185 185
  • Page 186 186
  • Page 187 187
  • Page 188 188
  • Page 189 189
  • Page 190 190
  • Page 191 191
  • Page 192 192
  • Page 193 193
  • Page 194 194
  • Page 195 195
  • Page 196 196
  • Page 197 197
  • Page 198 198
  • Page 199 199
  • Page 200 200
  • Page 201 201
  • Page 202 202
  • Page 203 203
  • Page 204 204
  • Page 205 205
  • Page 206 206
  • Page 207 207
  • Page 208 208
  • Page 209 209
  • Page 210 210
  • Page 211 211
  • Page 212 212
  • Page 213 213
  • Page 214 214
  • Page 215 215
  • Page 216 216
  • Page 217 217
  • Page 218 218
  • Page 219 219
  • Page 220 220
  • Page 221 221
  • Page 222 222
  • Page 223 223
  • Page 224 224
  • Page 225 225
  • Page 226 226
  • Page 227 227
  • Page 228 228
  • Page 229 229
  • Page 230 230
  • Page 231 231
  • Page 232 232
  • Page 233 233
  • Page 234 234
  • Page 235 235
  • Page 236 236
  • Page 237 237
  • Page 238 238
  • Page 239 239
  • Page 240 240
  • Page 241 241
  • Page 242 242
  • Page 243 243
  • Page 244 244
  • Page 245 245
  • Page 246 246
  • Page 247 247
  • Page 248 248
  • Page 249 249
  • Page 250 250
  • Page 251 251
  • Page 252 252
  • Page 253 253
  • Page 254 254
  • Page 255 255
  • Page 256 256
  • Page 257 257
  • Page 258 258
  • Page 259 259
  • Page 260 260
  • Page 261 261
  • Page 262 262
  • Page 263 263
  • Page 264 264
  • Page 265 265
  • Page 266 266
  • Page 267 267
  • Page 268 268
  • Page 269 269
  • Page 270 270
  • Page 271 271
  • Page 272 272
  • Page 273 273
  • Page 274 274
  • Page 275 275
  • Page 276 276

Motorola XT460 Operating instructions

Category
Two-way radios
Type
Operating instructions

Ask a question and I''ll find the answer in the document

Finding information in a document is now easier with AI