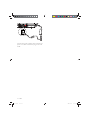
Philips HSB2351X/78 User manual
- Category
- DVD players
- Type
- User manual
This manual is also suitable for

© 2009 Koninklijke Philips Electronics N.V.
All rights reserved.
Document order number: HSB2351_x78_UM_V1.0
(1LQGG6HF
(1LQGG6HF

Register your product and get support at
www.philips.com/welcome
HSB2351
EN User manual
(1LQGG6HF
(1LQGG6HF

3
English
EN
Contents
1 Important 4
Safety 4
Notice 5
2 Your DVD Home Theater System 7
Introduction 7
What’s in the box 7
Overview of the main unit 8
Overview of the remote control 9
3 Connect 11
Place the unit 11
Attach speakers to the main unit 11
Connect TV 12
Connect audio cables 13
Connect FM antenna 13
Connect power 13
4 Get started 15
Prepare the remote control 15
Turn on 15
Find the correct viewing channel 15
Select the correct TV system 15
Select menu display language 16
Turn on Progressive Scan 16
Use Philips EasyLink 16
5 Play 18
Play discs 18
Play from USB 19
Play DivX video 19
Play MP3/WMA/picture les 19
Play control 20
Play options 20
Picture view options 21
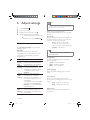
6 Adjust settings 22
General setup 22
Audio setup 23
Video setup 23
Preference setup 24
7 Tune to FM radio stations 26
Program radio stations automatically 26
Program radio stations manually 26
Tune to a preset radio station 26
8 Adjust volume level and sound effect
27
Adjust volume level 27
Select a sound effect 27
Mute sound 27
9 Connect other devices 28
Listen to an audio player 28
10 Product information 29
Speci cations 29
Supported disc formats 30
USB playability information 30
11 Troubleshooting 31
12 Appendix 33
Mount to a wall 33
13 Glossary 35
(1LQGG6HF
(1LQGG6HF

4
Warning
Never remove the casing of this unit. •
Never lubricate any part of this unit. •
Place this unit on a at, hard and stable surface. •
Never place this unit on other electrical equipment. •
Only use this unit indoors. Keep this unit away from •
water, moisture and liquid- lled objects.
Keep this unit away from direct sunlight, naked ames
•
or heat.
Never look into the laser beam inside the unit.
•
Hearing safety
Listen at a moderate volume.
Using headphones at a high volume can •
impair your hearing. This product can
produce sounds in decibel ranges that may
cause hearing loss for a normal person,
even for exposure less than a minute. The
higher decibel ranges are offered for those
that may have already experienced some
hearing loss.
Sound can be deceiving. Over time your •
hearing ‘comfort level’ adapts to higher
volumes of sound. So after prolonged
listening, what sounds ‘normal’ can actually
be loud and harmful to your hearing. To
guard against this, set your volume to a safe
level before your hearing adapts and leave
it there.
To establish a safe volume level:
Set your volume control at a low setting. •
Slowly increase the sound until you can •
hear it comfortably and clearly, without
distortion.
Listen for reasonable periods of time:
Prolonged exposure to sound, even at •
normally ‘safe’ levels, can also cause hearing
loss.
Be sure to use your equipment reasonably •
and take appropriate breaks.
Be sure to observe the following guidelines
when using your headphones.
Listen at reasonable volumes for •
reasonable periods of time.
1 Important
Safety
Know these safety symbols
This ‘bolt of lightning’ indicates uninsulated
material within your unit may cause an electrical
shock. For the safety of everyone in your
household, please do not remove product
covering.
The ‘exclamation point’ calls attention to
features for which you should read the enclosed
literature closely to prevent operating and
maintenance problems.
WARNING: To reduce the risk of re or electric
shock, this apparatus should not be exposed to
rain or moisture and objects lled with liquids,
such as vases, should not be placed on this
apparatus.
CAUTION: To prevent electric shock, match
wide blade of plug to wide slot, fully insert.
Warning
Where the MAINS plug or an appliance coupler is used •
as the disconnect device, the disconnect device shall
remain readily operable.
EN
(1LQGG6HF
(1LQGG6HF

5
Your product is designed and manufactured
with high quality materials and components,
which can be recycled and reused.
When you see the crossed-out wheel bin
symbol attached to a product, it means the
product is covered by the European Directive
2002/96/EC:
Never dispose of your product with other
household waste. Please inform yourself about
the local rules on the separate collection of
electrical and electronic products. The correct
disposal of your old product helps prevent
potentially negative consequences on the
environment and human health.
Your product contains batteries covered by
the European Directive 2006/66/EC, which
cannot be disposed with normal household
waste. Please inform yourself about the local
rules on separate collection of batteries
because correct disposal helps to prevent
negative consequences for the environmental
and human health.
Environmental information
All unnecessary packaging has been omitted.
We have tried to make the packaging easy to
separate into three materials: cardboard (box),
polystyrene foam (buffer) and polyethylene
(bags, protective foam sheet.)
Your system consists of materials which can
be recycled and reused if disassembled by
a specialized company. Please observe the
local regulations regarding the disposal of
packaging materials, exhausted batteries and old
equipment.
Be careful not to adjust the volume as your •
hearing adapts.
Do not turn up the volume so high that •
you can’t hear what’s around you.
You should use caution or temporarily •
discontinue use in potentially hazardous
situations. Do not use headphones while
operating a motorized vehicle, cycling,
skateboarding, etc.; it may create a traf c
hazard and is illegal in many areas.
Caution
Use of controls or adjustments or performance of •
procedures other than herein may result in hazardous
radiation exposure or other unsafe operation.
Wall mounting of the unit should only be
performed by quali ed personnel. The unit
must only be mounted on an appropriate wall
bracket and on a wall that can safely hold the
weight of the unit. Improper wall mounting
can result in severe injury or damage. Do not
attempt to wall mount the unit yourself.
Notice
Any changes or modi cations made to this
device that are not expressly approved by
Philips Consumer Lifestyle may void the user’s
authority to operate the equipment.
Environmental information
All unnecessary packaging has been omitted.
We have tried to make the packaging easy to
separate into three materials: cardboard (box),
polystyrene foam (buffer) and polyethylene
(bags, protective foam sheet.)
Your system consists of materials which can
be recycled and reused if disassembled by
a specialized company. Please observe the
local regulations regarding the disposal of
packaging materials, exhausted batteries and old
equipment.
English
EN
(1LQGG6HF
(1LQGG6HF

6
HDMI, and HDMI logo and High-De nition
Multimedia Interface are trademarks or
registered trademarks of HDMI licensing LLC.
DivX, DivX Certi ed, and associated logos are
trademarks of DivX, Inc. and are used under
license.
Of cial DivX® Ultra Certi ed product.
Plays all versions of DivX® video (including
DivX® 6) with enhanced playback of DivX®
media les and the DivX® Media Format.
Manufactured under license under U.S. Patent
#’s: 5,451,942; 5,956,674; 5,974,380; 5,978,762;
6,487,535 & other U.S. and worldwide patents
issued & pending. DTS and DTS Digital
Surround are registered trademarks and the
DTS logos and Symbol are trademarks of DTS,
Inc. © 1996-2008 DTS, Inc. All Rights Reserved.
The USB-IF Logos are trademarks of Universal
Serial Bus Implementers Forum, inc.
ENERGY STAR and the ENERGY STAR mark
are registered U.S. marks.
The making of unauthorized copies of copy-
protected material, including computer
programs, les, broadcasts and sound
recordings, may be an infringement of
copyrights and constitute a criminal offence.
This equipment should not be used for such
purposes.
Manufactured under license from Dolby
Laboratories.
Dolby and the double-D symbol are
trademarks of Dolby Laboratories.
Manufactured under license from Dolby
Laboratories.
Dolby, Pro Logic, and the double-D symbol are
trademarks of Dolby Laboratories.
Other trademarks and trade names are those
of their respective owners.
This apparatus includes this label:
Note
The type plate is located on the bottom of the •
apparatus.
EN
(1LQGG6HF
(1LQGG6HF

7
The unit supports these media/disc formats:
You can play DVD discs with the following
region codes:
DVD region code Countries
Russia
What’s in the box
Check and identify the contents of your
package:
Main unit•
Speakers (x 2)•
Power adapter for the main unit•
Power cord•
Remote control (with batteries)•
FM wire antenna•
AV cable (red/white/yellow)•
USB extension cable•
Wall mount bracket and screws (x4)•
Recordable
ReWritable
2 Your DVD
Home Theater
System
Congratulations on your purchase, and
welcome to <brand>! To fully bene t from
the support that <brand> offers, register your
product at www.<brand>.com/welcome.
This DVD Home Theater System is designed
to complement your home perfectly. Enjoy the
DVD Home Theater System with multi-channel
surround sound and excellent picture quality.
Introduction
With this unit, you can:
watch video from DVD/VCD/SVCD or •
USB devices
enjoy audio from discs or USB devices•
view pictures from discs or USB devices•
listen to FM radio•
Control EasyLink-compliant devices •
through a single remote control
Sync audio output with the video output•
You can enrich sound output with these
sound effects:
Surround sound experience•
Preset sound modes•
English
EN
(1LQGG6HF
(1LQGG6HF

8
g
Open the disc compartment.•
h
Start or pause play.•
i Disc compartment
j Remote control sensor
k Display panel
Display current status.•
l
USB socket.•
Overview of the main unit
Caution
Use of controls or adjustments or performance of •
procedures other than herein may result in hazardous
radiation exposure or other unsafe operation.
a SOURCE
Select a source.•
b MP3 LINK
Jack for an external audio device.•
c
Turn on the unit or switch to standby •
mode.
d
Stop play.•
Erase a preset radio station.•
e VOL -/+
Adjust volume.•
f
/
Skip to the previous/next title/•
chapter/track.
Select a preset radio station.•
b ca e hd gf
ijl k
EN
(1LQGG6HF
(1LQGG6HF

9
b Source selection keys
Select a source.•
c
OPTIONS
Access or exit the system setup menu.•
d
/
For menus: navigate up/down.•
Move an enlarged picture up/down.•
Rotate or invert pictures.•
e OK
Con rms an entry or selection.•
f
/ ( / )
For menus, navigate left/right.•
Search within a track or disc.•
Move an enlarged picture left/right.•
Tune to a radio station.•
g
INFO
For video/audio play, display •
information about the current status
or the disc.
For pictures, display a thumbnail view •
of picture les.
h
/
Skip to the previous/next title/•
chapter/track.
Select a preset radio station.•
i
Start or pause play.•
j
Stop play.•
Erase a preset radio station.•
k TREBLE / BASS
Change treble or bass. Use with •
+/- .
l Numeric keypad
Select a title/chapter/track directly.•
Select a preset radio station directly.•
m AUDIO SYNC
Access audio delay setting.•
n SOUND
Selects a prede ned sound effect.•
Overview of the remote
control
a
Turn on the unit or switch to standby •
mode.
w
v
t
q
r
p
u
s
c
g
k
m
n
o
j
i
f
d
e
h
a
b
l
English
EN
(1LQGG6HF
(1LQGG6HF

10
o ZOOM
For pictures or video: zoom in/out.•
p REPEAT A-B
Repeat a speci c section within a •
track/disc.
q REPEAT / PROGRAM
Selects or turns off repeat or shuf e •
mode.
Program radio stations.•
r SUBTITLE
Select DVD or DivX subtitle language.•
s SURROUND
Enable/disable Dolby Virtual Speakers •
(DVS) sound effect.
t
+/-
Adjust volume.•
u
Mute or restore volume.•
v MENU/BACK
Return to the previous screen.•
For video discs: access or exit the disc •
menu.
For video discs with playback •
control(PBC): turn on/off PBC.
w AUDIO
For VCD, select stereo, mono-left or •
mono-right channel.
For DVD/DivX video, select an audio •
language.
EN
(1LQGG6HF
(1LQGG6HF

11
2 Attach the left speaker to the left side of
the main unit.
3 Repeat step 2 to attach the right speaker.
4 Insert the supplied studs into the holes.
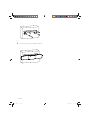
3 Connect
Place the unit
1 Place the unit near to the TV.
2 Keep the speakers at the normal listening
ear-level and directly parallel to the
listening area.
Note
To avoid magnetic interference or unwanted noise, •
never place this apparatus and speakers too close to
any radiation devices.
Never place this unit in an enclosed cabinet.
•
Install this unit near the AC outlet where the AC power •
plug can be easily reached.
Attach speakers to the main
unit
1
Place the main unit on a soft and at
surface.
Ensure that the rear side faces •
upwards.
English
EN
(1LQGG6HF
(1LQGG6HF

12
Note
To use Philips EasyLink, you must use HDMI connection •
(see “Use Phlips EasyLink”).
This unit is HDMI CEC compatible. It enables the
•
connected TV/device to control each other over HDMI.
a Connect an HDMI cable (not supplied)
to:
- the • HDMI socket on this unit.
- the HDMI input socket on the TV.•
Tip
If your TV has only a DVI connection, connect through •
a HDMI/DVI adaptor. An extra audio connection is
needed to complete this connection.
Option 3: Connect through
component - Higher quality
Component video provides better picture
quality than AV out connections.Though
component video supports high-de nition
signals, picture quality is lower than HDMI and
is analogue.
TV
HDMI IN
Connect TV
Option 1: Connect through AV cable -
Basic quality
AV out provides basic analogue connectivity.
1 Connect one end of the AV cable (red/
white/yellow) to the AV input sockets on
the TV.
2 Connect the other end to the AV OUT
( VIDEO , AUDIO L/R ) sockets on the unit.
Note
If you want to listen to sound from the unit instead of •
from TV, connect the video cable (yellow) only. Do not
connect the audio cable (red and white).
Option 2: Connect through HDMI -
Highest quality
If you want to experience full high-de nition
video, use HDMI connection. HDMI provides an
uncompressed, digital interface between your
TV and the unit. Both audio and video signals
are combined in one HDMI cable.
TV
VIDEO IN
EN
(1LQGG6HF
(1LQGG6HF

13
Connect FM antenna
Tip
This unit does not support MW radio reception. •
1 Connect the supplied FM antenna to the
FM ANT socket on the unit.
Connect power
Caution
Risk of product damage! Ensure that the power supply •
voltage corresponds to the voltage printed on the back
or the underside of the unit.
Risk of electric shock! When you unplug the AC power,
•
always pull the plug from the socket. Never pull the
cord.
Before you connect the AC power, ensure you have
•
completed all other connections.
FM ANT
a Connect a component video cable (red/
blue/green - not supplied) to:
- the • COMPONENT ( Pr/Cr Pb/Cb
Y ) sockets on this unit.
- the component input sockets on •
the TV.
Connect audio cables
1 To play sound from the TV through this
unit, connect audio cables (red/white - not
supplied) to:
the • AUX L/R sockets on this unit.
the audio output sockets on the TV.•
TV
Pr/Cr Pb/Cb Y
COMPONENT VIDEO IN PUT
TV
L AUDIO OUT R
English
EN
(1LQGG6HF
(1LQGG6HF

14
Connect the power adaptor with main unit and
power cord, then connect the plug to the wall
outlet.
b
c
EN
(1LQGG6HF
(1LQGG6HF

15
Turn on
1
Press .
The unit switches to the last selected »
source.
Find the correct viewing
channel
1
Press DISC to switch to disc mode.
2 Press the source button repeatedly on the
remote control of your TV.
Tip
The video-in channel may be called AV, VIDEO, HDMI •
etc. See the TV user manual on how to select the
correct input on the TV.
Select the correct TV system
Change this setting if the video does not appear
correctly. By default, this setting matches the
most common setting for TVs in your country.
1 Press OPTIONS .
2 Select [Video Setup] .
3 Select [TV Type] and then press .
4 Select a setting and then press OK .
• [PAL] - For TV with PAL color system.
3
1
2
4 Get started
Caution
Use of controls or adjustments or performance of •
procedures other than herein may result in hazardous
radiation exposure or other unsafe operation.
Always follow the instructions in this chapter in
sequence.
If you contact Philips, you will be asked for the
model and serial number of this apparatus. The
model number and serial number are on the
back of the apparatus. Write the numbers here:
Model No. __________________________
Serial No. ___________________________
Prepare the remote control
Caution
Risk of explosion! Keep batteries away from heat, •
sunshine or re. Never discard batteries in re.
Risk of decreased battery life! Never mix different •
brands or types of batteries.
Risk of product damage! When the remote control is
•
not used for long periods, remove the batteries.
Note
Perchlorate Material - special handling may apply. See •
www.dtsc.ca.gov/hazardouswaste/perchlorate.
1 Open the battery compartment.
2 Insert two R03 or AAA batteries with
correct polarity (+/-) as indicated.
3 Close the battery compartment.
English
EN
(1LQGG6HF
(1LQGG6HF

16
Note
If a blank/distorted screen is displayed, wait for 15 •
seconds for auto recovery or turn off progressive scan
manually.
9 Turn on the progressive scan mode on the
TV.
Turn off progressive scan manually
1 Turn off the progressive scan mode on the
TV.
2 Press OPTIONS .
3 Press / to select [Video Setup] in the
menu, then press
.
4 Select [Progressive] > [Off] , then press
OK .
5 To exit the menu, press OPTIONS .
Use Philips EasyLink
This unit supports Philips EasyLink, which
uses the HDMI CEC (Consumer Electronics
Control) protocol. EasyLink-compliant devices
that are connected through HDMI connectors
can be controlled by a single remote control.
Note
Philips does not guarantee 100% interoperability with •
all HDMI CEC devices.
1 Turn on the HDMI CEC operations on the
TV or other connected devices. See TVs/
devices manual for details.
2 You can now enjoy the following Philips
EasyLink controls.
• [NTSC] - For TV with NTSC color
system.
• [Multi] - For TV that is compatible
with both PAL and NTSC.
5 To exit the menu, press OPTIONS .
Select menu display language
1
Press OPTIONS .
2 Select [General Setup] .
3 Select [OSD Language] and then press .
4 Select a setting and then press OK .
5 To exit the menu, press OPTIONS .
Turn on Progressive Scan
Progressive scan displays twice the number of
frames per seconds than interlaced scanning
(ordinary TV system). With nearly double the
number of lines, progressive scan offers higher
picture resolution and quality.
Before you turn on this feature, ensure that:
The TV supports progressive scan •
signals.
You have connected this unit with the •
TV through component video.
1 Turn on the TV.
2 Ensure that the TV progressive scan mode
is deactivated (see the TV user manual).
3 Switch the TV to the correct viewing
channel for this unit.
4 Press DISC .
5 Press OPTIONS .
6 Press / to select [Video Setup] in the
menu, then press
.
7 Select [Progressive] > [On] , then press
OK .
A warning message is displayed. »
8 To proceed, select [Ok] and press OK .
The progressive setup is complete. »
EN
(1LQGG6HF
(1LQGG6HF

17
One touch play [Auto Wakeup TV]
When you press
, this unit will wake up
from standby mode and start disc play (if a
video disc is found in the disc compartment).
At the same time, your TV will also be turned
on and be switched to the correct viewing
channel.
One touch power-off [System Standby]
When you connect this unit to devices that
support standby mode, you can use the
remote control of this unit to switch this unit
and all connected HDMI devices to standby
mode. You can also use the remote control
from any of the connected HDMI devices to
perform one-touch standby .
One touch audio play [System Audio Control]
When you connect this unit to HDMI
CEC compliant devices, the unit can switch
automatically to play audio from the
connected device.
English
EN
(1LQGG6HF
(1LQGG6HF

18
To return to the menu during play:
1 Press MENU/BACK .
Note
To see the disc menu of a VCD disc, you must turn on •
PlayBack Control (PBC) feature of the disc.
Select an audio language
You can select an audio language on DVDs,
DiVx video or VCDs.
1 During disc play, press AUDIO .
The language options appear. If the »
selected audio channels is unavailable,
the default disc audio channel is used.
Note
For some DVDs, the language can only be changed •
from the disc menu. Press MENU/BACK to access the
menu.
Select a subtitle language
You can select a subtitle language on DVDs or
DivX® Ultra discs.
During play, press • SUBTITLE .
Tip
For some DVDs, the language can only be changed •
from the disc menu. Press MENU/BACK to access the
menu.
Sync audio output with video play
If the video play is slower than the audio output
(sound does not match with the pictures), you
can delay the audio output to match the video.
1 Press and hold AUDIO SYNC until
‘AUDIO SYNC XXX’ is displayed.
‘XXX’ denotes the delay time. »
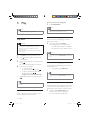
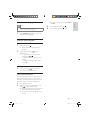
5 Play
Note
With some disc/ le types, play may differ. •
Play discs
Caution
Never look at the laser beam inside the unit. •
Risk of product damage! Never play discs with •
accessories such as disc stabilizer rings or disc
treatment sheets.
Never put any objects other than discs into the disc
•
compartment.
1 Press DISC to select the DISC source.
2 Press on the main set to open the disc
compartment.
3 Place a disc into the disc compartment and
press
.
Ensure that the label faces outwards. »
4 Play starts automatically.
To stop play, press •
.
To pause or resume play, press •
.
To skip to the previous/next title/•
chapter/track, press
/ .
If play does not start automatically:
Select a title/chapter/track and then press •
.
Tip
To play a locked DVD, enter the 4-digit parental control •
password.
Use the disc menu
When you load a DVD/(S)VCD disc, a menu
may be displayed on the TV screen.
EN
(1LQGG6HF
(1LQGG6HF

19
Play DivX video
You can play DivX les copied onto a CD-R/
RW, recordable DVD or USB device.
1 Insert a disc or connect a USB device.
2 Select a source:
For discs, press • DISC .
For USB devices, press • USB .
3 Select a title to play, then press .
To stop play, press •
.
To pause or resume play, press •
.
To change a subtitle language, press •
SUBTITLE .
Note
You can only play DivX videos rented or purchased •
through the DivX registration code of this unit.
Subtitle les with the following lename extensions (.srt,
•
.smi, .sub, .ssa, .ass) are supported but do not appear on
the le navigation menu.
The subtitle lename has to be the same as the le
•
name of the video.
Play MP3/WMA/picture les
You can play MP3/WMA/picture les copied
onto a CD-R/RW, recordable DVD or USB
device.
1 Insert a disc or connect a USB device.
2 Select a source:
For discs, press • DISC .
For USB devices, press • USB .
A contents menu is displayed.•
3 Select a folder, then press OK .
4 Select a le to play, then press .
To return to the main menu, press •
until the ‘Previous’ folder is selected,
then press OK .
To stop play, press •
.
To pause or resume play, press •
.
To skip to the previous/next le, press •
/ .
2 Within ve seconds, press +/- to set
the delay time for audio output.
Play from USB
Note
Ensure that the USB device contains playable music, •
pictures or video.
1 Connect the supplied USB extension cable
to:
the USB device•
the •
socket
2 Press USB to select the USB source.
A contents menu is displayed. »
3 Select a folder, then press OK .
4 Select a le to play, then press .
To return to the main menu, press •
until the ‘Previous’ folder is selected,
then press OK .
To stop play, press •
.
To pause or resume play, press •
.
To skip to the previous/next le, press •
/ .
English
EN
(1LQGG6HF
(1LQGG6HF

20
To cancel resume mode and stop play
completely:
1 In stop mode, press .
Play options
Display play information
1 During play, press INFO repeatedly to
display play information.
Zoom in/out image
1 During video/picture play, press ZOOM
repeatedly to zoom in/out the image.
When the image is zoomed in, you •
can press
/ / / to pan through
the image.
Change the audio channel
Note
This feature is only available for VCD/DivX play. •
1 During play, press AUDIO repeatedly to
select an audio channel available on the
disc:
Mono Left•
Mono Right•
Stereo•
Select an audio language
Note
This feature is only available for DVDs/DivX videos •
recorded with multiple audio languages.
1 Press AUDIO repeatedly to select an
audio language.
Play control
Select repeat/shuf e play options
1 During play, press REPEAT / PROGRAM
repeatedly to select a repeat option or the
shuf e play mode.
To resume normal play, press •
REPEAT / PROGRAM repeatedly until
[Repeat Off] is displayed.
Repeat A-B (DVD/VCD/CD/MP3/
WMA)
1 During music or video play, press REPEAT
A-B at the start point.
2 Press REPEAT A-B at the end point.
The selected section starts to play »
repeatedly.
To cancel repeat play, press • REPEAT
A-B again.
Note
The section A and B can be set only within the same •
track/title.
Search forward/backward
1 During play, press / ( / ) repeatedly
to select a search speed.
To resume play at normal speed, press •
.
Resume video play from last stopped
point
Note
This feature is only available for video play. •
1 In stop mode and when the disc has not
been removed, press OK .
EN
(1LQGG6HF
(1LQGG6HF
Page is loading ...
Page is loading ...
Page is loading ...
Page is loading ...
Page is loading ...
Page is loading ...
Page is loading ...
Page is loading ...
Page is loading ...
Page is loading ...
Page is loading ...
Page is loading ...
Page is loading ...
Page is loading ...
Page is loading ...
Page is loading ...
-
 1
1
-
 2
2
-
 3
3
-
 4
4
-
 5
5
-
 6
6
-
 7
7
-
 8
8
-
 9
9
-
 10
10
-
 11
11
-
 12
12
-
 13
13
-
 14
14
-
 15
15
-
 16
16
-
 17
17
-
 18
18
-
 19
19
-
 20
20
-
 21
21
-
 22
22
-
 23
23
-
 24
24
-
 25
25
-
 26
26
-
 27
27
-
 28
28
-
 29
29
-
 30
30
-
 31
31
-
 32
32
-
 33
33
-
 34
34
-
 35
35
-
 36
36


Philips HSB2351X/78 User manual
- Category
- DVD players
- Type
- User manual
- This manual is also suitable for
Ask a question and I''ll find the answer in the document
Finding information in a document is now easier with AI
Related papers
-
Philips MCD122/98 User manual
-
-
Philips DVP3380 HDMI 1080p DivX Ultra User manual
-
Philips DVP3360 User manual
-
Philips DVP3388 User manual
-
Philips DVP3368/94 User manual
-
-
Philips DVP3388K/98 User manual
-
Philips PET742/12 User manual
-
Philips DVP3360K User manual
