Page is loading ...

OWNER’S MANUAL
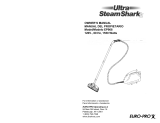
Model EP95B
Steam Blaster
Congratulations! You are the owner of the ultimate in modern Vapor Steam
Cleaning equipment. To fully enjoy the advantages of your appliance, please
take a few minutes to read all the “Owner’s Manual” and keep the instructions
handy for ready reference. Please review the product warranty and mail the
owner registration form.
For information or assistance:
EURO-PRO Operating LLC
94 Main Mill Street, Door 16
Plattsburgh, NY 12901
Tel.: 800-798-7398

1 YEAR LIMITED WARRANTY
EURO-PRO Operating LLC warrants this product to be free from defects in material and workmanship
for a period of one (1) year from the date of purchase when utilized for normal household use by the
original purchaser only. The attached Warranty Registration Card must be filled out and returned within
10 days of purchase. This is essential for your Warranty to be effective should any problem arise with
this product.
Should any defect covered by the terms of the limited warranty be discovered within one year, EURO-
PRO Operating LLC will repair or replace any defective part provided the unit is returned by the original
purchaser, freight prepaid, to EURO-PRO Operating LLC, 94 Main Mill Street, Door 16, Plattsburgh, NY
12901. Proof of purchase date and $15.00 for handling and return packing/shipping charges must be
included.*
The liability of EURO-PRO Operating LLC is limited solely to the cost of the replacement parts or the
complete unit at our option. LABOUR CHARGES ARE NOT INCLUDED.
This warranty does not cover normal wear of parts and does not apply to any unit that has been
tampered with or used for commercial purposes. This Limited Warranty does not cover damage caused
by misuse, negligent handling, or damage due to faulty packaging or mishandling in transit (by any
common carrier).
This warranty is extended to the original purchaser of the unit and excludes all other legal and/or
conventional warranties. The responsibility of EURO-PRO Operating LLC , if any, is limited to the
specific obligations expressly assumed by it under the terms of the limited warranty. In no event is
EURO-PRO Operating LLC liable for incidental or consequential damages of any nature whatsoever.
Some States do not permit the exclusion or limitation of incidental or consequential damages, so the
above may not apply to you.
This warranty gives you specific legal rights which vary from state to state.
PURCHASER___________________________________________________________
DATE OF PURCHASE ___________________________________________________
DEALER ______________________________________________________________
*important: Carefully pack item to avoid damage in shipping. Be sure to attach tag to item before packing
with your name, complete address and phone number with note giving purchase information, model
number and what you believe is the problem with item. We recommend you insure the package (as
damage in shipping is not covered by your warranty). Mark the outside of your package “ATTENTION
CUSTOMER SERVICE”.
Model EP95B
Please complete and return within ten (10) days of purchase. The registration will enable us
to contact you in the event a product defect is discovered. By returning this card you
acknowledge to have read and understood the instructions for use, and warnings set forth in
the accompanying instructions
.
RETURN TO: EURO-PRO Operating LLC, 94 Main Mill Street, Door 16, Plattsburgh, N.Y. 12901
PURCHASER: ……………………………………..…………………………………………………
ADDRESS: ………………………………………...……………………………………………….
CITY: ……………………………….. STATE/PROV:………………………………………….
DATE OF PURCHASE: ……………………… MODEL:..…………………………………….
NAME AND ADDRESS OF DEALER: …………………………………………………………..
OWNERSHIP REGISTRATION CARD
EP95B
Printed in Italy

IMPORTANT SAFETY INSTRUCTIONS
USAGE SUGGESTIONS FOR SHARK STEAM BLASTER
When using your Shark Steam Blaster, basic safety precautions should always
be observed, including the following:
Important User Information
Please note that this steam cleaner has a “flow through injection” type boiler
and is not a pressurized system. It will take approximately 45-90 seconds for
the steam injector to heat up and the “steam ready light” to go off. Once the
steam ready light has gone off, push the steam switch on the handgrip to the
“On” position (I) in order to start the steam flow. Steam power will steadily
increase during the first four (4) minutes of use, after which time steam output
will stabilize. Some steam will condense around the floor brush when in use
and will cause hard surfaces to become wet during the cleaning process, this
is normal.
To reduce the risk of fire, electric shock, or
injury:
• Do not leave the Shark Steam Blaster
plugged in when unattended. Unplug the
electrical cord when not in use and before
servicing or refilling water tank.
• Do not allow to be used as a toy. Close
attention is necessary when used by or near
children, pets or plants.
• Use only as described in this manual. Use
only manufacturer’s recommended
accessories.
• Do not pull cord, use cord as a handle, close
a door on cord, or pull cord around sharp
edges or corners. Keep cord away from
heated surfaces.
• Do not use extension cords or outlets with
inadequate current carrying capacity.
• Turn off all controls as applicable before
unplugging from electrical outlet.
• Do not unplug by pulling on cord. To unplug,
grasp the plug, not the cord.
• Do not handle plug or steam cleaner with wet
hands or operate without shoes.
• Do not put any objects into openings. Do not
use with any opening blocked.
• Store your appliance indoors in a cool, dry
area.
• Keep your work area well lit.
• When in use, never turn the appliance over
or on its side. Never direct steam towards
people, animals or plants.
• Do not immerse the steam cleaner into water
or other liquids. Always unplug the power
cord from the electrical socket when filling the
steam cleaner.
• Do NOT
add cleaning solutions, scented
perfumes, oils or any other chemicals to
the water used in this appliance as this
may damage the unit or make it unsafe for
use. Use tap water or distilled/purified
water if the tap water in your area is very hard.
1. Read all instructions before using your
Shark Steam Blaster.
2. Use the system only for its intended use.
3. To protect against a risk of electric shock,
do not immerse any part of the system in
water or other liquids.
4. Never yank cord to disconnect from
outlet; instead, grasp plug and pull to
disconnect.
5. Do not allow cord to touch hot surfaces.
Let the system cool completely before
putting away. Use “Cord Storage Hooks” for
power cord.
6. Always disconnect system from electrical
outlet when filling or emptying water tank
and when not in use.
7. Do not operate the system with a damaged
cord or plug, or if the appliance or any other
part of the system has been dropped or
damaged. To avoid the risk of electric
shock, do not disassemble or attempt to
repair the Shark Steam Blaster. Return
the system to EURO-PRO Operating LLC
(see warranty) for examination and repair.
Incorrect re-assembly or repair can cause a
risk of electrical shock or injury to persons
when the Shark Steam Blaster is used.
8. Close supervision is necessary for any
appliance being used by or near children.
Do not leave the system unattended while
connected.
9. Burns can occur from touching hot metal
parts, hot water or steam. Do not turn
upside down as there may be hot water in
the unit. Never direct steam at any person.
The steam is very hot and can cause burns.
10. Do not operate in the presence of
explosive and/or flammable fumes.
11. This appliance is intended only for
household use. Follow all user instructions
in this manual.
12. Never use any chemicals or substance
other than tap water in the machine. Use of
chemicals may damage the machine. Use
of chemicals will automatically void your
warranty.
Note
: We strongly recommend the
use of two (2) 100 % cotton towels
layered one on top of the other.
Wood, Vinyl and Marble Floors
Use the floor brush with a 100% cotton
terry cloth attached, ( see page 7 for
details). Move the brush slowly in back
and forth motions. When the towel is
soiled, you can turn the towel over or
replace it with a clean towel. If you are
working on a very dirty area, we
recommend that you move the brush
over the area slowly, several times. If it
is a wood floor, do NOT leave the unit
stationary for any length of time to avoid
heat or moisture build-up in the wood.
By cleaning with the towel over the
brush, you will not affect the shine on the
floor.
To Clean Waxed Floors: Install a clean
towel(s) on the floor brush, work quickly.
The towel will absorb the dirt but not
remove the wax.
Vinyl Floors: Do not allow heat to buildup
in any kind of vinyl, since it can soften it
enough to affect its texture. Work quickly
on vinyl. Use two (2) towels on floor brush.
Tile Floors: For tile and marble floors only,
if there is an area of the floor which is
excessively dirty, you may remove the
towels and agitate the area with the brush
bristles directly. Do not let the area dry.
Wipe immediately with a clean cloth. Re-
clean with brush and towels in place.
Note: Do not
use steam cleaner on
hardwood or vinyl floor without towels
installed on the floor brush.
Tips On How To Use Your
System
Water
• Use tap water for all your cleaning
needs, however, if you live in an area
with hard water, use
demineralized/distilled water.
Important: Do NOT add cleaning
solutions, scented perfumes, oils or any
other chemicals to the water used in
this appliance. Use tap water or
distilled/purified water if the tap
water in your area is very hard.
Temperature
• The vapor temperature at the tip of
the nozzle is between 220°F and 240°F.
• The temperature of the vapor falls to
100 °F at a distance of 10 inches from
the nozzle.
CAUTION: A towel wrapped around the
brush can become hot enough to burn.
Make sure that you let the towel cool off
before touching it or changing it.
• For best results use 100% cotton white
terry cloth towels.
• Use correct size (8” x 17”) of towel to
allow you to wrap the towel over the
ends of the brush and clip it under the
spring loaded towel clips.
• The purpose of using towels is to
absorb the moisture and dirt being
removed. Always use dry towels. A
wet towel will smear the dirt.
• Wash towels with strong detergent
and bleach.
Using Towels
• Using scented fabric softener while
washing the towels will cause the
scent to be released into the air when
using the towels with your steam
system.
SAVE THESE INSTRUCTIONS
For Household Use Only
8
Rev. 04/02C1

ADDITIONAL IMPORTANT SAFEGUARDS cont. OPERATING INSTRUCTIONS cont.
Important: Please note that bristles may
break through thin towels. We recommend
that two (2) towels, laid one on top of the
other be used. This will ensure that the
brush bristles do not break through and
that the towels will be sufficiently absorbent
and retain as much dirt as possible.
Very Important: When installing the
towels to the floor brush, ensure that the
towels do not cover the front and the back
of the brush. (See fig. E)
Attaching a Towel to the
Floor Brush
100% white terry cloth towel can be fitted
on this brush, so as to absorb the dirt and
protect delicate surfaces.
Fig. C
Fig. B
1. Prepare white terry cloth towel:
size 8” x 17” as shown in Fig. A.
2. Place the brush on top of the towel.
5. Place the corner under the cloth
holder as shown in Fig. D.
Fig. D
Open
Open
Fig. E
Fig. A
Warning:
Always keep unit in upright
position when in use. Do not lie flat on
the floor or turn upside down when in
use. Inverting the unit or placing flat on
the floor may cause hot water to exit
from the hose and cause injury.
1. To avoid circuit overload, do not operate
another appliance on the same socket
(circuit) when using this unit.
2. If an extension cord is absolutely
necessary, a 15 ampere 14 gage cord
should be used. Cords rated for less
amperage may overheat. Care should be
taken to arrange cord so that it cannot be
pulled or tripped over.
3. Do not leave unattended when the system
is connected to a power supply/electrical
outlet.
Note: We recommend that you drain
the water tank after every use.
4. Fold the other side of the towel as
shown in Fig. C.
Caution: Upon initial use, the steam will be mixed with water,
hot enough to scald. Ensure that the floor brush is
resting on the floor or the hose handgrip is directed
away from user when steam switch is turned on. Never
direct the nozzle or brush end of the unit toward
yourself or anyone near you.
Important User Information
Please note that this steam cleaner has a “flow through injection” type
boiler and is not a pressurized system. It will take approximately 45-90
seconds for the steam injector to heat up and the “steam ready light” to go
off. Once the steam ready light has gone off, push the steam switch on the
handgrip to the “On” position (I) in order to start the steam flow. Steam
power will steadily increase during the first four (4) minutes of use, after
which time steam output will stabilize. Some steam will condense around
the floor brush when in use and will cause hard surfaces to become wet
during the cleaning process, this is normal.
Warning: This appliance is equipped with a grounded-type
3-wire cord (3-prong plug). This plug will only fit into
an electrical outlet made for a 3-prong plug. This is a
safety feature. If the plug should fail to fit the outlet,
contact an electrician to replace the outlet. Do not
attempt to defeat the safety purpose of the
grounding pin, part of the 3-prong plug.
6. Place the towel around the brush,
and repeat folding the towel as shown
in Fig. E. When folding the towel,
leave some slack. Do not pull tightly
around the brush, leave some
looseness.
2
FOR HOUSEHOLD USE ONLY
SAVE THESE INSTRUCTIONS
3. Fold the towel as shown in Fig. B
7

OPERATING INSTRUCTIONS cont.
GETTING TO KNOW YOUR SHARK STEAM BLASTER
Steam On/Off
Switch
ON/OFF STEAM SWITCH
1. Before turning the steam switch to the
“On” position, wait until the “Steam
Ready” light located on the unit has
turned off.
2. Setting this switch to the “On” position will
start the flow of steam
.
CAUTION:
Upon initial use, the steam will be mixed with
water, hot enough to scald. Ensure that the
floor brush is resting on the floor or the hose
handgrip is directed away from user when
steam switch is turned on. Never direct the
nozzle or brush end of the unit toward yourself
or anyone near you.
CAUTION:
The “On/Off Steam Switch” located on the
handle must be in the “Off” position before
attaching or disassembling accessories.
Never leave the “Steam Switch” in the “On”
position when unit is not in use.
1
2
3
4
Glass & Tile Squeegee
This attachment is very useful for cleaning
large windows, plastic material, ceramic,
tiled surfaces, marble planes, etc.
Apply steam abundantly, rub with the
spongy side of squeegee and remove with
the glass wiping rubber located at the front
edge of squeegee.
1. Reservoir cover
2. On/Off Switch
3. Steam Ready Light (Green)
4. Pivoting Wheels
Technical Specifications
Voltage: 120V~ 60Hz.
Power: 1400 Watts
Water Capacity: 3 1/4 Cups (.8 L.)
Max. Steam Temp.: 240°F
Features
• On/Off Switch
• Thermostat & Safety
Thermofuse
• Steam Trigger on Handgrip
• Steam Ready Light
• 3 Pivoting Wheels
Detail Cleaning Attachment
This attachment is very useful for cleaning
surfaces that are difficult to reach. It is ideal for
radiators, door and window jambs, shutters and
sanitary fixtures. The following parts can be
applied to this attachment:
6 3

GETTING TO KNOW YOUR SHARK STEAM BLASTER
cont.
OPERATING INSTRUCTIONS
PREPARATION FOR USE
WARNING: ALWAYS unplug the appliance prior to any type
of maintenance on the unit. As all the appliances are
thoroughly tested before sale, there may be some residual
water in the boiler.
ASSEMBLY & OPERATION
To connect the tube and the accessories (fig. 1), insert part
(A) in part (B) turning this slightly to facilitate insertion. Make
sure that key (C) is securely fastened in the hole provided (D).
Open the reservoir cover (1) and pour in 3 1/4 cups
(.8 liters) of tap water or distilled water if your tap water is
particularly hard. Never add cleaning fluids. Close the
reservoir cover (1). Before plugging in the appliance, make
sure that you have assembled the tubes and accessories
correctly and the steam switch on handgrip is “Off”. Press the
on/off switch (2) to “On”; the steam ready light (3) will come
on; when the light (3) switches off (after about 1 minute), you
can start to use the appliance. To spray steam, simply press
the steam switch button on the handle (6) (fig. 2).
When there is no more steam, fill the tank again. To avoid
damage, never use the steam gun without water. If the tank is
full and no steam is sprayed, have the appliance checked by
the manufacturer. Always switch off the appliance after use,
pull out the plug and drain any residual water from water tank.
NOZZLE CLEANING INSTRUCTIONS
Your steamer should not normally require cleaning, however,
should you notice a marked decrease in steam output it may
be necessary to remove mineral deposit build-up from the
nozzle orifice. First ensure that there is water in the tank.
If tank is empty, fill with water, (we recommend using purified
or mineral water), then re-start unit noting whether steam
output is normal. If steam output is still low, follow these cleaning instructions:
1. Unplug steam cleaner from wall outlet.
2. Use a small diameter stiff metal wire such as a straightened metal paperclip
and carefully insert the end of the wire into the nozzle orifice.
3. Move wire back and forth several times to remove any deposits.
4. Reconnect appliance to power outlet, switch on and note steam output.
5. If steam performance does not improve, repeat steps #1 through #4.
This appliance cleans many types of hard surfaces with the force of steam without any
need for chemical cleaning products Obviously, it is also the ideal solution in particular
situations such as removing wall-paper, washing windows and degreasing many hard
surfaces in and around the home.
IMPORTANT INFORMATION
Before using the appliance make sure that the materials or the surfaces to be
cleaned can withstand a temperature of 212° F (100ºC). The steamer is
equipped with a safety device that, in the case of a fault, vents the steam
from the bottom of the appliance.
6
1
2
4
5
3
Important User Information
Please note that this steam cleaner has a “flow through
injection” type boiler and is not a pressurized system. It
will take approximately 45-90 seconds for the steam
injector to heat up and the “steam ready light” to go off.
Once the steam ready light has gone off, push the steam
switch on the handgrip to the “On” position (I) in order to
start the steam flow. Steam power will steadily increase
during the first four (4) minutes of use, after which time
steam output will stabilize. Some steam will condense
around the floor brush when in use and will cause hard
surfaces to become wet during the cleaning process, this
is normal.
STANDARD ACCESSORIES
1. THE HOSE includes the steam switch (6) (see page 6) on the handle.
All the accessories clip onto this and can be removed by pressing the lock key.
2. THE EXTENSIONS (2) are connected to each other and to the handle of the
hose. They extend the range of action and reach of the appliance and assure a
more comfortable working position.
3. THE BRUSH provided is the ideal accessory for cleaning hardwood, vinyl, tile
and marble floors. Two clamps are provided to fasten the cloth towels to the
brush.
4. THE CONCENTRATOR makes it possible to clean in even the tightest corners
(toilet, taps, joints between tiles); the concentrated jet of steam is able to
remove stubborn, ingrained dirt.
5. THE DETAIL BRUSH is combined with the concentrator by inserting
over the tip of the concentrator.
6. THE WINDOW SQUEEGEE has two rubber edges, a scrubber edge and
wiping edge, for cleaning windows and mirrors. When cleaning outside
windows, always avoid any sudden changes in temperature to prevent
breakage or cracks.
FOR CONSTANT EFFICIENCY OF THE APPLIANCE, REMEMBER TO
CLEAN ALL ACCESSORIES AND THE STEAM SUPPLY NOZZLES
REGULARLY
4 5
/