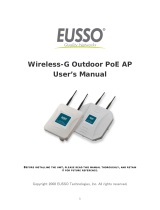
EnGenius Technologies 802.11b User manual

Category
Routers
Type
User manual

This manual is also suitable for

EnGenius Technologies IEEE 802.11b Outdoor Wireless Client Bridge

The EnGenius Technologies IEEE 802.11b Outdoor Wireless Client Bridge is a fully interoperable, IEEE 802.11b compliant Outdoor Wireless Last-mile product. The Wireless Client Bridge operates in remote bridge mode, and connects Outdoor Wireless Router Bridge to construct point-to-point as well as point-to-multipoint topologies, for maximum flexibility in configuring building-to-building networks to WISP.

Key Features

  • 9dBi patch directional antenna
  • Support 24VDC 0.8A Power-over-Ethernet
  • NAT/NAPT and Virtual Server Mapping support
IEEE 802.11b Outdoor
Wireless Client Bridge
User Manual
November 03, 2004
Version 1.00
Before operating the unit, please read this manual thoroughly, and
retain it for future reference.
Version 1.02
i
Contents
CHAPTER 1. INTRODUCTION.................................................................. 1
1.1 INTRODUCING THE WIRELESS CLIENT BRIDGE........................................... 1
1.2 PRODUCT FEATURES ................................................................................. 1
1.3 PACKAGE CONTENTS................................................................................. 1
1.4 SYSTEM REQUIREMENTS ........................................................................... 2
1.5 INLINE POWER INJECTOR (POE) ................................................................ 2
CHAPTER 2. INSTALLATION AND BASIC CONFIGURATION......... 3
2.1 BEFORE YOU START.................................................................................. 3
2.2 LOCATE THE WIRELESS CLIENT BRIDGE AND INLINE POWER INJECTOR
PORTS 4
2.3 PREPARING INSTALLATION........................................................................ 7
2.4 BASIC CONFIGURATION............................................................................. 9
2.4.1 What you need to know..................................................................... 9
2.4.2 Basic Configuration Steps................................................................ 9
2.4.3 Login into the Web Interface.......................................................... 10
2.4.4 Set IP Address, Subnet Mask, Default Route IP............................. 13
2.4.5 Set Wireless Encryption for Wireless Interface.............................. 14
2.4.6 Change Supervisor Account & Password ...................................... 15
2.4.7 Upgrade the Firmware................................................................... 16
2.4.8 Back-up the Wireless client bridge’s Configuration Files ............. 20
CHAPTER 3. NETWORK TOPOLOGIES............................................... 22
3.1 WIRELESS CLIENT BRIDGE-TO-CENTRAL WIRELESS BRIDGE.................. 23
3.2 WIRELESS CLIENT ROUTER-TO-CENTRAL WIRELESS BRIDGE................. 24
3.3 WIRELESS CLIENT BRIDGE-TO-CENTRAL WIRELESS ROUTER................. 25
3.4 WIRELESS CLIENT ROUTER-TO-CENTRAL WIRELESS ROUTER................ 26
CHAPTER 4. NETWORK PARAMETERS.............................................. 28
4.1 IP CONFIGURATION................................................................................. 28
4.2 CONFIGURE SNMP.................................................................................. 28
4.2.1 Configure Community Pool............................................................ 28
4.2.2 Configure Trap Host Pool.............................................................. 30
4.3 CONFIGURE WIRELESS RELATED PARAMETERS ....................................... 32
4.4 UTILITY................................................................................................... 35
4.4.1 Software Upgrade........................................................................... 35
4.4.2 Administration................................................................................ 36
CHAPTER 5. MONITOR INFORMATION ............................................. 37
Version 1.02
ii
5.1 SYSTEM INFORMATION............................................................................ 38
5.2 STATISTIC INFORMATION ........................................................................ 39
5.3 SITE SURVEY........................................................................................... 40
5.4 WIRELESS LINK INFORMATION ............................................................... 41
CHAPTER 6. SPECIFICATIONS.............................................................. 42
6.1 HARDWARE SPECIFICATIONS................................................................... 42
6.2 SOFTWARE SPECIFICATIONS.................................................................... 44
CHAPTER 7. DEFAULT SETTINGS........................................................ 45
7.1 GENERAL CONFIGURATION ..................................................................... 45
7.1.1 System............................................................................................. 45
7.1.2 SNMP ............................................................................................. 45
7.1.3 Wireless LAN.................................................................................. 46
7.2 UTILITY................................................................................................... 48
7.2.1 Software Upgrade........................................................................... 48
7.2.2 Administration................................................................................ 48
CHAPTER 8. REGULATORY COMPLIANCE INFORMATION........ 49
Version 1.02
1
Chapter 1. Introduction
1.1 Introducing the Wireless client bridge
The Wireless client bridge is a fully interoperable with IEEE 802.11b
compliant Outdoor Wireless Last-mile product. The Wireless client bridge
operates in remote bridge mode, and connects Outdoor Wireless Router
Bridge to construct point-to-point as well as point-to-multipoint topologies,
for maximum flexibility in configuring building-to-building networks to WISP.
1.2 Product Features
9 Outdoor enclosure in compliance with IP67
9 RF transmit power 100mW (20dBm) with -85dBm Rx sensitivity
@ 11Mbps data rate
9 Embedded 9dBi patch directional antenna
9 Support 24VDC 0.8A Power-over-Ethernet
9 NAT/NAPT and Virtual Server Mapping support
9 MIB-II and Private MIB support
9 MAC address based access control
1.3 Package Contents
The product package contains the following items.
1. One (1) Wireless client bridge Outdoor Wireless Client Bridge
unit
2. One (1) 100~240VAC, 50~60Hz AC/DC adapter with wall-
mount plug and DC plug power cord
3. One (1) 24VDC, 830mA Inline Power Injector (PoE)
4. Three (3) water protect kit consists of 3 of components
5. One (1) 1.8m grounding wire
6. One (1) User manual CD-disc
7. One (1) wall/mast mounting kit, including one (1) band clamp
Version 1.02
2
1.4 System Requirements
Installation of the Outdoor Wireless Client Bridge requires the following:
1. A Windows-based PC/AT compatible computer or Ethernet
data device with an available RJ-45 Ethernet port to run the
configuration program or with TCP/IP connection to the
Ethernet network.
2. A 10/100Base-T Ethernet RJ-45 Ethernet cable is connected to
Ethernet network.
3. A RS-232 consol port cable is connected to PC/AT compatible
computer.
4. An AC power outlet (100~240V, 50~60Hz) supplies the power.
1.5 Inline Power Injector (PoE)
The Wireless client bridge is equipped with an Inline Power Injector module.
The Inline Power Injector (PoE) delivers both data and power to Wireless
client bridge unit via a signal Ethernet cable, and gives the following
benefits to improve the performance vs. installation cost ratio.
1. This works great in areas where you may not have power
and/or Ethernet easily accessible, like house roof.
2. This also allows you to place the Wireless client bridge unit
closer to the antenna, more easily thus reducing signal loss
over antenna cabling.
3. Ethernet signal travels well over CAT 5 cable but 2.4GHz
signal doesn't do as well over antenna cabling.
4. Ethernet cabling is much cheaper than Antenna cabling.
Version 1.02
3
Chapter 2. Installation and Basic Configuration
This chapter describes the procedures of installing the Wireless client
bridge.
2.1 Before You Start
After unpacking the system, make sure the following items are present and
in good condition.
1. Wireless client bridge Outdoor Wireless Client Bridge unit
2. AC/DC adapter 100~240VAC, 50~60Hz with wall-mount plug
and DC plug power cord
3. Inline Power Injector (PoE) 24VDC, 830mA
4. Water protect kit consists of three of components
5. Grounding wire 1.8m
6. User manual CD-disc
7. Wall/mast mounting kit, including one (1) band clamp
2
3
4
5
7
6
1
Version 1.02
4
2.2 Locate the Wireless client bridge and Inline
Power Injector Ports
Interface on the Wireless client bridge Unit
9 Ethernet Port 1 for connecting the RJ-45 CAT-5 Ethernet
cable.
9 RS-232 Console Port 2 for connecting the 1.8m RS-232 null
modem console cable.
NOTE: The RJ-45 Ethernet cable is not provided in Wireless client bridge
shipping package as an accessory. User can find one from
computer store in accordance with the length required for outdoor
deployment.
NOTE: How to make up Water protect kit
PS:1.Red line is RJ-45 cable
2.Use dryer blew Ardent shrink casing pipe
Before After
Interface on the Inline Power Injector
Version 1.02
5
9 Data Input Port 3 for connecting cross-over Ethernet Cable to
PC or straight Ethernet cable to Hub Switch Router.
9 110~240VAC, 50~60Hz AC/DC power adapter DC Input Port
4
9 Power & Data Output Port 5 for connecting the 30m RJ-45
CAT-5 Ethernet Cable.
9 Grounding Port 6.
NOTE: The cross-over or straight type Ethernet cable is not provided in
Wireless client bridge shipping package as an accessory. User can
find one from computer store in accordance with the length required
for indoor deployment.
Mount Wireless client bridge on A Wall/Pole
The Wireless client bridge can be mounted on the wall, you can use the
Wall Mount kit to mount the Wireless client bridge as shown in Figure
2.2.1.
3
1
2
6
5
4
Version 1.02
6
Figure 2.2.1
You can also mount the Wireless client bridge to the mast as shown in
Figure 2.2.2.
Figure 2.2.2
Version 1.02
7
2.3 Preparing Installation
Before installing Wireless client bridge for the outdoor application in a hard-
to-reach location, we recommend to configure and test all the devices first.
For configuring the Wireless client bridge, please follow the quick steps
below to power up the Wireless client bridge.
Step 1
Attach the 1.8m RS-232 null modem console cable to the Console
Port on the Wireless client bridge unit (refer to page 4
), and the
other end (DB9 female type) to a terminal or a PC running a
terminal emulation program.
Step 2
Plug the DC plug of the AC/DC power adapter into the DC Input
Port of Inline Power Injector and the wall-mount plug into a power
outlet or power strip (refer to page 4
). The Power LED on the Inline
Power Injector will light up.
Step 3
Run the cross-over type uplink Ethernet cable from Data Input
Port (refer topage 4
) to the Ethernet port on a PC
Step 4
Step 5
Step 2
Step 3
Step 1:
Console Port
Connection
Version 1.02
8
NOTE: This connection is required for setting up initial configuration
information. After configuration is completed, the RS-232 null
modem console cable shall be removed, and run a cross-over
Ethernet cable from Data Input Port to PC, or a straight Ethernet
cable to LAN connection, e.g. Hub.
Step 5
Attach one straight Ethernet cable to the Power & Data Output
Port on the Inline Power Injector(refer to page 5
).
Step 6
Plug the other end of the straight Ethernet cable to the Ethernet
Port (refer to page 5
) on the Wireless client bridge.
When the Wireless client bridge receives power over the Ethernet cable,
the Wireless client bridge will start its boot sequence and the Active LED
on the Inline Power Injector will light up.
You can configure the Wireless client bridge via HTML browser, such as
Microsoft Internet Explorer or Netscape Navigator from a remote host or
PC.
Version 1.02
9
2.4 Basic Configuration
2.4.1 What you need to know
The Wireless client bridge can be configured into two operation roles,
including Wireless Client Bridge and Wireless Client Router.
The Wireless client bridge is shipped with default configuration to function
as a client bridge between an Ethernet and Wireless network by attaching
Wireless client bridge to the wired LAN simply. If user would configure
Wireless client bridge, please refer to the following procedures.
2.4.2 Basic Configuration Steps
This section describes a five-step configuration procedure to setup
Wireless client bridge workable upon your topology requirement.
Step 1 Select an operation mode for Wireless client bridge on the web
page “/General Config/System/”, and click FINISH to refresh this
page.
Step 2 Modify the factory-default parameters on the web page “/General
Config/System/”, and click FINISH to save the changes.
Step 3 Modify the factory-default parameters on the web page “/General
Config/Wireless/”, and click FINISH to save the changes.
Step 4 (Optional) Modify other parameters on the web page “/General
Config/”, and click FINISH to save the changes.
Step 5 Move to page “/Utility/Administration/”, select the Save
then Restart and then click FINISH to take effect on the previous
configuration changes.
Version 1.02
10
2.4.3 Login into the Web Interface
The Wireless client bridge supports access to the configuration system
through the use of an HTTP Interface.
Web Configuration
Before configuring Wireless client bridge, user needs to know the IP
Address assigned to the unit. When shipped from the factory, the IP
Address 192.168.5.99 was assigned to the Wireless client bridge by
default. To start a web connection, use http://192.168.2.1
Identify the IP Address assigned to the unit
However, user may change the IP Address later and cannot connect the
unit by using the default IP Address. In this case, it is a must to identify the
Wireless client bridge current IP Address before configuring. To identify the
IP Address, user can use the serial port (refer to page 4
) to gain access of
the current network status.
To start a Serial Port connection by following the steps below.
Step 1 Attach the RS-232 null modem console cable (refer to page 4
and
page 6
) to the RS-232 Console Port on Wireless client bridge.
Connect the other end to a terminal or a PC running a terminal
emulation program.
Step 2 Set the terminal to 115200 baud rate, None Parity, 8 data bits, 1
Stop bit, and ANSI compatible.
Step 3 Run a terminal emulation program on PC, such as Hyper
Terminal, and set the following connection properties.
Step 3.1 Click the Start icon > Program > Accessories >
Communication > Terminal.
Step 3.2 Create a new connection file, and select a Com Port
<COM1, COM2, etc., depending on PC> with
115200bps / 8-bits / 1-stop.
Step 3.3 Click the properties icon in the Tool Bar > setting >
select Emulation terminal VT100 > ok.
Version 1.02
11
Step 4 Reboot Wireless client bridge.
Step 5 When the Wireless client bridge is powered up, the “Current
Network Status” will be displayed as shown below.
Web Access Procedures
Once you identify the IP Address assigned to Wireless client bridge, use
web browser to configure Wireless client bridge through the HTTP
Interface. The following procedure explains how to configure each item.
Step 1 Open your browser and enter the IP Address
Step 2 Press <ENTER> key and the Wireless client bridge Login screen
appears as shown below.
Version 1.02
12
Step 3 Enter root in the User Name and the Password fields, and click
OK to enter the web configuration user interface screen as shown
below.
Web Configuration Structure
The web configuration user interface is grouped into a tree structure, and
contains the following settings or information.
General Configuration
System
TCP/IP
SNMP
Wireless
Running Status
System Info
Statistic Info
Version 1.02
13
Site Survey
Wireless Link Info
Utility
Software Upgrade
Administration
Move through the tree by clicking on an icon to expand or collapse the tree.
The nodes on the tree represent web pages that allow viewing and
modifying the parameters.
2.4.4 Set IP Address, Subnet Mask, Default Route IP
Host Information
The Host Name is not an essential setting, but it helps to identify the device
in network. Use this setting to assign a name to the device.
Version 1.02
14
IP Use MAC Addr.
You can choice Enable or Disable. If you choice Enable , it will set IP =
10.X.X.X that used to last 3 MAC Address ID.
For example :
MAC Addr = 00:47:55:43:43:49 => IP = 10.67.67.73(43hex=67decimal)
If you choice Disable you need setting Bridge IP Address Information.
Bridge IP Address
Use this setting to assign or change the Wireless client bridge IP address.
Bridge Subnet Mask
Enter an IP subnet mask to identify the sub network so the IP address can
be recognized on the LAN.
Default Gateway IP Address
Enter the default Gateway IP Address, and click FINISH at the bottom of
this page to complete the modification of this page.
2.4.5 Set Wireless Encryption for Wireless Interface
The Wireless client bridge supports 64-bit and 128-bit WEP encryption.
For 64-bit WEP encryption, an encryption key is 10 hexadecimal characters
(0-9 and A-F) or 5 ASCII characters.
For 128-bit WEP encryption, an encryption key is 26 hexadecimal
characters or 13 ASCII characters.
Modify the WEP encryption parameters on the web page “/General
Config/Woreless/”. Enter 1~15 characters into the WEP Key field, and
click KeyGen to generate the WEP64 or WEP128 key patterns.
Version 1.02
15
2.4.6 Change Supervisor Account & Password
Enter the Utility > Administration page. The figure below shows the
Utility/ Administration page.
Supervisor Account
Change the supervisor’s user name and password in the Supervisor
Account field, and click FINISH to take effect on the previous configuration
changes.
Apply the New Settings
Step 1 Enter the Utility > Administration page, select the Save then
Restart to apply the new configuration settings.
Step 2 Click FINISH to take effect on the previous configuration changes.
Hint: It takes about 10 seconds, to complete the restart process.
Version 1.02
16
2.4.7 Upgrade the Firmware
Setup your TFTP Server
The Trivial File Transfer Protocol (TFTP) Server allows you to transfer files
across a network. You can download the firmware files for Wireless client
bridge upgrades.
After the TFTP Server is installed, make sure you have the proper TFTP
Server IP address, the proper Wireless client bridge firmware files, and the
TFTP Server is operational.
Update the Firmware using the TFTP method
Step 1 Enter the Utility > Software Upgrade page as shown in the figure
below, and can use TFTP to upgrade Wireless client bridge. Here,
user must specify the TFTP server IP and select which file you
want to upgrade it (Program image, Web image), then click OK
button to start the TFTP upgrade process.
Step 2 If the upgrade process is success, the Wireless client bridge will
apply the new settings and start rebooting right away.
Hint: You must set up a TFTP Server and this server must contain the
latest new image files.
Version 1.02
17
Upgrade the Firmware using RS-232 console
Please refer to Provision 2.4.3
that introduces how to use RS-232 console
port.
Identify the IP Address assigned to the unit.
Step 1 If the connection is normal, when the Wireless client bridge is
powered up, the “Current Network Status” will be displayed as
Version 1.02
18
shown below.
Step 2 Press <Esc> keystroke to reboot the Wireless client bridge. Press
<x> key during the boot process, and it will display prompt
character NetARM> as the figure shown in the next page.
Step 3 Press h” keystroke, it will display related commands as the figure
shown below.
Version 1.02
19
Step 4 Select F -- upgrade Flash memory” and it will display upgrade
items for selection as the figure shown below.
Step 5 Select 3: SOHO” and select “4: WEBIMG” to update the firmware
files one by one.
Step 6 While the window starts to display “C” character continuously, click
Transfer and select the new firmware files <soho.bin> file, press
OK” to start to transfer file to Wireless client bridge.
Step 7 Select 4” to upgrade WEBIMG file. The procedures are the same
with upgrading SOHO file (go back to step 5), but should select
<pfs.img> file correctly for WEBIMG file upgrade.
Step 8 After the upgrade completes, remember to press “R” keystroke to
reboot the system.
Note: The default transfer protocol is using “Xmodem”, so please make
sure you select correct protocol to download/upload files when you
try to upgrade the Wireless client bridge’s firmware files.
Version 1.02
20
2.4.8 Back-up the Wireless client bridge’s Configuration
Files
After configuring Wireless client bridge, user can back-up the configuration
files. User can upload the latest back-up files and recover the Wireless
client bridge configuration to the settings specified in the back-up files.
Downloading Configuration Files
Just being the same with firmware upgrade procedures. After the prompt
character NetARM> is displayed, select “S – Save image to file”, and then
select “6: CONFIG” to back-up the Wireless client bridge configuration as
the figure shown below. The back-up file will be saved as <CONFIG.IMG>
file.
Uploading Configuration Files
To upload an configuration file to Wireless client bridge, user should select
F -- upgrade Flash memory” and then select “6: CONFIG”. While the
window starts to display “C” character continuously, click Transfer and
select the preferred <CONFIG.IMG>, then press OK to start transferring file
to Wireless client bridge.
Version 1.02
21
Note: Remember to press “R” to reboot the system after you upload the
configuration file to the Wireless client bridge
Version 1.02
22
Chapter 3. Network Topologies
This chapter describes several main types of installations implemented by
using the Outdoor Wireless System commonly. This is by no means
intended to be an exhaustive list of all possible configurations, but rather
shows examples of some of the more common implementations. The
Wireless client bridge can only be configured into Wireless Client
Router/Bridge to accomplish the broadband wireless point-to-point, point-
to-multipoint systems with Central Bridge as the figure shown below.
The Wireless client bridge performs in either router or bridge mode. In a
Point-to-Multipoint topology, all communication between network systems is
done through a centralized agent. Among the Outdoor Wireless
Router/Bridge products, the centralized agent is Central Router or Central
Bridge and the individual network notes may be Wireless Client Router or
Bridge .
To show the available Point-to-Multipoint topologies, the following examples
are provided.
1. Wireless Client Bridge-to-Central Wireless Bridge
2. Wireless Client Router-to-Central Wireless Bridge
3. Wireless Client Bridge-to-Central Wireless Router
4. Wireless Client Router-to-Central Wireless Router
Version 1.02
23
3.1 Wireless Client Bridge-to-Central Wireless
Bridge
Step 1 Set the Central Outdoor Unit
*1
(hereinafter, “COU”) to perform a
bridge (bridge IP address: 192.168.2.1).
Step 2 Set Wireless parameters on COU: Channel (1) and SSID
(wireless)
Step 3 Set the Remote Outdoor Unit
*2
(hereinafter, “ROU”) to perform a
bridge (bridge IP address: 192.168.2.2).
Step 4 Set Wireless parameters on ROU: Channel (1) and SSID
(wireless), and these parameters must be the same with COU.
Step 5 Left side subnet is transparent to the right side.
Step 6 DHCP server assign IP address to PC1 and PC2
Remarks:
*1 COU refers to Outdoor Wireless Router Bridge
*2 Both and Wireless client bridge could function the role of ROU
Version 1.02
24
3.2 Wireless Client Router-to-Central Wireless
Bridge
Step 1 Set the COU to perform a bridge (bridge IP address:
192.168.2.1).
Step 2 Set Wireless parameters on COU: Channel (1) and SSID
(wireless).
Step 3 Set the ROU to perform a Router (Wireless Interface IP:
192.168.2.2, Ethernet Interface IP: 192.168.10.1). It is a must to
enable NAT on Wireless Interface (default route is
192.168.2.254).
Step 4 Set Wireless parameters on ROU: Channel (1) and SSID
(wireless), these parameters must same with COU.
Step 5 Set the DHCP server service on the ROU and apply it on Ethernet
Interface.
Step 6 The ROU assigns IP addresses to PC1 and PC2
Version 1.02
25
3.3 Wireless Client Bridge-to-Central Wireless
Router
Step 1 Set the COU to perform a Wireless Router (Wireless Interface IP:
192.168.1.1, Ethernet Interface IP: 192.168.2.1). It is a must to
enable NAT on Ethernet interface (default route: 192.168.2.254).
Step 2 Set Wireless parameters on COU: Channel (1) and SSID
(wireless)
Step 3 Set the DHCP server service on the COU and apply it on Wireless
Interface.
Step 4 Set the ROU to perform a Bridge (Bridge Interface IP:
192.168.1.2).
Step 5 Set Wireless parameters on ROU: Channel (1) and SSID
(wireless), and these parameters must be the same with the COU.
Step 6 The COU assigns IP addresses to PC1 and PC2.
Step 7 The operator can also disable NAT behavior on COU to make the
two subnets transparent.
Version 1.02
26
3.4 Wireless Client Router-to-Central Wireless
Router
Step 1 Set the COU to perform a Wireless Router (Wireless Interface IP:
192.168.1.1, Ethernet Interface IP: 192.168.2.1, default route:
192.168.2.254).
Step 2 Set Wireless parameters on COU: Channel (1) and SSID
(wireless).
Step 3 Set the ROU to perform a Wireless Router (Wireless Interface IP:
192.168.1.2, Ethernet Interface IP: 192.168.10.1, default route:
192.168.1.1).
Step 4 Set Wireless parameters on ROU: Channel (1) and SSID
(wireless), and these parameters must be the same with COU.
Step 5 Set the DHCP server service on the ROU and apply it on Ethernet
Interface.
Step 6 The ROU assigns IP addresses to PC1 and PC2.
Version 1.02
27
The operator can also disable NAT behavior on COU and enable NAT
behavior on ROU (enable NAT on Wireless Interface). In this case, any
outgoing packets will transfer to 192.168.1.2.
The operator can also enable NAT behavior on COU (enable NAT on
Ethernet interface) and enable NAT behavior on ROU (enable NAT on
Wireless Interface).
Version 1.02
28
Chapter 4. Network Parameters
4.1 IP Configuration
Wireless Client Bridge
Step 1 Enter the IP Address manually into the Bridge IP Address field.
Step 2 Use Bridge IP Address setting to assign or change the bridge’s IP
address.
Step 3 Click FINISH at the bottom of this page to complete the
modification of IP address.
4.2 Configure SNMP
Select the /General Config/ TCP/IP/SNMP, and the SNMP screen
appears. The figure below shows the current SNMP community pool and
trap host pool.
4.2.1 Configure Community Pool
The SNMP Community Pool has five entries.
1. To modify the entry, click the select button beside the entry
index number and click Modify. The configuration page
appears as the figure shown below.
Version 1.02
29
2. Specify the Validity, Access Right and Community field.
9 Validity. Select Enable or Disable to control this
community.
9 Access Right. Select a command from the pull down menu
for this field.
9 Community. Enter the password related the Access Right
in this field.
3. Click OK to refresh the current community pool.
4. To modify another community entry to the current community
pool, repeat step 1 through step 3.
5. When you have modified all the entries preferred, click FINISH.
Version 1.02
30
4.2.2 Configure Trap Host Pool
The Trap Host Pool has five entries.
1. To modify a entry, click the select button beside the entry index
number and click Modify . The configuration page appears as
following figure.
2. Specify the Version, IP Address and Community field.
9 Version. Select Disable, Version 1 or Version 2 to control
this trap host.
9 IP Address. Enter the Trap Host IP Address.
9 Community. Enter the password in this field.
Version 1.02
31
3. Click OK to refresh the current trap host pool.
4. To modify another trap host entry to the current trap host pool,
repeat step 1 through step 3.
5. When you have modified all the entries preferred, click FINISH.
Version 1.02
32
4.3 Configure Wireless related parameters
Step 1 Select “/General Config/Wireless” and the Wireless LAN
information page appears as the figure shown below.
Step 2 In the Wireless LAN information page, set the following parameters
suitable for your radio network.
9 rts Threshold (default parameter: 60)
9 frag Threshold (default parameter: 2346)
9 SSID (default parameter: wireless)
9 Station Name (default parameter: ap)
Step 3 Click radio button to disable WEP or enable 64/128 bit WEP
services (default parameter: disable). If WEP is enabled, input
corresponded Default Key index and WEP Key and then click
KeyGen to generate the WEP64 & WEP128 key patterns.
Version 1.02
33
Step 4 Click FINISH at the bottom of this page to complete the
modification.
The following gives more info about the parameters set in the Wireless LAN
information page to users.
rts Threshold
The setting determines the packet size, ranging from 0 to 2339 bytes, at
which the bridge issues a request to send (RTS) before sending the packet.
A low RTS Threshold setting can be useful in areas where many client
devices are associating with the access point, or in areas where the clients
are far apart and can detect only the bridge and not each other.
frag Threshold
The setting determines the size, ranging from 256 to 2338 bytes, at which
packets are fragmented (sent as several pieces instead of as one block).
Use a low setting in areas where communication is poor or where there is a
great deal of radio interference.
SSID
The Service Set ID (SSID) can be any alphanumeric, case-sensitive entry
from 2 to 32 characters long. This string functions as a password to join the
radio network.
Station Name
Enter any alphanumeric, case-sensitive entry.
WEP Key
Enter 1~15 characters for 64 and 128 bits WEP KEY encryption, and then
click KeyGen to generate the WEP64 & WEP128 key patterns
automatically.
WEP
User can Disable or enable 64/128 bit WEP services here.
Default Key
Select an encryption key from the pull down menu.
WEP64 Key1~4 & WEP128 Key1~4
The keys in these fields can be generated automatically by KeyGen
function. For 40-bit encryption, enter 10 hexadecimal digits; for 128-bit
encryption, enter 26 hexadecimal digits. Hexadecimal digits include the
Version 1.02
34
numbers 0 through 9 and the letters A through F. The 40-bit WEP keys
can contain any combination of 10 of these characters; the 128-bit WEP
keys can contain any combination of 26 of these characters. The letters are
not case-sensitive.
Version 1.02
35
4.4 Utility
4.4.1 Software Upgrade
Step 1 Click Utility, select Software Upgrade page as the figure shown
below, and then use TFTP to upgrade AP. In the Utility – Software
Upgrade page, user must specify the TFTP server IP and select
by which file to upgrade (Program image, Web image), then click
OK button to start the TFTP upgrade process.
Step 2 If the upgrade process is success, the AP will apply the new
settings and start rebooting right away.
Hint: You must set up a TFTP server and this server must contain one
latest new image.
Version 1.02
36
4.4.2 Administration
Step 1 Click Utility, Administration. The following figure shows the
Utility – Administration page.
9 Supervisor Account. Change the supervisor’s user name
& password in the Supervisor Account field, and Click
FINISH to take effect on the previous configuration
changes.
9 Apply the New Settings. Click Utility, Administration,
select the Save then Restart to apply the new
configuration settings.
Step 2 Click FINISH to take effect on the previous configuration changes.
Hint: It takes about 10 seconds, to complete the restart process.
Version 1.02
37
Chapter 5. Monitor Information
User can find the system running status and other information on this
window. Click the Running Status link on the left window, use can choose
which function that he wants to monitor.
General System Information
The following information can be found in this block.
9 Product Model
9 Host Name
9 Software Version
9 Build (Built by)
9 Boot Code Version
9 Web Version
9 System Uptime
General System Status
The following information can be found in this block.
9 Operation Mode
9 Bridge IP Address
9 Bridge Subnet
9 Wireless SSID
Services Information
This block shows whether the following services are enabled or disabled.
9 NAPT
9 SNMP
9 MAC Filter
9 WEP encryption.
  • Page 1 1
  • Page 2 2
  • Page 3 3
  • Page 4 4
  • Page 5 5
  • Page 6 6
  • Page 7 7
  • Page 8 8
  • Page 9 9
  • Page 10 10
  • Page 11 11
  • Page 12 12
  • Page 13 13
  • Page 14 14
  • Page 15 15
  • Page 16 16
  • Page 17 17
  • Page 18 18
  • Page 19 19
  • Page 20 20
  • Page 21 21
  • Page 22 22
  • Page 23 23
  • Page 24 24
  • Page 25 25
  • Page 26 26
  • Page 27 27

EnGenius Technologies 802.11b User manual

Category
Routers
Type
User manual
This manual is also suitable for

EnGenius Technologies IEEE 802.11b Outdoor Wireless Client Bridge

The EnGenius Technologies IEEE 802.11b Outdoor Wireless Client Bridge is a fully interoperable, IEEE 802.11b compliant Outdoor Wireless Last-mile product. The Wireless Client Bridge operates in remote bridge mode, and connects Outdoor Wireless Router Bridge to construct point-to-point as well as point-to-multipoint topologies, for maximum flexibility in configuring building-to-building networks to WISP.

Key Features

  • 9dBi patch directional antenna
  • Support 24VDC 0.8A Power-over-Ethernet
  • NAT/NAPT and Virtual Server Mapping support

Ask a question and I''ll find the answer in the document

Finding information in a document is now easier with AI