Sanyo plc wxe45 User manual

Category
Data projectors
Type
User manual

This manual is also suitable for

Multimedia Projector
MODEL PLC-WXE45
Owners Manual
Network Supported
□WiredLAN
100-Base-TX/10-Base-T
*
Refertotheowner’smanual
belowfordetailsaboutnetwork
function.
■NetworkSet-upandOperation
2
ThisMultimediaProjectorisdesignedwiththemostadvancedtechnologyforportability,durability,andeaseofuse.
This projector utilizes built-in multimedia features, a palette of 16.77 million colors, and matrix liquid crystal display
(LCD)technology.
Note:
• The On-Screen Menu and figures in this manual may
differ slightly from the product.
•The contents of this manual are subject to change
without notice.
Lar�e Screen in Limited SpaceLar�e Screen in Limited Space
Short focus lens allows you to project large images
fromshortdistance.(p.13)
Antitheft Alarm Function
This projector is equipped with anAntitheft alarm
function which sounds when a vibration is detected.
(pp.48,51-53)
Security Features
The projector cannot be operated without remote
control.Keep theremote controlsecurely athand to
minimizetheriskoftheft.
Easilyidentifiableorangecabinetforsecurity.
The PIN code lock guards the projector from an
unauthorizeduser.(pp.18,47-48)
Lo�o Function
TheLogofunctionallowsyoutocustomizethescreen
logo. The Logo page identifies the owner of the
projector.(pp.42,43)
Closed Caption
This is a printed version of the program sound or
other information displayed on the screen. You can
turnonthefeatureandswitchthechannels.(p.50)
Simple Computer System Settin�
Theprojectorhas aMulti-scansystem to conformto
almostallcomputeroutputsignalsquickly.(p.26)
Compatibility
The projector widely accepts various video and
computerinputsignalsincluding;Computers,6Color
systems(PAL,SECAM,NTSC,NTSC4.43,PAL-M,or
PAL-N),Componentvideo,S-videoandRGBscart.
LAN Network Function
Thisprojector isloaded withthe Wiredfunction.You
can manage the projector via network. For details,
refer to the owner’s manual Network Set-up and
Operation.”
Quick Termination
TheACpowercordcanbeunpluggedimmediately
afterturningofftheprojectorwithoutwaitingforthe
projectortocooldown.(p.19)
Di�ital Zoom (for Computer)
The digital zoom function allows you to focus
on crucial information during a presentation. You
can expand the images approx. 16 times the
screen sizeand compress them to approximately
aquarterofthescreensize.(p.33)
Blackboard Function
Ablackboardcanbeusedasaprojectionscreen.
(pp.30,37)
*TheboardcolorislimitedtoGreen.
Colorboard Function
At the time of simple projection on the colored
wall,youcangettheclosecolorimagetothecolor
imageprojectedonawhitescreenbyselectingthe
similarcolortothewallcolorfromthepresetfour
colors.
Multilan�ua�e Menu Display
TheOperationmenuisavailablein16languages:
English, German, French, Italian, Spanish,
Portuguese, Dutch, Swedish, Finnish, Polish,
Hungarian,Romanian,Russian,Chinese,Korean,
andJapanese.(p.41)
Switchable Interface Terminal
The projector provides a switchable interface
terminal. You can use the terminal as computer
inputormonitoroutputconveniently.(p.44)
Power Mana�ement
The Power management function reduces power
consumptionandmaintainslamplife.(p.45)
Input Search Function
Inputsignalcanbesearchedautomatically.(p.44)
You can turn on or operate the
projector ONLY via the remote control.
Make sure not to lose the remote
control.
Features and Desi�n
3
Trademarks
Each name of corporations or products in this book is either a registered trademark or a trademark of its
respectivecorporation.
Features and Desi�n . . . . . . . . . . . . . . . 2
Table of Contents . . . . . . . . . . . . . . . . . . 3
To the Owner. . . . . . . . . . . . . . . . . . . . . . 4
Safety Instructions
. . . . . . . . . . . . . . . . . 5
AirCirculation 6
InstallingtheProjectorinProperPosition 6
MovingtheProjector 6
Compliance. . . . . . . . . . . . . . . . . . . . . . . 7
Part Names and Functions
. . . . . . . . . . 8
Front 8
Back 8
Bottom 8
RearTerminal 9
TopPanel 10
AntitheftAlarmSettingButtons 10
RemoteControl 11
RemoteControlBatteryInstallation 12
OperatingRange 12
Installation. . . . . . . . . . . . . . . . . . . . . . . 13
PositioningtheProjector 13
AdjustableFeet 13
ConnectingtoaComputer 14
ConnectingtoVideoEquipment 15
ConnectingtoComponentVideoEquipment 16
ConnectingtheACPowerCord 17
Basic Operation . . . . . . . . . . . . . . . . . . 18
TurningOntheProjector 18
TurningOfftheProjector 19
HowtoOperatetheOn-ScreenMenu 20
MenuBar 21
FocusAdjustment 22
KeystoneCorrection 22
SoundAdjustment 23
RemoteControlOperation 23
Computer Input . . . . . . . . . . . . . . . . . . 25
InputSourceSelection 25
ComputerSystemSelection 26
AutoPCAdjustment 27
ManualPCAdjustment 28
ImageLevelSelection 30
ImageLevelAdjustment 31
ScreenSizeAdjustment 32
Video Input . . . . . . . . . . . . . . . . . . . . . . 34
InputSourceSelection(Video,S-video) 34
InputSourceSelection(Component,RGB
Scart21-pin) 35
VideoSystemSelection 36
ImageLevelSelection 37
ImageLevelAdjustment 38
ScreenSizeAdjustment 40
Settin� . . . . . . . . . . . . . . . . . . . . . . . . . . 41
Setting 41
Antitheft Alarm Function . . . . . . . . . . . 51
HowtoUsetheAntitheftAlarmFunction 51
Maintenance and Cleanin� . . . . . . . . . 54
WarningIndicator 54
CleaningtheAirFilters 55
ResettingtheFilterCounter 55
AttachingtheLensCover 56
CleaningtheProjectionLens 56
CleaningtheProjectorCabinet 56
LampReplacement 57
LampReplacementCounter 58
Appendix. . . . . . . . . . . . . . . . . . . . . . . . 59
Troubleshooting 59
MenuTree 62
IndicatorsandProjectorCondition 64
CompatibleComputerSpecifications 65
TechnicalSpecifications 66
OptionalParts 67
Dimensions 67
PJLinkNotice 68
ConfigurationsofTerminals 69
PINCodeNumberMemo 70
Table of Contents
4
CAUTION:TO REDUCE THE RISK OF ELECTRIC
SHOCK, DO NOT REMOVE COVER
(OR BACK). NO USER-SERVICEABLE
PARTS INSIDE EXCEPT LAMP
REPLACEMENT. REFER SERVICING
TO QUALIFIED SERVICE
PERSONNEL.
THISSYMBOLINDICATESTHAT
DANGEROUSVOLTAGECONSTITUTINGA
RISKOFELECTRICSHOCKISPRESENT
WITHINTHISUNIT.
THISSYMBOLINDICATESTHATTHERE
AREIMPORTANTOPERATINGAND
MAINTENANCEINSTRUCTIONSINTHE
OWNER'SMANUALWITHTHISUNIT.
CAUTION
RISK OF ELECTRIC SHOCK
DO NOT OPEN
Safety Precaution
WARNING: ●THIS APPARATUS MUST BE EARTHED.
●TO REDUCE THE RISK OF FIRE OR
ELECTRIC SHOCK, DO NOT EXPOSE THIS
APPLIANCE TO RAIN OR MOISTURE.
– This projector produces intense light from the
projection lens.Avoid staring directly into the lens,
otherwise eye damage could result. Be especially
careful that children do not stare directly into the
beam.
– Install the projectorina properposition.Otherwise it
mayresultinfirehazard.
– Allowingtheproperamountofspaceonthetop,sides,
and rear of the projector cabinet is critical for proper
aircirculationandcoolingoftheunit.Thedimensions
shown here indicate the minimum space required.
If the projector is to be built into a compartment or
similarlyenclosed,theseminimumdistancesmustbe
maintained.
– Donotcovertheventilationslotontheprojector.Heat
build-upcanreducetheservicelifeofyourprojector,
andcanalsobedangerous.
– Iftheprojectorisunusedforanextendedtime,unplug
theprojectorfromthepoweroutlet.
–Donotprojectthesameimageforalongtime.The
afterimagemayremainontheLCDpanelsbythe
characteristicofpanel.
The symbol mark and recycling systems described below
apply to EU countries and do not apply to countriesin other
areasoftheworld.
Your product is designed and manufactured with high quality
materials and components which can be recycled and/or
reused.
Thesymbolmarkmeansthatelectricalandelectronic
equipment, batteries and accumulators, at their end-oflife,
shouldbedisposedofseparatelyfromyourhouseholdwaste.
Note:
If a chemical symbol is printed beneath the symbol mark,
this chemical symbol means that the battery or accumulator
containsaheavymetalatacertainconcentration.Thiswillbe
indicatedasfollows:Hg:mercury,Cd:cadmium,Pb:lead
IntheEuropeanUnionthereareseparatecollectionsystems
forusedelectricalandelectronicequipment,
batteriesandaccumulators.
Please,disposeofthemcorrectlyatyourlocal
communitywastecollection/recyclingcentre.
Please,helpustoconservetheenvironment
welivein!
CAUTION
Not for use in a computer room as defined in the
StandardfortheProtectionofElectronicComputer/Data
ProcessingEquipment,ANSI/NFPA75.
Ne peut être utilisé dans une salle d’ordinateurs telle
que définie dans la norme ANSI/NFPA 75 Standard
for Protection of Electronic Computer/Data Processing
Equipment.
READ AND KEEP THIS OWNERS MANUAL FOR
LATER USE.
CAUTION
DO NOT SET THE PROJECTOR IN GREASY, WET,
OR SMOKY CONDITIONS SUCH AS IN A KITCHEN
TO PREVENT A BREAKDOWN OR DISASTER.
IF THE PROJECTOR COMES IN CONTACT
WITH OIL OR CHEMICALS, IT MAY BECOME
DETERIORATED.
Beforeinstallingandoperating the projector,read this
manualthoroughly.
The projector provides many convenient features and
functions. Operating the projector properly enables
youtomanagethosefeaturesandmaintainitingood
conditionformanyyearstocome.
Improper operation may result in not only shortening
the product life, but also malfunctions, fire hazard, or
otheraccidents.
Ifyourprojectorseemstooperateimproperly,readthis
manualagain,checkoperationsandcableconnections
and try the solutions in the “Troubleshooting” section
on pages 59~61 of this manual. If the problem still
persists, contact the dealer where you purchased the
projectorortheservicecenter.
To the Owner
SIDEandTOP REAR
5
Allthesafetyandoperatinginstructionsshouldbereadbefore
theproductisoperated.
Read all of the instructions given here and retain them for
later use. Unplug this projectorfromAC power supply before
cleaning. Do not use liquid or aerosol cleaners. Use a damp
clothforcleaning.
Followallwarningsandinstructionsmarkedontheprojector.
Foraddedprotectiontotheprojectorduringalightningstorm,
or when it is left unattended and unused for long periods of
time, unplug it from the wall outlet. This will prevent damage
duetolightningandpowerlinesurges.
Donotexposethisunittorainorusenearwater...forexample,
inawetbasement,nearaswimmingpool,etc...
Donotuseattachmentsnotrecommendedbythemanufacturer
astheymaycausehazards.
Do not place this projector on an unstable cart, stand, or
table.Theprojectormayfall,causingseriousinjurytoachild
or adult, and serious damage to the projector. Use only with
a cart or stand recommended by the manufacturer, or sold
with the projector. Wall or shelf mounting should follow the
manufacturer's instructions, and should use a mounting kit
approvedbythemanufacturers.
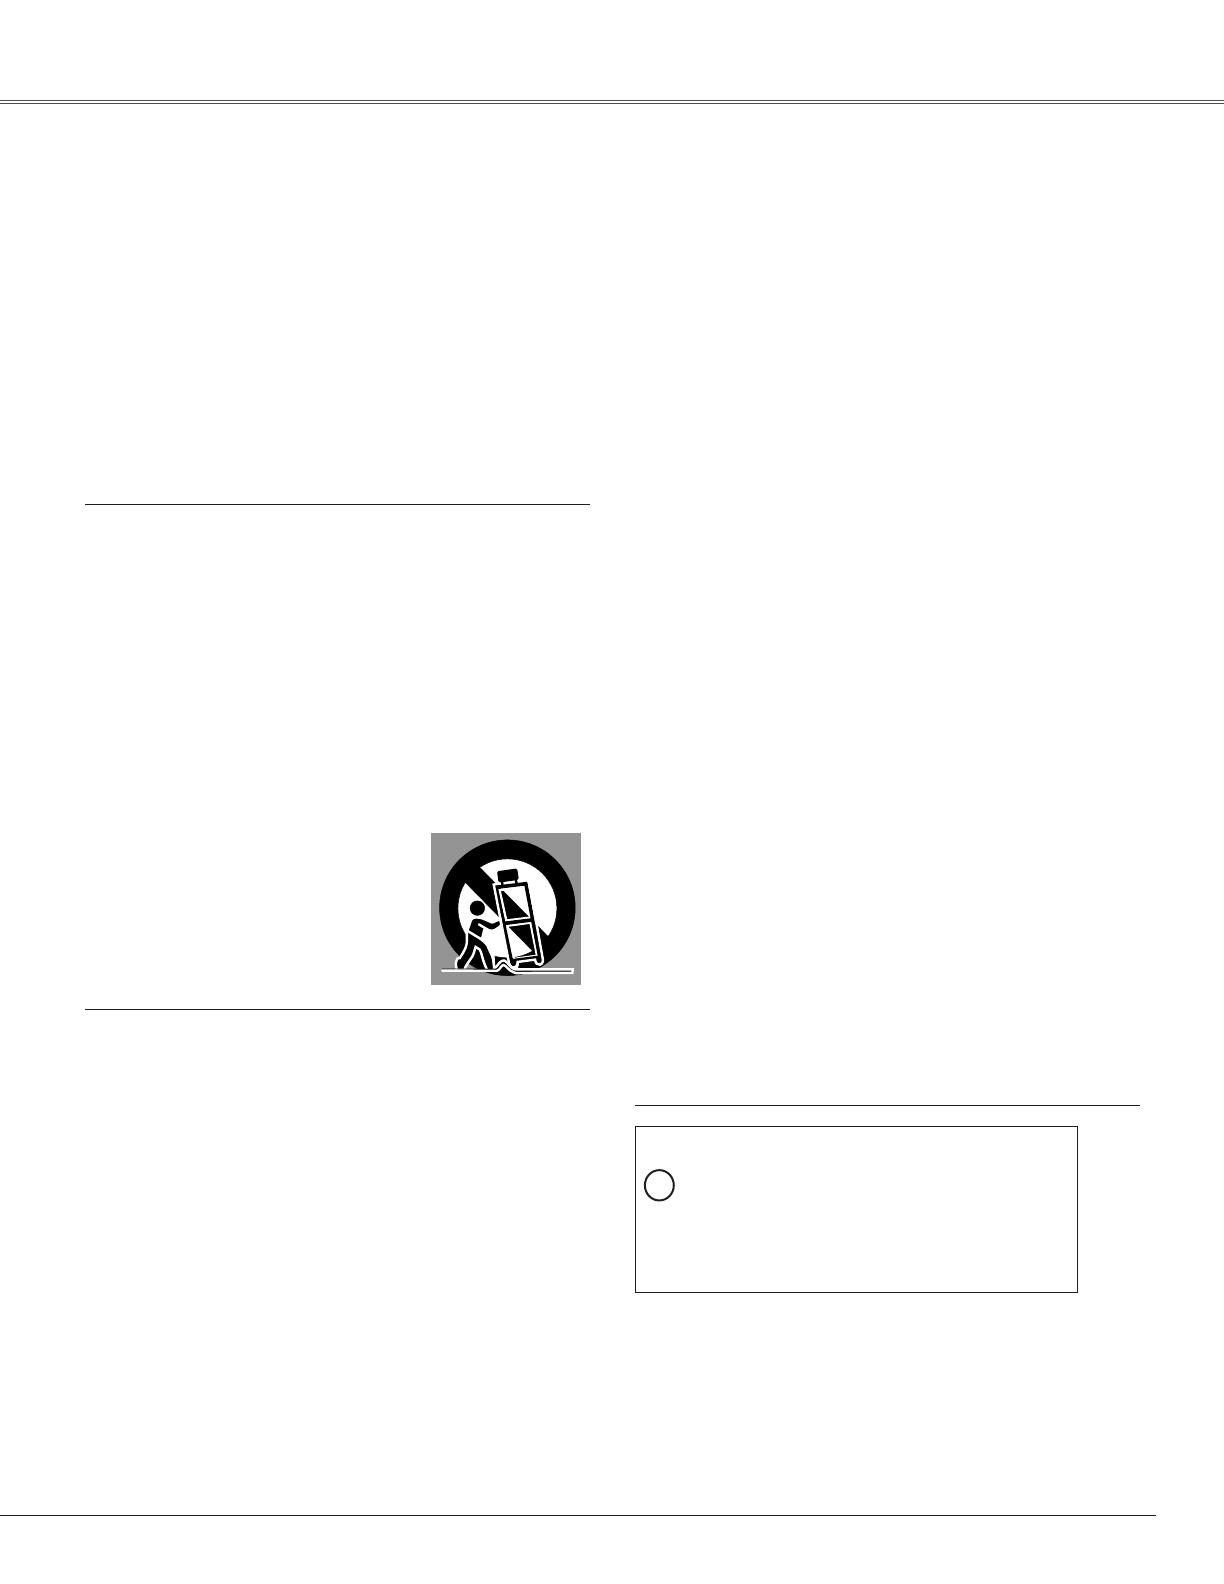
An appliance and cart combination
should be moved withcare. Quick stops,
excessive force, and uneven surfaces
may cause the appliance and cart
combinationtooverturn.
Slotsandopeningsinthebackandbottomofthecabinetare
provided for ventilation, to ensure reliable operation of the
equipmentandtoprotectitfromoverheating.
The openings should never be covered with cloth or other
materials, and the bottom opening should not be blocked
by placing the projector on a bed, sofa, rug, or other similar
surface.Thisprojectorshouldneverbeplacednearorovera
radiatororheatregister.
This projector should not be placed in a built-in installation
suchasabookcaseunlessproperventilationisprovided.
Never push objects of any kind into this projector through
cabinet slots as they may touch dangerous voltage points
or short out parts that could result in a fire or electric shock.
Neverspillliquidofanykindontheprojector.
Do not install the projector near the ventilation duct of air-
conditioningequipment.
Thisprojectorshouldbeoperatedonlyfromthetypeofpower
source indicated on the marking label. If you are not sure of
thetypeofpowersupplied,consultyourauthorizeddealeror
localpowercompany.
Do not overload walloutlets and extension cordsas this can
resultinfireorelectricshock.Donotallowanythingtoreston
the power cord. Do not locate this projector where the cord
maybedamagedbypersonswalkingonit.
Do not attempt to service this projector yourself as opening
or removing covers may expose you to dangerous voltage
or other hazards. Refer all servicing to qualified service
personnel.
Unplug this projector from wall outlet and refer servicing to
qualifiedservicepersonnelunderthefollowingconditions:
a.Whenthepowercordorplugisdamagedorfrayed.
b.Ifliquidhasbeenspilledintotheprojector.
c.Iftheprojectorhasbeenexposedtorainorwater.
d.If the projector does not operate normally by following
the operating instructions. Adjust only those controls that
are covered by the operating instructions as improper
adjustmentofother controlsmayresultin damageandwill
often require extensive work by a qualified technician to
restoretheprojectortonormaloperation.
e.If theprojector has been droppedor the cabinet hasbeen
damaged.
f.Whentheprojectorexhibitsadistinctchangeinperformance
thisindicatesaneedforservice.
When replacement parts are required, be sure the service
technician has used replacement parts specified by the
manufacturerthathavethesamecharacteristicsastheoriginal
part. Unauthorized substitutions may result in fire, electric
shock,orinjurytopersons.
Upon completion of any service or repairs to this projector,
asktheservicetechniciantoperformroutinesafetychecksto
determinethattheprojectorisinsafeoperatingcondition.
To the Owner Safety Instructions
NOTE FOR CUSTOMERS IN THE US
HgLAMP(S)INSIDETHISPRODUCTCONTAIN
MERCURYANDMUSTBERECYCLEDOR
DISPOSEDOFACCORDINGTOLOCAL,STATE
ORFEDERALLAWS.
6
Movin� the Projector
Whenmovingtheprojector,replacethelenscoverand
retracttheadjustablefeettopreventdamagetothelens
and cabinet. When the projector is not in use for an
extendedperiod,putitintoasuitablecase.
Handle the projector carefully; do not drop, bump,
subject it to strong forces, or put other things on the
cabinet.
Donotrolltheprojectormorethan
20degreesfromsidetoside.
Do not point the projector up to
projectanimage.
Donotpointtheprojectordownto
projectanimage.
Do not put the projectoron either
sidetoprojectanimage.
Install the projector properly. Improper Installation may
reducethelamplifeandcausefirehazard.
Installin the Projector in Proper
Position
Openingsinthe cabinetareprovidedfor ventilation.To
ensurereliableoperationoftheproductandtoprotectit
from overheating, these openings must not be blocked
orcovered.
Air Circulation
AirIntake
Vent
ExhaustVent
(Hotairexhaust)
ExhaustVent
(Hotairexhaust)
AirIntake
Vent
CAUTION
Hot air is exhausted from the exhaust vent. When
using or installing the projector, the following
precautionsshouldbetaken.
– Do not put any flammable objects or spray can
neartheprojector.Hotairisexhaustedfromtheair
vents.
– Keeptheexhaustventatleast3’(1 m) away from
anyobjects.
– Donottouchaperipheralpartoftheexhaustvent,
especially screws and metallic part. This area will
becomehotwhiletheprojectorisbeingused.
– Donotputanythingontheprojector.Objectsputon
thecabinetwillnotonlygetdamagedbutalsomay
causefirehazardbyheat.
Coolingfansareprovidedtocooldowntheprojector.
Thefan’srunningspeedischangedaccordingtothe
temperatureinsidetheprojector.
CAUTION IN CARRYING OR
TRANSPORTING THE PROJECTOR
– Do not drop or bump the projector, otherwise
damagesormalfunctionsmayresult.
– When carryingthe projector, usea suitablecarrying
case.
– Donottransporttheprojectorbycourieroranyother
transportserviceinanunsuitabletransportcase.This
maycausedamagetotheprojector.Forinformation
about transporting the projector by courier or any
othertransportservice,consultyourdealer.
– Donotputtheprojectorinacasebeforeitiscooled
enough.
Do not pitch the projector more
than 20 degrees backward and
forward.
Safety Instructions
CAUTION
Choosetherunningspeedofcoolingfansinthefan
controlsettingaccordingtothealtitudeinwhichthe
projector is being used (p.49). Failure to do so may
affecttheprojectorlife.
7
Compliance
AC Power Cord for the United Kin�dom:
This cord is already fitted with a moulded plug incorporating a fuse, the value of which is indicated on the pin face of the plug.
Shouldthefuse needtobereplaced,anASTAapprovedBS 1362fusemustbe usedofthe samerating,markedthus
ASA
.Ifthe
fusecoverisdetachable,neverusetheplugwiththecoveromitted.Ifareplacementfusecoverisrequired,ensureitisofthesame
colourasthatvisibleonthepinfaceoftheplug(i.e.redororange).FusecoversareavailablefromthePartsDepartmentindicated
inyourUserInstructions.
Iftheplugsuppliedisnotsuitableforyoursocketoutlet,itshouldbecutoffanddestroyed.
Theendoftheflexiblecordshouldbesuitablypreparedandthecorrectplugfitted.
WARNING: A PLUG WITH BARED FLEXIBLE CORD IS HAZARDOUS IF ENGAGED IN A LIVE SOCKET
OUTLET.
TheWiresinthismainsleadarecolouredinaccordancewiththefollowingcode:
Green-and-yellow············Earth
Blue·································Neutral
Brown······························Live
As the colours of the wires in the mains lead of this apparatus may not correspond with the coloured markings identifying the
terminalsinyourplugproceedasfollows:
Thewirewhichiscolouredgreen-and-yellowmustbeconnectedtotheterminalintheplugwhichismarkedbytheletterEorbythe
safetyearthsymbol
orcolouredgreenorgreen-and-yellow.
ThewirewhichiscolouredbluemustbeconnectedtotheterminalwhichismarkedwiththeletterNorcolouredblack.
ThewirewhichiscolouredbrownmustbeconnectedtotheterminalwhichismarkedwiththeletterLorcolouredred.
WARNING: THIS APPARATUS MUST BE EARTHED.
TheACPowerCordsuppliedwiththisprojectormeetstherequirementforuseinthecountryyoupurchasedit.
AC Power Cord for the United States and Canada:
ACPowerCordusedintheUnitedStatesandCanadaislistedbytheUnderwritersLaboratories(UL)and
certifiedbytheCanadianStandardAssociation(CSA).
ACPowerCordhasagrounding-typeAClineplug.Thisisasafetyfeaturetobesurethattheplugwillfit
intothepoweroutlet.Donottrytodefeatthissafetyfeature.Shouldyoubeunabletoinsertthepluginto
theoutlet,contactyourelectrician.
THE SOCKET-OUTLET SHOULD BE INSTALLED NEAR THE EQUIPMENT AND EASILY ACCESSIBLE.
AC Power Cord Requirement
Federal Communications Commission Notice
Thisequipmenthas beentestedand foundtocomplywiththelimitsfor aClassB digitaldevice,pursuanttoPart15oftheFCC
Rules. These limits are designed to provide reasonable protection against harmful interference in a residential installation.
This equipment generates, uses, and can radiate radio frequency energy. If it is not installed and used in accordance with the
instructions,itmaycauseharmful interferencetoradiocommunications.However,thereisnoguaranteethatinterferencewill not
occurina particular installation. If this equipment does cause harmful interference to radio or television reception, which can be
determined by turning the equipment offand on, the user is encouraged to try to correct the interferencebyoneor more of the
followingmeasures:
– Reorientorrelocatethereceivingantenna.
– Increasetheseparationbetweentheequipmentandreceiver.
– Connecttheequipmentintoanoutletonacircuitdifferentfromthattowhichthereceiverisconnected.
– Consultthedealeroranexperiencedradio/TVtechnicianforhelp.
UseofshieldedcableisrequiredtocomplywithClassBlimitsinSubpartBofPart15ofFCCRules.
Do not make any changes or modifications to the equipment unless otherwise specified in the instructions. If such changes or
modificationsshouldbemade,youcouldberequiredtostopoperationoftheequipment.
ModelNumber :PLC-WXE45
TradeName:Sanyo
Responsibleparty:SANYOFISHERCOMPANY
Address :21605PlummerStreet,Chatsworth,California91311
TelephoneNo. :(818)998-7322
8
Bottom
Back
Antitheft alarm settin� buttons
Focus Lever
Projection Lens
Lens Cover
(See p. 56 for attachin�)
CAUTION
Hot air is exhausted from the exhaust
vent. Do not put heat-sensitive objects
nearthisside.
Front
CAUTION
Do not turn on the projector with putting
the lens cover on. The light beam may
damage lens cover and result in fire
hazard.
Attach the lens cover while the projector
isnotinusetoavoidscratchingthelens
surface.
Infrared Remote Receiver
Indicators
Speaker
Air Intake Vent
Power Cord Connector
Terminals and Connectors
Lamp Cover
Air Filters
Battery Compartment
(For Antitheft alarm function)
Adjustable Feet
Exhaust Vents
Kensin�ton Security Slot
ThisslotisforaKensingtonlockusedto
detertheftoftheprojector.
*Kensington is a registered trademark ofACCO
BrandsCorporation.
Part Names and Functions
9
Rear Terminal
S-VIDEO IN
MONITOR OUT
COMPUTER IN
2 /
COMPUTER
/
COMPONENT
AUDIO IN
R
VIDEO IN
L
(MONO)
(VARIABLE)
AUDIO OUT
S-VIDEO IN
ConnecttheS-VIDEOoutputfromvideoequipment
tothisjack(p.15).
AUDIO IN
Connecttheaudiooutputfromvideoequipment
connectedtoortothisjack.[Whentheaudio
outputismonaural,connectittoL(MONO)jack
(p.15).
COMPUTER/COMPONENT AUDIO IN
Connecttheaudiooutput(stereo)fromacomputer
orvideoequipmentconnectedtoortothis
jack(pp.14,16).
VIDEO IN
Connectthecompositevideooutputfromvideo
equipmenttoVIDEOjack(p.15).
COMPUTER IN 2/MONITOR OUT
Thisterminalisswitchableandcanbeused
forinputfromacomputeroroutputtotheother
monitor.
SettheterminalupaseitherComputerinputor
Monitoroutputproperly.[UsedforMonitorout,
thisterminaloutputsonlyincomingsignalfrom
COMPUTERIN1/COMPONENTINterminal(pp.
14,44)].
AUDIO OUT (VARIABLE)
Connectanexternalaudioamplifiertothisjack
(pp.14-16).
ThisterminaloutputssoundfromAUDIOIN
terminal(or).
SERVICE PORT
When controlling the projector from a computer,
connect the computer to this connector with a
controlcable.
COMPUTER IN 1/COMPONENT IN
Connectoutputsignalfromacomputer,RGBscart
21-pinvideooutput, or componentvideooutputto
thisterminal(pp.14,16).
Whenthecableisofthelongervariety,itis
advisabletousethisterminalandnotCOMPUTER
IN2/MONITOROUT.
Part Names and Functions
LAN Connection Terminal
ConnecttheLANcable(Refertotheowner's
manualof"NetworkSet-upandOperation".).
10
Top Panel
LAMP REPLACE indicator
Turnyellowwhenthelifeoftheprojectionlamp
drawstoanend.(pp.57,64)
WARNING indicator
Emit a red light when the projector detects
abnormal condition. This also blinks red
when the internal temperature of the projector
exceedstheoperatingrange.(pp.54,64)
POWER indicator
Itturnsredwhentheprojectorisinthestand-by
mode.
It remains green while the projector is under
operation.
(pp.18,64)
Antitheft Alarm Settin� Buttons
Buttons 1-3
UsedforAntitheftalarmsetting.
ALARM indicator
Blinks red to indicate the battery condition or
keyoperation.
F button
UsedforAntitheftalarmsetting.
ThesebuttonsareusedforAntitheftalarmfunction.
(pp.51-53)
Part Names and Functions
Remote Control
Toensuresafeoperation,observethefollowingprecautions:
– Donotbend,drop,orexposetheremotecontroltomoisture
orheat.
– Forcleaning,useasoftdrycloth.Donotapplybenzene,
thinner,spray,oranyotherchemicals.
POWER ON/STAND-BY button
Turntheprojectoronoroff(pp.18,19).
VIDEO button
SelectVIDEOinputport(pp.23,34).
COMPUTER button
SelectCOMPUTERinputport(pp.23,25,35).
MENU button
OpenorclosetheOn-ScreenMenu(p.20).
D.ZOOM ▲▼ buttons
Zoominandouttheimages(pp.24,33).
AUTO PC button
Automaticallyadjustthecomputerimagetoitsoptimum
setting(pp.24,27).
IMAGE button
Selecttheimagelevel(pp.24,30,37).
FREEZE button
Freezethepicture(p.23).
MUTE button
Mutethesound(p.23).
P-TIMER button
OperatetheP-timerfunction(p.24).
NO SHOW button
Temporarilyturnofftheimageonthescreen(p.24).
KEYSTONE button
Correctthekeystonedistortion(pp.22,41).
Point ▲▼◄► (VOLUME + / –) buttons
– SelectanitemoradjustthevalueintheOn-ScreenMenu.
(p.20)
– PantheimageinDigitalzoom+mode(p.33).
– Adjustthevolumelevel(Point◄►buttons)(p.23).
SELECT button
– Executetheselecteditem(p.20).
– ExpandorcompresstheimageinDigitalzoommode.
(p.33)
LAMP CONTROL button
Selectthelampmode(pp.24,46).
11
You can turn on or operate the
projector ONLY via the remote control.
Make sure not to lose the remote
control.
Part Names and Functions
30º
30º
Part Names and Functions
1 2 3
Toensuresafeoperation,pleaseobservethefollowingprecautions:
●Usetwo(2)AAorLR6typealkalinebatteries.
●Alwaysreplacebatteriesinsets.
●Donotuseanewbatterywithausedbattery.
●Avoidcontactwithwaterorliquidmatter.
●Donotexposetheremotecontroltomoistureorheat.
●Donotdroptheremotecontrol.
●Ifthebatteryhasleakedontheremotecontrol,carefullywipethecasecleanandinstallnewbatteries.
●Riskofexplosionifabatteryisreplacedbyanincorrecttype.
●Disposeofusedbatteriesaccordingtotheinstructions.
Openthebattery
compartmentlid.
Installnewbatteriesinto
thecompartment.
Replacethe
compartmentlid.
Two AA size batteries
Forcorrectpolarity(+and
–),besurebatteryterminals
areincontactwithpinsin
thecompartment.
Pointthe remotecontrol towardthe projector
(Infrared Remote Receiver) when pressing
anybutton.Maximumoperatingrangeforthe
remote control is about 16.4’ (5 m) and 60
degreesinfrontoftheprojector.
Operatin� Ran�e
Remote Control Battery Installation
16.4’
(5m)
1212
Note:
•This projector is not equipped with an optical zoom. To adjust the screen size, change the throw distance.
The brightness in the room has a great influence on picture quality. It is recommended to limit the ambient
lighting in order to get the best image.
•All measurements are approximate and may vary from the actual sizes.
50”
80”
110”
A
3.927’(119.7cm)
2.826’(86.1cm)
1.726’(52.6cm)
(InchDiagonal)
Fortheprojectorpositioning,seethefiguresbelow.
Theprojectorshouldbesetperpendicularlytotheplaneofthescreen.
Projectionanglecanbeadjustedupto10.0degreeswith
theadjustablefeet.
Liftthefrontoftheprojectorandpullthefeetlocklatches
onbothsidesoftheprojectorupward.
1
AdjustableFeet
FeetLockLatches
Releasethefeetlocklatchestolocktheadjustablefeet
androtatetheadjustablefeettoadjustthepositionand
tilt.
2
Toretracttheadjustablefeet,liftthefrontoftheprojector
andpullandundothefeetlocklatches.
Keystonedistortionoftheprojectedimagecanbe
correctedbyremotecontroloperationormenuoperation
(pp.22,41).
3
Adjustable Feet
Positionin� the Projector
Installation
13
ScreenSize
(WxH)mm
16:10aspectratio
50” 80” 110”
1077x673 1723x1077 2369x1481
Throwdistance 1.726’(52.6cm) 2.826’(86.1cm) 3.927’(119.7cm)
A
0.623’(19.0cm) 0.846’(25.8cm) 1.069’(32.6cm)
14
Connecting to a Computer
S-VIDEOIN
MONITOR OUT
COMPUTERIN2/
COMPUTER
/
COMPONENT
AUDIO IN
R
VIDEO IN
L
(MONO)
(VARIABLE)
AUDIO OUT
SERVICE PORT
S-VIDEO IN
AUDIO IN
R
VIDEO IN
L
(MONO)
Cables used for connection
• VGA Cables (Mini D-sub 15 pin)*
Audio Cables (Mini Plug: stereo)
(*One cable is supplied; other cables are not supplied with the projector.)
External Audio Equipment
VGA cable
Audio cable
(stereo)
Audio cable
(stereo)
Monitor Output
or
Monitor Input
Audio Output
COMPUTER/
COMPONENT
AUDIO IN
AUDIO OUT
(stereo)
Audio Input
COMPUTER IN 2/
MONITOR OUT
Unplug the power cords of
both the projector and external
equipment from the AC outlet
before connecting the cables.
Note:
Input sound to the COMPUTER/COMPONENT AUDIO IN
terminal when using the COMPUTER IN 1/COMPONENT
IN and the COMPUTER IN 2/MONITOR OUT terminal as
input.
When the AUDIO OUT is plugged-in, the projector’s
built-in speaker is not available.
When the cable is of the longer variety, it is advisable to
use the COMPUTER IN 1/COMPONENT IN and not the
COMPUTER IN 2 /MONITOR OUT.
Monitor Output
COMPUTER IN 1/
COMPONENT IN
VGA cable
This terminal is switchable. Set up the
terminal as either Computer input or
Monitor output (see page 44).
Installation
15
S-VIDEO IN
MONITOR OUT
COMPUTER IN
2 /
COMPUTER
/
COMPONENT
AUDIO IN
R
VIDEO IN
L
(MONO)
(VARIABLE)
AUDIO OUT
Connecting to Video Equipment
Cables used for connection
• Video and Audio Cable (RCA x 3)
• S-VIDEO Cable
Audio Cable (Mini Plug: stereo)
(Cables are not supplied with the projector.)
Note:
When the AUDIO OUT is plugged-in, the projector’s
built-in speaker is not available.
The S-VIDEO jack connection overrides the VIDEO jack
connection when “Auto” is selected in the Input Menu
(p.34).
External Audio Equipment
Audio cable
(stereo)
VIDEO
S-VIDEO
S-Video cable Video and audio cable
Composite Video and Audio OutputS-Video Output
AUDIO IN
Audio Input
AUDIO OUT
(stereo)
(R) (L)
(R) (L) (Video)
(Video)
Unplug the power cords of both the projector
and external equipment from the AC outlet
before connecting the cables.
Installation
16
Connecting to Component Video Equipment
S-VIDEO IN
MONITOR OUT
COMPUTER IN
2 /
COMPUTER
/
COMPONENT
AUDIO IN
R
VIDEO IN
L
(MONO)
(VARIABLE)
AUDIO OUT
Cables used for connection
Audio Cables (Mini Plug: stereo)
• Scart-VGA Cable
• Component Cable
• Component-VGA Cable
(Cables are not supplied with the projector.)
Note:
When the AUDIO OUT is plugged-in, the projector’s
built-in speaker is not available.
External Audio Equipment
COMPUTER IN 1/COMPONENT IN
COMPUTER/
COMPONENT
AUDIO IN
Audio cable
(stereo)
Audio cable
(stereo)
Audio Input
Component Video Output
(Y, Pb/Cb, Pr/Cr)
RGB Scart 21-
pin Output
Audio Output
Scart-VGA
cable
Component-VGA
cable
AUDIO OUT
(stereo)
Component
cable
Unplug the power cords of both the projector
and external equipment from the AC outlet
before connecting the cables.
Installation
CAUTION
TheACoutletmustbenearthisequipmentandmustbeeasily
accessible.
Connectin� the AC Power Cord
ConnecttheACpowercord(supplied)tothe
projector.
17
Note:
UnplugtheACpowercordwhentheprojectorisnotin
use.Whentheprojectorisconnectedtoanoutletwiththe
ACpowercord,itisinstand-bymodeandconsumesa
littleelectricpower.
Installation
Thisprojectorusesnominalinputvoltagesof100–120V
or200–240VACanditautomaticallyselectsthecorrect
inputvoltage.Itisdesignedtoworkwithsingle-phasepower
systemshavingagroundedneutralconductor.Toreduce
theriskofelectricalshock,donotplugintoanyothertypeof
powersystem.
Ifyouarenotsureofthetypeofpowerbeingsupplied,
consultyourauthorizeddealerorservicestation.
Connecttheprojectorwithallperipheralequipmentbefore
turningiton.
Topowercord
connectoronyour
projector.
Projector side AC outlet side
Ground
TotheACoutlet.
(120 V AC)
For Continental EuropeFor the U.S.A. and Canada For the U.K.
TotheACoutlet.
(200–240 V AC)
TotheACoutlet.
(200–240 V AC)
NOTE ON THE POWER CORD
ACpowercordmustmeettherequirementsofthecountrywhereyouusetheprojector.
ConfirmtheACplugtypewiththechartbelowandproperACpowercordmustbeused.
IfthesuppliedACpowercorddoesnotmatchyourACoutlet,contactyoursalesdealer.
Connecttheprojector’sACpowercordintoanAC
outlet.ThePOWERindicatorturnsred.Openthelens
cover.
PressthePOWERON/STAND-BYbuttononthe
remotecontrol.ThePOWERindicatorbecomesgreen
andthecoolingfansstarttooperate.Thepreparation
displayappearsonthescreenandthecountdown
starts.
2
3
1
Thepreparationdisplaydisappearsafter30seconds.
4
Afterthecountdown,theinputsourcethatwas
selectedthelasttimeandtheLampmodestatusicon
(seepage46)willappearonthescreen.
IftheprojectorislockedwithaPINcode,aPINcode
InputDialogBoxappears.EnterthePINcodeas
instructedbelow.
Seepage46fortheLampmode.
Video
Selected Input Source and Lamp Mode
Completeperipheralconnections(withacomputer,
VCR,etc.)beforeturningontheprojector.
Lampmodestatus
OK
AftertheOKicon
disappears,youcan
operatetheprojector.
PIN Code Input Dialo� Box
Turnin� On the Projector
Enter a PIN code
SelectanumberbypressingthePoint▲▼buttons,and
thenpressthePointbuttontofixthenumberandmove
thepointer.Thenumberchangesto"".Ifyoufixedan
incorrectnumber,movethepointertothenumberyouwant
tocorrectbypressingthePointbutton,andthenselect
thecorrectnumberbypressingthePoint▲▼buttons.
Repeatthissteptocompleteenteringafour-digitnumber.
"1234"issetastheinitialPINcodeatthefactory.
Afterenteringthefour-digitnumber,movethepointerto
"Set"bypressingthePointbutton.PresstheSELECT
buttonsothatyoucanstarttooperatetheprojector.
IfyouenteredanincorrectPINcode,"PINcode"andthe
number()turnsred.EnterthecorrectPINcodeall
overagain.
What is PIN code?
PIN(PersonalIdentificationNumber)codeisasecuritycode
thatallowsthepersonwhoknowsittooperatetheprojector.
SettingthePINcodepreventsunauthorizeduseofthe
projector.
APINcodeconsistsofafour-digitnumber.RefertothePIN
codelockfunctionintheSettingMenuonpages47–48for
lockingoperationoftheprojectorwithyourPINcode.
Note:
When the Input Search function is set on
On1 or On2, the input signal will be searched
automatically (p.44).
When the Logo select function is "Off,” the
logo will not be displayed on the screen
(p.42).
When the "Countdown off" or "Off" is selected
in the Display function, the countdown will not
be shown on the screen (p.41).
During the countdown period, all operations
are invalid.
If the PIN code number is not entered within
three minutes after the PIN code dialog box
appeared, the projector will be turned off
automatically.
The “1234” is set as the initial PIN code at the
factory.
CAUTION ON HANDLING THE PIN CODE
If you forget your PIN code, the projector can no
longer be started. Take a special care in setting a
newPIN code;write downthe numberin acolumn
on page 70 of this manual and keep it on hand.
ShouldthePINcodebemissingorforgotten,consult
yourdealerorservicecenter.
18
Basic Operation
16
Note:
The Filter warning and Lamp replacement
icons may appear on the screen depending on
the usage state of the projector.
PressthePOWERON/STAND-BYbuttononthe
remotecontrol,and“Poweroff?”appearsonthe
screen.
PressthePOWERON/STAND-BYbuttonagaintoturn
offtheprojector.ThePOWERindicatorstartstoblink
red,andthecoolingfanskeeprunning.(Youcanselect
thelevelofthefans’quietnessandrunningspeed.See
page49.)AtthistimeyoucanunplugtheACpower
cordevenifthefansarestillrunning.
1
2
TOMAINTAINTHELAMPLIFE,ONCEYOU
TURNTHEPROJECTORON,WAITATLEAST5
MINUTESBEFORETURNINGITOFF.
3
Whentheprojectorhascooleddownenoughtobe
turnedonagain,thePOWERindicatorstopsblinking.
“Poweroff”disappearsafter4seconds.
Power off?
Note:
When the On start function is “On,” this projector is turned
on automatically by connecting the AC power cord to an
AC outlet (p. 46).
The running speed of cooling fans is changed according
to the temperature inside the projector.
Do not put the projector in a case before the projector is
cooled enough.
If the WARNING indicator blinks or emits a red light, see
“Warning Indicator” on page 54.
While the POWER indicator is blinking, the lamp is being
cooled down and the projector cannot be turned on. Wait
until the POWER indicator stops blinking to turn on the
projector again.
The fan rotation will terminate directly if the AC power
cord is unplugged immediately after the projector is turned
off.
The projector can be turned on after the POWER indicator
turns red. The waiting time to restart will be shortened
when the normal power-off processing for fan cooling is
completed, compared with the time the AC power cord is
immediately unplugged after the power-off.
Turnin� Off the Projector
19
DONOTOPERATETHEPROJECTOR
CONTINUOUSLYWITHOUTREST.CONTINUOUS
USEMAYRESULTINSHORTENINGTHELAMP
LIFE.TURNOFFTHEPROJECTORANDLET
STANDFORABOUTANHOURINEVERY24
HOURS.
Basic Operation
Menu bar
Pointer
(red frame)
Menu icon
Item data
PressthePoint◄►
buttonstoadjustthe
value.
SELECT
button
Pointer (red frame)
PressthePoint▲▼
buttonstomovethe
pointer.
Item
How to Operate the On-Screen Menu
On-Screen Menu
Quit
Exitthismenu.
TheprojectorcanbeadjustedorsetviatheOn-Screen
Menu.Foreachadjustmentandsettingprocedure,referto
therespectivesectionsinthismanual.
UsethePoint◄►buttonstoselectaMenuicon;use
thePoint▲▼buttonstoselectanitem.
PresstheSELECTbuttontoshowtheitemdata.To
adjustthedata,usethePoint◄►buttons.Refertothe
relevantpagesformoredetailsabouteachadjustment.
ToclosetheOn-ScreenMenu,presstheMENUbutton
again.
PresstheMENUbuttonontheremotecontrolto
displaytheOn-ScreenMenu.
Note:
The selected item is not active until the SELECT button is
pressed.
1
2
3
SELECT button
POINT buttons
Remote Control
MENU button
20
Press the SELECT button
heretodisplaynextitems.
Press the SELECT button
here to display previous
items.
Basic Operation
  • Page 1 1
  • Page 2 2
  • Page 3 3
  • Page 4 4
  • Page 5 5
  • Page 6 6
  • Page 7 7
  • Page 8 8
  • Page 9 9
  • Page 10 10
  • Page 11 11
  • Page 12 12
  • Page 13 13
  • Page 14 14
  • Page 15 15
  • Page 16 16
  • Page 17 17
  • Page 18 18
  • Page 19 19
  • Page 20 20
  • Page 21 21
  • Page 22 22
  • Page 23 23
  • Page 24 24
  • Page 25 25
  • Page 26 26
  • Page 27 27
  • Page 28 28
  • Page 29 29
  • Page 30 30
  • Page 31 31
  • Page 32 32
  • Page 33 33
  • Page 34 34
  • Page 35 35
  • Page 36 36
  • Page 37 37
  • Page 38 38
  • Page 39 39
  • Page 40 40
  • Page 41 41
  • Page 42 42
  • Page 43 43
  • Page 44 44
  • Page 45 45
  • Page 46 46
  • Page 47 47
  • Page 48 48
  • Page 49 49
  • Page 50 50
  • Page 51 51
  • Page 52 52
  • Page 53 53
  • Page 54 54
  • Page 55 55
  • Page 56 56
  • Page 57 57
  • Page 58 58
  • Page 59 59
  • Page 60 60
  • Page 61 61
  • Page 62 62
  • Page 63 63
  • Page 64 64
  • Page 65 65
  • Page 66 66
  • Page 67 67
  • Page 68 68
  • Page 69 69
  • Page 70 70
  • Page 71 71

Sanyo plc wxe45 User manual

Category
Data projectors
Type
User manual
This manual is also suitable for

Ask a question and I''ll find the answer in the document

Finding information in a document is now easier with AI