Page is loading ...

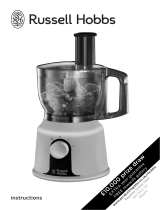
instructions
£10,000 prize draw
EXTRA year guarantee
FREE rewards gallery
www.productregister.co.uk/rhobbs
Register online now!
See back for
details

2

3
Read the instructions, keep them safe, pass them on if you pass the
appliance on. Remove all packaging before use.
A IMPORTANT SAFEGUARDS
Follow basic safety precautions, including:
1 This appliance can be used by persons with
reduced physical, sensory or mental capabilities
or lack of experience and knowledge if they
have been supervised/instructed and
understand the hazards involved.
• Keep the appliance and cable out of reach of
children; they must not use or play with it.
s To avoid injury, take care handling the blades,
emptying the jug, and cleaning.
u Don’t add hot liquid (over 40°C), as it may be
ejected due to sudden steaming.
c Misuse of the appliance may cause injury.
2 Don’t leave it unattended while plugged in.
3 Unplug before assembling, dismantling or
cleaning.
4 If the cable is damaged, return the appliance,
to avoid hazard.
L Don’t put the motor unit in liquid.
5 Don’t use the blender unless the lid and cap are fitted.
6 Don’t put utensils into the jug while the appliance is plugged in.
7 Switch off (0) before fitting the jug or mill to the motor unit.
8 Switch off (0), and wait till the blades stop before removing the
lid from the jug, or removing the jug from the motor unit.

4
9 Don’t use accessories or attachments other than those we supply.
10 Don’t use the appliance for any purpose other than those
described in these instructions.
11 Don’t operate the appliance if it’s damaged or malfunctions.
12 Don’t run the motor for more than 2 minutes, or it may overheat.
After 2 minutes, switch off for at least 2 minutes, to let it cool.
household use only
C PREPARATION
1 Sit the motor unit on a dry, firm, level surface.
2 Route the cable so it doesn’t overhang, and won’t trip or catch.
3 Lower the jug on to the motor unit, then turn the jug clockwise,
to lock it in place.
4 Pull the lid up and off the jug – it’s stiff, because of the seal.
5 Put the ingredients into the jug. Don’t fill it past the 1500ml mark,
or the contents may force the lid off when you start the motor.
C FIT THE LID
6 Put the lid on the jug, and push it down to seal it.
7 Align the pips on the sides of the cap with the slots in the hole in
the lid, put the cap into the hole, and turn clockwise to lock it.
8 Don’t run the blender without the cap.
C POWER UP
9 Check that the speed control is set to 0.
10 Put the plug into the power socket (switch it on, if it’s switchable).
C SPEED CONTROL
11 Turn the speed control clockwise (1 = low, 2 = high).
12 Turn it back to 0 to turn the motor off.
13 Use low speed (1) for lighter applications, using mainly liquid
ingredients, and high speed (2) for heavier applications, using
mainly solid ingredients.
14 Turning it anti-clockwise to Y will give you a short burst at high
speed, for more precise control. In this direction, the control is
spring-loaded. When you let go, it’ll return to 0.

5
C ADDING INGREDIENTS
15 To add ingredients while the blender is working, turn the cap
anti-clockwise to unlock it, lift it off, pour the new ingredients via
the hole, then replace the cap, and turn it clockwise to lock it.
16 Check that the added ingredients don’t push the volume in the
jug past 1500ml.
C FINISHED?
17 Turn the speed control to 0, and wait till the blades stop moving.
18 Turn the jug anti-clockwise to unlock it, and lift it off the motor
unit.
Y CRUSHING ICE
19 Start with half to threequarters of a cup of ice, or 4 to 6 cubes,
and add 15ml (1 tablespoon) of fresh cold water.
20 Put the lid on the blender, then:
a) turn the speed control to Y for a second or so, then release it
b) check the state of the ice
c) repeat till the ice is the consistency that you need
C USING THE MILL
21 Turn the mill upside down.
22 Unscrew the collar.
23 Remove the blade unit and seal.
24 Put the goods to be ground into the bowl – dry goods only.
25 Lower the blade unit and seal on to the bowl.
26 Lower the collar on to the bowl, then screw it into place (just
under 1½ turns).
27 Turn the mill right way up.
28 Lower the mill on to the motor unit, then turn the it clockwise, to
lock it in place.
29 Turn the speed control to Y in short bursts till you achieve the
size of grind you want.
30 Let the speed control return to 0, and wait till the blades stop
moving.
31 Turn the mill anti-clockwise to unlock it, and lift it off the motor
unit.
32 Turn the mill upside down.

6
33 Tap the mill a couple of times to move all the grounds into the
bowl.
34 Unscrew the collar.
35 Remove the blade unit and seal.
36 Empty the bowl.
C CARE AND MAINTENANCE
37 Switch off (0) and unplug before cleaning.
38 Turn the jug anti-clockwise to unlock, and lift it off the motor unit.
39 Handwash the jug, lid and cap.
40 Use a brush to clean the blades.
41 Wipe the outside of the motor unit with a clean damp cloth.
42 Handwash the removable parts.
` You may wash these parts in a dishwasher.
43 If you use a dishwasher, the harsh environment inside the
dishwasher will affect the surface finishes.
44 The damage should be cosmetic only, and should not affect the
operation of the appliance.
F JUG BLADE UNIT
45 If you want to remove the blade unit from the jug for cleaning.
46 Unscrew the jug from the collar.
47 Lift the blade unit out of the collar.
48 Remove the seal.
49 Handwash the collar, seal and blade unit.
50 Replace the seal round the blade unit.
51 Replace the blade unit in the collar.
52 Screw the collar on to the jug.
, Don’t swap the blade units – neither will work properly.

7
a few simple recipes to get you started
coriander pesto (dip, topping or sauce)
4 handfuls fresh leaf coriander 4 cloves fresh garlic
120g pine nuts 250ml olive oil
120g freshly grated Parmesan salt and pepper
Blend the coriander, garlic, pine nuts, and a bit more than half the
oil at speed 2 till smooth. To adjust the thickness, add a little oil,
blend, and repeat. Transfer to a bowl, stir in the Parmesan, and
adjust the seasoning. Serve as a dip (fairly thick), as a topping for
soup (not too thick, but not runny), or with warm pasta (fairly runny).
sweet and sour sauce
2 shallots, peeled 1 clove garlic
small piece fresh ginger, peeled 1 tbsp soy sauce
dash white wine vinegar 1 tsp mustard
1 tsp tomato purée
Blend everything at speed 2 till really smooth. Serve with chicken or
fish, or as a dip.
black olive and anchovy tapenade/sauce
250g pitted black olives 60g anchovy fillets, drained
3 tbsp capers, drained 150ml olive oil
2 tbsp brandy (optional) fresh ground black pepper
Save half the oil. Blend everything else at speed 2 till smooth. To
adjust the thickness, add a little oil, blend, and repeat. For tapenade,
to spread on toast, you need a paste. For sauce, it should be runny.
horseradish and apple sauce
250ml double cream 6 tbsp horseradish relish
2 sharp flavoured apples 2 tsp paprika
Peel and grate the apples. Blend the cream in the jug at speed 2 till
soft peaks form, spoon gently into a large bowl, and gently fold in
the rest of the ingredients. Season with black pepper, and serve
with beef or sausage.
recipes are available on our website:
blending – http://www.russellhobbs.com/ifu/550931
smoothies – http://www.russellhobbs.com/ifu/550941

8
552-528
W
ENVIRONMENTAL PROTECTION
To avoid environmental and health problems due to hazardous
substances in electrical and electronic goods, appliances marked
with this symbol mustn’t be disposed of with unsorted municipal
waste, but recovered, reused, or recycled.
S CUSTOMER SERVICE
If you ring, have the Model No. to hand, as we won’t be able to help
without it. It’s on the rating plate (usually underneath the product).
The product isn’t user-serviceable. If it isn’t working, read the
instructions, check the plug fuse and main fuse/circuit breaker. If it’s
still not working, consult your retailer.
If that doesn’t solve the problem, ring Customer Service for advice.
If they tell you to return the product to us, pack it carefully, include a
note with your name, address, day phone number, and what’s
wrong. If under guarantee, say where and when purchased, and
include proof of purchase (till receipt). Send it to:
Customer Service, Spectrum Brands (UK) Ltd, Fir Street, Failsworth,
Manchester M35 0HS
email: support@russellhobbs.com
telephone: 0845 658 9700 (local rate number)
E GUARANTEE
Defects affecting product functionality appearing within two years
of first retail purchase will be corrected by replacement or repair
provided the product is used and maintained in accordance with the
instructions. Your statutory rights are not affected. Documentation,
packaging, and product specifications may change without notice.
J ONLINE
www.russellhobbs.co.uk for more products
I REGISTER ONLINE FOR –
£10,000 prize draw, EXTRA year guarantee,FREE
rewards gallery
Visit www.productregister.co.uk/rhobbs
You must register within 28 days of purchase.
/