
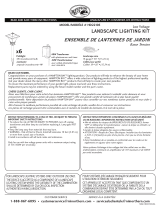
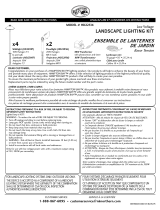
12V AC LED Series
Installation Instruction Guide
Please note these warnings:
1. Do not plug-in transformer until the low-voltage cable is installed and the light fixtures are connected. Also, disconnect the transformer
power before any service to the product.
2. Warning: Risk of electrical shock. Do not install light fixtures within 10 feet of pool, spa or fountain.
3. Warning: Risk of electrical shock. Install power unit 5 feet or more from a pool, spa or fountain. Connect power unit to a receptacle
protected by GFCI protected cover plate receptacle marked "Wet location while in use."
4. Install, operate and maintain system to meet all applicable codes.
5. Operate only 12V AC fixtures on this system.
6. Do not attempt to service, adjust or replace any part of the LED light sources.
7. Always do final aiming and fixture spacing at night for best lighting effect.
8. This product contains chemicals known in the state of California to cause cancer, birth defects and/or other reproductive harm.
Thoroughly wash hands after installing, handling, cleaning or otherwise touching this product.
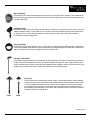
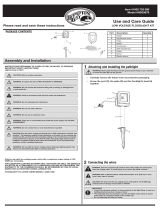
First: P8270 Transformer - Ensure total fixture wattage does not exceed
45
watts. Select transformer mounting location within 30
inches of an 120V, un-switched, GFCI protected outlet. Install mounting screws on 2 5/8 inch centers leaving enough space under the
screw heads to attach the transformer. Strip one end of the low-voltage cable 3/8 inch and separate the leads ½ inch. Push both leads
up into the cable connection point on the bottom and secure with set screws. Hang the transformer on the mounting screws. Install the
photo-control within 40" of the transformer where natural daylight is available. Be careful to aim away from any artificial light source.
Set Transformer Mode:
The P8270 has several operation choices. Off - turns lighting off. On - Lights will burn regardless of
time. Dusk To Dawn - Uses the photo-control to turn lights on at dusk and off at dawn. Timer
Hours - Use if you desire to turn lighting off during the night. Set to the number of "ON" hours you
wish. The photo-control will turn the lighting on when it gets dark and then off when the set number
of hours is reached.
Second: P8617 / P8626 Low-Voltage Cable - Lay the main low-voltage cable along the path
where the light fixtures will be installed. The cable is available in 75ft (P8617) and 150ft (P8626)
lengths.
Third: Place landscape fixtures in the desired locations and connect each to the main low-voltage cable. Place the plastic insert with
curved side down over the main low-voltage cable. While holding these together, slide the plastic insert down the connector guides until
the stainless steel stabs make contact with the low-voltage cable. Tighten the cap, taking care to properly thread, until the cable is
compressed on the stabs. If cable other than #14 is used care must be taken to align cable with stabs. By inverting the plastic insert,
#12 cable can be used.

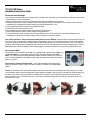
Well Light (P5295)
Remove from carton. Select mounting location and remove dirt, mulch or deck material so fixture is well seated and will
maintain the aiming position you select. Fixture lip should remain above grade. Attach fixture connector (included) to the
main low-voltage cable.
Floodlight (P5299)
Remove from carton. Select spike or deck mount and attach with wing-nut. If deck mounting on a flat surface, secure the
adapter to mounting surface. If spike mounting, press into dirt or mulch while holding the spike. Do not push from head
as damage can occur. Loosen wing-nut to adjust aiming and re-tighten to lock in place. Attach fixture connector
(included) to the main low-voltage cable.
Deck Light (P5296)
Remove from carton. Remove two cover screws, cover, and lens and align at desired mounting location. Two mounting
screws are provided for typical mounting. Securely mount taking care not to damage the LED light source. Replace lens
and cover. Attach fixture connector (included) to the main low-voltage cable.
Path Light – Shell (P5225)
A versatile path light with adjustment of the head from full cutoff (horizontal) to 45 degree up-tilt for flood affect. Carefully
remove from carton protecting head assembly. Slip staff into head fitter and tighten set screw. Tighten knuckle screw to
prevent movement while mounting. Select spike or deck adapter mounting. Mount as desired. Loosen the knuckle screw
to adjust tilt and re-tighten. Attach fixture connector (included) to the main low-voltage cable.
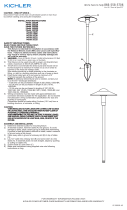
Path Lights
Carefully remove from carton protecting head assembly. Connect staff to head by carefully threading
or slipping the staff in place. Select spike or deck adapter mounting. If deck mounting on a flat surface,
secure the adapter to mounting surface, insert fixture staff, and tighten set screw. If spike mounting,
insert staff into spike and tighten set screw. When locating the spike fixture, press into dirt or mulch
while holding the spike. Do not push from head or staff as damage can occur. Attach fixture connector
(included) to the main low-voltage cable.
P5297 P5298
93033064 (12/01/10)
Page is loading ...
Page is loading ...
-
 1
1
-
 2
2
-
 3
3
-
 4
4


Progress Lighting P5299-31 Operating instructions
- Type
- Operating instructions
Ask a question and I''ll find the answer in the document
Finding information in a document is now easier with AI
in other languages
Related papers
Other documents
-
luminii Leto 15 Canopy Installation guide
-
 Hampton Bay HD22928BK Installation guide
-
Prime TNCDTSTK6 User manual
-
 Kichler Lighting 15880CBR30 User manual
-
 Hampton Bay HD33970BK Installation guide
-
 Hampton Bay HD33679BK User manual
-
 Hampton Bay HD22105BK Operating instructions
-
 Hampton Bay HD22514AGB Operating instructions
-
 Proscapes 8608-0605-01 Installation guide
-
 Dekorators 180271 Installation guide


