Instruction
Manual
Manuel d’instructions
Manual de instrucciones
Model # is located by barcode.
Please write your model # on your sales receipt or below.
Le numéro de modèle se trouve à côté du code-barres.
Veuillez inscrire le numéro de modèle sur votre reçu de vente ou ci-dessous.
El numéro de modelo está ubicado al lado del código de barras.
Sirvase escribir el numéro de modelo en el recibo de compra o debajo.
Model Number:
FN 20016906-F AG
CARACTÉRISTIQUES SPÉCIALES
Bouton de changement d’aspersion
(sur certains modèles) :
Sur les modèles AST/ASO, le mode
d’aspersion est contrôlé par un bouton-
poussoir qui vous permet de sélectionner
soit l’aspersion corps entier, soit l’aspersion
haute puissance concentrée. Pour modifier le réglage, appuyer sur le
bouton situé à la base de la douchette de manière à ce qu’il dépasse
de l’autre côté de sa position actuelle.
Modèles AST : Modifier l’orientation de la douchette
en desserrant l’écrou puis en repositionnant la
douchette. Reserrer ensuite. Permet une aspersion
plus haute, plus basse ou plus large.
Bouton de Ruissellement éconergique
(sur certains modèles) :
Pour utiliser le bouton, il suffit d’appuyer sur
le bouton de changement d’aspersion situé à
l’arrière de la douchette. Pour revenir au mode
d’aspersion d’origine, appuyer sur le bouton
situé de l’autre côté de la douchette.
OPERATION
Spray Selector (On Some Models):
Spray Selector allows you to select from various
spray patterns. On some models spray pattern
is controlled by the small lever that rotates left
and right.
EN FRANÇAIS AU VERSO
ENGLISH
Thank you for purchasing this Waterpik
®
shower head. This booklet
will give you the information to make installation easy and quick. You
are close to enjoying a powerful and invigorating shower experience
with your new Waterpik
®
shower head.
You can view more information about Waterpik
®
shower head
products at www.waterpik.com.
Note: Pictures shown may not directly match your shower head.
PRIOR TO INSTALLATION
• Write down your model number in the allotted space above. (model
number is found on the packaging near barcode).
If you do not have the package you may find the model number on
our website www.waterpik.com.
FRANÇAIS
Nous vous remercions pour votre acquisition de ce produit de
douchage Waterpik
®
. L’information présentée dans cette brochure
vous permettra d’exécuter facilement et rapidement l’installation du
produit. Vous pourrez dans peu de temps bénéficier de la puissance
et des effets rafraichissants de votre nouveau produit de douchage
Waterpik
®
.
Vous pouvez trouver sur notre site Internet www.waterpik.com de
l’information additionnelle.
Note : Les illustrations incluses peuvent ne pas représenter
exactement le produit acheté (douchette).
AVANT L’INSTALLATION
• Inscrire dans l’espace ci-dessus le numéro de modèle du produit
(le numéro de modèle du produit figure sur l’emballage, à proximité
du code à barres).
Si l’emballage du produit n’est plus disponible, on peut trouver
le numéro de modèle du produit sur notre site Internet
www.waterpik.com.
WARNING:
1 To avoid hot water dangers and conserve even more energy, make
sure your water heater is set at 120°F (48.9°C) or below.
2 Test the tub/shower water with your hand before bathing.
3 For additional safety for Ecoflow
®
or high efficiency shower heads,
it is recommended that all homes have installed a pressure balance
tub and shower valve with the rotational limit stops properly set by
a plumber.
4 For external use only. The potentially deadly amoeba, Naegleria
fowleri, may be present in some tap water or unchlorinated well
water.
CARE AND CLEANING
• To maintain proper working conditions cleaning is required when
mineral deposits appear on the spray orifices. To clean mineral
deposits, gently rub the rubber nozzles on the face of the shower
head to dislodge.
• To clean heavier deposits, remove shower head and soak face
down in 1-2 cups of white vinegar (use white vinegar only) for
about 2-3 hours. Replace shower head and run in each mode to
flush out vinegar. Repeat as necessary.
• Do not clean or rinse any part with harsh chemicals, heavy duty
EcoRain
®
is a trademark of Water Pik, Inc. registered in Australia, Canada, China,
Mexico, and the United States.
OptiFlow
®
is a trademark of Water Pik, Inc. registered in Australia, Canada, China,
EU, Hong Kong, India, Japan, Korea, Mexico, and the United States.
EasySelect
®
is a trademark of Water Pik, Inc. registered in Australia, Canada,
China, EU, Mexico, Taiwan and the United States.
Shower Massage
®
is a trademark of Water Pik, Inc. registered in Canada.
The Original Shower Massage
®
is a trademark of Water Pik, Inc. registered in the
United States.
Treat Yourself Better
®
is a trademark of Water Pik, Inc. registered in the
United States.
The Plus is in the Power
®
is a trademark of Water Pik, Inc. registered in Canada,
Mexico and the United States.
A Powerful and Invigorating Experience
®
is a trademark of Water Pik, Inc.
registered in Canada, Mexico and the United States.
PowerPulse Massage
®
is a trademark of Water Pik, Inc. registered in Mexico.
© 2016 Water Pik, Inc. Printed in China.
Water Pik, Inc.
1730 East Prospect Road
Fort Collins, CO 80553-0001 U.S.A.
www.waterpik.com
• Remove old shower head and remove all pipe tape as well.
• Insure that the washer from the old shower is not connected to the
pipe. Use a thin utensil to check inside the pipe for washers, such
as a pencil or screw driver. Do not use your fingers.
• No tools needed for shower head installation.
• Retirer la douchette existante; éliminer également les résidus de
composé d’étanchéité des tuyauteries.
• Veiller à ce que le joint de la douchette existante ne reste pas
attaché sur le tube d’alimentation. Utiliser un ustensile mince tel un
crayon ou un tournevis pour vérifier qu’aucun joint ne se trouve à
l’intérieur du tube d’alimentation. Ne pas utiliser les doigts.
• Aucun outil n’est nécessaire pour l’installation de la douchette.
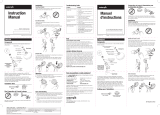
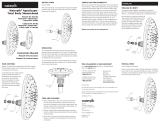
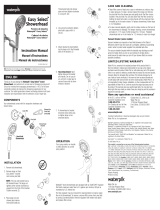
1. Install fixed mount shower head
by holding the shower head in
position and threading the pivot
ball nut onto the pipe by turning
clockwise until it is snug. Hand
tighten only.
INSTALLATION
Fixed Mount
Shower Head
Washer
Filter Screen (actual item may
vary from that illustrated)
Pivot Ball Nut
J-pipe
1
TROUBLESHOOTING GUIDE
Problem Solution
No water flow from installed
shower head.
a Confirm previous shower washer is not in
the j-pipe.
b Confirm there is only one washer in the
pivot ball.
Low water pressure or
missing spray patterns.
a Clean shower head in vinegar/water
solution. (See care & cleaning section).
b Clean filter screen.
Leaking at pipe pivot ball
connection.
a Confirm only one washer is seated on top
of the screen.
b Grate bar of soap across the j-pipe
threads to act as a sealant.
c Make sure all pipe tape is removed from
j-pipe. Please refer back to installation
instructions for pipe tape.
Shower head is too stiff to
change angle
a Install shower head to provide additional
leverage to change angle of spray (contact
Water Pik for further instructions) See
Toggle Button spray pattern instructions.
UTILISATION DU PRODUIT
Sélecteur du mode d’aspersion
(sur certains modèles) :
Le sélecteur du mode d’aspersion permet de
choisir l’un des modes d’aspersion disponibles
sur la douchette. Le pivotement d’une petite
manette (vers la droite ou vers la gauche)
permet la sélection du mode d’aspersion.
GUIDE DE DÉPANNAGE
SPECIAL FEATURES
Toggle Button (On Some Models):
Spray patterns for AST/ASO models are
controlled by a push button which allows
you to select either the full-body spray or
the concentrated power spray. To change
the setting, push the button at the base
of the shower head so that it extends to the
opposite side of its current position.
AST Models: Change the orientation of
your shower head by loosening the nut and
repositioning shower head; retighten. Allows for
higher, lower or wider spray coverage.
Water Saving Trickle Button
(On Some Models):
To use the button simply push the toggle
button on the back of the shower head. To
return to orginal setting, push button on other
side of the shower head.
cleaners, or abrasives; this may damage parts or finish and will
void warranty.
• Clean filter screen by removing from the pivot ball and rinse by
back flushing to remove particles. Follow step 1 under installation
to reinstall shower head, making sure washer is re-seated on top
of filter screen.
LIMITED LIFETIME WARRANTY
Save your receipt as proof of purchase is required for warranty
action. Water Pik, Inc. warrants to the original purchaser of this
product that it is free from defects in material and workmanship for
as long as the original purchaser owns this product. Water Pik, Inc.
will replace any part of the product which in our opinion is defective,
provided that the product has not been abused, misused, altered or
damaged after purchase. (This includes damage due to use of tools
or harsh chemicals.) In the event an item has been discontinued we
will replace with what we deem to be the closest product. Water
Pik, Inc. is not responsible for labor charges, installation, or other
consequential cost. The responsibility of Water Pik, Inc. shall not
exceed the original purchase price of the product. This warranty gives
you specific legal rights. You may also have other rights that vary
where you reside.
Have any questions or need assistance?
For quick service prior to calling have your model number and receipt
ready.
In the U.S., call our toll-free
Customer Assistance Line
1-800-525-2774.
In Canada, call our toll-free
Customer Assistance Line
1-888-226-3042.
www.waterpik.com
Outside the U.S., write us at
Water Pik, Inc.
1730 East Prospect Road
Fort Collins, CO 80553-0001
U.S.A
If product malfunctions or becomes damaged, stop use and contact
Water Pik, Inc. for replacement.
Waterpik
®
is a trademark of Water Pik, Inc. registered in Argentina, Australia,
Austria, Benelux, Canada, Chile, China, Czech Republic, EU, Finland, France,
Germany, Hong Kong, Hungary, India, Israel, Italy, Japan, Korea, Mexico, Norway,
Poland, Russian Federation, South Africa, Spain, Sweden, Switzerland, Taiwan,
Turkey, Ukraine, and the United States.
Waterpik
®
(stylized) is a trademark of Water Pik, Inc. registered in Australia,
Canada, China, EU, Hong Kong, India, Israel, Japan, Korea, Mexico, Russian
Federation, Switzerland, Taiwan and the United States.
EcoFlow
®
is a trademark of Water Pik, Inc. registered in Australia, Canada, China,
EU, Hong Kong, Mexico, and the United States.
Problème Solution
Aucun débit d’eau par
la douchette installée.
a Vérifier que la rondelle d’origine de la douche
n’est pas restée dans le tube d’alimentation
courbé.
b Vérifier qu’il n’y a qu’une seule rondelle dans
l’écrou.
Basse pression de
l’eau, ou absence
de certains modes
d’aspersion.
a Nettoyer la douchette dans une solution
vinaigre/eau (voir la section Entretien et
nettoyage).
b Nettoyer le tamis.
Fuite à la connexion
tube d’alimentation/
boule d’articulation.
a Vérifier la présence d’une unique rondelle
au-dessus du tamis de filtration.
b Gratter une savonnette avec le filetage du
tube d’alimentation - le savon assurera
l’étanchéité.
c S’assurer que tout l’adhésif à tuyauterie a été
retiré du tube d’alimentation courbé. Consulter
de nouveau les instructions d’installation
concernant l’adhésif à tuyauteries..
Montage trop rigide de
la pomme de douche
– modification de
l’orientation impossible
a Installer la pomme de douche de manière à
pouvoir exercer un plus grand effet de levier,
pour pouvoir changer l’orientation de la pomme
de douche et des jets (contacter WaterPik
pour d’autres instructions). Voir les instructions
ci-dessus relatives aux modes d’aspersion du
Bouton de changement d’asperion.
INSTALLATION
Nut
Douchette fixe
Rondelle
Tamis de filtration
Écrou de la boule
d’articulation
Tube
d’alimentation
(courbé)
1. Installer la douchette fixe en
maintenant la douchette en
position puis en enfilant la boule
d’articulation sur le tuyau en la
tournant dans le sens horaire
jusqu’à ce que celle-ci soit bien
serrée. Serrer uniquement à la
main.
1
Écrou


