Page is loading ...

Pure-12A 12” Full Range Top Cabin V1
Order code: D3721
MANUAL
Highlite International B.V. – Vestastraat 2 – 6468 EX – Kerkrade – the Netherlands
ENGLISH

1
Pure-12A 12” Full Range Top Cabin
Order code: D3721
Table of contents
Warning ............................................................................................................................................................................... 2
Safety Instructions ......................................................................................................................................................... 2
Operating Determinations .......................................................................................................................................... 4
Connection with the mains......................................................................................................................................... 4
Return Procedure .......................................................................................................................................................... 5
Claims .............................................................................................................................................................................. 5
Description of the device ................................................................................................................................................. 6
Overview ........................................................................................................................................................................ 6
Back ................................................................................................................................................................................. 7
Installation ........................................................................................................................................................................... 9
Setup and Operation ......................................................................................................................................................10
Connection Example 1 (2 x Pure-10A/Pure-12A/Pure-15A and 2 x Pure-15AS/Pure-18AS) ..........................10
Connection Example 2 (2 x Pure-10A/Pure-12A/Pure-15A and 1 x Pure-15AS/Pure-18AS) ..........................11
Control Panel ...............................................................................................................................................................12
Main Menu Options ....................................................................................................................................................12
1. Preset......................................................................................................................................................................13
2. LowEQ ....................................................................................................................................................................13
3. MidEQ ....................................................................................................................................................................13
4. HighEQ ...................................................................................................................................................................13
5. Highpass ................................................................................................................................................................14
6. Delay ......................................................................................................................................................................14
7. Limit ........................................................................................................................................................................14
8. Phase......................................................................................................................................................................14
9. FrontLED .................................................................................................................................................................15
10. Contrast ...............................................................................................................................................................15
11. Display .................................................................................................................................................................15
12. SleepMode .........................................................................................................................................................15
13. Lock ......................................................................................................................................................................16
14. PasswordSet ........................................................................................................................................................16
15. NameSet .............................................................................................................................................................16
16. Store .....................................................................................................................................................................17
17. Recall ...................................................................................................................................................................17
18. Reset.....................................................................................................................................................................18
19. Info ........................................................................................................................................................................18
20. Exit .........................................................................................................................................................................18
Connection Cables .........................................................................................................................................................19
Maintenance ....................................................................................................................................................................20
Replacing the Fuse .....................................................................................................................................................20
Troubleshooting ...............................................................................................................................................................20
No Sound ......................................................................................................................................................................20
Sound Warping ............................................................................................................................................................20
Product Specifications ....................................................................................................................................................21

2
Pure-12A 12” Full Range Top Cabin
Order code: D3721
Warning
Unpacking Instructions
Immediately upon receiving this product, carefully unpack the carton and check the contents to ensure
that all parts are present, and have been received in good condition. Notify the dealer immediately and
retain packing material for inspection if any parts appear damaged from shipping or the carton itself
shows signs of mishandling. Save the carton and all packing materials. In the event that a fixture must be
returned to the factory, it is important that the fixture be returned in the original factory box and packing.
Your shipment includes:
● DAP Audio Pure-12A 12” Full Range Top Cabin
● Pro power cable (1,5 m)
● User manual
Safety Instructions
Every person involved with the installation, operation and maintenance of this system has to:
● be qualified
● follow the instructions of this manual
Before your initial start-up, please make sure that there is no damage caused by transportation.
Should there be any, consult your dealer and do not use the system.
To maintain perfect condition and to ensure a safe operation, it is absolutely necessary for the user to
follow the safety instructions and warning notes written in this manual.
Please consider that damages caused by manual modifications to the system are not subject to
warranty.
This system contains no user-serviceable parts. Refer servicing to qualified technicians only.
IMPORTANT:
The manufacturer will not accept liability for any resulting damages caused by the non-observance of
this manual or any unauthorized modification to the system.

3
Pure-12A 12” Full Range Top Cabin
Order code: D3721
● Always disconnect power from the mains, when system is not used. Only handle the power cord by
the plug. Never pull out the plug by tugging the power cord.
● Always operate the unit with the AC ground wire connected to the electrical system ground.
● Avoid flames and do not put close to flammable liquids or gases.
● Avoid ground loops! Always be sure to connect the power amps and the mixing console to the
same electrical circuit to ensure the same phase!
● Avoid installing your equipment very near radio or TV sets, mobile phones, etc., as these can cause
RF (radio frequency) interference.
● Avoid loud feedback from microphones. This can damage your speaker.
● Before changing your grounds around, always turn your amplifiers down.
● Do not connect this device to a dimmer pack.
● Do not drive the inputs with a signal level higher than required to drive the equipment to full output.
● Do not open this device. Risk: hazardous radiation exposure.
● Do not open the device and do not modify the device.
● Do not switch the system on and off in short intervals, as this would reduce the system’s life.
● Extreme frequency boosts in connection with a high input signal level may lead to overdriving your
equipment. Should this occur, it is necessary to reduce the input signal level by using the INPUT
control.
● For replacement use fuses of same type and rating only.
● If device is dropped or struck, disconnect mains power supply immediately. Have a qualified
engineer inspect for safety before operating.
● If the system has been exposed to drastic temperature fluctuation (e.g. after transportation), do not
switch it on immediately. The arising condensation water might damage your system. Leave the
system switched off until it has reached room temperature.
● If your DAP Audio device fails to work properly, discontinue use immediately. Pack the unit securely
(preferably in the original packing material), and return it to your DAP Audio dealer for service.
● Make sure that the available voltage is not higher than stated on the rear panel.
● Make sure that the power cord is never crimped or damaged. Check the device and the power
cord from time to time.
● Make sure that the signals into the mixer are balanced, otherwise hum could be created.
● Make sure that there is sufficient room on all sides of the system for air circulation.
● Make sure you do not use the wrong kind of cables or defective cables.
● Make sure you use DI boxes to balance unbalanced signals; All incoming signals should be clear.
● Never let the power cord come into contact with other cables! Handle the power cord and all
connections with the mains with particular caution!
● Never remove warning or informative labels from the unit.
● Never modify, bend, mechanically strain, put pressure on, pull or heat up the power cord.
● Never use anything to cover the ground contact.
● Never use the device during thunderstorms, unplug the device immediately.
● Only use device indoors, avoid contact with water or other liquids.
● Prevent distortion! Make sure that all components connected to the Pure-12A have sufficient power
ratings. Otherwise distortion will be generated because the components are operated at their limits.
● Repairs, servicing and electric connection must be carried out by a qualified technician.
● The best way (even if not always feasible) to avoid ground loops is to connect the electric ground of
all the equipment to a single central point (“star” system). In this case, the central point can be the
mixer.
● To avoid or solve hum and buzzing troubles, try different combinations of lifting grounds on units that
are supplied with ground lift switches or make sure all chassis are connected to earth ground, either
through the A.C. power cord ground or by the front panel rack mount screws.
● To emphasize a frequency range, you do not necessarily have to move its respective slider upwards;
instead, try lowering surrounding frequency ranges. This way, you avoid causing the next piece of
equipment in your sound path to overdrive. You also preserve valuable dynamic reserve
(“headroom”).
● The user is responsible for correct positioning and operating of this product. The manufacturer will not
accept liability for damages caused by the misuse or incorrect installation of this device.
● When connecting the other parts of your sound system, watch out for the so-called “ground loops”.
● Please read this manual carefully and keep it for future reference.
● WARRANTY: Till one year after date of purchase.

4
Pure-12A 12” Full Range Top Cabin
Order code: D3721
Operating Determinations
This system is not designed for permanent operation. Consistent operation breaks will ensure that the
system will serve you for a long time without defects.
If this system is operated in any other way than the one described in this manual, the product may suffer
damages and the warranty becomes void.
Any other operation may lead to dangers like short-circuit, burns, electric shock, etc.
You endanger your own safety and the safety of others!
Improper installation can cause serious injuries and damage of property !
The Pure-12A speaker can be placed on a flat stage floor or be hung from a ceiling by means of the
Speaker hanging eye (D8436).
Refer installation to a qualified technician! Do not attempt installation yourself!
Connection with the mains
Connect the device to the mains with the power-plug.
Always pay attention, that the right color cable is connected to the right place.
International
EU Cable
UK Cable
US Cable
Pin
L
BROWN
RED
YELLOW/COPPER
PHASE
N
BLUE
BLACK
SILVER
NEUTRAL
YELLOW/GREEN
GREEN
GREEN
PROTECTIVE GROUND
Make sure that the device is always connected properly to the earth!
Improper installation can cause serious damage to people and property!

5
Pure-12A 12” Full Range Top Cabin
Order code: D3721
Return Procedure
Returned merchandise must be sent prepaid and in the original packing, call tags will not be issued.
Package must be clearly labeled with a Return Authorization Number (RMA number). Products returned
without an RMA number will be refused. Highlite will not accept the returned goods or any responsibility.
Call Highlite 0031-455667723 or mail aftersales@highlite.com and request an RMA prior to shipping the
fixture. Be prepared to provide the model number, serial number and a brief description of the cause for
the return. Be sure to properly pack fixture, any shipping damage resulting from inadequate packaging is
the customer’s responsibility. Highlite reserves the right to use its own discretion to repair or replace
product(s). As a suggestion, proper UPS packing or double-boxing is always a safe method to use.
Note: If you are given an RMA number, please include the following information on a piece of paper
inside the box:
01) Your name
02) Your address
03) Your phone number
04) A brief description of the symptoms
Claims
The client has the obligation to check the delivered goods immediately upon delivery for any short-
comings and/or visible defects, or perform this check after our announcement that the goods are at their
disposal. Damage incurred in shipping is the responsibility of the shipper; therefore the damage must be
reported to the carrier upon receipt of merchandise.
It is the customer's responsibility to notify and submit claims with the shipper in the event that a fixture is
damaged due to shipping. Transportation damage has to be reported to us within one day after receipt
of the delivery.
Any return shipment has to be made post-paid at all times. Return shipments must be accompanied with
a letter defining the reason for return shipment. Non-prepaid return shipments will be refused, unless
otherwise agreed in writing.
Complaints against us must be made known in writing or by fax within 10 working days after receipt of the
invoice. After this period complaints will not be handled anymore.
Complaints will only then be considered if the client has so far complied with all parts of the agreement,
regardless of the agreement of which the obligation is resulting.

6
Pure-12A 12” Full Range Top Cabin
Order code: D3721
Description of the device
Features
The DAP Audio Pure-12A is an active full range 12" speaker which can be tweaked perfectly via the 24-bit
DSP module. It is a very compact, powerful and versatile cabinet, suitable for mobile applications as well
as rental companies or fixed installations. The cabinet is constructed out of birch plywood with a scratch-
resistant finish that can handle the rough life on the road.
● System: 2-way active full range
● Power supply: 120/230 V AC, 50/60 Hz
● Power RMS: 300 W RMS
● Speaker: 12” Woofer and 1” Compression driver
● Frequency response (+/-6 dB): 45 Hz–20 kHz
● Max. SPL @ 1 m: 126 dB
● Crossover frequency: 1,7 kHz
● Dispersion (-6 dB): 75° Horizontal / 50° Vertical
● Cooling: Forced cooling
● Audio connector: 2 x combo 3-pin XLR/6,3 mm jack IN; 3-pin XLR Link; 3,5 mm mini jack Aux IN
● External controls: Controllable DSP through LCD interface
● DSP processor: 24 bit, 24 bit/96 kHz audio conversion AD/DA
● Electronic protections: Thermal / Convection Fan / Overload / Digital Limiter / Compressor
● Mains connector: Pro power connector IN/OUT
● Housing: 12-mm Birch Plywood; Water-resistant coating; 1,5-mm metal grill with foam
● Mounting: 35-mm/M12 pole mount
● Fuse: T5AL/250V
● Dimensions: 363 x 355 x 550 mm (LxWxH)
● Weight: 18,5 kg
Optional accessories
D3780 – Transport Cover for Pure-12(A)
D8436 – DAP speaker hanging eye
Overview
Fig. 01

7
Pure-12A 12” Full Range Top Cabin
Order code: D3721
Back
Fig. 02
01) LCD display
02) Sensitivity selector, AUX IN
Press the button to select the sensitivity of the AUX input. Choose between headphones and a line
level device.
03) 3,5 mm jack connector, AUX IN
Connect headphones or a line level device.
04) Channel selector
Move the switch to select one of the 3 ‘link’ modes:
● CH1: The Pure-12A will send the signal received on input 1 to the connected speaker.
● CH2: The Pure-12A will send the signal received on input 2 to the connected speaker.
● CH1+CH2: The Pure-12A will send the signal received on inputs 1+2 to the connected speaker.
05) 3-pin XLR connector, LINK
Connect a speaker.
06) Cooling fan
07) Power switch ON/OFF
08) Voltage selector
Move the switch to select the desired voltage, 120 V or 230 V.
Make sure that the available voltage is not higher/lower than the option selected with this switch.
09) Ground/earth connection
10) Fuse T5AL/250V
11) Pro power connector (Blue) IN
12) Pro power connector (Gray) THROUGH

8
Pure-12A 12” Full Range Top Cabin
Order code: D3721
Fig. 03
13) Combo 3-pin XLR/6,3 mm jack connector, INPUT 2
Connect a line level device or a microphone.
14) Gain control, INPUT 2
Turn the control to set gain for input 2.
15) Sensitivity selector, INPUT 2
Press the button to select the sensitivity of the input 2. Choose between a microphone or a line level
device.
16) Combo 3-pin XLR/6,3 mm jack connector, INPUT 1
Connect a line level device or a microphone.
17) Gain control, INPUT 1
Turn the control to set gain for input 1.
18) Sensitivity selector, INPUT 1
Press the button to select the sensitivity of the input 1. Choose between a microphone or a line level
device.
19) Menu control
Turn/press the control to navigate through the main menu.

9
Pure-12A 12” Full Range Top Cabin
Order code: D3721
Installation
Remove all packing materials from the Pure-12A. Check if all foam and plastic padding is removed.
Connect all cables.
Do not supply power before the whole system is set up and connected properly.
Always disconnect from electric mains power supply before cleaning or servicing.
Damages caused by non-observance are not subject to warranty.
Fig. 04

10
Pure-12A 12” Full Range Top Cabin
Order code: D3721
Setup and Operation
Follow the directions below, as they pertain to your preferred operation mode.
Before plugging the unit in, always make sure that the power supply matches the product specification
voltage. Do not attempt to operate a 115 V specification product on 230 V power, or vice versa.
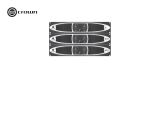
Connection Example 1 (2 x Pure-10A/Pure-12A/Pure-15A and 2 x Pure-15AS/Pure-18AS)
Make your initial connections with all the equipment powered off and ensure that all the main volume
controls are turned completely to the minimum. Follow the steps below.
01) Connect the outputs on your mixer with the inputs on the Pure-15AS/Pure-18AS.
02) Connect the Link connectors on the Pure-15AS/Pure-18AS with the input connectors on the Pure-
10A/Pure-12A/Pure-15A.
03) Turn on your mixer first, then the speakers.
04) After using your equipment, turn off the Pure speakers first, then the mixer.
Fig. 05

11
Pure-12A 12” Full Range Top Cabin
Order code: D3721
Connection Example 2 (2 x Pure-10A/Pure-12A/Pure-15A and 1 x Pure-15AS/Pure-18AS)
Make your initial connections with all the equipment powered off and ensure that all the main volume
controls are turned completely to the minimum. Follow the steps below.
01) Connect the outputs on your mixer with the inputs on the Pure-15AS/Pure-18AS.
02) Connect the Link connectors on the Pure-15AS/Pure-18AS with the input connectors on the Pure-
10A/Pure-12A/Pure-15A.
03) Turn on your mixer first, then the speakers.
04) After using your equipment, turn off the Pure speakers first, then the mixer.
Fig. 06

12
Pure-12A 12” Full Range Top Cabin
Order code: D3721
Control Panel
Press and turn the control to navigate
through the menu options.
Fig. 07
Display Off after 60 seconds
When the control (19) is neither pressed or turned for 60 seconds, the display will turn off.
Once you have pressed or turned the control (19), the display will light up.
Main Menu Options
01) Upon start-up, the display will show a splash screen with the Pure Series logo.
02) 5 seconds later, the display will show the start screen:
● LEVEL indicates the master signal level.
● CH1 and CH2 indicate the current input signal level on inputs 1 and 2.
03) Turn the control (19) to set the level. The adjustment range is between -80 dB and 0 dB.
04) Press the control (19) to enter the main menu. The display will show:
05) Turn the control (19) to select the desired menu.
06) Press the control (19) to open the menu.
07) Turn the control (19) to set values/choose options.
08) Press the control (19) to save changes.

13
Pure-12A 12” Full Range Top Cabin
Order code: D3721
1. Preset
In this menu you can set the desired preset.
01) Turn the control (19) to select one of the 5 presets:
02) Press the control (19) to confirm.
2. LowEQ
In this menu you can set the low equalizer.
01) Turn the control (19) to set the low equalizer. The adjustment range is between -12 dB and 6 dB.
02) Press the control (19) to confirm.
3. MidEQ
In this menu you can set the mid equalizer.
01) Turn the control (19) to set the mid equalizer. The adjustment range is between -12 dB and 6 dB.
02) Press the control (19) to confirm.
4. HighEQ
In this menu you can set the high equalizer.
01) Turn the control (19) to set the high equalizer. The adjustment range is between -12 dB and 6 dB.
02) Press the control (19) to confirm.

14
Pure-12A 12” Full Range Top Cabin
Order code: D3721
5. Highpass
In this menu you can set the high pass filter frequency.
01) Turn the control (19) to select one of the 6 options:
02) Press the control (19) to confirm.
6. Delay
In this menu you can set the delay.
01) Turn the control (19) to set the delay. The adjustment range is between 0–200 ms. The distance will
change accordingly.
02) Press the control (19) to confirm.
7. Limit
In this menu you can set the signal threshold.
01) Turn the control (19) to set the limit. The adjustment range is between -20 dB and 0 dB.
02) Press the control (19) to confirm.
8. Phase
In this menu you can reverse the phase.
01) Turn the control (19) to select one of the 2 options:
● NORMAL (normal phase)
● MINUS (phase reversal)
02) Press the control (19) to confirm.

15
Pure-12A 12” Full Range Top Cabin
Order code: D3721
9. FrontLED
In this menu you can set the function of the front LED located underneath the grill.
01) Turn the control (19) to select one of the 3 options:
● CLIP: If a received signal is too strong, the LED will light in red.
● ON: The LED will light in green.
● OFF: The LED will be off.
02) Press the control (19) to confirm.
10. Contrast
In this menu you can set the display contrast.
01) Turn the control (19) to set the display contrast. The adjustment range is between 0–20, from dark to
brightest.
02) Press the control (19) to confirm.
Never set the contrast to 0!
The display will turn so dark that the displayed text will be invisible.
11. Display
In this menu you can adjust the display settings.
01) Turn the control (19) to select one of the 2 options:
● OFF: If the control is not pressed/turned for 60 seconds, the display will turn off.
● ON: The display will remain continuously on.
02) Press the control (19) to confirm.
12. SleepMode
In this menu you can set the sleep mode.
01) Turn the control (19) to select one of the 2 options:
● OFF: The amplifier will remain on.
● ON: The amplifier will be turned off and the device will use less electric power.
02) Press the control (19) to confirm.

16
Pure-12A 12” Full Range Top Cabin
Order code: D3721
13. Lock
In this menu you can set the menu lock.
01) Turn the control (19) to select one of the 2 options:
● OFF: The menu lock is inactive.
● ON: If the control is not pressed/turned for 60 seconds, the display will turn off. In order to access
the main menu, turn and press the control (19) to insert the password.
02) Press the control (19) to confirm.
14. PasswordSet
In this menu you can change the password.
01) Turn and press the control (19) to insert the current password.
02) Press the control (19) to confirm.
03) Turn and press the control (19) to insert the new password.
04) Press the control (19) to confirm.
05) Turn and press the control (19) to repeat/confirm the new password.
06) Press the control (19) to confirm.
15. NameSet
In this menu you can set the device‘s name.
01) Turn the control (19) to select the character that needs to be edited. The NAME indicator will show its
number (01–16).
02) Press the control (19) to confirm.
03) Turn the control (19) to select a desired symbol for the character.
04) Press the control (19) to confirm.
05) Repeat steps 1–4 to edit the remaining characters.
06) When done, turn the control (19) until the NAME indicator shows SAVE (to save the new name) or
EXIT (to quit without saving).
07) Press the control (19) to confirm.

17
Pure-12A 12” Full Range Top Cabin
Order code: D3721
16. Store
In this menu you can store the device’s current settings.
01) Turn the control (19) to select a desired slot. There are 6 slots.
02) Press the control (19) to confirm.
03) Turn the control (19) to select the character that needs to be edited. The NAME indicator will show its
number (01–18).
04) Press the control (19) to confirm.
05) Turn the control (19) to select a desired symbol for the character.
06) Press the control (19) to confirm.
07) Repeat steps 3–6 to edit the remaining characters.
08) When done, turn the control (19) until the NAME indicator shows SAVE (to save the settings) or EXIT
(to quit without saving).
09) Press the control (19) to confirm.
17. Recall
In this menu you can load the device’s settings.
01) Turn the control (19) to select a desired setting file.
02) Press the control (19) to load the desired settings.

18
Pure-12A 12” Full Range Top Cabin
Order code: D3721
18. Reset
In this menu you can restore the factory default settings.
01) Turn the control (19) to select one of the 2 options:
● NO: Return to the main menu.
● YES: Restore the factory default settings.
02) Press the control (19) to confirm.
03) If you have chosen YES, you will need to insert the password.
04) Turn and press the control (19) to insert the current password.
05) Press the control (19) to confirm.
06) The factory default settings will be restored.
19. Info
In this menu you can view the device’s software version, temperature and the total operation time.
20. Exit
Press the control (19) to return to the start screen.

19
Pure-12A 12” Full Range Top Cabin
Order code: D3721
Connection Cables
Take care of your cables, always holding them by the connectors and avoiding knots and twists when
coiling them: This gives the advantage of increasing their life and reliability. Periodically check your
cables. A great number of problems (faulty contacts, ground hum, discharges, etc.) are caused entirely
by using unsuitable or faulty cables.
Headphones
Unbalanced
Balanced
For these applications the unit provides 1/4" TRS and XLR connectors to easily interface with most
professional audio devices. Follow the configuration examples below for your particular connection.
Unbalanced
Balanced
/